 Data Structure
 Networking
 RDBMS
RDBMS Operating System
 Java
Java MS Excel
 iOS
iOS HTML
HTML CSS
CSS Android
 Python
 C Programming
 C++
C++ C#
C# MongoDB
 MySQL
MySQL Javascript
 PHP
PHP
- Selected Reading
- UPSC IAS Exams Notes
- Developer's Best Practices
- Questions and Answers
- Effective Resume Writing
- HR Interview Questions
- Computer Glossary
- Who is Who
Draw a triangle with centroid using OpenCV
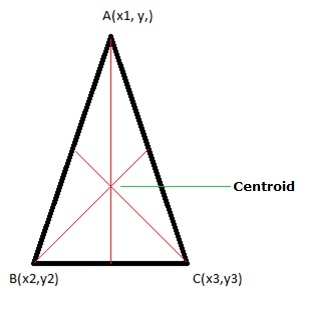
The centroid is also called the geometric center; it is defined as the center point of the object. Whereas the centroid of a triangle is defined as the point of intersection of all three medians of a triangle.

Calculating the Centroid of a triangle:
Let's consider an ABC triangle, the three vertices of the triangle are A(x1, y1), B(x2, y2), and C(x3, y3). Then the centroid of a triangle can be calculated by taking the average of the x and y coordinates of all three vertices.
centroid of a triangle = ((x1+x2+x3)/3 , (y1+y2+y3)/3 )
In this article, we will see the python programs to draw a triangle with a centroid using the OpenCV library.
Using pre-defined coordinates
In this approach, the triangle will be drawn using the predefined coordinates. Here we will use the drawContours() method to join the coordinate points.
The drawContours() method is used to join the boundary points to make any type of shape. Following is the syntax of this function -
drawContours(img, contours, contourIdx, color[, thickness[, lineType[, hierarchy[, maxLevel[, offset]]]]])
Parameters
img: Destination image.
contours: All the input contours. Which should be passed as a Python list.
contourIdx: specifies the index of contours (it is useful when individual contours are drawn). If it is -1, all the contours are drawn.
And remaining parameters are color, thickness, lineType, etc.
Example
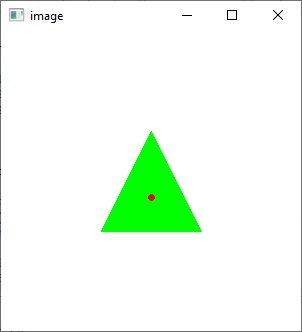
In this example, the triangle will be drawn by using the predefined coordinates.
import cv2
import numpy as np

image = np.ones((300, 300, 3), np.uint8) * 255

pt1 = (150, 100)
pt2 = (100, 200)
pt3 = (200, 200)

triangle_cnt = np.array([pt1, pt2, pt3])

cv2.drawContours(image, [triangle_cnt], 0, (0,255,0), -1)

# finding centroid
centroid = ((pt1[0]+pt2[0]+pt3[0])//3, (pt1[1]+pt2[1]+pt3[1])//3)
cv2.circle(image, centroid, 2, (0, 0, 255), 2)

cv2.imshow("image", image)
cv2.waitKey(0)
Output

Using Mouse Drag
To draw the triangle with a centroid here we will use the setMouseCallback(), cv.line(), and cv2.circle() functions along with the cv2.EVENT_LBUTTONDOWN mouse event type.
The setMouseCallback() function: It is used to specify which function has to be called for a specific window. In other words, the function creates a mouse event handler for the specified window.
cv2.line(): Draws a line between two connecting points pt1 and pt2 in the image.
cv2.circle(): Draws a circle with a given center and radius.
cv2.EVENT_LBUTTONDOWN: It indicates the left mouse button is pressed.
Example
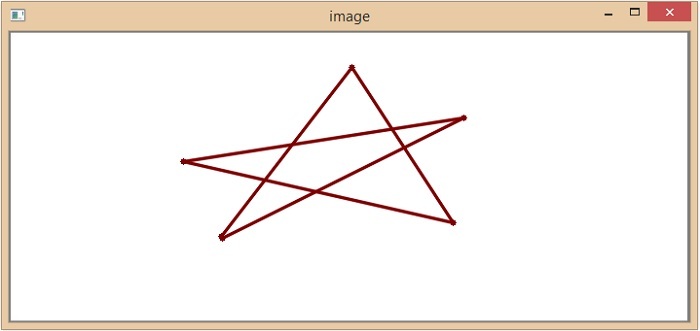
Initially, the mouse callback function is set to a window using the namedWindow() method to read the triangle coordinates where the user draws. And by using the mouse click event we will identify the x and y coordinates and then the triangle will be drawn using the cv2.line() function. Finally, the centroid will be calculated using the basic formula, it will draw by using the cv2.circle() function.
import numpy as np
import cv2 as cv
ix,iy,sx,sy = -1,-1,-1,-1
x_points = []
y_points = []

# mouse callback function
def draw_lines(event, x, y, flags, param):
   global ix,iy,sx,sy
   # if the left mouse button was clicked, record the starting
   if event == cv.EVENT_LBUTTONDOWN:

      # draw circlar points of 2px
      cv.circle(img, (x, y), 3, (0, 0, 127), -1)

      if ix != -1:
         cv.line(img, (ix, iy), (x, y), (0, 0, 127), 2, cv.LINE_AA)
         x_points.append(x)
         y_points.append(y)
      else:
         sx, sy = x, y
      ix,iy = x, y
   if len(x_points) == 3:
      centroid = (sum(x_points)//3, sum(y_points)//3)
      cv2.circle(img, centroid, 2, (0, 0, 255), 2)
      return None

# read image
img = cv.resize(cv.imread("Images/Blank_img.png"), (1280, 720))
cv.namedWindow('image')
cv.setMouseCallback('image',draw_lines)

while(1):
   cv.imshow('image',img)
   if cv.waitKey(20) & 0xFF == ord('q'):
      break

cv.destroyAllWindows()
Output

In this article we have seen the two different ways to draw triangle with a centroid using the OpenCV library in python.

