- Cordova - Home
- Cordova - Overview
- Cordova - Environment Setup
- Cordova - First Application
- Cordova - Config.xml File
- Cordova - Storage
- Cordova - Events
- Cordova - Back Button
- Cordova - Plugman
- Cordova - Battery Status
- Cordova - Camera
- Cordova - Contacts
- Cordova - Device
- Cordova - Accelerometer
- Cordova - Device Orientation
- Cordova - Dialogs
- Cordova - File System
- Cordova - File Transfer
- Cordova - Geolocation
- Cordova - Globalization
- Cordova - InAppBrowser
- Cordova - Media
- Cordova - Media Capture
- Cordova - Network Information
- Cordova - Splash Screen
- Cordova - Vibration
- Cordova - Whitelist
- Cordova - Best Practices
Cordova - File Transfer
This plugin is used for uploading and downloading files.
Step 1 - Installing File Transfer Plugin
We need to open command prompt and run the following command to install the plugin.
C:\Users\username\Desktop\CordovaProject>cordova plugin add cordova-plugin-file-transfer
Step 2 - Create Buttons
In this chapter, we will show you how to upload and download files. Let's create two buttons in index.html
<button id = "uploadFile">UPLOAD</button>
<button id = "downloadFile">DOWNLOAD</button>
Step 3 - Add Event Listeners
Event listeners will be created in index.js inside the onDeviceReady function. We are adding click events and callback functions.
document.getElementById("uploadFile").addEventListener("click", uploadFile);
document.getElementById("downloadFile").addEventListener("click", downloadFile);
Step 4A - Download Function
This function will be used for downloading the files from server to device. We uploaded file to postimage.org to make things more simple. You will probably want to use your own server. The function is placed in index.js and will be triggered when the corresponding button is pressed. uri is the server download link and fileURI is the path to the DCIM folder on our device.
function downloadFile() {
   var fileTransfer = new FileTransfer();
   var uri = encodeURI("http://s14.postimg.org/i8qvaxyup/bitcoin1.jpg");
   var fileURL =  "///storage/emulated/0/DCIM/myFile";

   fileTransfer.download(
      uri, fileURL, function(entry) {
         console.log("download complete: " + entry.toURL());
      },

      function(error) {
         console.log("download error source " + error.source);
         console.log("download error target " + error.target);
         console.log("download error code" + error.code);
      },

      false, {
         headers: {
            "Authorization": "Basic dGVzdHVzZXJuYW1lOnRlc3RwYXNzd29yZA=="
         }
      }
   );
}
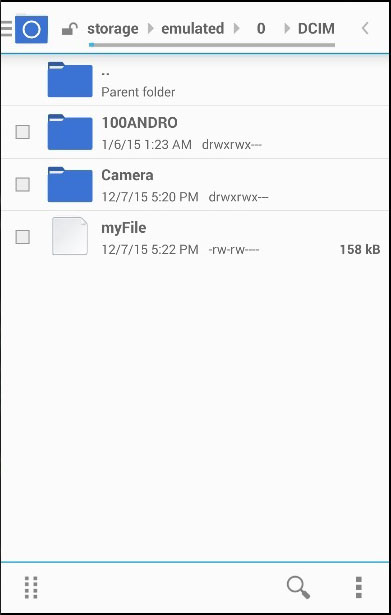
Once we press the DOWNLOAD button, the file will be downloaded from the postimg.org server to our mobile device. We can check the specified folder and see that myFile is there.
The console output will look like this −

Step 4B - Upload Function
Now let's create a function that will take the file and upload it to the server. Again, we want to simplify this as much as possible, so we will use posttestserver.com online server for testing. The uri value will be linked for posting to posttestserver.
function uploadFile() {
   var fileURL = "///storage/emulated/0/DCIM/myFile"
   var uri = encodeURI("http://posttestserver.com/post.php");
   var options = new FileUploadOptions();
   options.fileKey = "file";
   options.fileName = fileURL.substr(fileURL.lastIndexOf('/')+1);
   options.mimeType = "text/plain";

   var headers = {'headerParam':'headerValue'};
   options.headers = headers;
   var ft = new FileTransfer();
   ft.upload(fileURL, uri, onSuccess, onError, options);

   function onSuccess(r) {
      console.log("Code = " + r.responseCode);
      console.log("Response = " + r.response);
      console.log("Sent = " + r.bytesSent);
   }

   function onError(error) {
      alert("An error has occurred: Code = " + error.code);
      console.log("upload error source " + error.source);
      console.log("upload error target " + error.target);
   }

}
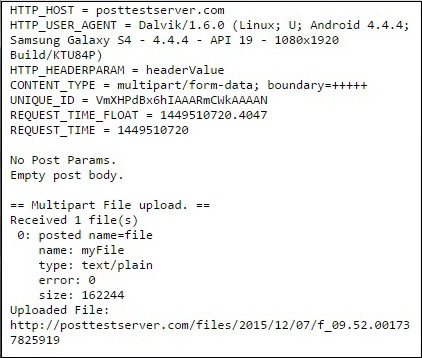
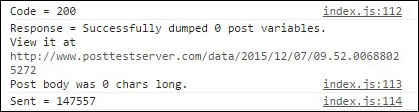
Now we can press the UPLOAD button to trigger this function. We will get a console output as confirmation that the uploading was successful.
We can also check the server to make sure that the file was uploaded.