
Article Categories
- All Categories
-
 Data Structure
-
 Networking
-
 RDBMS
RDBMS
-
 Operating System
-
 Java
Java
-
 MS Excel
-
 iOS
iOS
-
 HTML
HTML
-
 CSS
CSS
-
 Android
-
 Python
-
 C Programming
-
 C++
C++
-
 C#
C#
-
 MongoDB
-
 MySQL
MySQL
-
 Javascript
-
 PHP
PHP
-
 Economics & Finance
Checkbox in MATLAB App Building
MATLAB provides an integrated app building toolbox that we can use to create a graphical user interface based app without writing any kind of code. Hence, MATLAB allows users to create professional applications by just drag and drop facility. After that the user can write a MATLAB code to define the behavior of the app options.
As mentioned above, this article is primarily meant for creating a user interface in the application which provides a list of options from which a user can select any number of choices. This user interface is referred to as checkbox.
A checkbox typically appears as a small squared shaped box and allows a user to select or de-select the option by checking or unchecking the box.
Procedure to Create a Checkbox in MATLAB App
The step-by-step procedure to create a checkbox in a MATLAB application is explain below:
Step 1 - Open MATLAB and select the "APPS" tab and then select the "Design App" option on the ribbon.

Step 2 - Create a blank app by clicking on the "New" option. A new window will open with lots of components as shown in the following figure.
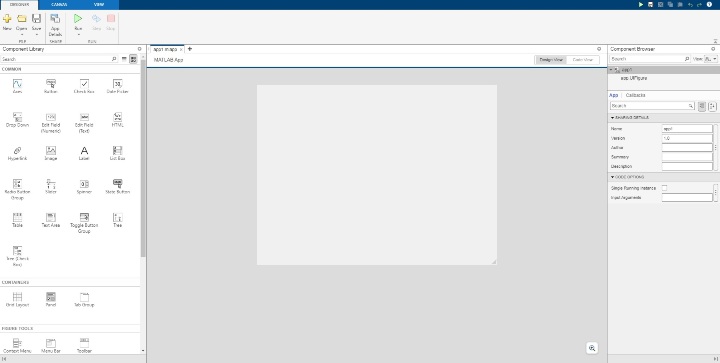
Here, a component library is displayed on the left side bar and a component property pane is displayed on the right side bar.
Step 3 - Drag and drop the "Check Box" option from the component library on the canvas displayed in the middle of the window.
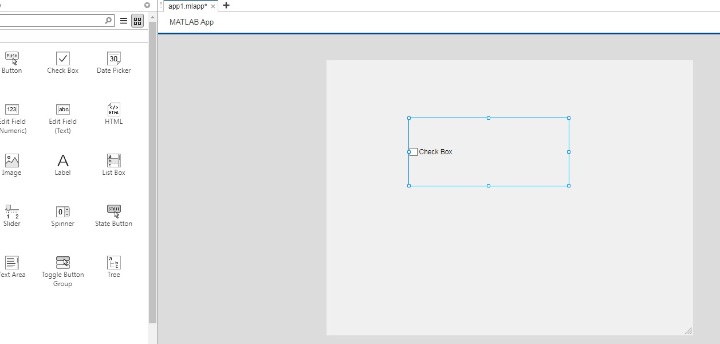
When we do this a check box will appear on the canvas and a pane to customize the properties of the check box will appear on the right side bar.
Step 4 - Define the various properties of the checkbox:
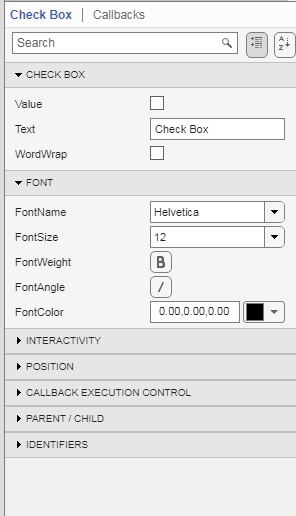
CHECK BOX - Using this property, we can change the value and text label of the checkbox.
FONT - Using this property, we can change the font, text size, text color, and angle of text of the checkbox.
INTERACTIVITY - This property is used to make the checkbox visible, enable, show tooltip, or create a context menu.
POSITION - This property allows us to change the position and dimensions of the checkbox on the canvas.
CALLBACK EXECUTION CONTROL - This property is used to control the interrupt ability and busy action of the checkbox.
PARENT/CHILD - This property controls the handle visibility of the checkbox.
IDENTIFIERS - This property allows us to add tags to the check box.
Step 5 - Finally write the MATLAB code to define the functionality of the checkbox.
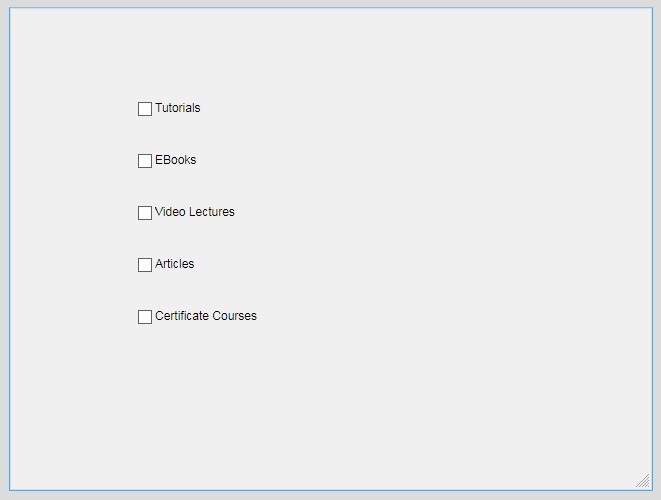
Example Checkbox Creation in MATLAB
Step 1 - Creating five check boxed with labels "Tutorials", "E-Books", "Video Lectures", "Articles", and "Certificate Courses".
Step 2 - Now, write MATLAB codes to add functionality to each check box. For this, right-click on the first check-box "Tutorials" and then click on the Callbacks option, and next select the "Add ValueChangedFcn callback" option.
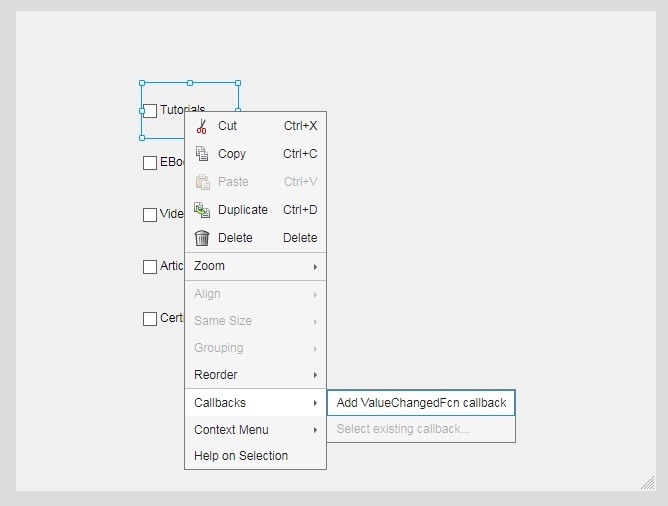
Once we click on "Add ValueChangedFcn callback" option, it will take us to the code window, where it adds a function with a name "TutorialsCheckBoxValueChanged()".
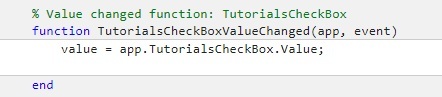
Step 3 - We will add a functionality by writing a code in the space provided. In this case, we are defining the following functionality:
if value == 1
   fprintf(?You have selected Tutorials);
end
We will write this code for each checkbox.
Example
% MATLAB program to demonstrate adding checkboxes in an app
classdef app1 < matlab.apps.AppBase
   % Properties that correspond to app components
   properties (Access = public)
     UIFigure                    matlab.ui.Figure
     CertificateCoursesCheckBox  matlab.ui.control.CheckBox
     ArticlesCheckBox            matlab.ui.control.CheckBox
     VideoLecturesCheckBox       matlab.ui.control.CheckBox
     EBooksCheckBox              matlab.ui.control.CheckBox
     TutorialsCheckBox           matlab.ui.control.CheckBox
   end

   % Callbacks that handle component events
   methods (Access = private)

      % Value changed function: TutorialsCheckBox
      function TutorialsCheckBoxValueChanged(app, event)
         value = app.TutorialsCheckBox.Value;

         if value == 1
            fprintf('You have selected Tutorials');
         end
      end

      % Value changed function: EBooksCheckBox
      function EBooksCheckBoxValueChanged(app, event)
         value = app.EBooksCheckBox.Value;

         if value == 1
            fprintf('You have selected Ebooks');
         end
      end

      % Value changed function: VideoLecturesCheckBox
      function VideoLecturesCheckBoxValueChanged(app, event)
         value = app.VideoLecturesCheckBox.Value;

         if value == 1
             fprintf('You have selected Video Lectures');
            end
        end

      % Value changed function: ArticlesCheckBox
      function ArticlesCheckBoxValueChanged(app, event)
         value = app.ArticlesCheckBox.Value;

         if value == 1
            fprintf('You have selected Articles');
         end
     end

     % Value changed function: CertificateCoursesCheckBox
     function CertificateCoursesCheckBoxValueChanged(app, event)
         value = app.CertificateCoursesCheckBox.Value;

         if value == 1
           fprintf('You have selected Certificate Courses');
         end
      end
   end

   % Component initialization
   methods (Access = private)

      % Create UIFigure and components
      function createComponents(app)

         % Create UIFigure and hide until all components are created
         app.UIFigure = uifigure('Visible', 'off');
         app.UIFigure.Position = [100 100 640 480];
         app.UIFigure.Name = 'MATLAB App';

         % Show the figure after all components are created
         app.UIFigure.Visible = 'on';
      end
   end

   % App creation and deletion
   methods (Access = public)

      % Construct app
      function app = app1

         % Create UIFigure and components
         createComponents(app)

         % Register the app with App Designer
         registerApp(app, app.UIFigure)

         if nargout == 0
            clear app
         end
      end

      % Code that executes before app deletion
      function delete(app)

         % Delete UIFigure when app is deleted
         delete(app.UIFigure)
      end
   end
end
Output
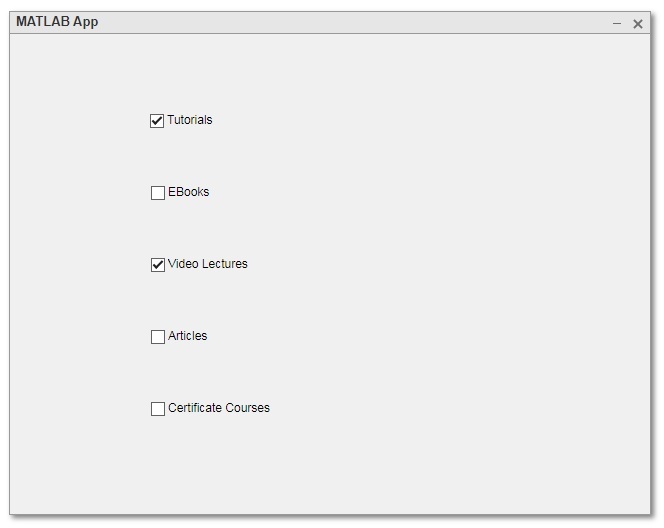
You have selected Tutorials
You have selected Video Lectures
In this way, we can create checkboxes in a MATLAB application.

411 Views
