- Blue Prism - Home
- Blue Prism - Introduction to RPA
- Blue Prism - Introduction
- Blue Prism - Object Studio
- Blue Prism - Application Modeller
- Blue Prism - Process Studio
- Blue Prism - Exceptions Handling
- Blue Prism - Work Queues
- Blue Prism - Credentials Manager
- User, Role and Log Management
- Email and Surface Automation
- Blue Prism - Schedule Management
- Blue Prism Useful Resources
- Blue Prism - Quick Guide
- Blue Prism - Useful Resources
- Blue Prism - Discussion
Blue Prism - Quick Guide
Blue Prism - Introduction to RPA
A robot is a machine that mimics the human user in performing various tasks, such as clicks, navigations, typing, etc. Sequence of meaningful activities that may involve multiple systems or applications make up a process. Automation is the sequence of steps which are performed without any human interference (once configured).
Robotic Process Automation
Robotic process automation (RPA) allows using software robots instead of people to drive the business. It is used to automate regular tasks so the user can concentrate on accomplishing complex tasks rather than routine work manually. This would in turn reduce the human errors.
RPA Benefits
The following are the advantages of RPA −
Building a unified view of the customer
Increased customer satisfaction
Increased employee productivity
More accuracy and quality
Cost effective
Up to 80% reduction in AHT (Average Handle Time)
Up to 90% reduction in ART (Average Resolution Time)
Increased ROI (Return on Investment) within 3 months on an average.
RPA Tools
We have the following popular tools available in market for RPA −
Blue Prism
Automation Anywhere
Ui Path
Work Fusion
Open Span
Uses of RPA
The following are the uses of RPA −
Dual data entry scenarios
Data manually entered in one system need not be reentered into another system. RPA replaces such dual human effort since invoices are indexed in the workflow and then manually reentered in ERP.
Straight-through processing
Inputs arriving from various systems such as web pages for customer orders, workflow for invoices, emails or excel files must be entered into ERP. However, if the input is clean and the rules are well laid out that data entry can be done through RPA.
Virtual integration between different systems
Standalone, Legacy, ERP or workflow systems often do not communicate with one another and integrating them would cost millions of dollars and precious IT time, RPA can provide light weight integration connecting disparate systems at the user interface level.
Responding to data extraction and responding requests
When data and report requests come from multiple process owners, vendors, and even end customers, employees log into a system to extract the data, format it, and send an email to the requestor. RPA lends itself well to such rule-based tasks.
Rule based decision making
RPA can execute decision-based tasks provided the rules driving those decisions are well laid out. For instance, on an invoice coming from a utility vendor, RPA can change payment terms to "immediate" from whatever is on the invoice.
Life Cycle of RPA
The lifecycle of RPA is given below −
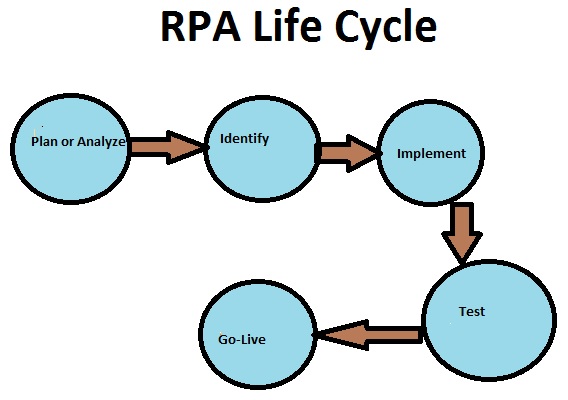
Analyze and Identify
Step one of RPA life cycle is to analyze a business problem for RPA development. This is usually done by business analysts and RPA architects. Processes which can be automated are identified, timelines for the development are decided, approach is documented, and approval is obtained from stakeholders to start the development.
Implement
RPA developers work on the requirements in development environment to automate the manual processes. Development is done in wizard and these is a limited requirement to perform coding in developing the bots.
Testing
In this phase, bots are tested to evaluate the quality and to correct errors if any.
Go Live
After the bot is tested thoroughly, it would be deployed into the live environment where users start using it. It enters maintenance phase where support and change requests for the bot are entertained and defects are fixed with immediate effect.
Types of Robot in RPA
There are two types of robots in RPA as given below −
- Back Office Robots
- Front Office Robots
Back Office Robots
Following are the features of back office robots −
Back office robots will run unattended.
They are in batch Mode.
They run in virtual environments.
Back office robots are not supervised by any one.
The back office robots send heartbeats to the server, so that it knows instantly when a robot is down.
Back office robots help in error reduction and are cost effective.
Front Office Robots
Following are the features of front office robots −
Front office robots share the same workstation as an employee who has control over where and when it is used.
Front office robots are stand alone and they need human interference.
User triggers these robots and they run only under manual surveillance.
Front office robots operate from local machine and cannot be run or scheduled remotely.
Blue Prism - Introduction
Blue prism is a UK-Based Software Company and is one of the leading robotic process automation tools. It is used to automate mundane tasks such that they could operate without any manual intervention. Blue prism has gained edge over its competitors as it has better security, flexibility, scalability, compliance, and resilience.
Pre-requirements for Blue Prism
The following are the pre-requisites for the Blue Prism. It is the only software which −
Creates and supports a digital workforce of industrial strength and enterprise scale
Does not require IT skills to implement
Can be implemented in sprints of 4 to 8 weeks (Start to finish)
Is very low cost compared to the TCO of alternative solutions
Provides tremendous payback with self-funding returns and an ROI that has been as high as 80%
Can be managed within IT infrastructure and processes
Installation of Blue Prism
The following are the installation requirements for Blue Prism −
Windows 7 (Preferred) OS, 64 bit or 32 bit
Blue prism installation Software, 64 or 32 bit, depending on your OS
Blue Prism License File
SQL Server Express Edition, 64 or 32 bit depending on your OS
We shall look at the process of installing Blue Prism with SQL Server Management Studio −
Installation of SqlExpr
Download SQL server, SqlExpr.exe file from Microsoft official website and after the download click on SqlExpr. This will launch the Sql Server that can be used to install the Sql connection.
Installing Blue Prism
Once the SQL server is installed, we need to install Blue Prism using the steps given below and the screenshots −
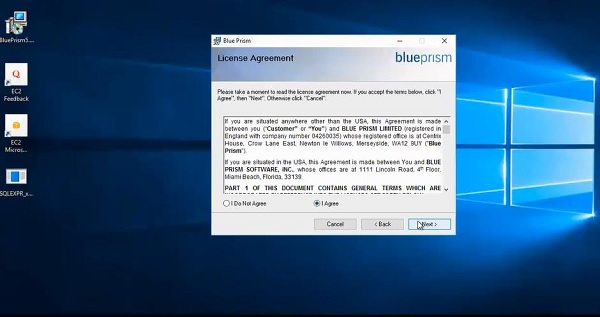
Step 1 − Click on Blue Prism 5.0.10_x64 for the installation to start.
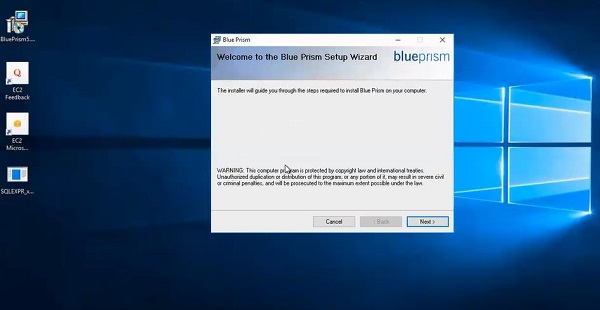
Step 2 − Click on next on the dialogue box.
Step 3 − Agree to the License Agreement.
Step 4 − Choose the installation folder.

Step 5 − Click on next.

Step 6 − Once you click on next, the installation processes.
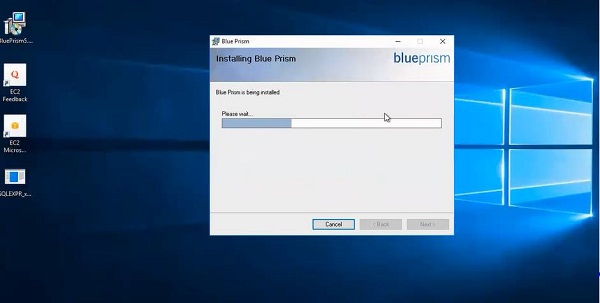
Step 7 − Once the installation is completed, close the window.

This completes the installation of Blue Prism and the icon appears on the desktop.
Opening Blue Prism
Once the installation of Blue Prism is completed, we shall look at how to open the application using the below steps −
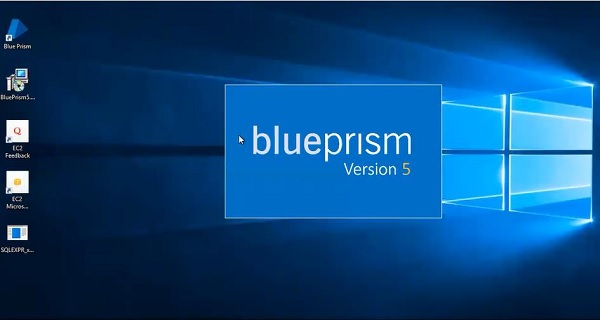
Click on Icon
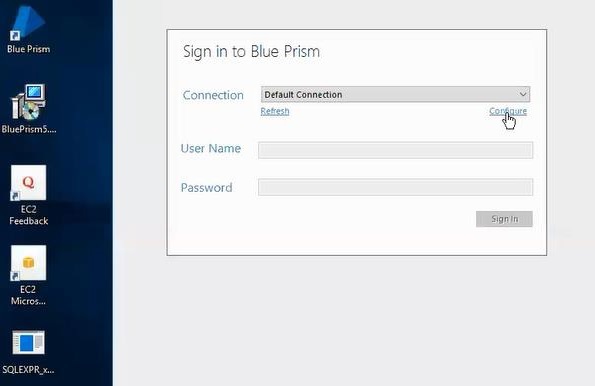
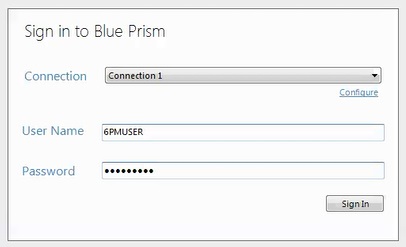
The default Username and Password for Blue Prism are as follows −
Username: Admin
Password: Admin
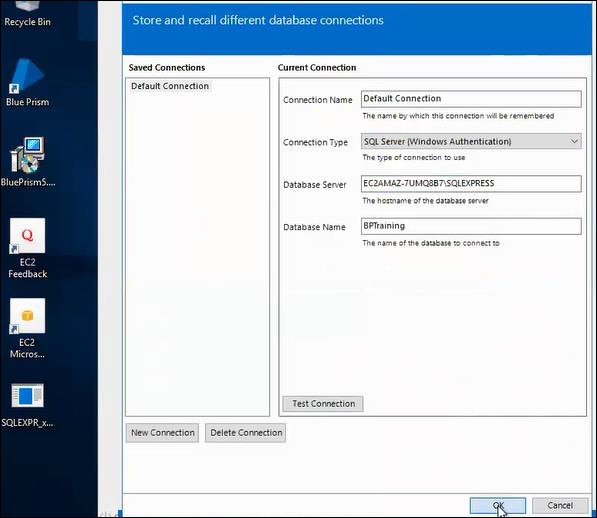
Creating the Database
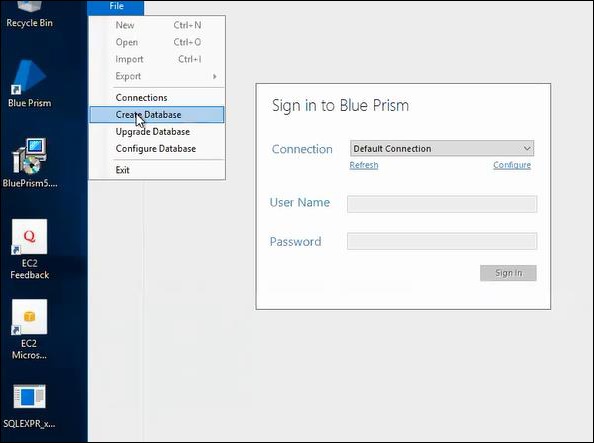
We shall now create a database using Blue Prism as shown in the below images −
First, open the installed application and go to File and then click on Create Database.
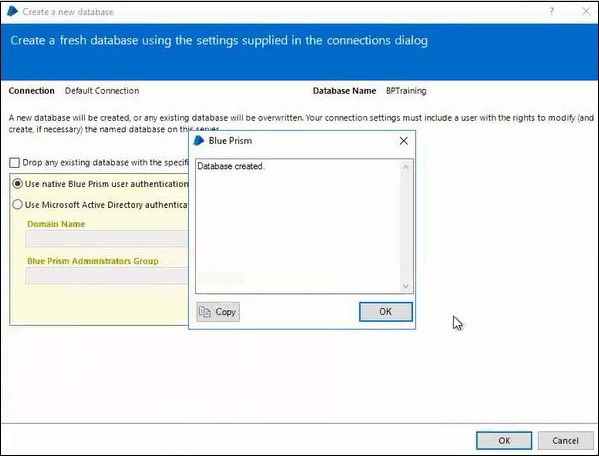
Now that the database is created, sign with the default username and password.
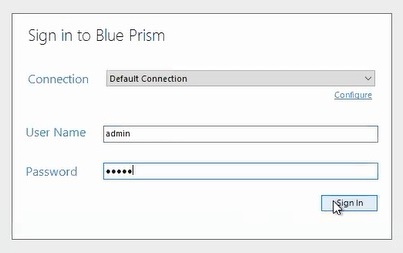
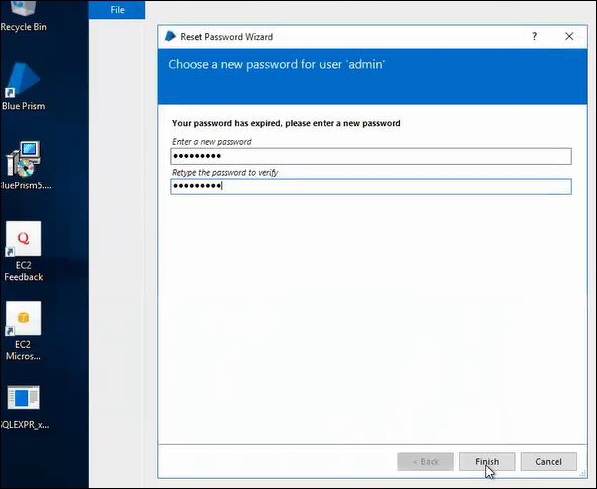
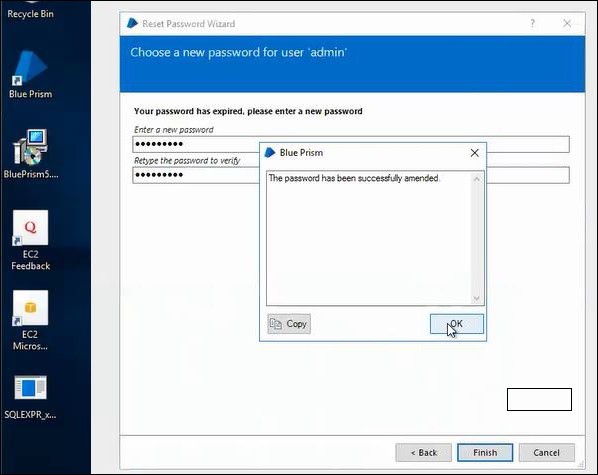
After clicking on sign in button, choose a new password for user.
Different tabs of Blue Prism
There are 6 types of tabs in Blue Prism as follows −
- Home
- Studio
- Control
- Dashboard
- Releases
- System
The following is the overview of different parts of Blue Prism −
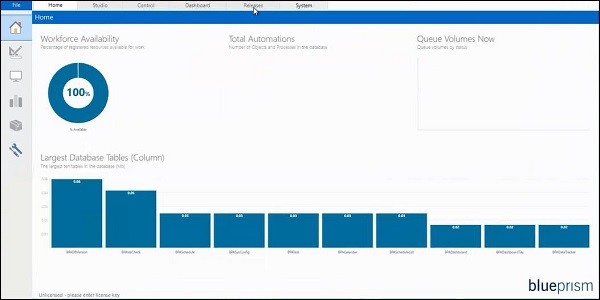
Home
Home has displays different charts which gives information about the blue prism database. Workforce availability shows the run time resources that we are using, total automations shows the number of queues and automations in the database, queue volumes now gives the queue volumes by status and largest database tables shows the largest tables in the blue prism database.
Studio
Studio is an important part of Blue Prism where we implement actual automation steps. There are two studios: Object Studio and Process Studio.
Control
Control room is the central point of administration in Blue Prism where it handles control, monitor, execute and schedule of process executions on the distributed bots.
Dashboard
Dashboard is used to depict different charts displaying information about robotic work force.
Releases
Release manager is used to manage import and export of configuration packages between different blue prism environments.
System
System tab is used by administrator for user management.
Blue Prism - Object Studio
Object studio is mainly used to develop the objects. Inside the object, we have different types of actions as follows −
the Application Modular to Spy the Elements
initialize page and clean up page
Creating the Object from Object Studio
After launching the Blue Prism, open Studio tab, right click on Objects and select Create Object. The screenshots clearly explain the process of creating objects −
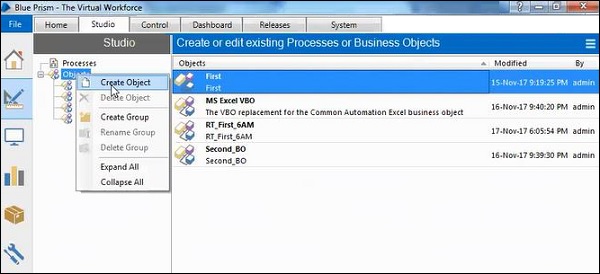
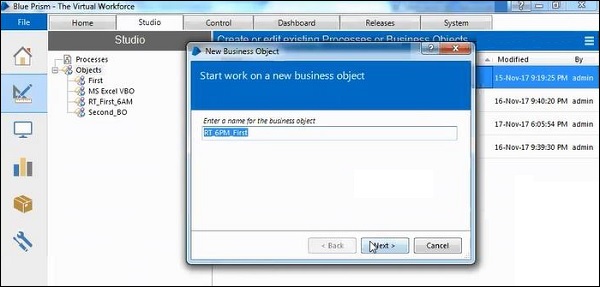
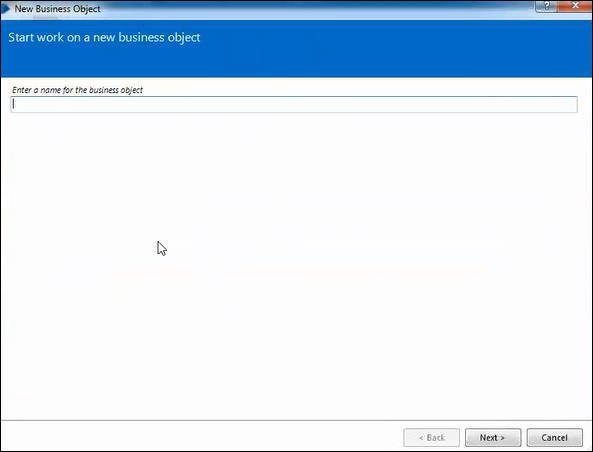
Provide a name for new business object.
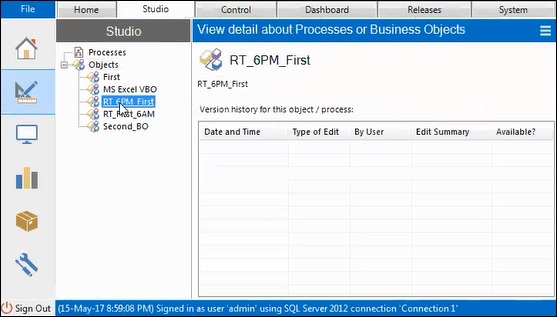
It will create an object in objects list.
Different Stages in Object Studio
The different stages in the Object Studio are listed below −
- Link
- Block
- Read
- Write
- Navigate
- Code
- Wait
- Process
- Page
- Action
- Decision
- Choice
- Calculation
- Multi Calculation
- Data Item
- Collection
- Loop
- Note
- Anchor
- End
- Exception
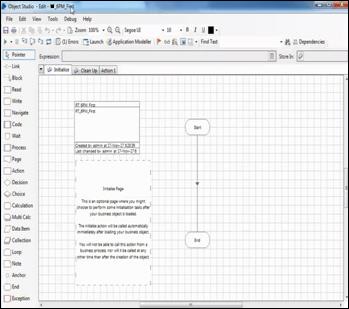
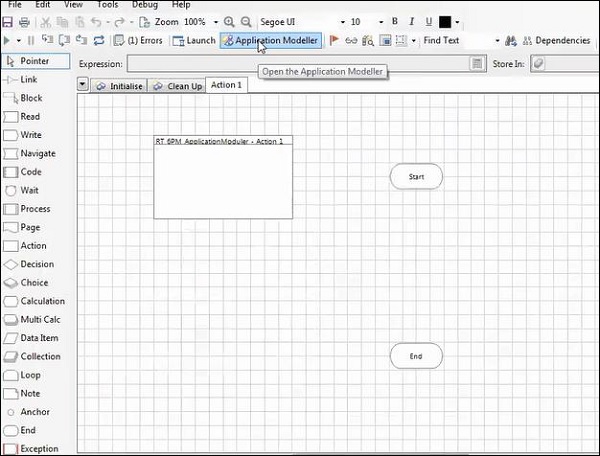
Once you create an object, the initialize, cleanup and action pages will be created and the initialize page will be launched with the above mentioned stages.
The below Business Object (VBO) will give you more detailed explanation of how the stages can be used and how the VBO works.
Understanding Collections to Excel
Multiple values stored in the form of rows and columns are called collections.
We call add rows to collections using the below two ways −
Using Internal VBO as "collections".
Using "Utility-Collection Manipulation" VBO.
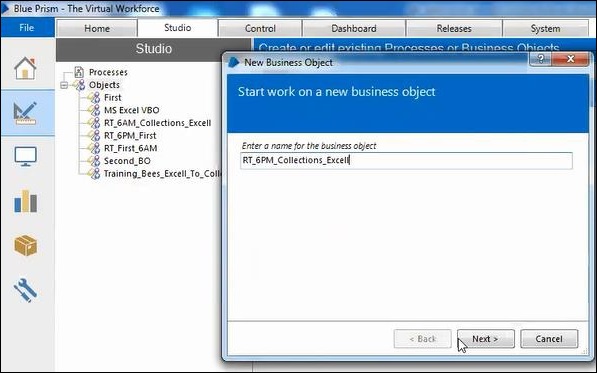
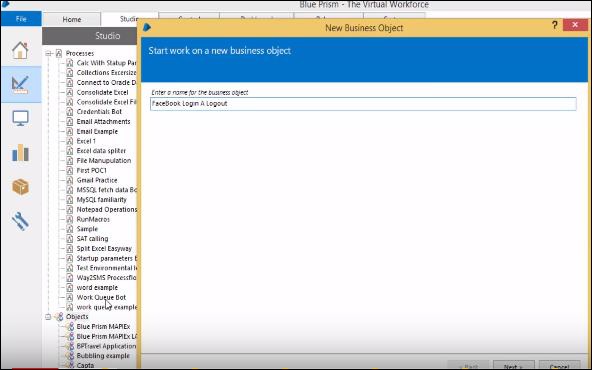
Create a Business Object
Enter the name of the business object you like to create as shown below −
Now, enter the description of the business object as shown below −
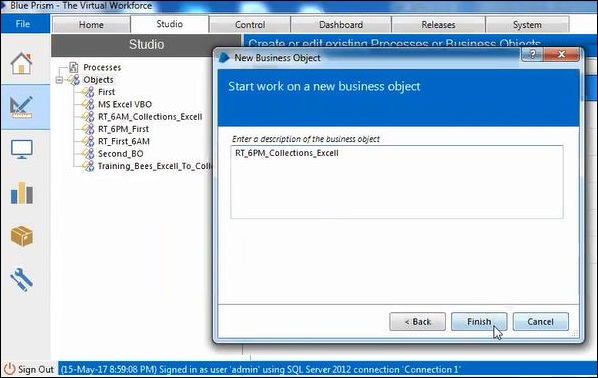
Then, click on Finish.
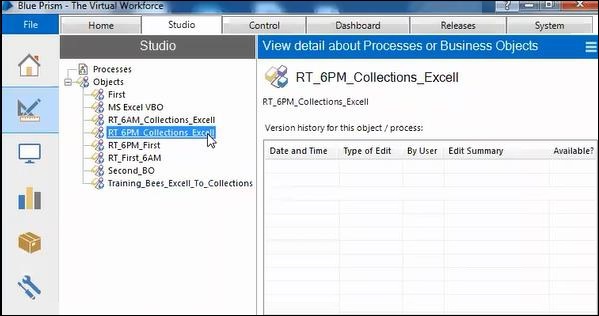
Double click on newly created VBO to open it.
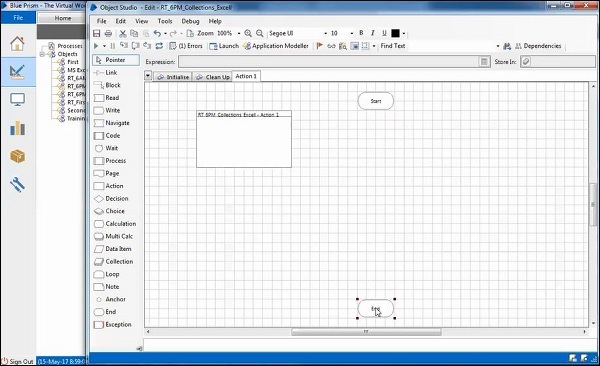
In the action tab, the start and end stages will be created by default with a link to them, select the link and delete, so that the actual stages can be implemented in it.
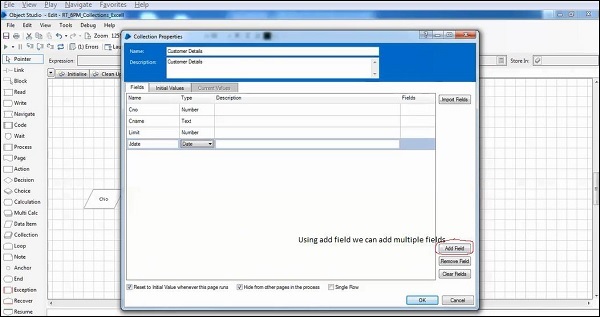
Create a collection and add rows to the collection using the internal VBO.
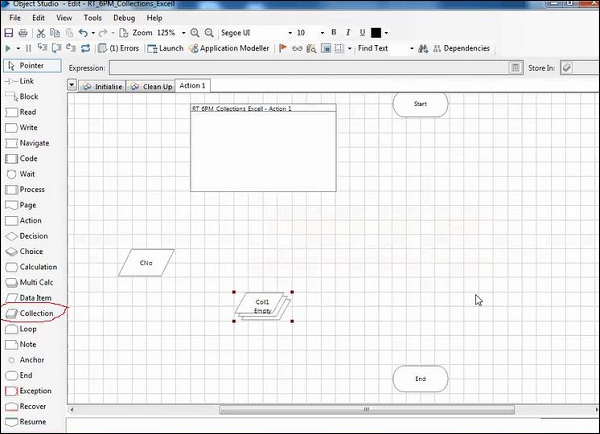
Provide the collection name, description and provide details in fields: name, type, description and fields. Use Add field to add any extra field.
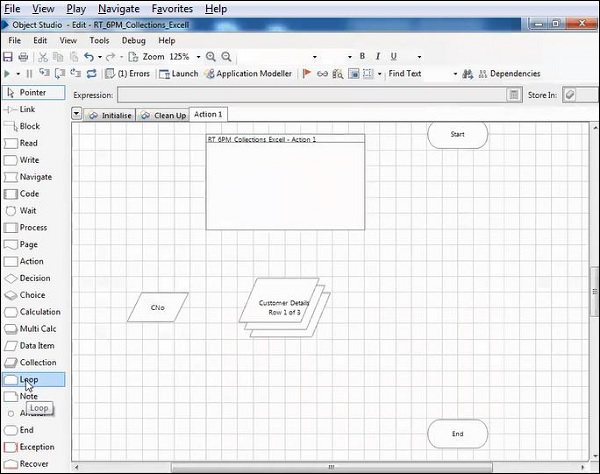
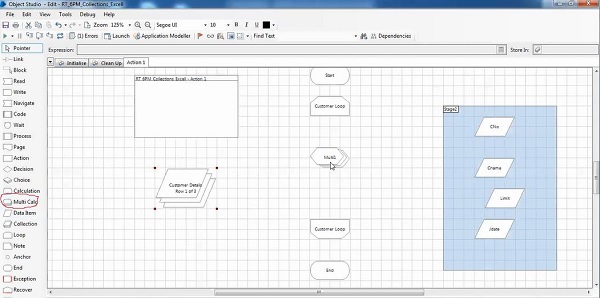
Use Loop Stage
Select Loop from the stages, loop will have start and end parts. It is used to execute the stages in the loop with the mentioned iterations.
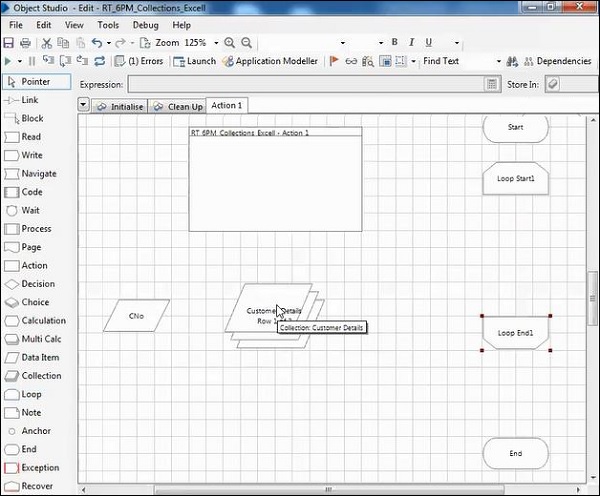
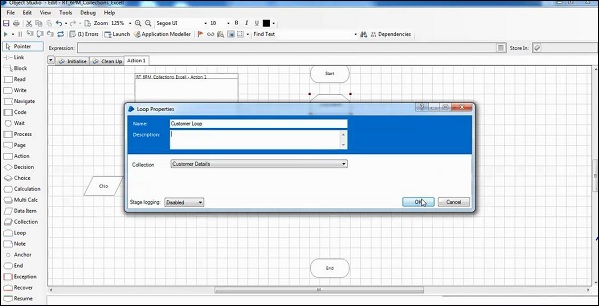
Provide the name for the loop and select the correct collection from the drop down list.
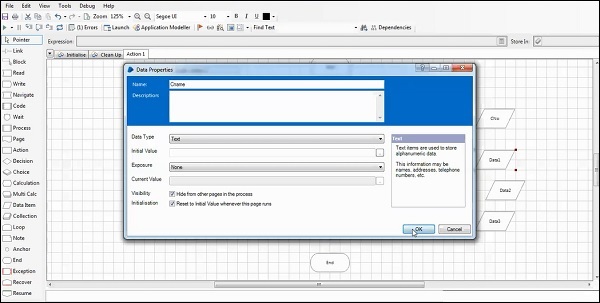
Create four date items
Using the data item stage, create four data items as given below −
- C no
- C name
- Limit
- Jdate
Use Multi Calculation to add data to collection in the empty row.
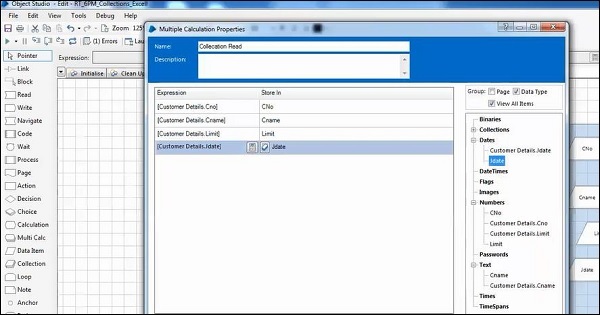
Provide a name to that multi calculation, drag the expression from collection list to expression, and drag the data items from the data item list to Store In values.
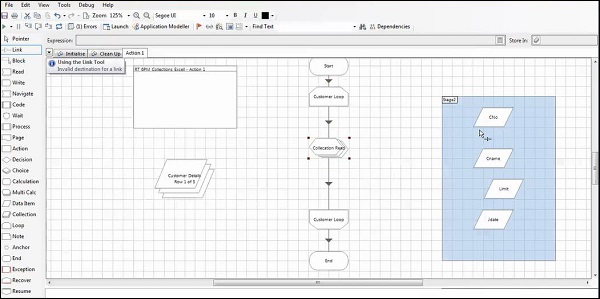
Link the stages using Link and save the Business object.
Execute the VBO by clicking on play button.
The result will be with the proper outputs which were provided in the collection as shown below −
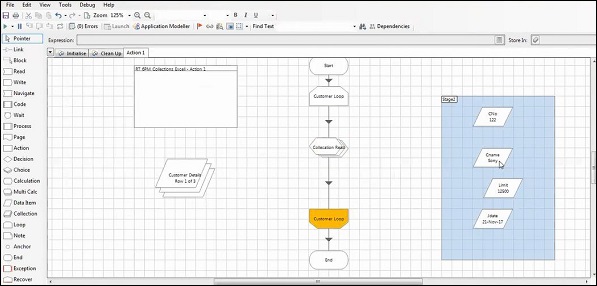
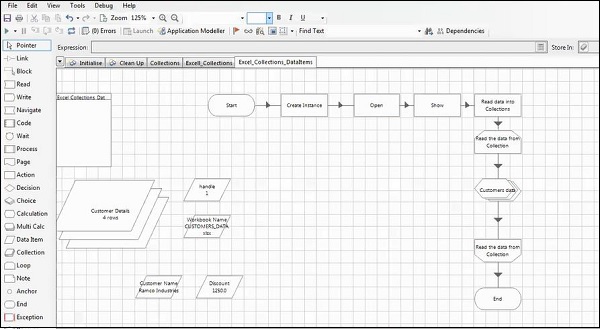
We will understand the collections with Excel as shown below −
First, we need to create an instance and take the output as 'handle' then open the work book name and pass the handle as input parameters.
It will write the work book name, then perform another action get worksheet as collections.
Step 1: Create instance
Action −
Name: Create instance
Description: Create instance
Business Object −
Ms Excel VBO
Action: Create Instance
Output: Handle
Step 2: Open
Business Object: Ms Excel VBO
Action: Open workbook
Input −
Value= Handle
File Name
Output: store in workbook.
Step 3: Show
Business Object: Ms Excel VBO
Action: Show
Input −
Value = Handle
Step 4: Read data into collections
Business Object: Ms Excel VBO
Action: Get worksheet as collection (Fast)
Output: store in Customer Details.
Step 5: Loop
Go to Loop properties
Name: Read the data from collection
Description: Read the data from collection
Collection: Customer Details.
Step 6: Multi Calculation
Name: Customer data
Customer details.
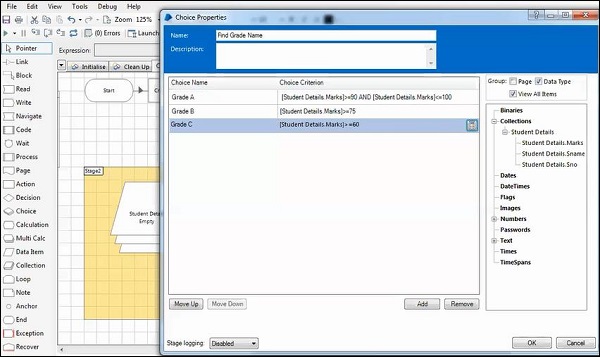
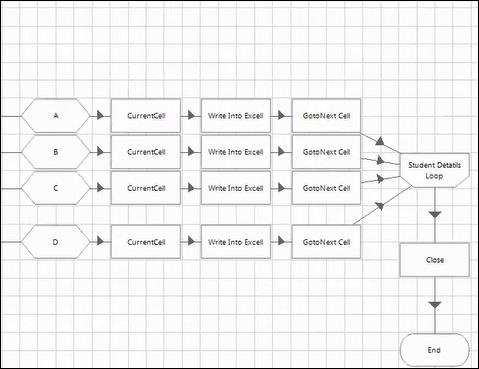
Understanding Choice with Collection and Excel
We need to create student Data with the given data −
Grade A >=90
Grade B >=75
Grade C >=60
Grade D >=50
Step 1: Create instance
Action −
Name: Create instance
Description: Create instance
Business Object −
Ms Excel VBO
Action: Create Instance
Output: Handle
Step 2: Open
Business Object: Ms Excel VBO
Action: Open workbook
Input −
Value= Handle
File Name
Output: store in workbook.
Step 3: Show
Business Object: Ms Excel VBO
Action: Show
Input −
Value= Handle
Step 4: Read data into collections
Business Object: Ms Excel VBO
Action: Get worksheet as collection (Fast)
Output: store in Students Details.
Step 5: Loop
Go to Loop properties
Name: Read the data from collection
Description: Read the data from collection
Collection: Student details
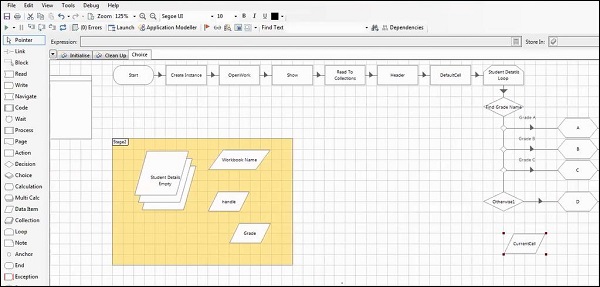
Step 6: Choice
| Choice Name | Choice Criterion |
|---|---|
| Grade A | Student Details Marks>=90 and <=100 |
| Grade B | Student Details Marks>=75 |
| Grade C | Student Details Marks>=60 |
Create one data item as Grade.
Create calculation as follows −
- Grade A
- Grade B
- Grade C
Before the loop, we need to configure the values.
Take the Action stage:
Name: Default Cell
Business Object: Ms Excel VB
Action: Active workbook
Then,
Perform another action - Current Cell
Business Object: Ms Excel VBO
Action: get Active Cell
Output store in Current cell.
Then,
Write the data into excel
Business Object: Ms Excel VBO
Action: Set Cell Value
Perform another action - Go to Next Cell
Business Object: Ms Excel VBO
Action: Go to Next Empty cell down
Input: store in current cell.
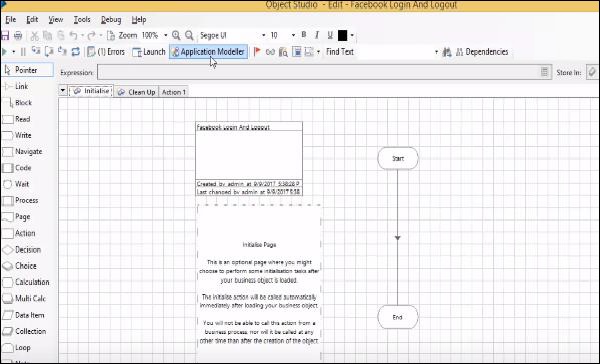
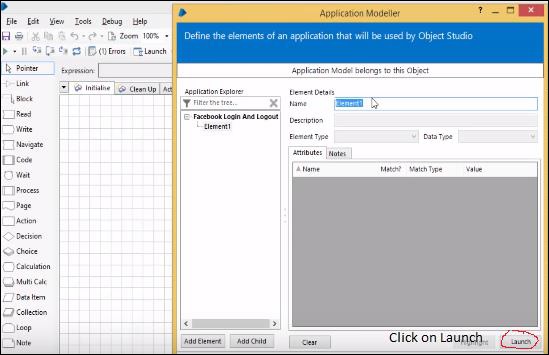
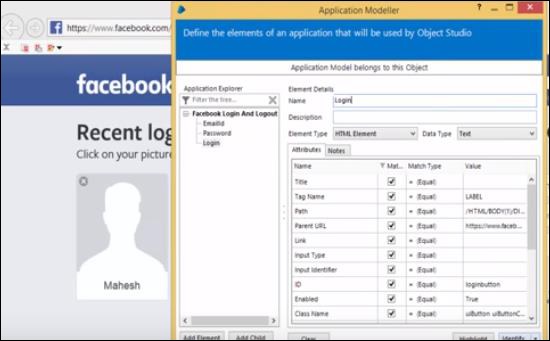
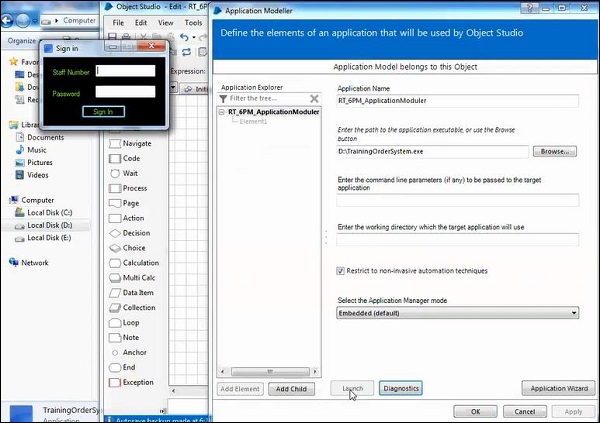
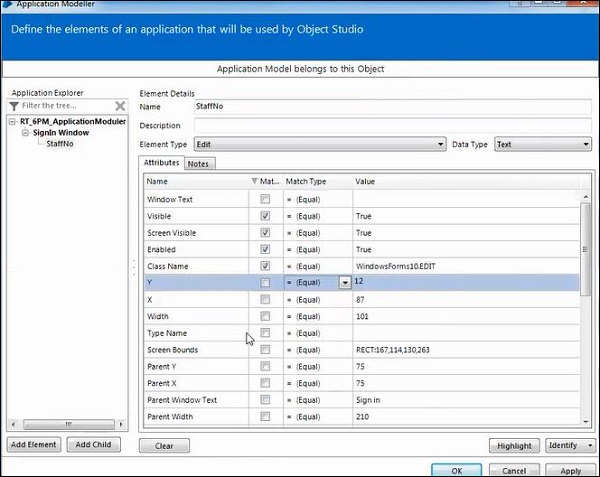
Blue Prism - Application Modeller
Application modeller is used for spying the applications. Spying is identifying the elements in the Applications.
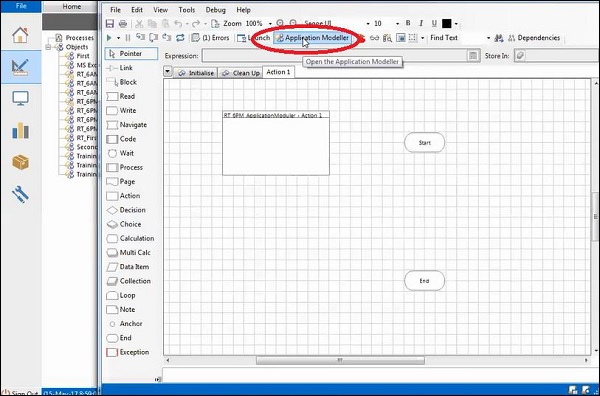
Application modeller window is as follows −

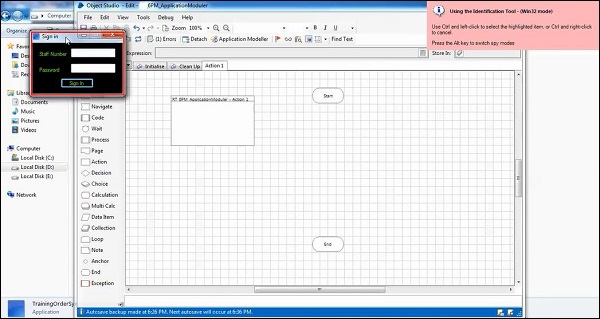
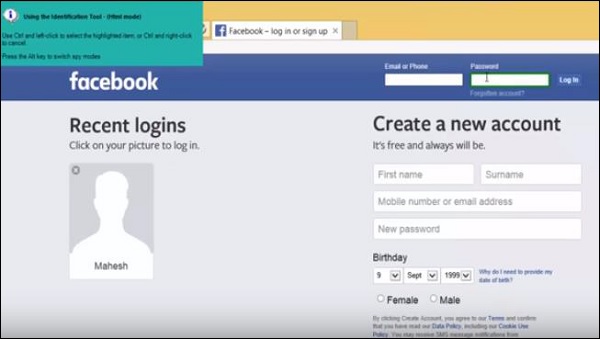
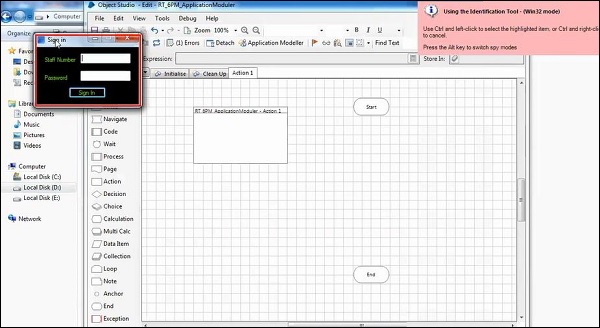
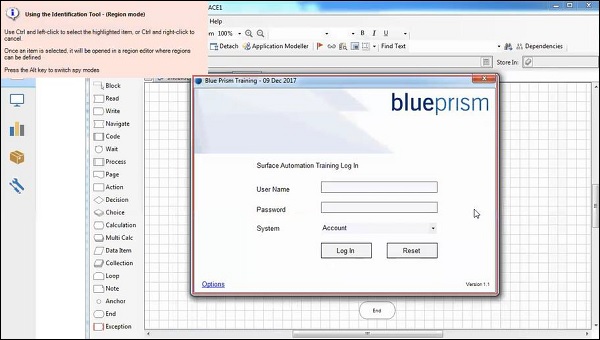
Spying Modes
We have 4 different types of spying modes as shown below −
Win32 Mode
HTML Mode
Accessibility Mode
Region Mode
Follow the below steps to select any of the spying modes or to switch between different modes −
Use Ctrl and Left-Click to select the highlighted item in spying modes.
Use Ctrl and Right-Click to Cancel.
Press the Alt Key to switch spy modes.
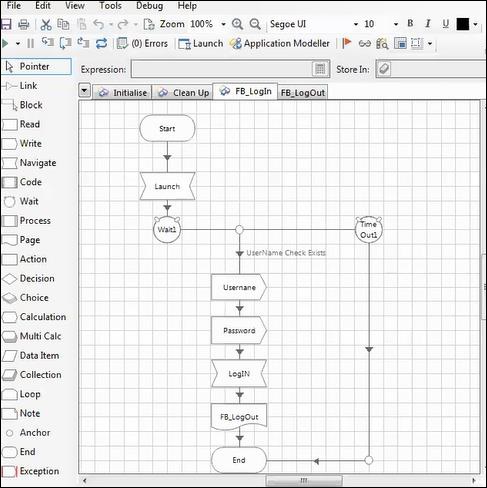
Working with Web Applications
We shall now discuss how to work with web applications −
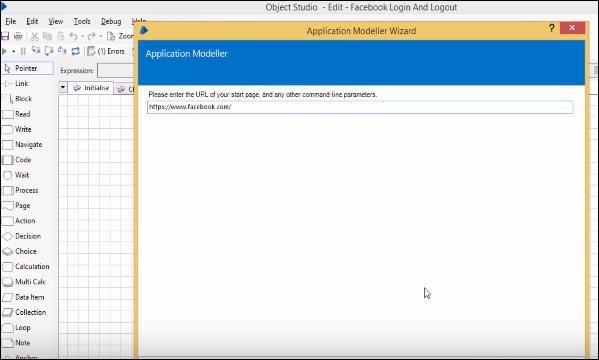
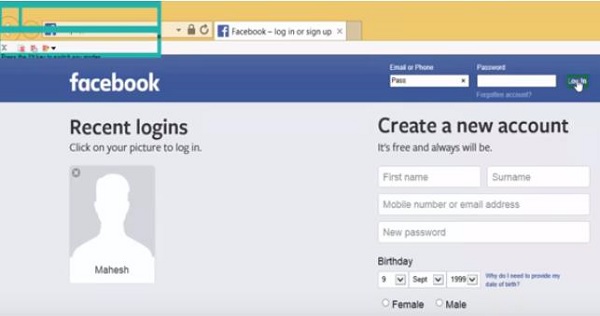
Facebook login and logout
First, let us create a business object and enter a name for it.
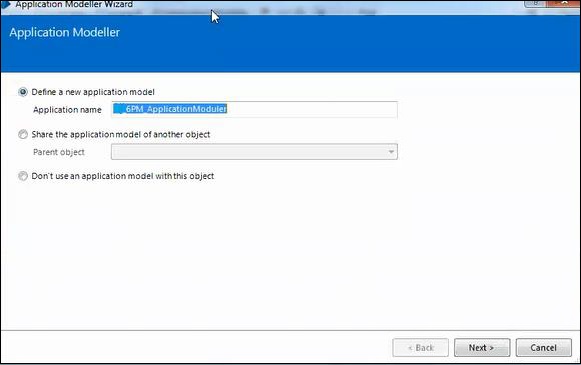
We need to configure the Application Modeller.
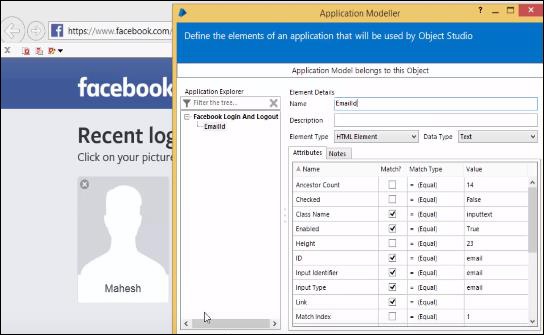
Now we are going to spy the login button, username and password fields.


Now, we shall start the implementation part.
Create data items for email and passwords.
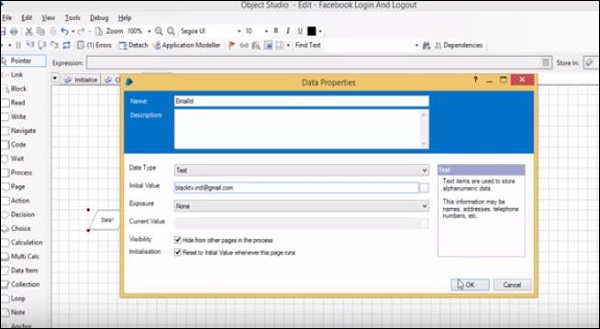
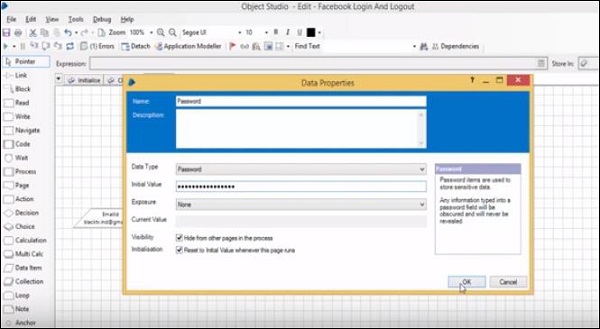
Use 'write stage' to type email id and password into Facebook site.
Click on Login button using Navigate Stage.
We are not getting the Click Actions in Navigate Stage.
So, go to Application Modeller and change the Login Element type to button.
Here, we are using the wait stage to load the site before launching the website.
Now login to Facebook site.
To logout from account, we need to prepare the element in Application Modeller.
Spy the required elements, first check what are the elements required for logout.
Then, we need to spy the arrow and sign-out option.
Use Navigate stage to click on arrow and click on logout.
After login button the site will take some time to load Account information. It depends on our network mean internet speed.
After login use conditional wait to hold the bold until the logout arrow will exists.
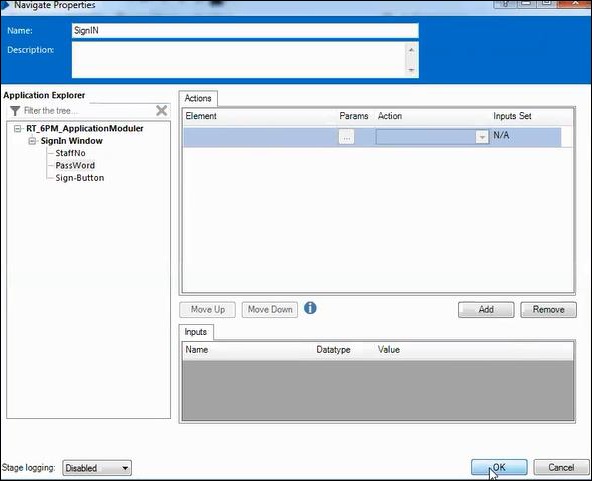
Working with Windows Applications and Multiple Windows
We shall learn how to automate the training order system with the step-wise procedure given below. The screenshots given in the subsequent sections help you understand the process clearly.
Step 1 − Create the business object.
Step 2 − Configure the Application modeller.
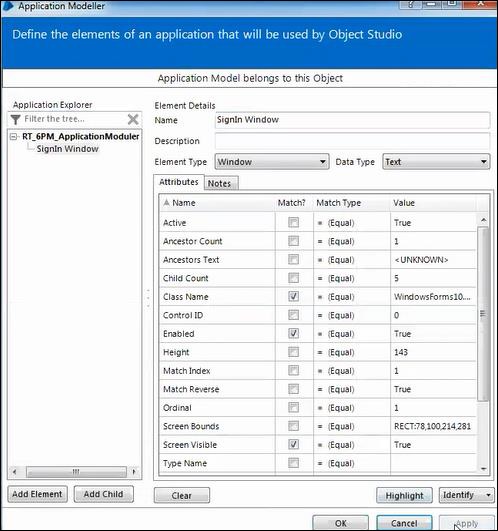
Step 3 − Spying the Sign in window.
Use Ctrl+Left to highlight the element, and ordinal element is used to Unique Identification.
Step 4 − Spying the staff number.
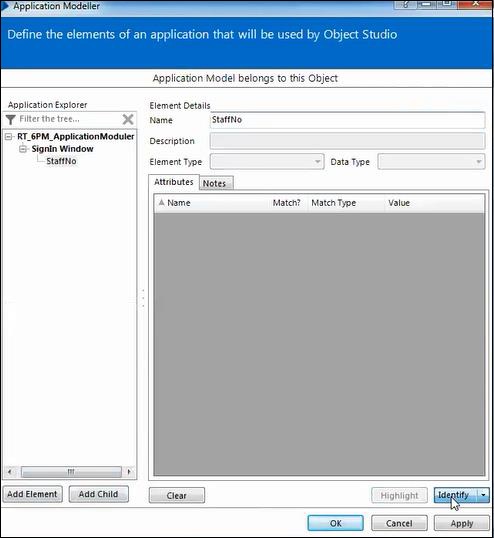
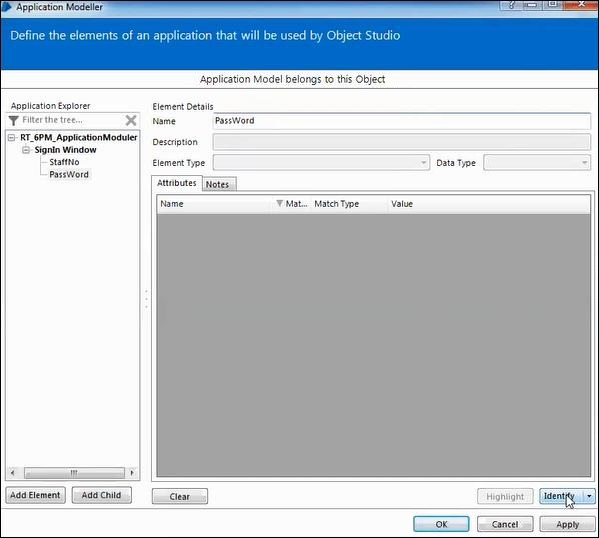
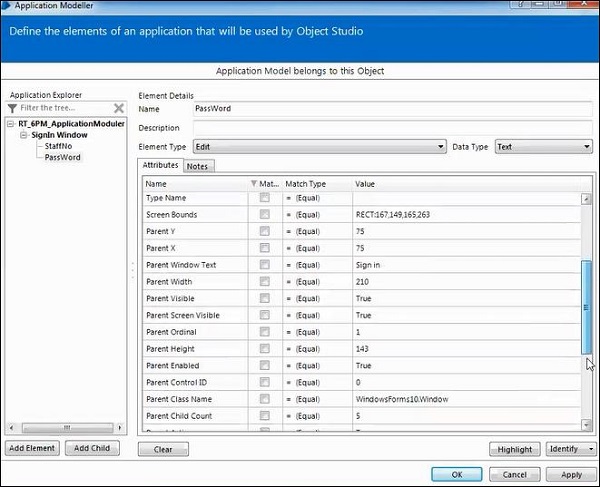
Step 5 − Spying the password.
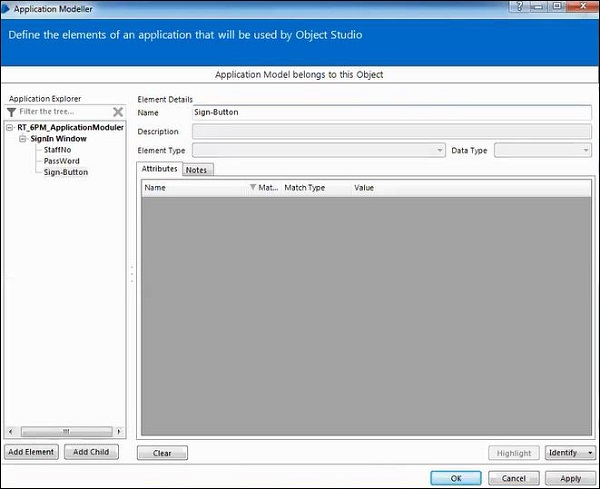
Step 6 − Spying the sign in button.
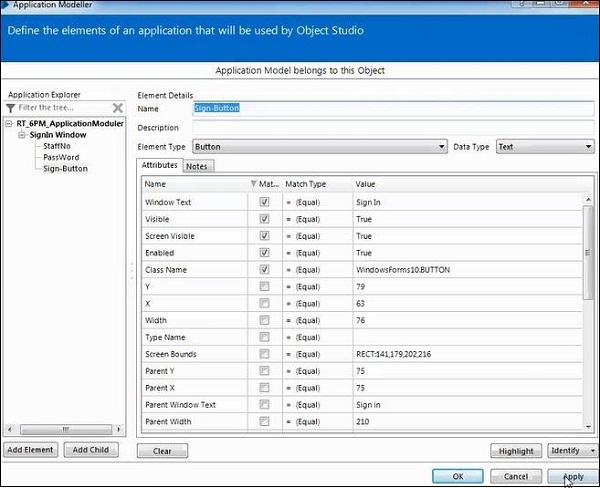
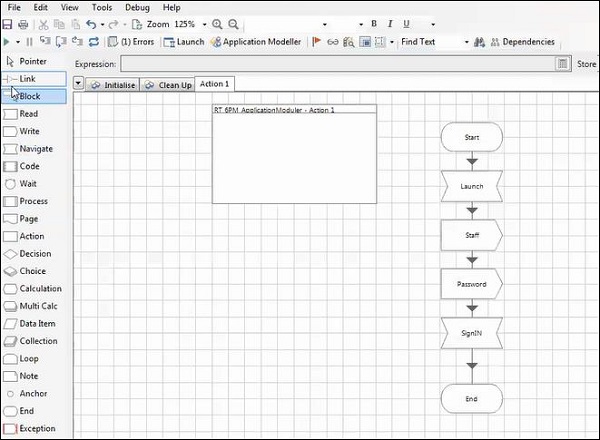
Now we start the implementation part.
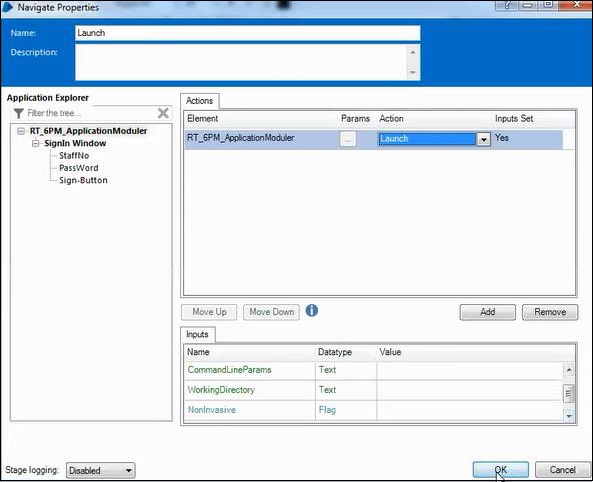
Step 7 − Using the Navigation stage to launch the application.
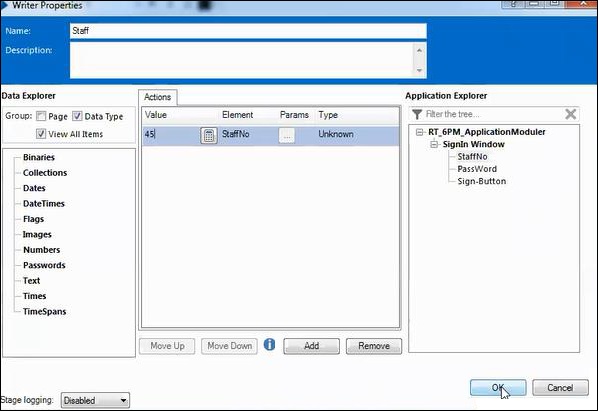
Step 8 − Using write stage to configure the staff number.
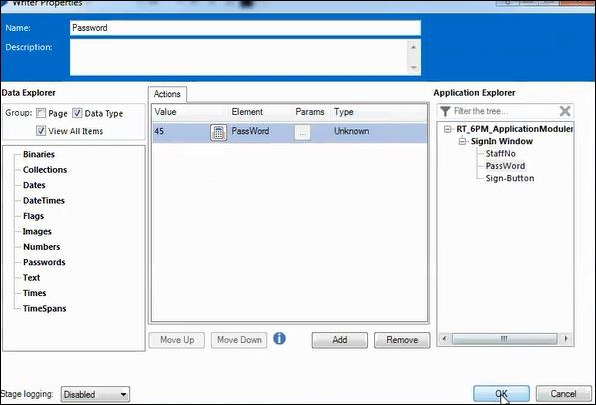
Step 9 − Using another write stage to configure the Password.
Step 10 − Using Navigate stage to Sign IN.
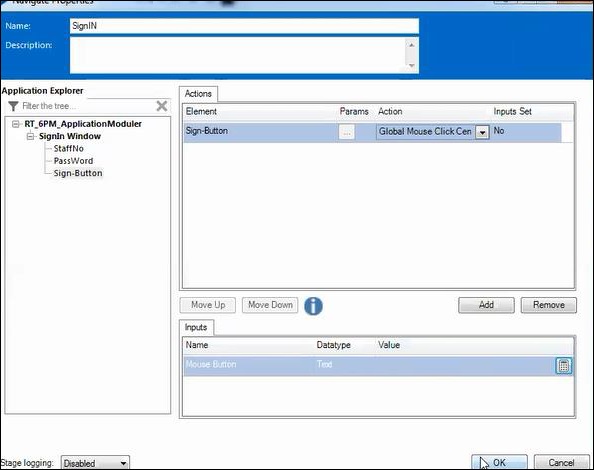
Step 11 − Link the process.
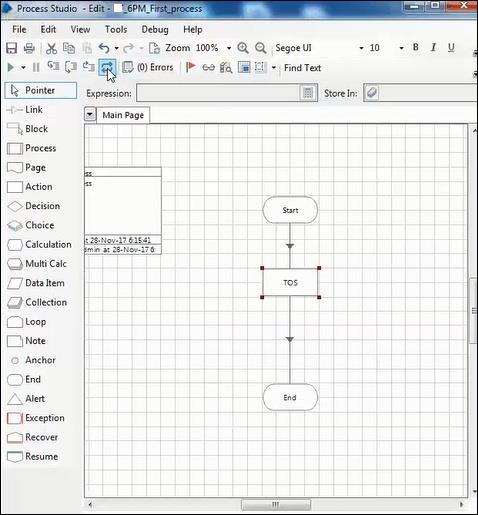
Blue Prism - Process Studio
Process studio has only Main page. If the page is published, we can call from the process studio. We use the Process studio for developing and testing.
Difference between Process and Object Studio
Major difference between process and object studio are given below −
| Process Studio | Object Studio |
|---|---|
| It is created as diagram that looks like flow diagram by development tool | Create Objects graphically by development tool |
| Stages: We have Alert stage in Process Studio | Stages: Read, Write, Navigate, Code and Wait |
| We have the Main Page | We have initialize and clean up Page |
| Process interacts with object studio and control room | Object Studio interacts with external Application. |
| Launch and Application Modeller is not available | Launch and Application Modeller is available |
Stages in Process Studio
Various stages in the Process Studio are given below −
- Link
- Block
- Process
- Page
- Action
- Decision
- Choice
- Calculation
- Multi Calculation
- Data Item
- Collection
- Loop
- Note
- Anchor
- End
- Alert
- Exception
Publishing the object studio pages
We can publish the object studio pages using the below steps −
Develop the Business Object.
Deploy the Business object actions.
Publish the object studio.
After publishing the process, we can run from the Process Studio.
Publishing the Process to Control Room
We can publish the process to control room using below steps −
Develop the process object.
Double click on the description.
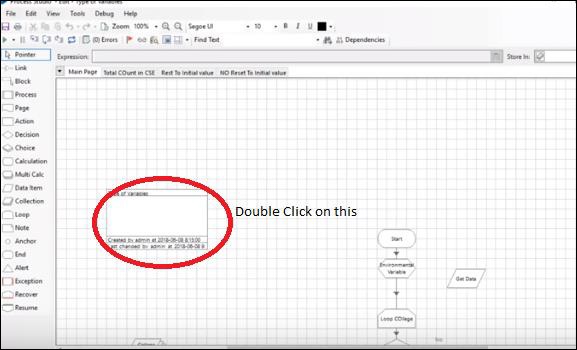
Then select the check box publish the process to control room.
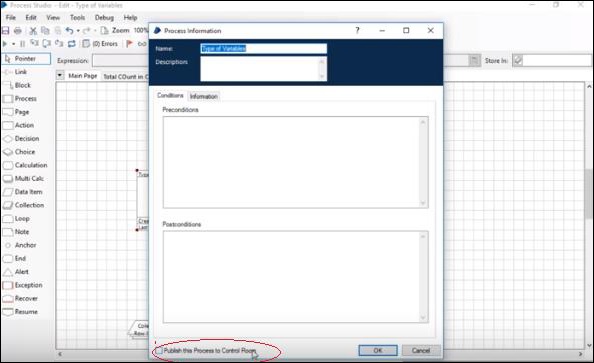
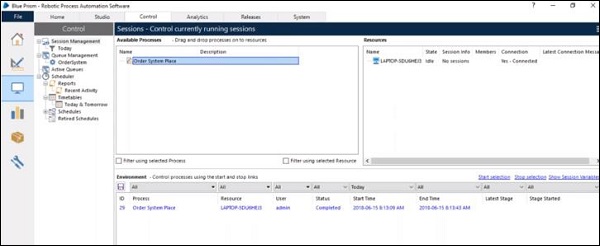
The published process displayed in the available process.
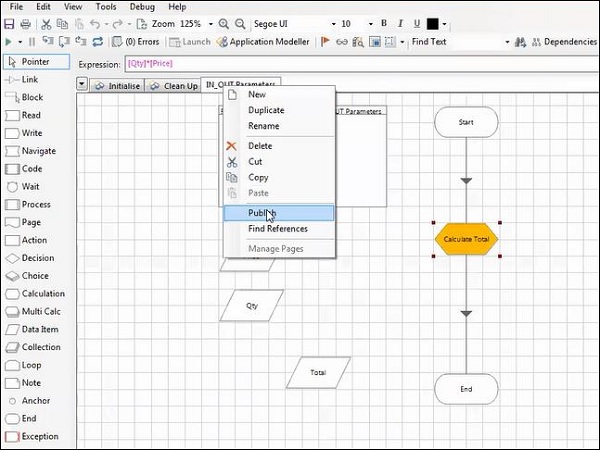
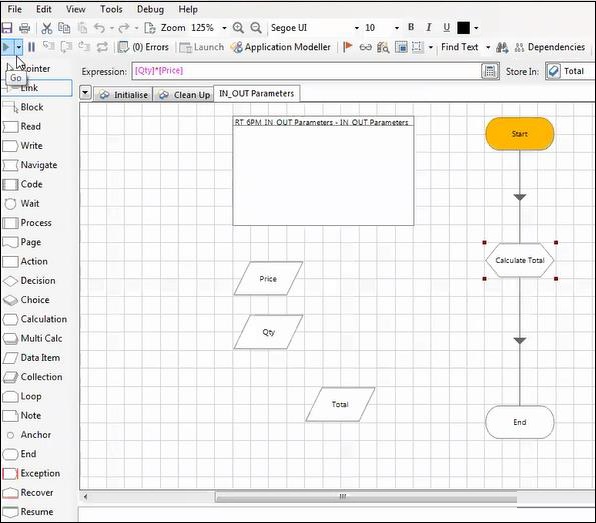
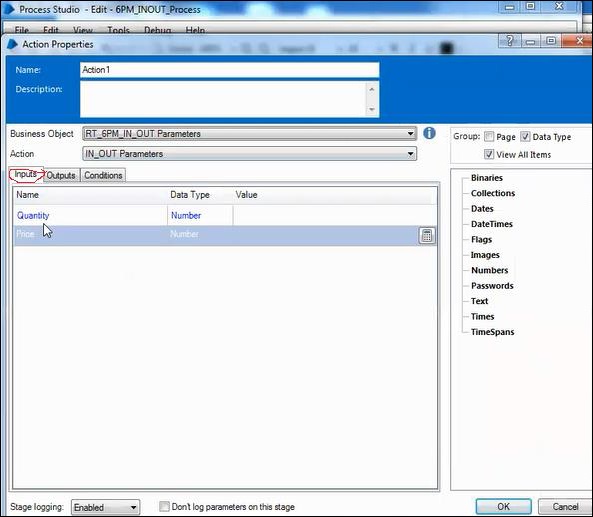
Input/Output Parameters Passing
We want to pass some parameters to one page to another page using the input/output parameters.
We create the input and output parameters in process studio.
We need to declare the input parameters at the start stage.
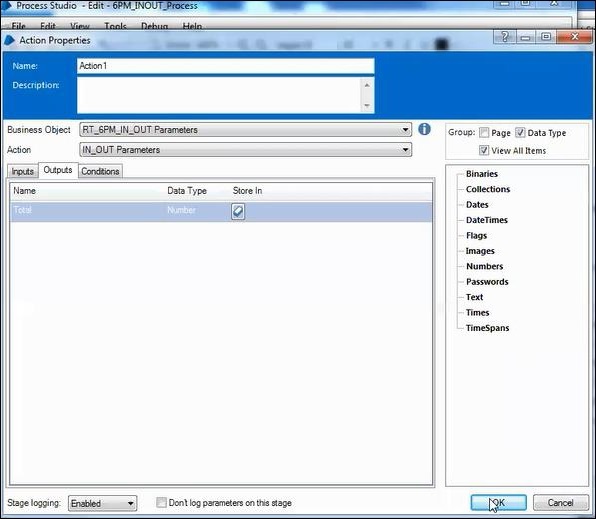
We need to declare the output parameters at the end stage.
We shall look at a step-wise approach to pass Input and Output parameters −
Step 1 − Create the business object.

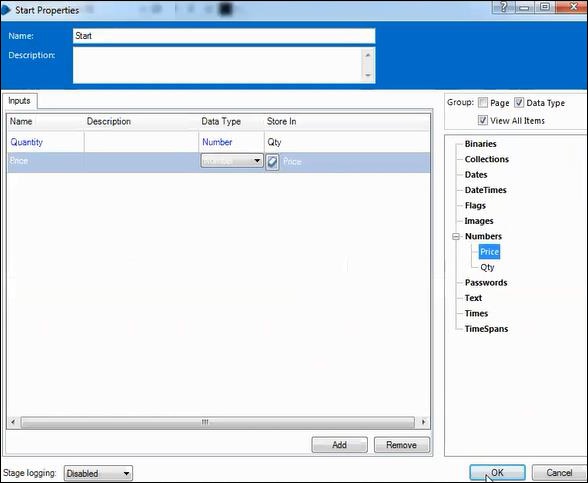
Step 2 − Define the input parameters in Start stage.
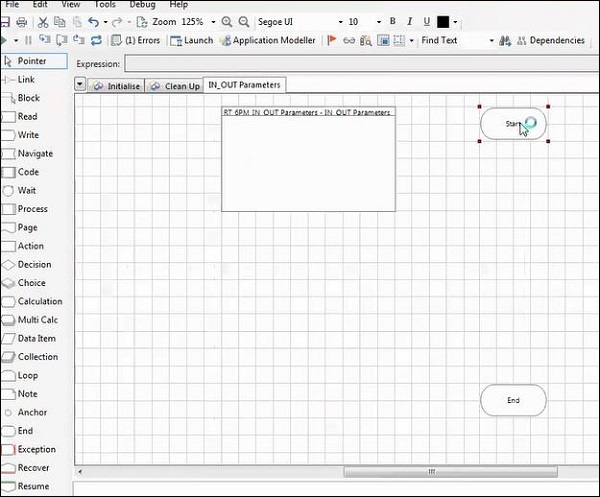
Step 3 − Double click on Start Stage to configure the input parameters.
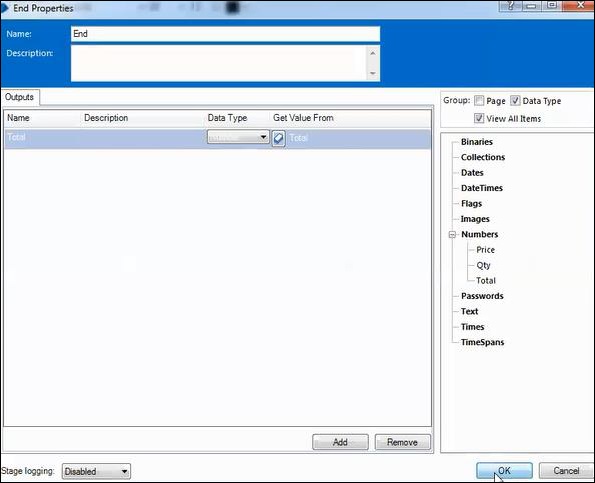
Step 4 − Define the output parameters in End Stage.
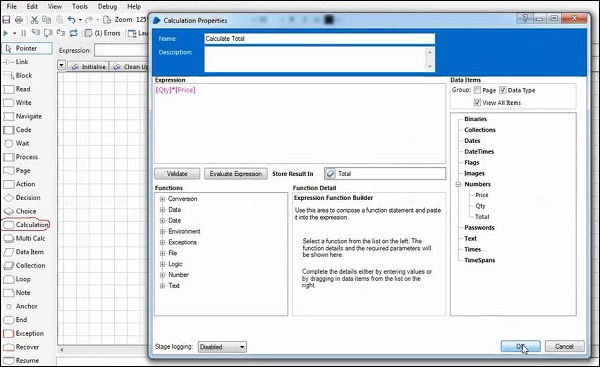
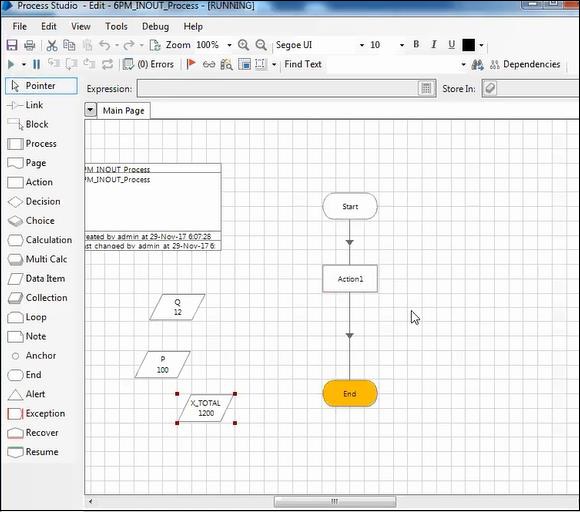
Step 5 − Go to calculation Stage for simple calculation.
Step 6 − Connect the process and save it.
Step 7 − We must publish the process.
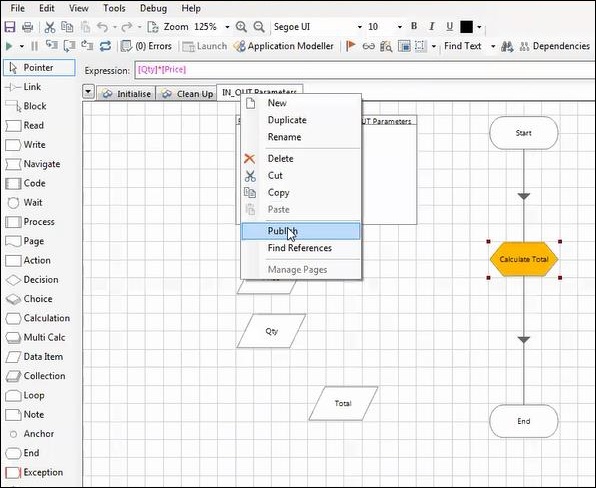
Step 8 − After publishing the process, we can run from the Process Studio.
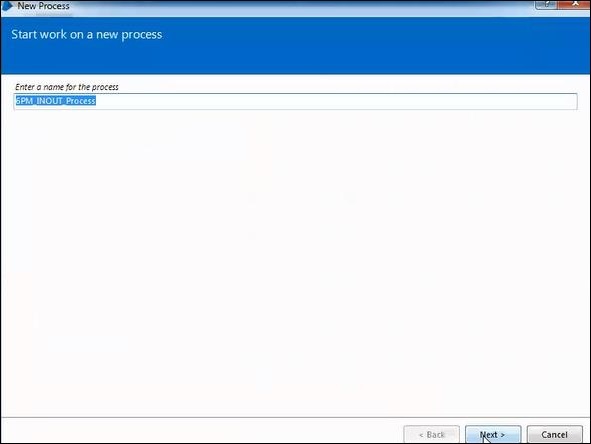
Step 9 − We need to create the process in process studio.
Step 10 − Use the Action stage to call the process from object studio.
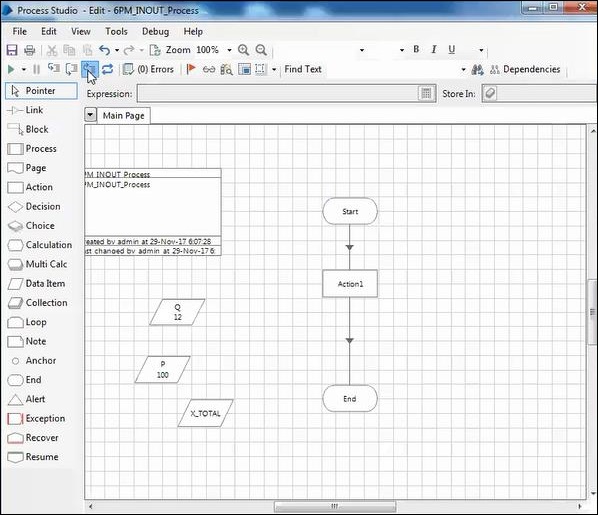
Step 11: Create the data items and run the process.
Blue Prism - Exceptions Handling
Exception handling is defined by the management of exceptions in unassisted automation. It ensures that problems can be automatically resolved if possible, or easily identifiable and repairable by system administrators or passed for human completion where appropriate. The success of exception handling depends on how well it is implemented during development.
Achieving Exception handling in Blue Prism
Exception handling is a critical part of any blue prism solution. An exception is a problem that arises during the execution of a process/object.
When errors are encountered in blue prism, it generates exceptions.
Exception Handling Stages
Exception handling can be achieved by using resume, recover and exception stage.
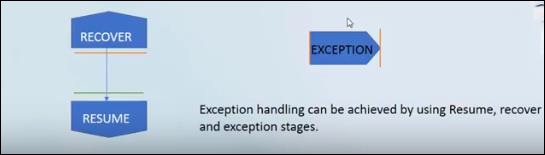
Recovery − Begins a block for handling exceptions.
Resume − Ends a block for handling exceptions.
Exception − Explicitly raises an exception in the execution of process or object.
Types of Exceptions
We have 3 types of exceptions in Blue Prism −
Internal Exceptions
System Exceptions
Business Exceptions
Internal Exceptions
Internal Exceptions come based on our missing mandatory data in stages.
Suppose, we want to save the data for newly created excel. However, we missed to provide path, then we get the internal exceptions.
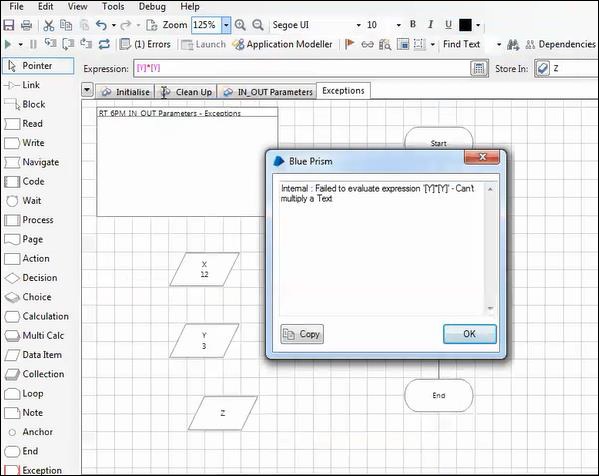
Another example is when we give invalid expression in calculation stage, we get internal exceptions as shown below −
Create 3 data items i.e X, Y and Z with text type.
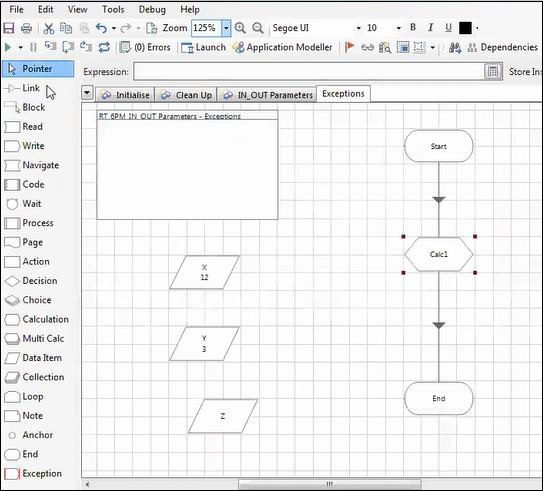
Use calculation stage to perform the simple calculation
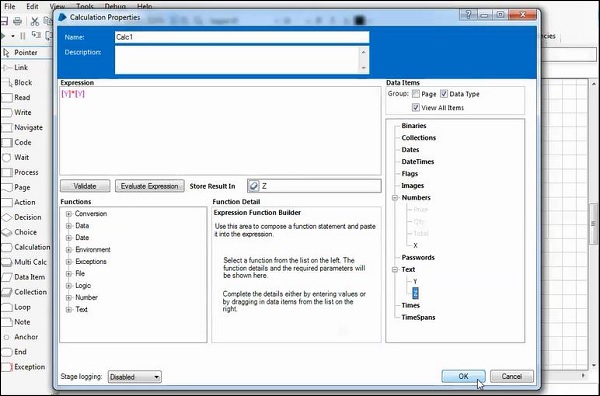
Now, run the process.
Business Exceptions
These exceptions are not actually exceptions, however, based on the business rules, we are creating the exceptions. We need to fire manually through bot.
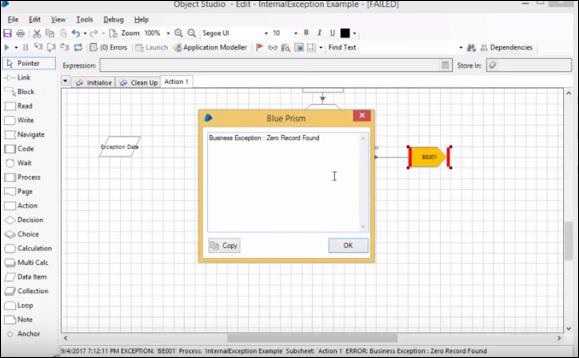
Let us suppose, we working on excel data having the employee name and his account balance. Reading these data into collections and checking the balance of each employee. If the balance of any employee is zero, we need to fire exception and log the message. As per business rules, if the balance is zero, the payments cannot be done.
Step 1 − First, we will read the data and store the collection.
Step 2 − We need to loop collections and check if the column has zero. If yes, then throw an exception.
Step 3 − We need to configure the Exception stage. As we have so many exceptions types, we need to configure this as Business Exception.
System Exceptions
System Exceptions will occur based on internet is down or our bot need internet or any system failures.
We need to handle these Exceptions using the Recovery and Resume stages. We don't need to link to recovery stage, whenever and whereever exceptions fires, immediately the recovery stage catches those exceptions.
Exception Bubbling
When the Exception is fired, it moves upwards towards the flow until it gets caught by recovery is called Exception blubbing.
Blue Prism - Work Queues
A work queue is an internal configurable list that enables a Process to manage its workload. A process can use different work queues and a work queue can be shared by multiple processes if required.
The Queue Management tab in Control Room provides the operational user interface for work queues. The tab is divided into two: a list of queues is shown in the upper half, and the lower half shows a list of the items in a queue.
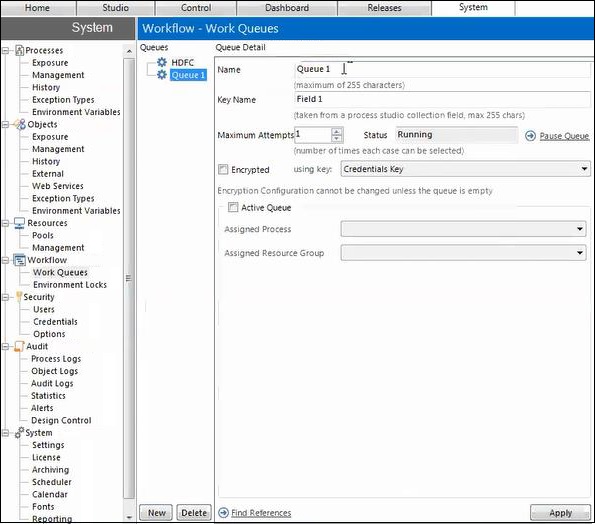
Work Queue Configuration
Work queues are created in System Manager, the administrative are of Blue Prism.
Tags
A Tag is a keyword of term assigned to a Work Queue item as a method of categorizing or grouping that item.
Adding tags
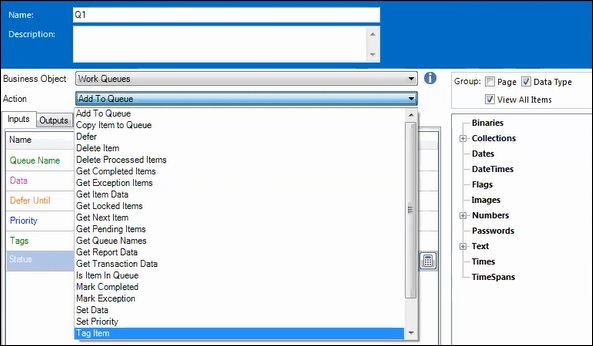
Adding a Tag to a Work Queue item simply requires the use of an Action Stage. Add an Action stage into your process flow. In the Action stage, perform the following actions −
Select the Internal – Work Queues Business Object.
Select the Tag Item Action.
Set the Item ID Input Parameter to be the Item ID for the Work Queue Item you wish to tag. The item does not need to be locked to add a tag.
Set the Tag Input Parameter to be the Tag that you want to add to the Work Queue item.
Click OK.
Removing Tags
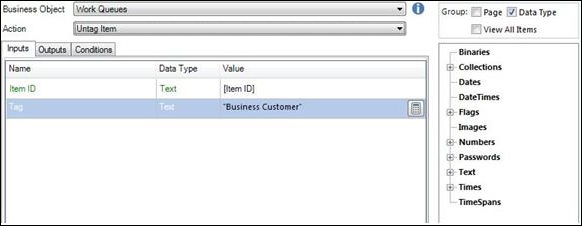
Removing a Tag from a Work Queue item also requires the use of an Action stage. To remove a Tag, follow the below steps in Process Studio −
Add an Action stage into your process flow.
In the Action Properties, perform the following −
Select the Internal – Work Queues Business Object.
Select the Untag Item action.
Set the Item ID Input Parameter to be the Item ID for the Work Queue Item you wish to un-tag. The item does not need to be locked to remove a Tag.
Set the Tag Input Parameter to be the Tag that you want to remove from the Work Queue item.
Click OK.
The following screenshot explains the above steps clearly −
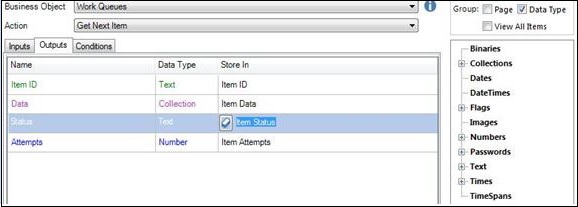
Status
Each Work Queue item has a status. The status can be used as a method of recording what work has been done so far on a Work Queue item
Setting the Status for a Work Queue item simply requires the use of an Action stage. The following steps will be required −
Add an Action stage into your process flow
In the Action Properties do the following −
Select the Internal – Work Queues Business Object.
Select the Update Status action.
Set the Item ID Input Parameter to be the Item ID for the Work Queue Item you wish to assign a status to.
Set the Status Input Parameter to be the Status that you want to update the Work Queue item with.
Click OK
The following screenshot explains the above steps clearly −
Using Status
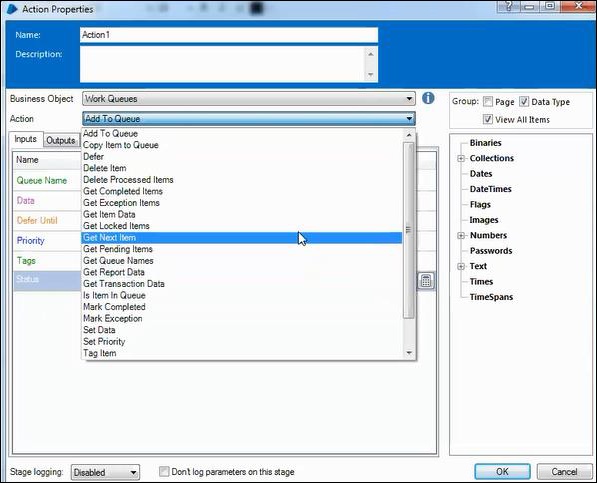
Your process can also be configured to use the item status to ensure steps within your process that should never be repeated.
To use the Item Status, simply add decision stages to your process that checks the Item Status so that any parts of your process that have already been done for the item can be skipped. Remember, the Item Status can be returned as an output from the Get Next Item action.
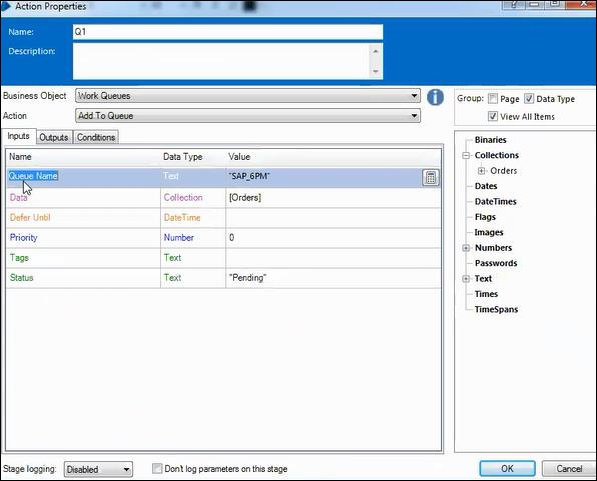
Priority
When designing an automated solution, you should consider if any different work types or scenarios within the process should be worked before the other worked items.
Using Priority
The Priority for a Work Queue item is done when the item is first added to the queue using the Add To Queue action. The Priority of an item cannot be changed after it has been added to the queue.
Active Queues
Using the traditional session management model, sessions are started on resources which poll the work queue for cases to work. These sessions are started in Control Room manually, or via a scheduler service which is running on a Blue Prism Server instance.
Active queues introduce an alternative mechanism for managing the sessions which work the queues, made possible by creating a closer association between work queues and sessions.
Instead of creating sessions separately in Control Room and then moving to the queue management page to see the results, active queues allow you to set a target number of resources which should be working the queue. Blue Prism uses the active queue configuration to determine how to achieve that target.
Active Work Queues are only useful when running dozens of sessions for one process. When this is not the case, the benefits of Active Work Queues will not be realized.
Blue Prism - Credentials Manager
Credentials are a secure repository for details used to log in to target applications. They are encrypted in the Blue Prism database to make them only accessible to those who should be able to use them.
The Credentials Management system determines which Processes, Resources and Roles have permission to access the information, and a special Internal – Credentials Business Object provides actions for using credentials.
To configure the credentials, Go to System Manager → Security → Credentials.
Before creating the credentials first, we need to configure the key, then only it will allow to create credentials.
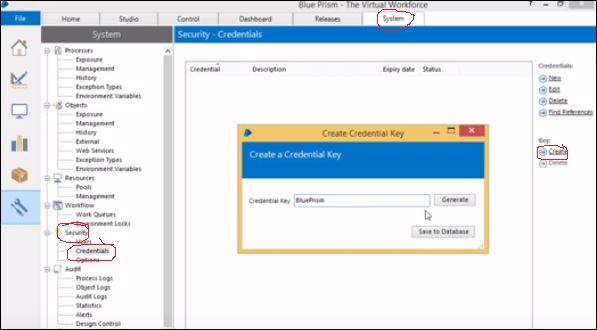
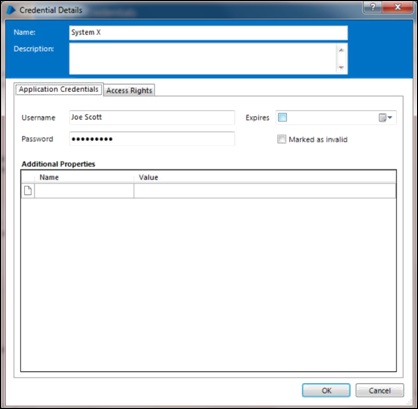
Creating the credentials.
User, Role and Log Management
In this chapter, we shall discuss about User, Role and Log Management in Blue Prism Environment.
Step 1
Login into blue prism
Step 2
Select system → Security →User
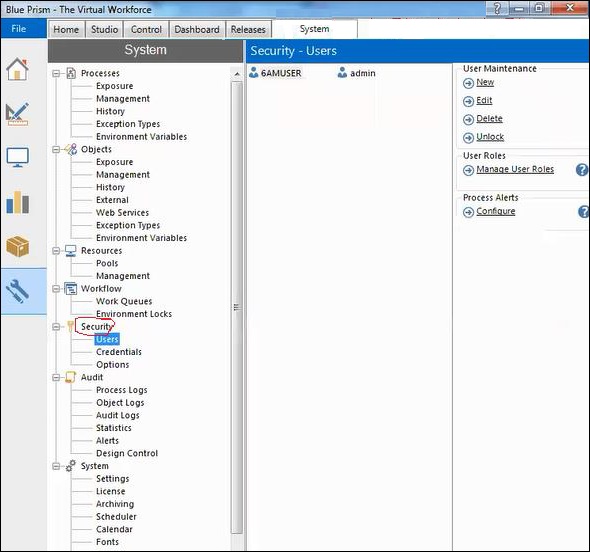
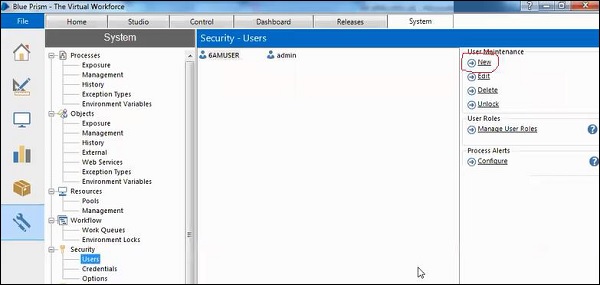
Step 3
Window will open right side we can find the new option click on it.
Step 4
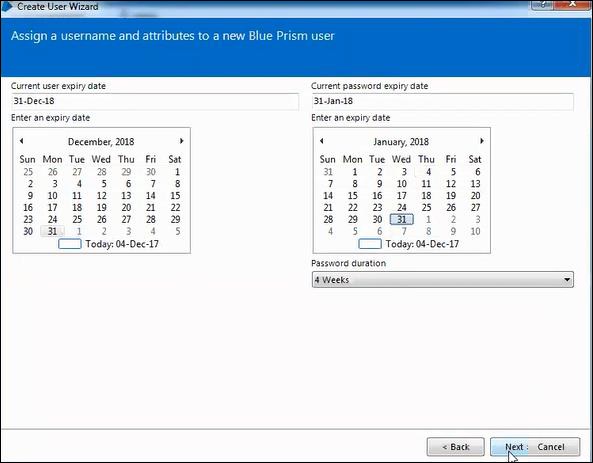
Window will open with name as create user wizard their enter name and password.
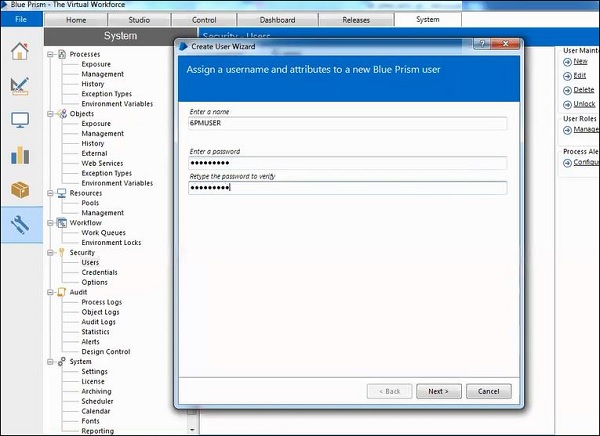
Step 5
Click next button and a window will open give the password duration and assign the role.
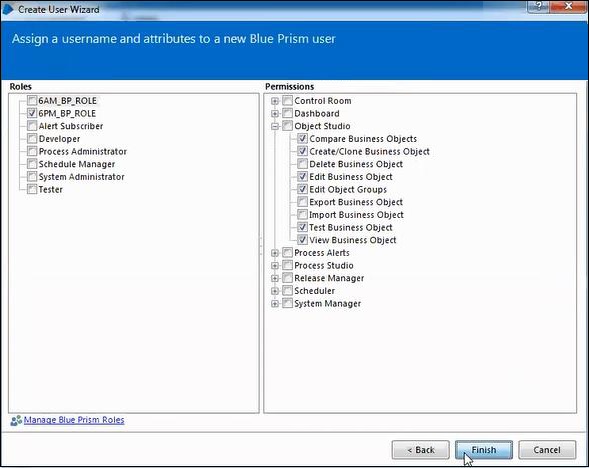
Step 6
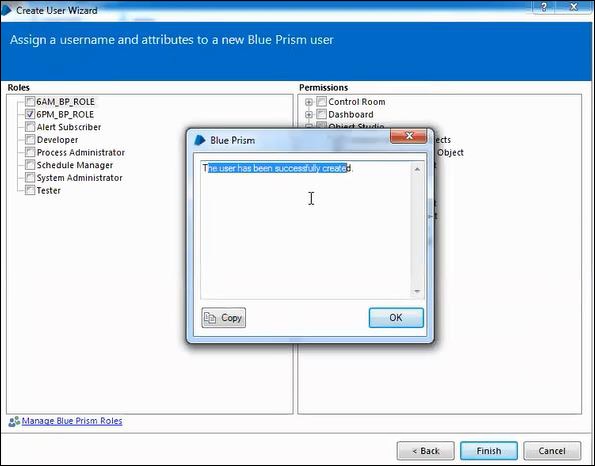
We gave permission to access development then click finish.
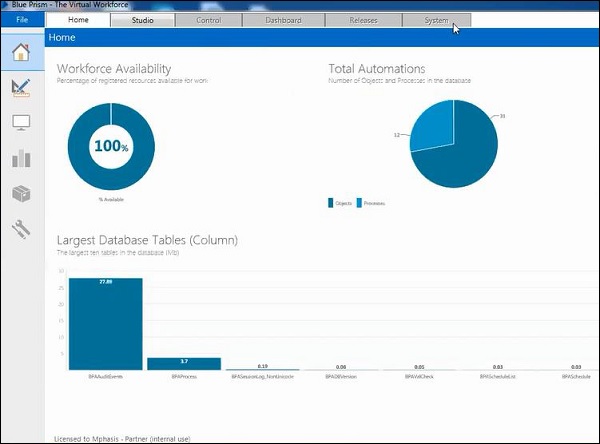
Now logout form the admin user and then login with user which we created.

We can observe that access home and studio because gave permission to access the development only.
Email and Surface Automation
We shall discuss email automation and surface automation topics in this chapter.
Email Automation
Before performing email automation, we need to give permission to our Gmail account we are currently using.
Follow the below steps to give the permission to the Gmail account −
Go to My Account page → Click on Sign-in & Security → Scroll to end of the page and select less Secure apps option → Enable it.
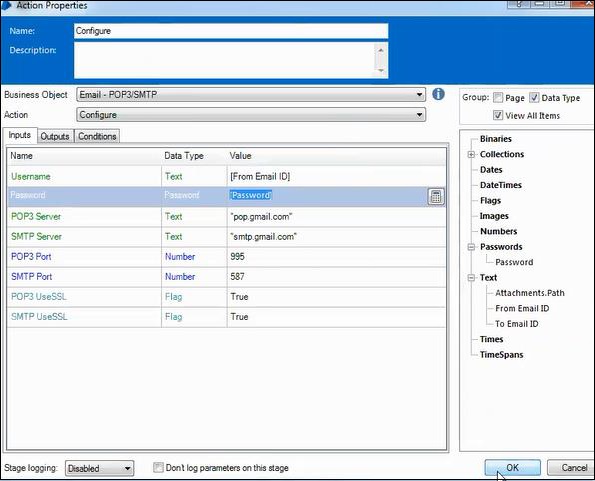
Step 1 − We need to configure the email settings in action.
Step 2 − Create two data items for username, password, from email address and to email address.
Step 3 − Provide the POP3 and SMTP server details
Step 4 − Provide the POP3 and SMTP port Details.
Step 5 − Provide the true for POP3 UseSSL and SMTP UseSSL. The screenshot given below explains all the above steps clearly.
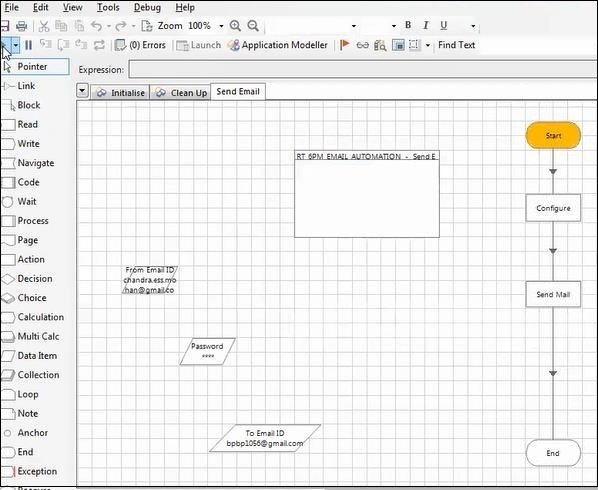
Step 6 − Let us name it as "Send mail".
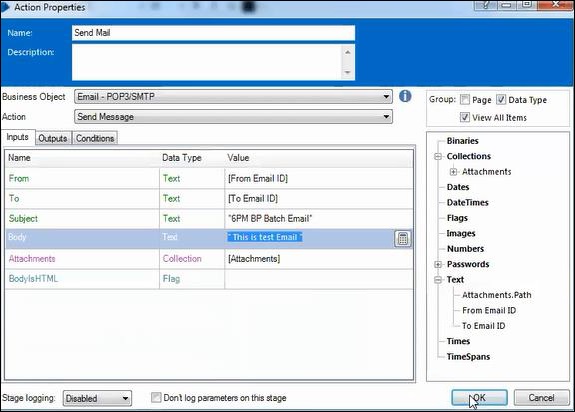
Step 7 − Next step is to link the process.
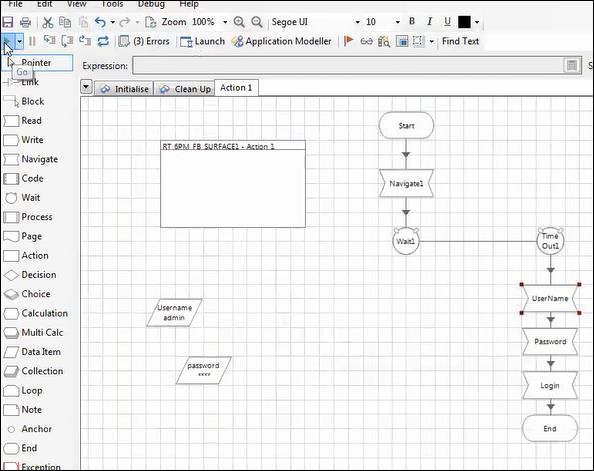
Surface Automation
Blue Prism provides Surface Automation techniques that can be used as an alternative when technology connectors are not available. Some of these Surface Automation techniques are briefly described in: Regions, Character Matching, Global Clicks, and Keys sections.
Follow the below steps to run surface automation in your device. Screenshots are included after each step for easy understanding −
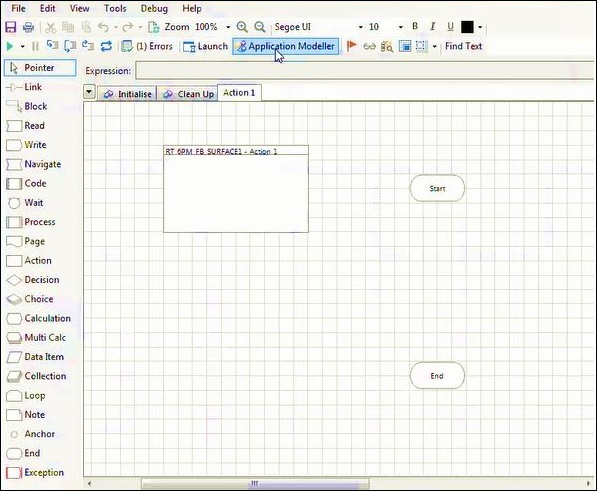
Step 1 − Create the business object and configure the Application modeller with Surface Automation.
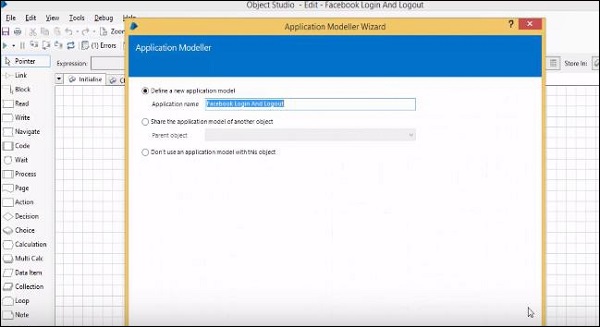
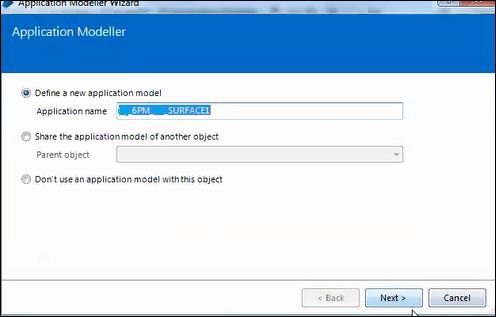
Step 2 − In the next step, we need to define a new application model name as given below −
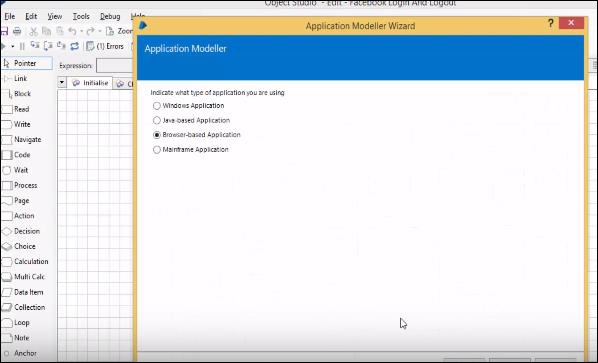
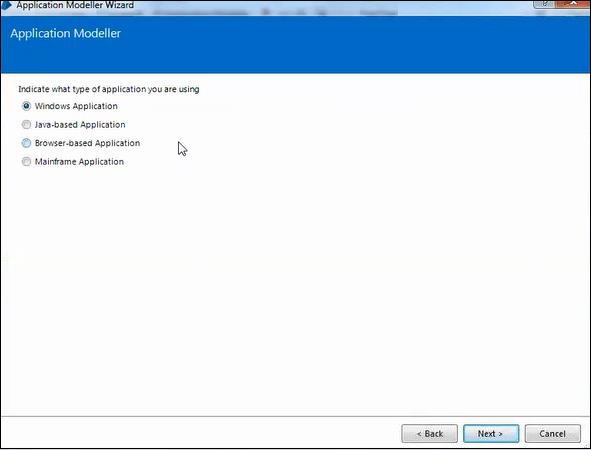
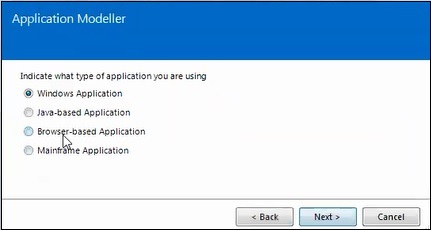
Step 3 − Based on the application type in use, select one as shown below −
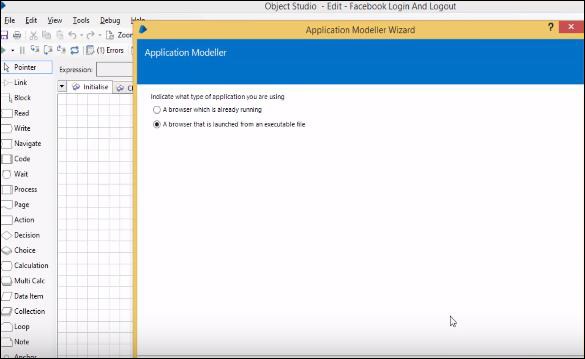
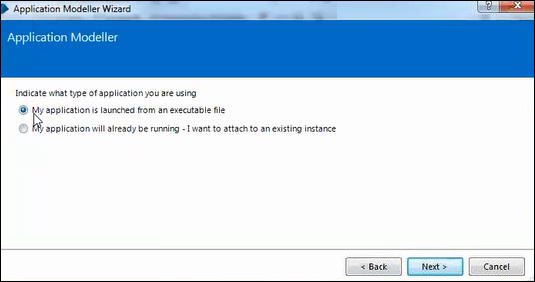
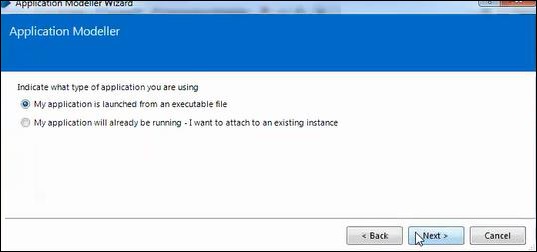
Step 4 − Indicate the type of application being used.
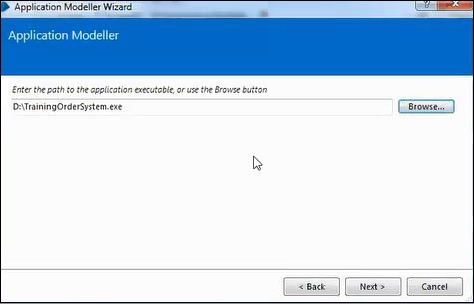
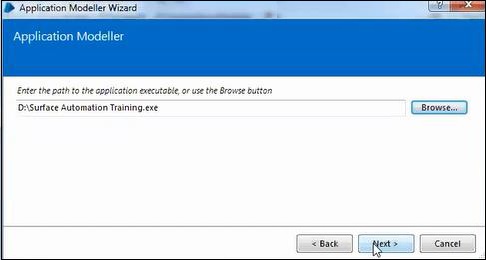
Step 5 − In this step, enter the path where the .exe file is saved or browse the location using Browse button as shown below −
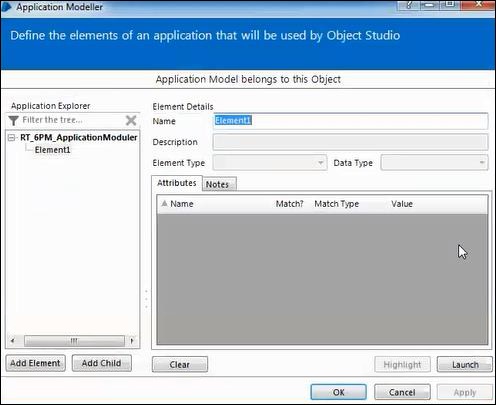
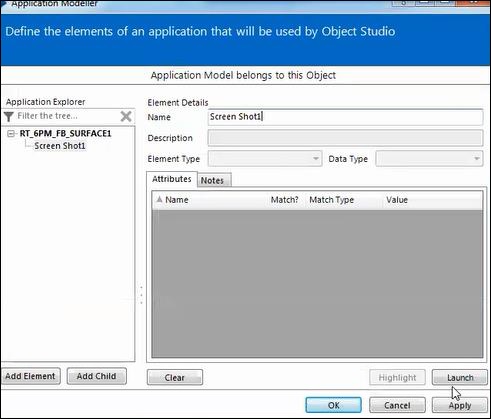
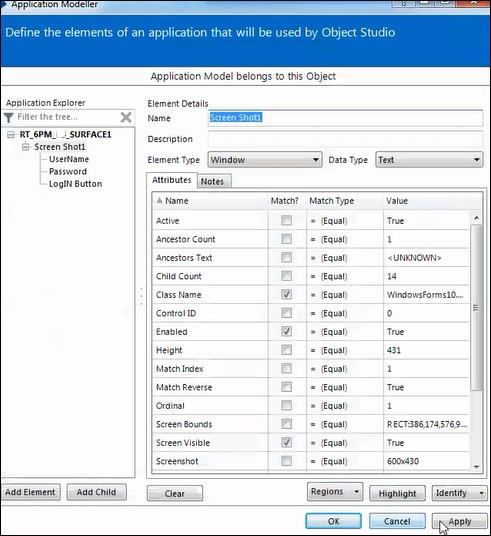
Step 6 − Enter the Element details and launch the application.
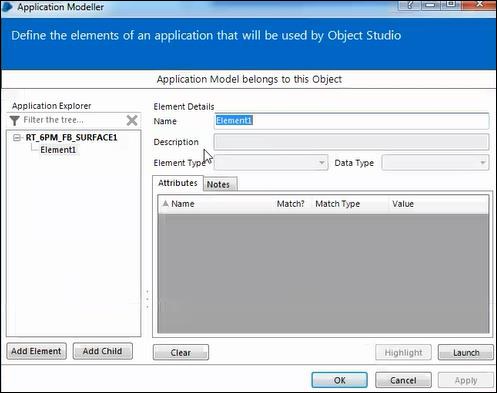
Step 7 − We can launch the application using the launch button at the bottom as given below.
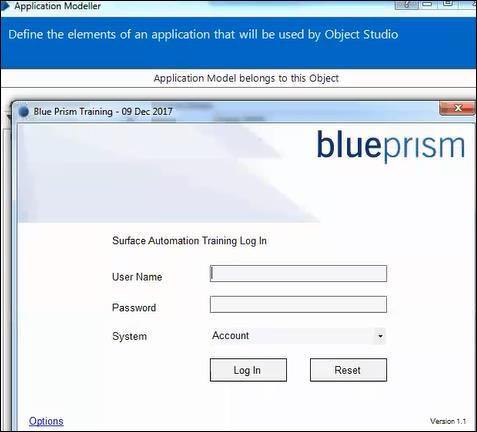
Step 8 − Login into the application using the credentials.
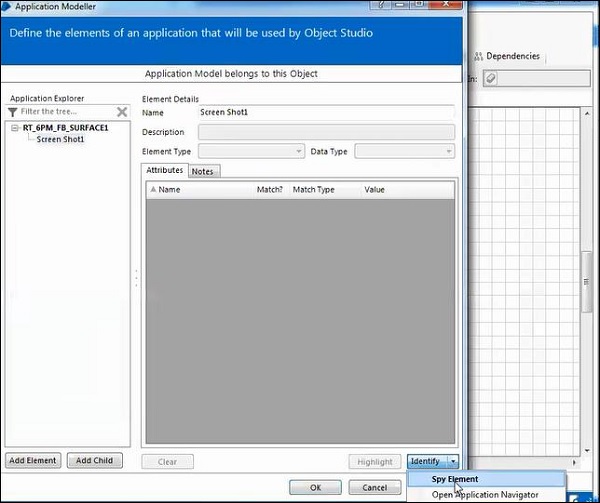
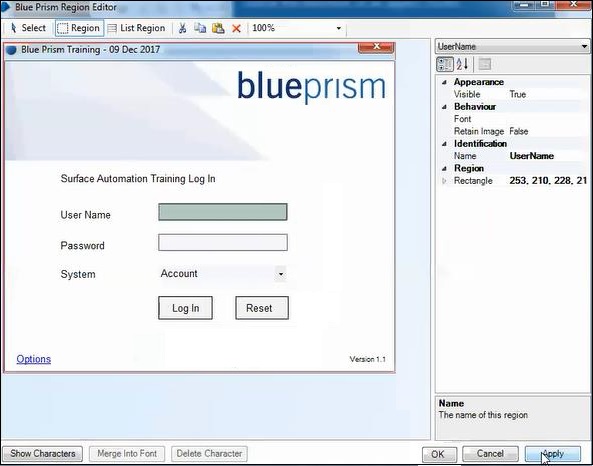
Step 9 − Identify the spy elements as shown below −
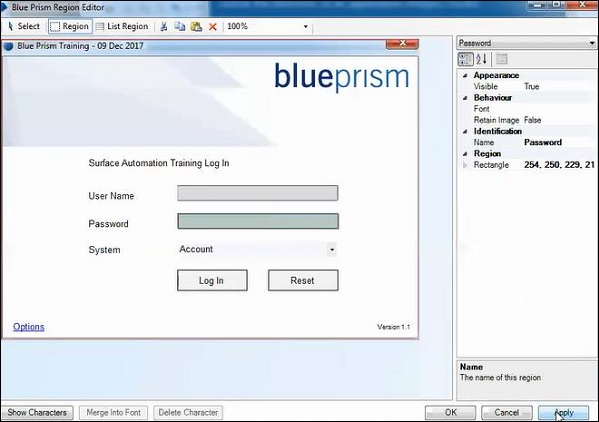
Step 10 − In this step, we need to identify the username and password.
Step 11 − Identify the User Name.
Step 12 − Identify the password.
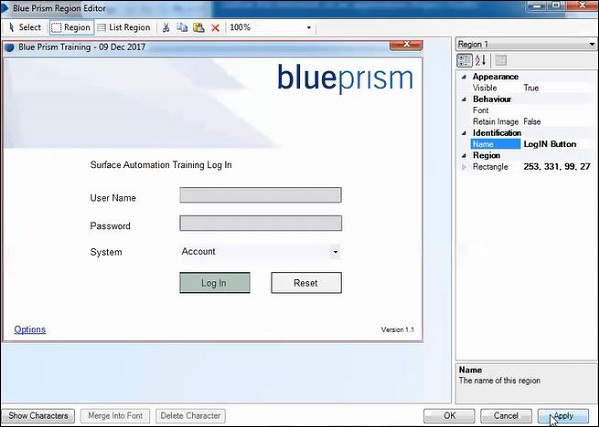
Step 13 − Identify the login button.
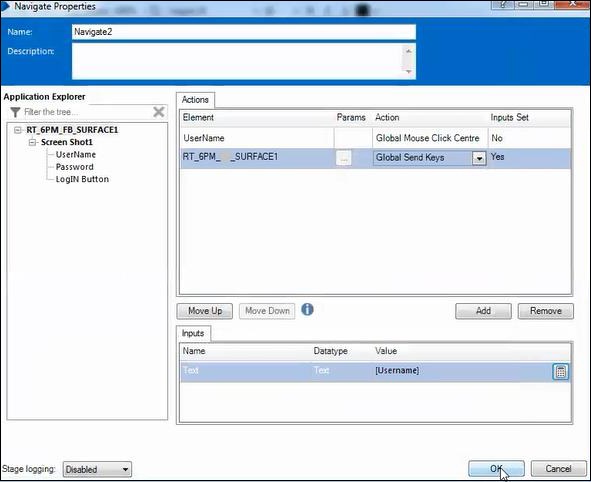
Step 14 − Create the two data items: username and password.
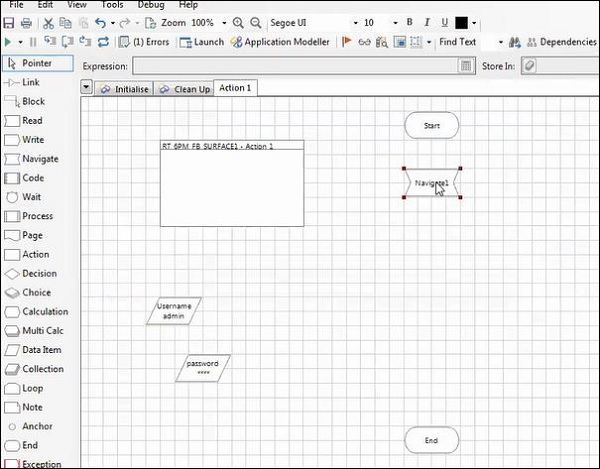
Step 15 − Launch the application using the navigation stage.

Step 16 − Configure the username using the navigation stage.
Step 17 − Configure the password using the navigation stage.
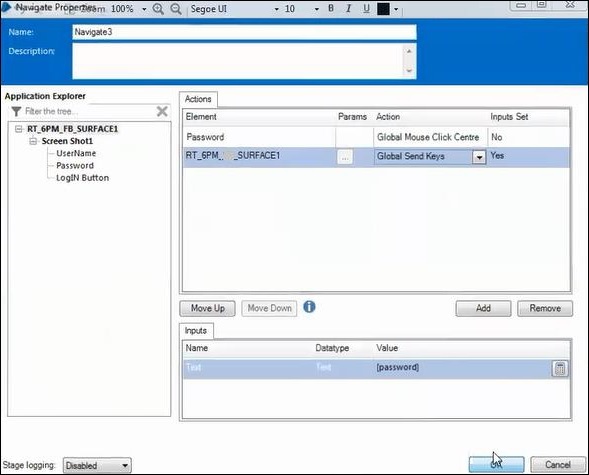
Step 18 − Now, run the process.
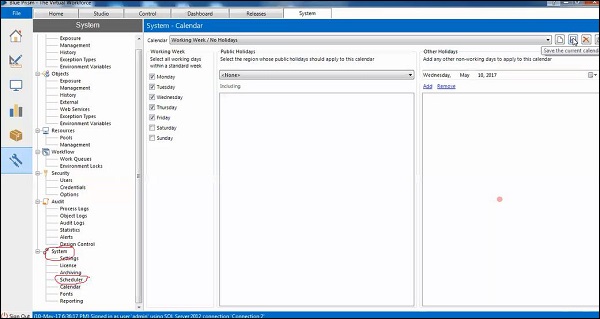
Blue Prism - Schedule Management
In this section, we shall discuss about schedule management.
Scheduler
Blue Prism tool allows to execute processes at specified times and repeat their execution at various intervals. It is termed as Scheduler.
Configure Scheduler
In the System tab, we have Scheduler option. Configure the scheduler as shown below −
After we configure the scheduler, we need to click on the Check box to activate the scheduler as shown below −
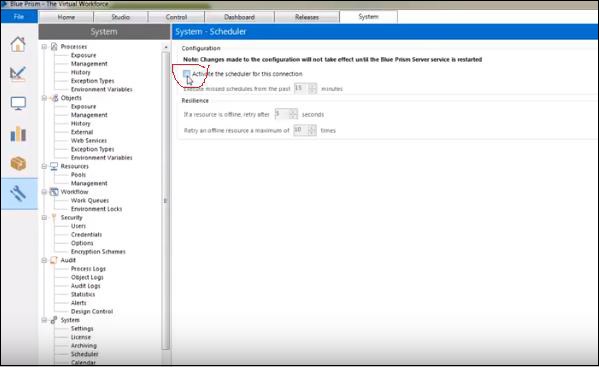
If the resource is offline, we have retry option under Resilience in the scheduler. We can choose to retry in the terms of seconds and number of times.
