- Blue Prism - Home
- Blue Prism - Introduction to RPA
- Blue Prism - Introduction
- Blue Prism - Object Studio
- Blue Prism - Application Modeller
- Blue Prism - Process Studio
- Blue Prism - Exceptions Handling
- Blue Prism - Work Queues
- Blue Prism - Credentials Manager
- User, Role and Log Management
- Email and Surface Automation
- Blue Prism - Schedule Management
- Blue Prism Useful Resources
- Blue Prism - Quick Guide
- Blue Prism - Useful Resources
- Blue Prism - Discussion
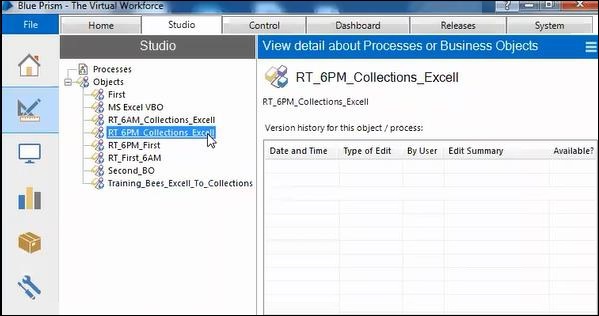
Blue Prism - Object Studio
Object studio is mainly used to develop the objects. Inside the object, we have different types of actions as follows −
the Application Modular to Spy the Elements
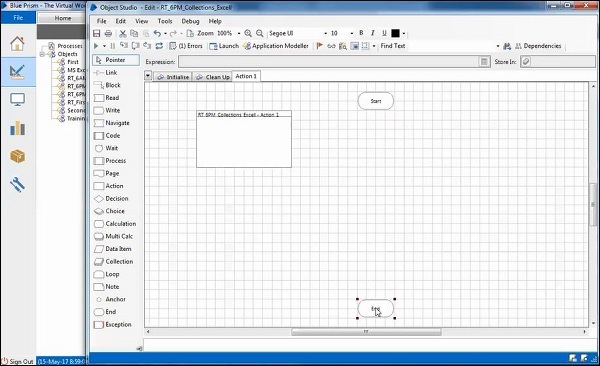
initialize page and clean up page
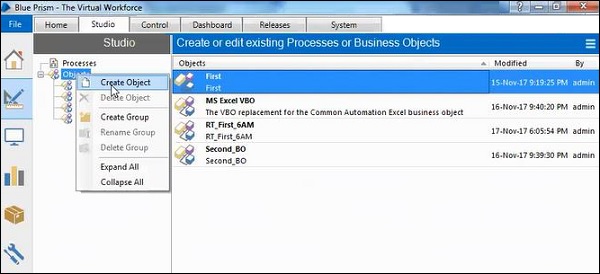
Creating the Object from Object Studio
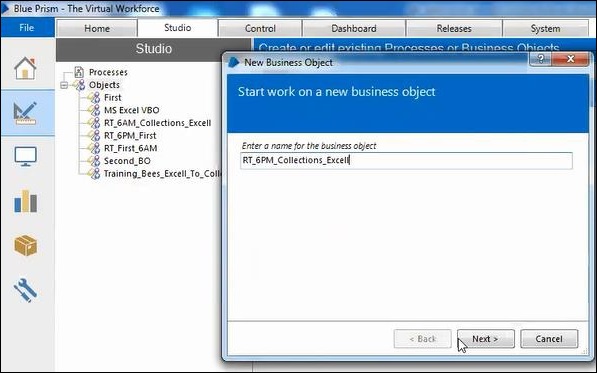
After launching the Blue Prism, open Studio tab, right click on Objects and select Create Object. The screenshots clearly explain the process of creating objects −
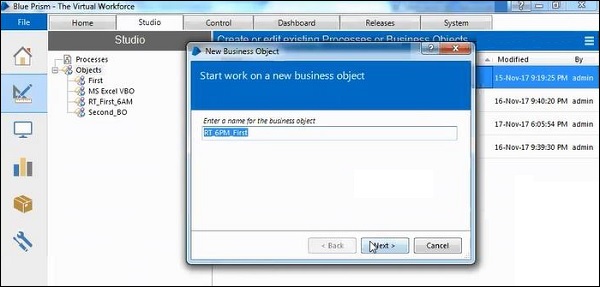
Provide a name for new business object.
It will create an object in objects list.
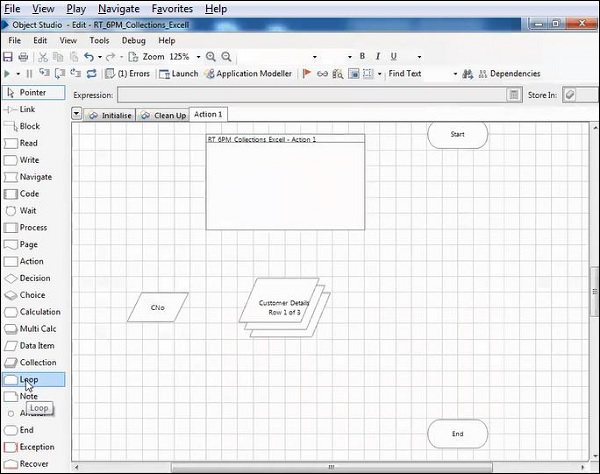
Different Stages in Object Studio
The different stages in the Object Studio are listed below −
- Link
- Block
- Read
- Write
- Navigate
- Code
- Wait
- Process
- Page
- Action
- Decision
- Choice
- Calculation
- Multi Calculation
- Data Item
- Collection
- Loop
- Note
- Anchor
- End
- Exception
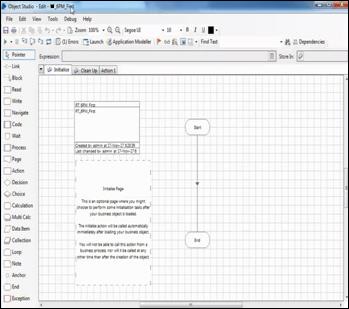
Once you create an object, the initialize, cleanup and action pages will be created and the initialize page will be launched with the above mentioned stages.
The below Business Object (VBO) will give you more detailed explanation of how the stages can be used and how the VBO works.
Understanding Collections to Excel
Multiple values stored in the form of rows and columns are called collections.
We call add rows to collections using the below two ways −
Using Internal VBO as "collections".
Using "Utility-Collection Manipulation" VBO.
Create a Business Object
Enter the name of the business object you like to create as shown below −
Now, enter the description of the business object as shown below −
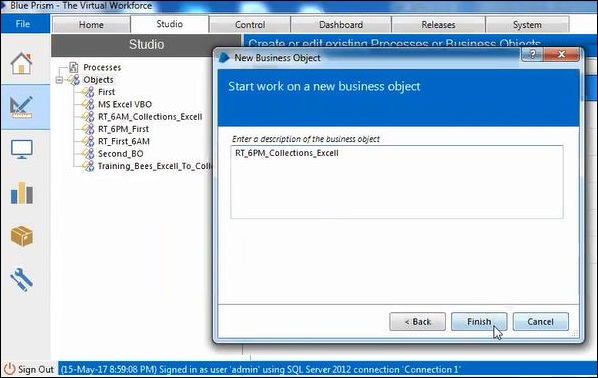
Then, click on Finish.
Double click on newly created VBO to open it.
In the action tab, the start and end stages will be created by default with a link to them, select the link and delete, so that the actual stages can be implemented in it.
Create a collection and add rows to the collection using the internal VBO.
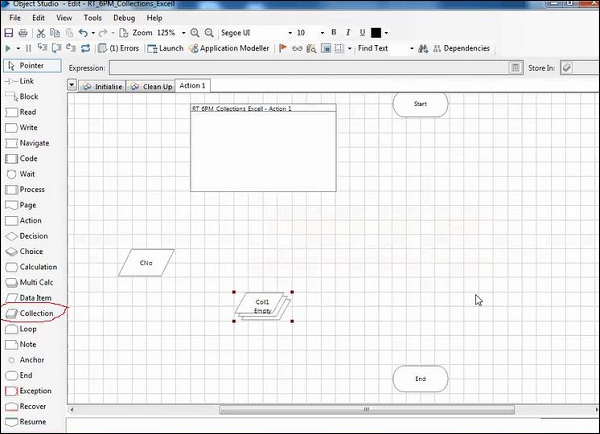
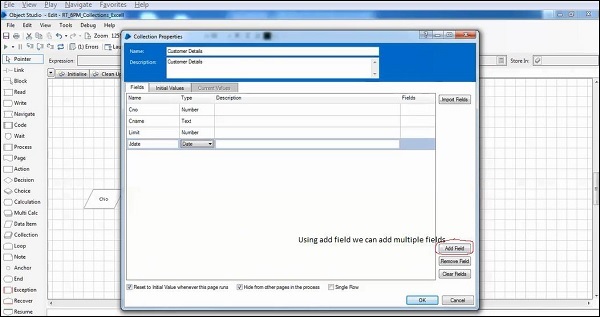
Provide the collection name, description and provide details in fields: name, type, description and fields. Use Add field to add any extra field.
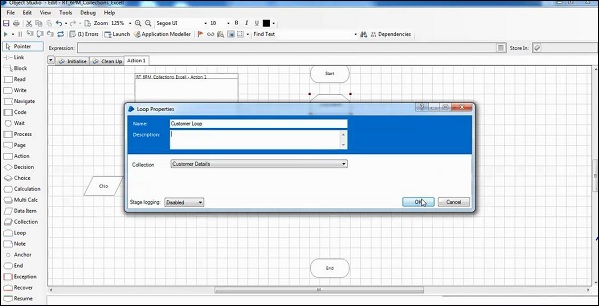
Use Loop Stage
Select Loop from the stages, loop will have start and end parts. It is used to execute the stages in the loop with the mentioned iterations.
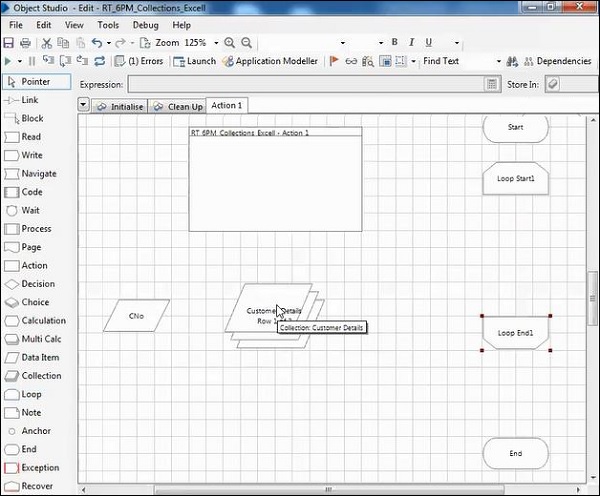
Provide the name for the loop and select the correct collection from the drop down list.
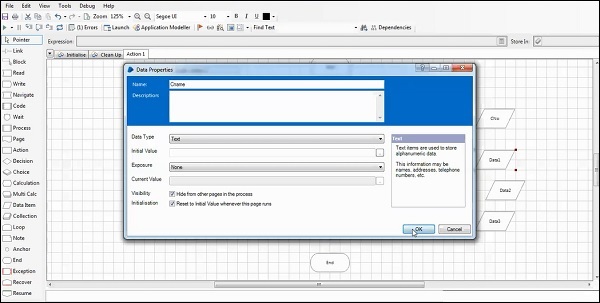
Create four date items
Using the data item stage, create four data items as given below −
- C no
- C name
- Limit
- Jdate
Use Multi Calculation to add data to collection in the empty row.
Provide a name to that multi calculation, drag the expression from collection list to expression, and drag the data items from the data item list to Store In values.
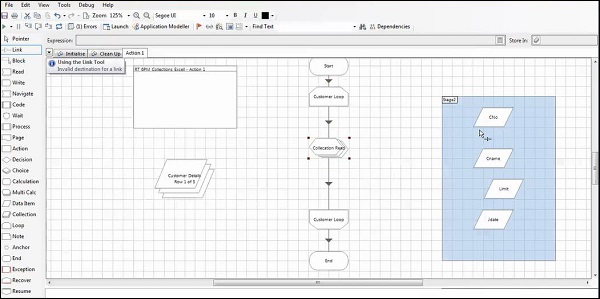
Link the stages using Link and save the Business object.
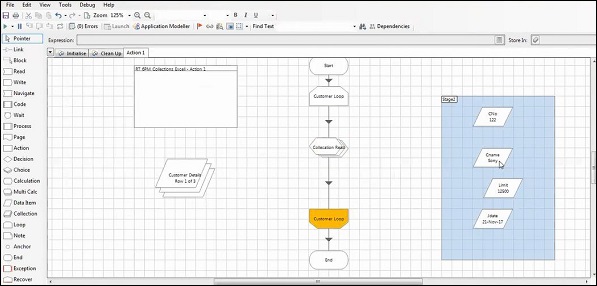
Execute the VBO by clicking on play button.
The result will be with the proper outputs which were provided in the collection as shown below −
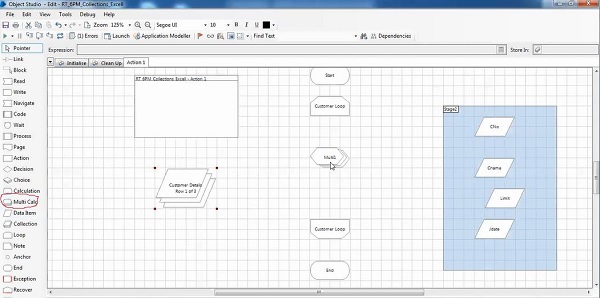
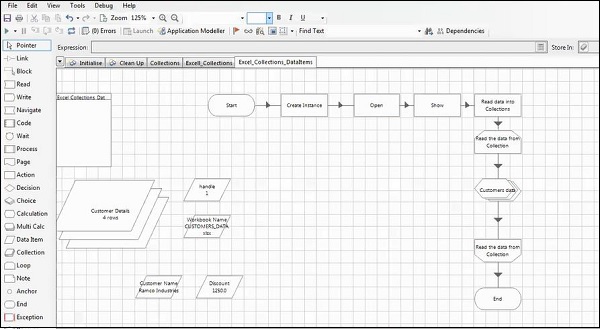
We will understand the collections with Excel as shown below −
First, we need to create an instance and take the output as 'handle' then open the work book name and pass the handle as input parameters.
It will write the work book name, then perform another action get worksheet as collections.
Step 1: Create instance
Action −
Name: Create instance
Description: Create instance
Business Object −
Ms Excel VBO
Action: Create Instance
Output: Handle
Step 2: Open
Business Object: Ms Excel VBO
Action: Open workbook
Input −
Value= Handle
File Name
Output: store in workbook.
Step 3: Show
Business Object: Ms Excel VBO
Action: Show
Input −
Value = Handle
Step 4: Read data into collections
Business Object: Ms Excel VBO
Action: Get worksheet as collection (Fast)
Output: store in Customer Details.
Step 5: Loop
Go to Loop properties
Name: Read the data from collection
Description: Read the data from collection
Collection: Customer Details.
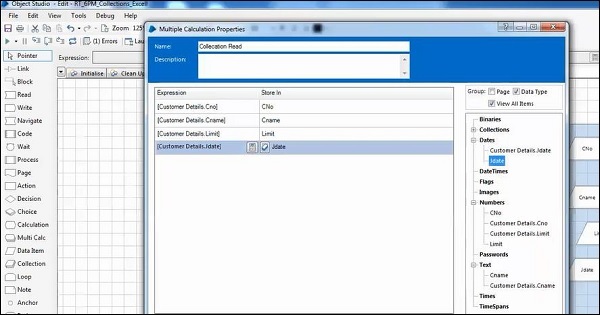
Step 6: Multi Calculation
Name: Customer data
Customer details.
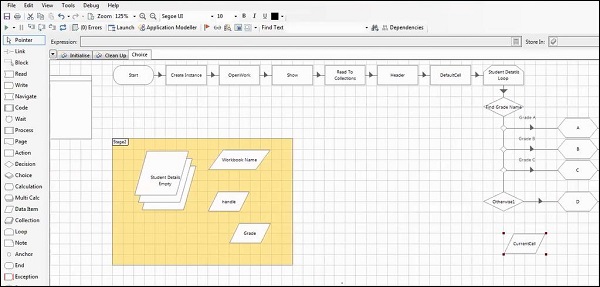
Understanding Choice with Collection and Excel
We need to create student Data with the given data −
Grade A >=90
Grade B >=75
Grade C >=60
Grade D >=50
Step 1: Create instance
Action −
Name: Create instance
Description: Create instance
Business Object −
Ms Excel VBO
Action: Create Instance
Output: Handle
Step 2: Open
Business Object: Ms Excel VBO
Action: Open workbook
Input −
Value= Handle
File Name
Output: store in workbook.
Step 3: Show
Business Object: Ms Excel VBO
Action: Show
Input −
Value= Handle
Step 4: Read data into collections
Business Object: Ms Excel VBO
Action: Get worksheet as collection (Fast)
Output: store in Students Details.
Step 5: Loop
Go to Loop properties
Name: Read the data from collection
Description: Read the data from collection
Collection: Student details
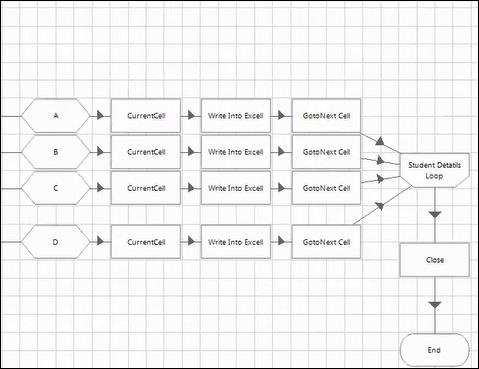
Step 6: Choice
| Choice Name | Choice Criterion |
|---|---|
| Grade A | Student Details Marks>=90 and <=100 |
| Grade B | Student Details Marks>=75 |
| Grade C | Student Details Marks>=60 |
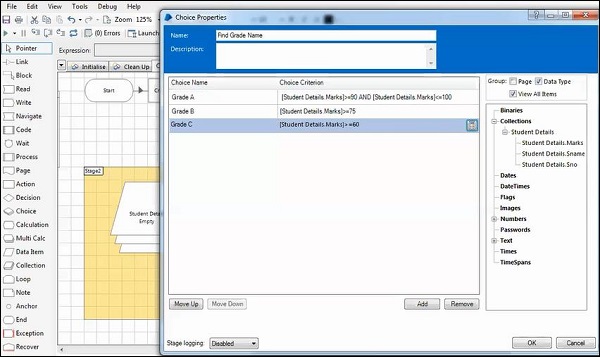
Create one data item as Grade.
Create calculation as follows −
- Grade A
- Grade B
- Grade C
Before the loop, we need to configure the values.
Take the Action stage:
Name: Default Cell
Business Object: Ms Excel VB
Action: Active workbook
Then,
Perform another action - Current Cell
Business Object: Ms Excel VBO
Action: get Active Cell
Output store in Current cell.
Then,
Write the data into excel
Business Object: Ms Excel VBO
Action: Set Cell Value
Perform another action - Go to Next Cell
Business Object: Ms Excel VBO
Action: Go to Next Empty cell down
Input: store in current cell.