- Amazon VPC - Home
- What is Amazon VPC?
- Amazon VPC - Components
- Creating Your First VPC
- Public vs Private Subnets
- Amazon VPC - Security Groups
- Network Access Control Lists
- Amazon VPC - Flow Logs
- Amazon VPC - Endpoints
- Amazon VPC - Peering
- Amazon VPC Useful Resources
- Amazon VPC - Quick Guide
- Amazon VPC - Resources
- Amazon VPC - Discussion
Amazon VPC - Creating Your First VPC
In this chapter, let's understand the steps that you can follow to create your own custom Amazon Virtual Private Cloud (VPC) using AWS Management Console.
Creating and Configuring Your Own Custom VPC
A custom VPC allows users to have full control over their networking environment, including subnets, route tables, and gateways.
Step 1: Sign In to the AWS Management Console
First, click on the link https://aws.amazon.com/console/ to go to the AWS Console. Next, login using your credentials to log in to your AWS account.
At the front page of your AWS console, type "VPC" in the search bar at the top and select the "VPC" service from the dropdown.
Step 2: Create a Custom VPC
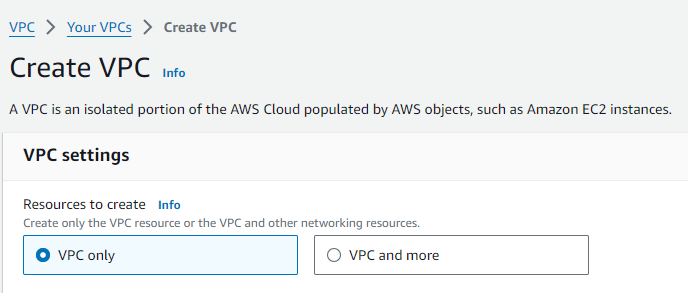
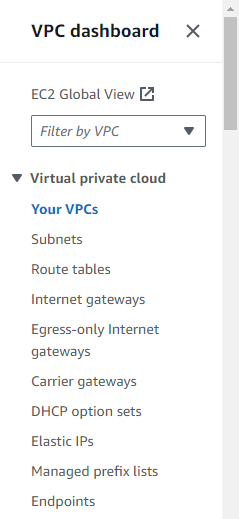
At the VPC Dashboard, click on the "Create VPC" button to start the process of creating your own VPC.
In the "Create VPC" wizard, choose the "VPC Only" option. This allows you to configure your VPCs CIDR block and other settings manually.
Step 3: Configure Your VPC
You first need to give your VPC a descriptive name (e.g., "MyCustomVPC"). Next, select the IPv4 CIDR block for your VPC. For example, you can use 10.0.0.0/16 to create a large range of IP addresses for your VPC.
It is optional but if you want to use IPv6, you can enable it, and Amazon will automatically assign an IPv6 CIDR block.
Now you have an option to choose between "Default" or "Dedicated" tenancy. Default tenancy allows shared tenancy across instances. Dedicated tenancy assigns instances to hardware reserved for your account.
Once you have configured all these settings, you can click on the "Create VPC" button at the bottom of the page.
Step 4: Configure Subnets
Subnets allow you to divide your VPC into smaller networks. Go to the "Subnets" section of the VPC Dashboard and click "Create Subnet".
Next, you need to choose a name for the subnet and select an Availability Zone (e.g., us west 1a) for it to reside in. Each subnet must be in one Availability Zone.
Then, define a CIDR Block for the Subnet. Try to choose a smaller range from the main VPC CIDR block (e.g., 10.0.1.0/24) for the subnet.
You can repeat the above steps if you need multiple subnets.
Step 5: Configure an Internet Gateway
First, we will create an Internet Gateway. On VPC dashboard, go to the "Internet Gateways" section and click "Create Internet Gateway". Once created, now attach the Internet Gateway to your VPC by selecting the gateway and choosing "Attach to VPC".
Step 6: Set Up Route Tables
Once you set up Subnets and Internet Gateways, you need to set up route tables. Go to the "Route Tables" section and click "Create Route Table". Next, you need to assign the route table to the subnet you created in the above step.
Finally, add a route to direct traffic through the Internet Gateway. For example, add a route for 0.0.0.0/0 and point it to your Internet Gateway.
Step 7: Configure Security Groups
Now, you need to create Security Groups. For this, first go to the "Security Groups" section and then create a group that defines what type of traffic is allowed to and from resources in your VPC.
After creating Security Groups, you need to specify rules to control access, like allowing HTTP and HTTPS traffic on specific ports.
Step 8: Launch Resources in Your VPC
Now your VPC is set up, you can start launching AWS resources like EC2 instances within your VPC.
First, launch EC2 Instances by clicking on the EC2 section and selecting "Launch Instance". Next, choose one of the subnets you created in your VPC.
Step 9: Test Connectivity
After launching the EC2 instance, it is time to test the connectivity to ensure that everything is working as expected. If your Internet Gateway and route table correctly set up, your instances should have internet access.
