
Article Categories
- All Categories
-
 Data Structure
-
 Networking
-
 RDBMS
RDBMS
-
 Operating System
-
 Java
Java
-
 MS Excel
-
 iOS
iOS
-
 HTML
HTML
-
 CSS
CSS
-
 Android
-
 Python
-
 C Programming
-
 C++
C++
-
 C#
C#
-
 MongoDB
-
 MySQL
MySQL
-
 Javascript
-
 PHP
PHP
-
 Economics & Finance
A Complete Guide to Learn Android Studio For App Development
Introduction
Android is one of the famous operating systems which is used across many mobile devices.Almost 75 % of mobile devices across the world are using android as their mobile operating system. Hence learning android development will be beneficial which will help you to deliver your applications to the huge number of audience. Before you start learning android development there are some tools which you should understand. So in this article we will take a look at a complete guide to learn android studio for app development.
What is Android Studio ?
Android Studio is an official IDE developed by JetBrains for building android applications. It provides various features and plugins which helps developers to develop android applications efficiently. Android Studio also provides features such as debugging of applications and others which make development of applications easier. Various features of Android Studio are listed below ?
Android Studio provides code suggestions while writing code for android applications.
It provides an emulator which developers can use to run and test the android applications.
Android studio provides debugger which makes it easy to debug android applications.
It also provides a flexible gradle system which helps to manage the dependencies used within the android studio project.
Git version control plugin within the android studio makes it easy to manage the versioning of the code.
Android Studio also provides support for native app development providing support for different programming language such as C++.
How to install Android Studio ?
As Android studio is an official IDE for android development. We have to install android studio for starting with android app development. Below are the steps which you have to follow for installation of Android Studio on your machine.
Make sure your machine is compatible to run Android Studio.
Download and install JDK on your machine.
Navigate to the link below to see different download options for Android Studio. Choose the appropriate option from the given page to download the android studio version which is suitable for your machine.
Once you have downloaded android studio simply install it by following the guide on this link.
Creating a new Android Studio Project.
Once you have installed android studio on your machine, now it's time to create a new Android Studio project for creating an android application. For creating a new android studio follow below step by step guide ?
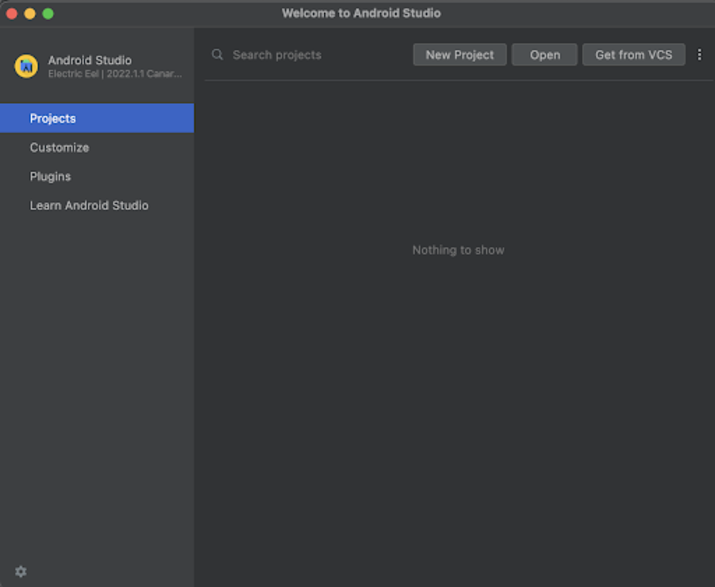
Step 1 ? Creating a new project in Android Studio.
Navigate to Android studio as shown in below screen. In the below screen click on New Project to create a new Android Studio Project.
After clicking on New Project you will get to see the below screen.
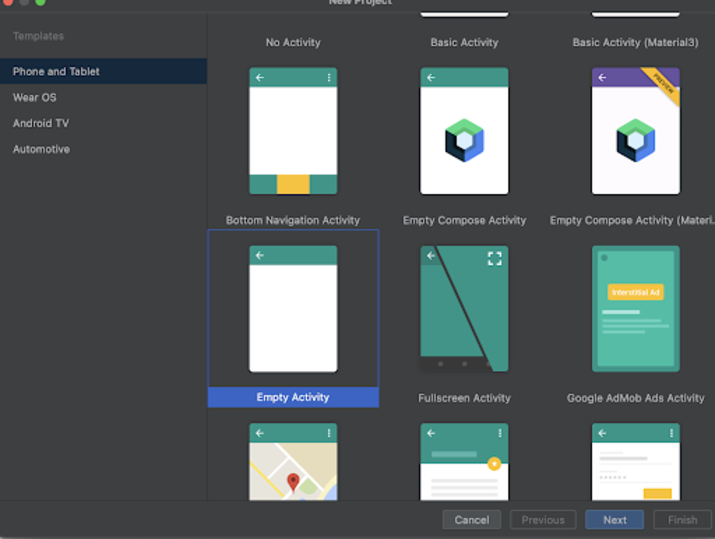
Inside this screen we have to simply select Empty Activity and click on Next. After clicking on next you will get to see the screen below.
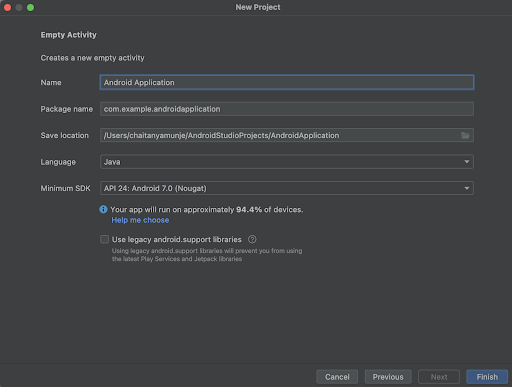
Inside this screen we have to simply specify the project name. Then the package name will be generated automatically.
You can choose the programming language for your project according to your requirement and then simply click on Finish to create your project.
File structure of Android Studio Project.
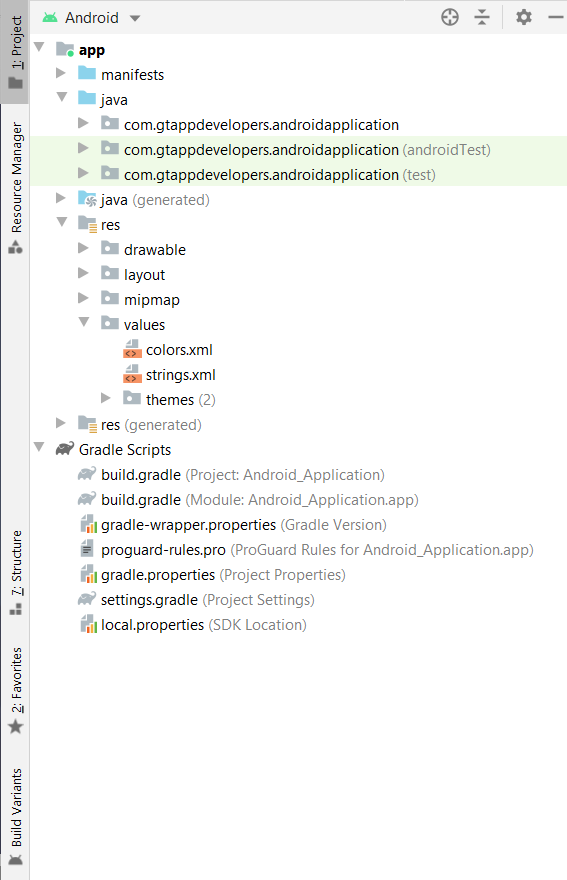
Once you have created your android studio project. On the left pane you will get to see the complete file structure for your android studio project. Now we will take a look at each of them one by one.
manifests ? This is a directory which contains an AndroidManifest.xml file inside which we write all the application details such as the activities which are being used within our applications, permissions required for application to work, app name, app logo and others in detail.
java ? This folder contains the java class files in which we can create classes and activities for our application. In java inside the first directory for our apps package name we can get to see our Activities. We have to create classes for our application in the first directory of our package name.
drawable ? This directory is use to store all the images which we are going to used within our android application.
layout ? The layout folder will contain the layout xml files inside which we will be creating the UI for our application.
mipmap ? This directory is used to store the application icon which is being displayed when the app is installed in users mobile device.
-
values ? Values folder consist of different files.
colors.xml ? This file is used to specify the color codes for different colors which we will be using within our application.
strings.xml ? This file contains all the string variables along with its values which are going to be used within our application.
themes ? This directory consists of themes.xml file which is used to specify the theme for our application.
Gradle Scripts ? Gradle Scripts contains various gradle files which are used to add the dependencies within our android application and specify the SDK version for our application.
Understanding the Designing part.
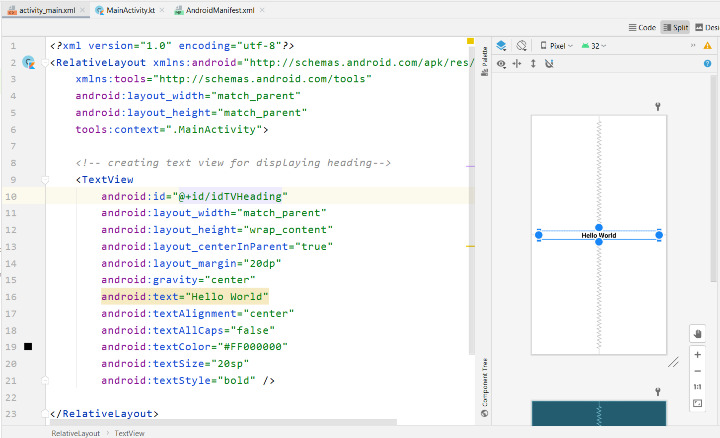
All the UI layouts created within an android application are created in the XML file and located in the res directory under layouts folder. For designing the UI of an android application, there are two ways which we can use. Firstly we can design the UI for our application by writing the code in our xml file and the generated UI will be displayed in the right screen. Another way is we can simply use drag and drop functionality to drag and drop the widgets and place them within our application. For using this drag and drop functionality we have to simply click on the Design option at the top right corner. Then we can simply use drag and drop widgets from our Palette within our screen to display them.
Understanding the Coding part.
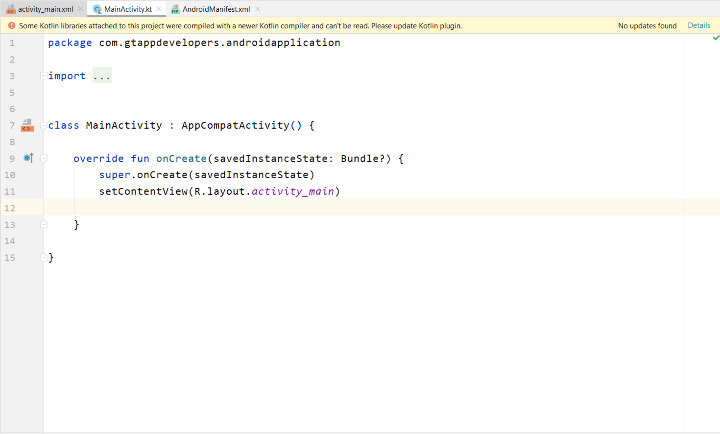
In the above screen we can get to see our kotlin file. This file is located within our app>java>app?s package name. In this file we have to write the business logic which we will be using to perform some actions within our android applications. Inside this file we can add click listeners for our views which we have created in our xml file or we can set data to our views. We have to add actions for different views inside on Create method.
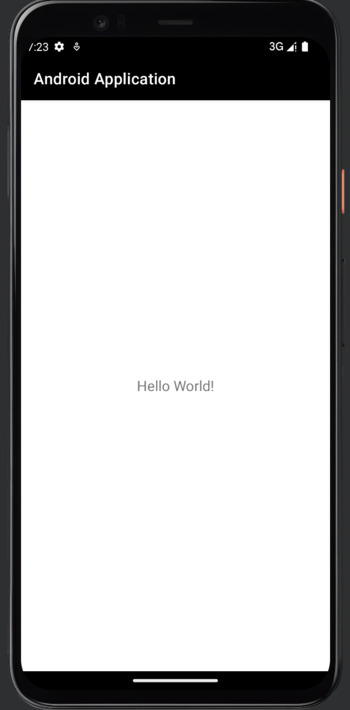
Running your android application.
Now once you have created the UI inside your XML file and written the business logic for that view inside your Kotlin or Java file. Now it's time to run your application in an emulator or a real device. For running your android application click on that green play icon in the android studio to run your application on Emulator. To run your application on device you have to simply enable USB Debugging in your android device and then connect your device with your machine via an USB cable.
Conclusion
In the above article, we have taken a look at a Complete Guide to Learn Android Studio for App Development. We have taken a look at the different steps to be followed for building an android application.

2K+ Views
