- Zend Framework - Home
- Zend Framework - Introduction
- Zend Framework - Installation
- Skeleton Application
- Zend Framework - MVC Architecture
- Zend Framework - Concepts
- Zend Framework - Service Manager
- Zend Framework - Event Manager
- Zend Framework - Module System
- Application Structure
- Zend Framework - Creating Module
- Zend Framework - Controllers
- Zend Framework - Routing
- Zend Framework - View Layer
- Zend Framework - Layout
- Models & Database
- Different Databases
- Forms & Validation
- Zend Framework - File Uploading
- Zend Framework - Ajax
- Cookie Management
- Session Management
- Zend Framework - Authentication
- Email Management
- Zend Framework - Unit Testing
- Zend Framework - Error Handling
- Zend Framework - Working Example
Zend Framework - Quick Guide
Zend Framework - Introduction
A PHP Web Framework is a collection of classes which helps to develop a web application. Zend is one of the most popular PHP framework. It is an open-source MVC framework for rapidly developing, modern web applications. Zend Framework has several loosely coupled components, so it is referred to as Component Library. Zend Framework provides any PHP stack and Zend server to run Zend framework applications.
Zend Studio is an IDE that includes features to integrate with Zend Framework. It provides MVC view and code generation. The current Zend framework 3.0 includes new components such as JSON RPC server, a XML to JSON converter, PSR-7 functionality, and compatibility with PHP 7.
Zend Framework 2 is an open source framework for developing web applications and services using PHP 5.3+. Zend Framework 2 uses 100% object oriented code and utilizes most of the new features of PHP 5.3, namely Namespaces, Lambda Functions and Closures.
Zend Framework 2 evolved from Zend Framework 1, a successful PHP framework with over 15 million downloads. Zend Server has a free community version and a commercial version.
Zend Framework Features
Some of the salient features of Zend Framework is as follows −
- Pure object oriented web application framework
- Advanced MVC implementation
- Supports multi databases including PostgreSQL, SQLite etc.,
- Simple cloud API
- Session management
- Data encryption
- Flexible URI Routing
- Zend provides RESTful API development support.
- Code reusable and easier to maintain.
Why Zend Framework?
What makes the Zend Framework one of the premier frameworks used by PHP developers is that it provides clean and stable code complete with intellectual property rights. It also makes programming easier. It is fast, easy to learn and convenient framework. Zend supports strong cryptography tools and password hashing techniques.
Zend Goals
Following are the goals of the Zend Framework.
- Flexibility
- Simple and productive
- Compatibility
- Extensibility − Programmer can easily extend all the framework classes.
- Portability − Supports multiple environments
Zend Applications
The following popular products are developed by using the Zend Framework.
- McAfee Company website
- IBM Company website
- Magento − one of the popular shopping cart website.
Advantages of Zend Framework
Some of the advantages of the Zend Framework are listed below.
Loosely Coupled − Zend provides the option to delete modules or components which we dont need in the application.
Performance − Zend Framework is highly optimized for performance. Zend Framework 3 is 4x faster than its previous version.
Security − Framework supports industry standard encryption.
Testing − PHPUnit is integrated with Zend so you can easily test the framework.
In the next chapter, we will learn how to install the Zend Framework.
Zend Framework - Installation
To install the Zend Framework, we must first install the Composer and the latest version of PHP as shown in the following steps.
Install Composer − Zend uses Composer for managing its dependencies, so make sure you have the Composer installed on your machine. If the Composer is not installed, then visit the official website of Composer and install it.
Install the latest version of PHP − To get the maximum benefit of Zend Framework, install the latest version of PHP. The minimum required version for the Zend Framework 3 is PHP 5.6 or later.
Install Zend Framework
Zend Framework can be installed in two ways. They are as follows −
- Manual installation
- Composer based installation
Let us discuss both these installations in detail.
Manual Installation
Download the latest version of Zend Framework by visiting the following link https://framework.zend.com/downloads/archives
Extract the content of the downloaded archive file to the folder you would like to keep it. Once you have a copy of Zend Framework available in your local machine, your Zend Framework based web application can access the framework classes. Though there are several ways to achieve this, your PHP include_path needs to contain the path to the Zend Framework classes under the /library directory in the distribution. This method applies to Zend Framework version 2.4 and earlier only.
Composer Based Installation
To easily install the Zend Framework, use the Composer tool. This is the preferred method to install the latest version of Zend Framework. To install all the components of the Zend Framework, use the following Composer command −
$ composer require zendframework/zendframework
Each Zend Framework module / component can be installed individually as well. For example, to install the MVC component of the Zend Framework, use the following composer command −
$ composer require zendframework/zend-mvc
Zend Framework - Skeleton Application
Let us create a skeleton application using the Zend Framework MVC layer and module systems.
Installation using Composer
The easiest way to create a new Zend Framework project is to use a Composer. It is defined as below −
$ cd /path/to/install
$ composer create-project -n -sdev zendframework/skeleton-application myapp
You would see the following result on your screen −
Installing zendframework/skeleton-application (dev-master
   941da45b407e4f09e264f000fb537928badb96ed)
   - Installing zendframework/skeleton-application (dev-master master)
   Cloning master

Created project in myapp
Loading composer repositories with package information
Installing dependencies (including require-dev) from lock file
   - Installing zendframework/zend-component-installer (0.3.0)
   Loading from cache

   - Installing zendframework/zend-stdlib (3.0.1)
   Loading from cache

   - Installing zendframework/zend-config (2.6.0)
   Loading from cache

   - Installing zendframework/zend-loader (2.5.1)
   Loading from cache

   - Installing zendframework/zend-eventmanager (3.0.1)
   Loading from cache

   - Installing zendframework/zend-view (2.8.0)
   Loading from cache

   - Installing container-interop/container-interop (1.1.0)
   Loading from cache

   - Installing zendframework/zend-servicemanager (3.1.0)
   Loading from cache

   - Installing zendframework/zend-validator (2.8.1)
   Loading from cache

   - Installing zendframework/zend-escaper (2.5.1)
   Loading from cache

   - Installing zendframework/zend-uri (2.5.2)
   Loading from cache

   - Installing zendframework/zend-http (2.5.4)
   Loading from cache

   - Installing zendframework/zend-router (3.0.2)
   Loading from cache

   - Installing zendframework/zend-modulemanager (2.7.2)
   Loading from cache

   - Installing zendframework/zend-mvc (3.0.1)
   Loading from cache

   - Installing zendframework/zend-skeleton-installer (0.1.3)
   Loading from cache

   - Installing zfcampus/zf-development-mode (3.0.0)
   Loading from cache
zendframework/zend-config suggests installing zendframework/zend-filter
   (Zend\Filter component)
zendframework/zend-config suggests installing zendframework/zend-i18n
   (Zend\I18n component)
zendframework/zend-config suggests installing zendframework/zend-json
   (Zend\Json to use the Json reader or writer classes)
zendframework/zend-view suggests installing zendframework/zend-authentication
   (Zend\Authentication component)
zendframework/zend-view suggests installing zendframework/zend-feed
   (Zend\Feed component)
zendframework/zend-view suggests installing zendframework/zend-filter
   (Zend\Filter component)
zendframework/zend-view suggests installing zendframework/zend-i18n
   (Zend\I18n component)
zendframework/zend-view suggests installing zendframework/zend-json
   (Zend\Json component)
zendframework/zend-view suggests installing zendframework/zend-navigation
   (Zend\Navigation component)
zendframework/zend-view suggests installing zendframework/zend-paginator
   (Zend\Paginator component)
zendframework/zend-view suggests installing zendframework/zend-permissions-acl
   (Zend\Permissions\Acl component)
zendframework/zend-servicemanager suggests installing ocramius/proxy-manager
   (ProxyManager 1.* to handle lazy initialization of services)
zendframework/zend-validator suggests installing zendframework/zend-db
   (Zend\Db component)
zendframework/zend-validator suggests installing zendframework/zend-filter
   (Zend\Filter component, required by the Digits validator)
zendframework/zend-validator suggests installing zendframework/zend-i18n
   (Zend\I18n component to allow translation of validation error messages as well as
   to use the various Date validators)
zendframework/zend-validator suggests installing zendframework/zend-i18nresources
   (Translations of validator messages)
zendframework/zend-validator suggests installing zendframework/zend-math
   (Zend\Math component)
zendframework/zend-validator suggests installing zendframework/zend-session
   (Zend\Session component)
zendframework/zend-router suggests installing zendframework/zend-i18n
   (^2.6, if defining translatable HTTP path segments)

zendframework/zend-modulemanager suggests installing zendframework/zend-console
   (Zend\Console component)
zendframework/zend-mvc suggests installing zendframework/zend-json ((^2.6.1 ||
   ^3.0) To auto-deserialize JSON body content in AbstractRestfulController
   extensions, when json_decode is unavailable)
zendframework/zend-mvc suggests installing zendframework/zend-mvc-console
   (zend-mvc-console provides the ability to expose zend-mvc as a console application)
zendframework/zend-mvc suggests installing zendframework/zend-mvc-i18n
   (zendmvc-i18n provides integration with zend-i18n, including a translation bridge
   and translatable route segments)
zendframework/zend-mvc suggests installing zendframework/zend-mvc-pluginfileprg
   (To provide Post/Redirect/Get functionality around forms that container
   file uploads)
zendframework/zend-mvc suggests installing zendframework/zend-mvc-pluginflashmessenger
   (To provide flash messaging capabilities between requests)
zendframework/zend-mvc suggests installing zendframework/zend-mvc-pluginidentity
   (To access the authenticated identity (per zend-authentication) in controllers)
zendframework/zend-mvc suggests installing zendframework/zend-mvc-plugin-prg
   (To provide Post/Redirect/Get functionality within controllers)
zendframework/zend-mvc suggests installing zendframework/zend-psr7bridge
   ((^0.2) To consume PSR-7 middleware within the MVC workflow)
zendframework/zend-mvc suggests installing zendframework/zend-servicemanager-di
   (zend-servicemanager-di provides utilities for integrating zend-di and
   zendservicemanager in your zend-mvc application)

Generating autoload files
   Removing optional packages from composer.json
   Updating composer.json
Removing zendframework/zend-skeleton-installer...
   - Removing zendframework/zend-skeleton-installer (0.1.3)
   Removed plugin zendframework/zend-skeleton-installer.
   Removing from composer.json
   Complete!
> zf-development-mode enable
You are now in development mode.
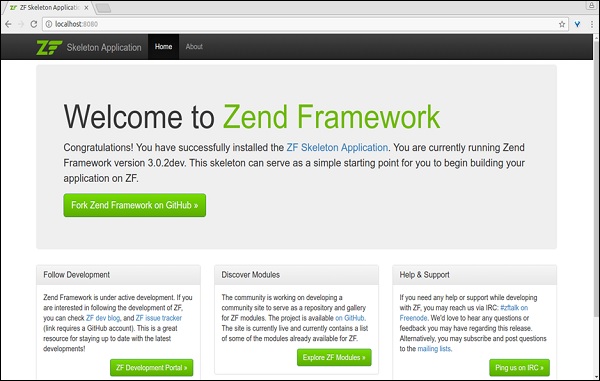
Now that the application is installed, you can test it out immediately using the PHP's built-in web server −
$ cd path/to/install/myapp
$ composer serve
Then you would see the following response −
> php -S 0.0.0.0:8080 -t public/ public/index.php
This will start the PHP built-in CLI server on port 8080. Once the development server is started, you can visit the site at (http://localhost:8080/). The built-in CLI server is for development only.
Unit Tests
To run the skeleton unit tests, type the following command in your terminal.
$ composer require --dev zendframework/zend-test
It will produce the following response −
Using version ^3.0 for zendframework/zend-test
   ./composer.json has been updated
Loading composer repositories with package information
Updating dependencies (including require-dev)
   - Installing zendframework/zend-dom (2.6.0)
   Loading from cache

   - Installing zendframework/zend-console (2.6.0)
   Loading from cache

   - Installing sebastian/version (2.0.1)
   Loading from cache

   - Installing symfony/yaml (v3.2.1)
   Downloading: 100%

   - Installing sebastian/resource-operations (1.0.0)
   Loading from cache

   - Installing sebastian/recursion-context (2.0.0)
   Loading from cache

   - Installing sebastian/object-enumerator (2.0.0)
   Loading from cache

   - Installing sebastian/global-state (1.1.1)
   Loading from cache

   - Installing sebastian/exporter (2.0.0)
   Loading from cache

   - Installing sebastian/environment (2.0.0)
   Loading from cache

   - Installing sebastian/diff (1.4.1)
   Loading from cache

   - Installing sebastian/comparator (1.2.2)
   Loading from cache

   - Installing phpunit/php-text-template (1.2.1)
   Loading from cache

   - Installing doctrine/instantiator (1.0.5)
   Loading from cache

   - Installing phpunit/phpunit-mock-objects (3.4.3)
   Downloading: 100%

   - Installing phpunit/php-timer (1.0.8)
   Loading from cache

   - Installing phpunit/php-file-iterator (1.4.2)
   Loading from cache

   - Installing sebastian/code-unit-reverse-lookup (1.0.0)
   Loading from cache

   - Installing phpunit/php-token-stream (1.4.9)
   Loading from cache

   - Installing phpunit/php-code-coverage (4.0.4)
   Downloading: 100%

   - Installing webmozart/assert (1.2.0)
   Loading from cache

   - Installing phpdocumentor/reflection-common (1.0)
   Loading from cache

   - Installing phpdocumentor/type-resolver (0.2.1)
   Loading from cache

   - Installing phpdocumentor/reflection-docblock (3.1.1)
   Loading from cache

   - Installing phpspec/prophecy (v1.6.2)
   Loading from cache

   - Installing myclabs/deep-copy (1.5.5)
   Loading from cache

   - Installing phpunit/phpunit (5.7.4)
   Downloading: 100%

   - Installing zendframework/zend-test (3.0.2)
   Loading from cache

zendframework/zend-console suggests installing zendframework/zend-filter
   (To support DefaultRouteMatcher usage)
symfony/yaml suggests installing symfony/console (For validating YAML files
   using the lint command)
sebastian/global-state suggests installing ext-uopz (*)
phpunit/phpunit-mock-objects suggests installing ext-soap (*)
phpunit/php-code-coverage suggests installing ext-xdebug (>=2.4.0)
phpunit/phpunit suggests installing phpunit/php-invoker (~1.1)
phpunit/phpunit suggests installing ext-xdebug (*)
zendframework/zend-test suggests installing zendframework/zend-mvc-console
   (^1.1.8, to test MVC <-> console integration)
Writing lock file
Generating autoload files
Now the testing support is enabled so you can run the test using the following command.
$ ./vendor/bin/phpunit
Apache Web Server
Hosting the Zend Framework based application in the production environment is very simple and straight-forward. Just create a VirtualHost in the Apache configuration file and point the DocumentRoot to the Public folder of the Zend Framework application.
A sample configuration (myapp) is given below −
<VirtualHost *:80>
   ServerName myapp.localhost
   DocumentRoot /path/to/install/myapp/public
   <Directory /path/to/install/myapp/public>
      DirectoryIndex index.php
      AllowOverride All
      Order allow,deny
      Allow from all
      <IfModule mod_authz_core.c>
         Require all granted
      </IfModule>
   </Directory>
</VirtualHost>
Zend Framework - MVC Architecture
Before proceeding with this chapter, let us have a brief understanding of MVC. A Model View Controller is a software approach that separates the application logic from the presentation. In practice, it permits the webpages to contain minimal PHP scripting since the presentation is separate from it.
The short description of the MVC Components is as follows
Model − Model represents the structure of the application data. Typically, model classes contain functions that helps to retrieve, insert and update business data in the back-end database (MySQL, PostgreSQL, etc.).
View − View is the presentation layer of the MVC Application. It gets the models data through the Controller and display it as needed. It is loosely coupled to the Controller and the Model and so, it can be changed without affecting either the Model and the Controller.
Controller − The Controller is the main component of the MVC architecture. Every request first hits the controller. In other words, the controller processes all the request and serves as an intermediary between the Model, View, and any other resources needed to process the HTTP request and to generate the response.
In the next chapter, we will understand the different concepts of the Zend Framework.
Zend Framework - Concepts
Zend Framework is a collection of 60+ components. They are loosely connected with each other. They can be used as both stand-alone component as well as a group of components working as a single unit.
Zend Framework provides three most important components, which are −
- zend-servicemanager
- zend-eventmanager and
- zend-modulemanager.
They provide Zend components the ability to integrate with other components efficiently.
Event Manager − It gives the ability to create event based programming. This helps to create, inject and manage new events.
Service Manager − It gives the ability to consume any services (PHP classes) from anywhere with a little effort.
Module Manager − Ability to convert a collection of PHP classes with similar functionality into a single unit called as a module. The newly created modules can be used, maintained and configured as a single unit.
We will cover these concepts in detail in the subsequent chapters.
Zend Framework - Service Manager
The Zend Framework includes a powerful service locator pattern implementation called zend-servicemanager. Zend framework extensively uses the service manager for all its functionalities. The Service Manager provides a high-level abstraction for the Zend Framework. It also integrates nicely with all the other components of the Zend Framework.
Install Service Manager
The Service Manager component can be installed using the composer tool.
composer require zendframework/zend-servicemanager
Example
First, all the services need to be registered into the service manager. Once the services are registered into the server manager system, it can be accessed at any time with minimal efforts. The service manager provides a lot of options to register the service. A simple example is as follows −
use Zend\ServiceManager\ServiceManager;
use Zend\ServiceManager\Factory\InvokableFactory;
use stdClass;
$serviceManager = new ServiceManager([
   'factories' => [stdClass::class => InvokableFactory::class,],
]);
The above code registers the stdClass into the system using the Factory option. Now, we can get an instance of the stdClass at any time using the get() method of the service manager as shown below.
use Zend\ServiceManager\ServiceManager;
$object = $serviceManager->get(stdClass::class);
The get() method shares the retrieved object and so, the object returned by calling the get() method multiple times is one and the same instance. To get a different instance every time, the service manager provides another method, which is the build() method.
use Zend\ServiceManager\ServiceManager;
$a = $serviceManager->build(stdClass::class);
$b = $serviceManager->build(stdClass::class);
Service Manager Registration
The service manager provides a set of methods to register a component. Some of the most important methods are as given below −
- Factory method
- Abstract factory method
- Initializer method
- Delegator factory method
We will discuss each of these in detail in the upcoming chapters.
Factory Method
A factory is basically any callable or any class that implements the FactoryInterface (Zend\ServiceManager\Factory\FactoryInterface).
The FactoryInterface has a single method −
public function __invoke(ContainerInterface $container, $requestedName, array
   $options = null)
The arguments details of the FactoryInterface is as follows −
container (ContainerInterface) − It is the base interface of the ServiceManager. It provides an option to get other services.
requestedName − It is the service name.
options − It gives additional options needed for the service.
Let us create a simple class implementing the FactoryInterface and see how to register the class.
Class Test - Object to be Retrieved
use stdClass;
class Test {
   public function __construct(stdClass $sc) {
      // use $sc
   }
}
The Test class depends on the stdClass.
Class TestFactory - Class to Initialize Test Object
class TestFactory implements FactoryInterface {
   public function __invoke(ContainerInterface $container, $requestedName,
      array $options = null) {
      $dep = $container->get(stdClass::class);
      return new Test($dep);
   }
}
The TestFactory uses a container to retrieve the stdClass, creates the instance of the Test class, and returns it.
Registration and Usage of the Zend Framework
Let us now understand how to register and use the Zend Framework.
serviceManager $sc = new ServiceManager([
   'factories' => [stdClass::class => InvokableFactory::class,
      Test::class => TestFactory::class]
]);
$test = $sc->get(Test::class);
The service manager provides a special factory called InvokableFactory to retrieve any class which has no dependency. For example, the stdClass can be configured using the InvokableFactory since the stdClass does not depend on any other class.
serviceManager $sc = new ServiceManager([
   'factories' => [stdClass::class => InvokableFactory::class]
]);
$stdC = $sc->get(stdClass::class);
Another way to retrieve an object without implementing the FactoryInterface or using the InvokableFactory is using the inline method as given below.
$serviceManager = new ServiceManager([
   'factories' => [
      stdClass::class => InvokableFactory::class,
      Test::class => function(ContainerInterface $container, $requestedName) {
         $dep = $container->get(stdClass::class);
         return new Test($dep);
      },
   ],
]);
Abstract Factory Method
Sometimes, we may need to create objects, which we come to know only at runtime. This situation can be handled using the AbstractFactoryInterface, which is derived from the FactoryInterface.
The AbstractFactoryInterface defines a method to check whether the object can be created at the requested instance or not. If object creation is possible, it will create the object using the __invokemethod of the FactoryInterface and return it.
The signature of the AbstractFactoryInterface is as follows −
public function canCreate(ContainerInterface $container, $requestedName)
Initializer Method
The Initializer Method is a special option to inject additional dependency for already created services. It implements the InitializerInterface and the signature of the sole method available is as follows −
public function(ContainerInterface $container, $instance)
function(ContainerInterface $container, $instance) {
   if (! $instance instanceof EventManagerAwareInterface) {
      return;
   }
   $instance->setEventManager($container->get(EventManager::class));
}
In the above example, the method checks whether the instance is of type EventManagerAwareInterface. If it is of type EventManagerAwareInterface, it sets the event manager object, otherwise not. Since, the method may or may not set the dependency, it is not reliable and produces many runtime issues.
Delegator Factory Method
Zend Framework supports delegators pattern through DelegatorFactoryInterface. It can be used to decorate the service.
The signature of this function is as follows −
public function __invoke(ContainerInterface $container,
   $name, callable $callback, array $options = null
);
Here, the $callback is responsible for decorating the service instance.
Lazy Services
Lazy service is one of those services which will not be fully initialized at the time of creation. They are just referenced and only initialized when it is really needed. One of the best example is database connection, which may not be needed in all places. It is an expensive resource as well as have time-consuming process to create. Zend framework provides LazyServiceFactory derived from the DelegatorFactoryInterface, which can produce lazy service with the help of the Delegator concept and a 3rd party proxy manager, which is called as the ocramius proxy manager.
Plugin Manager
Plugin Manager extends the service manager and provides additional functionality like instance validation. Zend Framework extensively uses the plugin manager.
For example, all the validation services come under the ValidationPluginManager.
Configuration Option
The service manager provides some options to extend the feature of a service manager. They are shared, shared_by_default and aliases. As we discussed earlier, retrieved objects are shared among requested objects by default and we can use the build() method to get a distinct object. We can also use the shared option to specify which service to be shared. The shared_by_default is same as the shared feature, except that it applies for all services.
$serviceManager = new ServiceManager([
   'factories' => [
      stdClass::class => InvokableFactory::class
   ],
   'shared' => [
      stdClass::class => false // will not be shared
   ],
   'shared_by_default' => false, // will not be shared and applies to all service
]);
The aliases option can be used to provide an alternative name to the registered services. This have both advantages and disadvantages. On the positive side, we can provide alternative short names for a service. But, at the same time, the name may become out of context and introduce bugs.
aliases' => ['std' => stdClass::class, 'standard' => 'std']
Zend Framework - Event Manager
All modern applications need solid and flexible event components. Zend Framework provides one such component, zend-eventmanager. The zend-eventmanager helps to design high level architecture and supports subject/observer pattern and aspect oriented programming.
Install Event Manager
The event manager can be installed using the Composer as specified below −
composer require zendframework/zend-eventmanager
Concepts of the Event Manager
The core concepts of the event manager are as follows −
Event − Event is arbitrarily named action, say greet.
Listener − Any PHP callback. They are attached to the events and gets called when the event is triggered. The default signature of Listener is −
function(EventInterface $e)
EventInterface Class − Used to specify the event itself. It has methods to set and get event information like name (set/getName), target (get/setTarget) and parameter (get/setParams).
EventManager class − The instance of the EventManager tracks all the defined events in an application and its corresponding listeners. The EventManager provides a method, attach to attach listener to an event and it provides a method, trigger to trigger any pre-defined event. Once trigger is called, EventManager calls the listener attached to it.
EventManagerAwareInterface − For a class to support event based programming, it needs to implement the EventManagerAwareInterface. It provides two methods, setEventManager and getEventManager to get and set the event manager.
Example
Let us write a simple PHP console application to understand the event manager concept. Follow the steps given below.
Create a folder eventapp.
Install zend-eventmanager using the composer.
Create a PHP file Greeter.php inside the eventapp folder.
Create class Greeter and implement the EventManagerAwareInterface.
require __DIR__ . '/vendor/autoload.php';
class Greeter implements EventManagerAwareInterface {
   // code
}
Here, require is used to autoload all composer installed components.
Write the setEventManager method in class Greeter as shown below −
public function setEventManager(EventManagerInterface $events) {
   $events->setIdentifiers([ __CLASS__, get_called_class(),]);
   $this->events = $events;
   return $this;
}
This method sets the current class into the given event manager ($events argument) and then sets the event manager in local variable $events.
The next step is to write the getEventManager method in class Greeter as shown below −
public function getEventManager() {
   if (null === $this->events) {
      $this->setEventManager(new EventManager());
   }
   return $this->events;
}
The method gets the event manager from a local variable. if it is not available, then it creates an instance of event manager and returns it.
Write a method, greet, in class Greeter.
public function greet($message) {
   printf("\"%s\" from class\n", $message);
   $this->getEventManager()->trigger(__FUNCTION__, $this, $message ]);
}
This method gets the event manager and fires / triggers events attached to it.
The next step is to create an instance of the Greeter class and attach a listener to its method, greet.
$greeter = new Greeter();
$greeter->getEventManager()->attach('greet', function($e) {
   $event_name = $e->getName();
   $target_name = get_class($e->getTarget());
   $params_json = json_encode($e->getParams());
   printf("\"%s\" event of class \"%s\" is called." .
      " The parameter supplied is %s\n",
      $event_name,
      $target_name,
      $params_json);
});
The listener callback just prints the name of the event, target and the supplied parameters.
The complete listing of the Greeter.php is as follows −
<?php
require __DIR__ . '/vendor/autoload.php';

use Zend\EventManager\EventManagerInterface;
use Zend\EventManager\EventManager;
use Zend\EventManager\EventManagerAwareInterface;

class Greeter implements EventManagerAwareInterface {
   protected $events;
   public function setEventManager(EventManagerInterface $events) {
      $events->setIdentifiers([__CLASS__, get_called_class(), ]);
      $this->events = $events;
      return $this;
   }
   public function getEventManager() {
      if (null === $this->events) {
         $this->setEventManager(new EventManager());
      }
      return $this->events;
   }
   public function greet($message) {
      printf("\"%s\" from class\n", $message);
      $this->getEventManager()->trigger(__FUNCTION__, $this, [$message ]);
   }
}

$greeter = new Greeter();
$greeter->greet("Hello");
$greeter->getEventManager()->attach('greet', function($e) {
   $event_name = $e->getName();
   $target_name = get_class($e->getTarget());
   $params_json = json_encode($e->getParams());
   printf("\"%s\" event of class \"%s\" is called." . " The parameter supplied is %s\n",
      $event_name,
      $target_name,
      $params_json);
});
$greeter->greet("Hello");
Now, run the application in the command prompt php Greeter.php and the result will be as follows −
"Hello" from class
"Hello" from class
"greet" event of class "Greeter" is called. The parameter supplied is ["Hello"]
The above sample application explains only the basics of an event manager. The Event manager provides many more advanced options such as Listener Priority, Custom Callback Prototype / Signature, Short Circuiting, etc. The Event manager is used extensively in the Zend MVC framework.
Zend Framework - Module System
The Zend Framework provides a powerful module system. The module system has three components. They are as follows −
Module Autoloader − A Module Autoloader is responsible for locating and loading of modules from variety of sources. It can load modules packaged as Phar archives as well. The implementation of the Module Autoloader is located at myapp/vendor/zendframework/zend-loader/src/ModuleAutoloader.php.
Module Manager − Once the Module Autoloader locates the modules, the module manager fires a sequence of events for each module. The implementation of the Module Manager is located at myapp/vendor/zendframework/zendmodulemanager/src/ModuleManager.php.
Module Manager Listeners − They can be attached to the events fired by the Module Manager. By attaching to the events of module manager, they can do everything from resolving and loading modules to performing complex work for each modules.
MVC Web Module System
The MVC Web Application in the Zend Framework is usually written as Modules. A single website can contain one or more modules grouped by functionality. The recommended structure for MVC-Oriented module is as follows −
module_root/
   Module.php
   autoload_classmap.php
   autoload_function.php
   autoload_register.php
   config/
      module.config.php
   public/
      images/
      css/
      js/
   src/
      <module_namespace>/
      <code files>
   test/
      phpunit.xml
      bootstrap.php
      <module_namespace>/
         <test code files>
   view/
      <dir-named-after-module-namespace>/
         <dir-named-after-a-controller>/
            <.phtml files>
The structure is same as discussed in the previous chapter, but here it is generic. The autoload_ files can be used as a default mechanism for autoloading the classes available in the module without using the advanced Module Manager available in the zend-modulemanager.
autoload_classmap.php − Returns an array of class name and its corresponding filename.
autoload_function.php − Returns a PHP callback. This can utilize classes returned by autoload_classmap.php.
autoload_register.php − Registers the PHP callback that is returned by the autoload_function.php.
These autoload files are not required but recommended. In the skeleton application, we have not used the autoload_ files.
Module Class
The Module class should be named Module and the namespace of the module class should be Module name. This will help the Zend Framework to resolve and load the module easily. The Application module code in the skeleton(myapp) application,myapp/module/Application/src/Module.php is as follows −
namespace Application;
class Module {
   const VERSION = '3.0.2dev';
   public function getConfig() {
      return include __DIR__ . '/../config/module.config.php';
   }
}
The Zend Framework module manager will call the getConfig() function automatically and will do the necessary steps.
Zend Framework - Application Structure
In this chapter, let us understand the structure of the Zend Framework application. The structure of the myapp application is as follows −
 composer.json
 composer.lock
 CONDUCT.md
 config
    application.config.php
    autoload
       development.local.php
       development.local.php.dist
       global.php
       local.php.dist
       README.md
       zend-developer-tools.local-development.php
    development.config.php
    development.config.php.dist
    modules.config.php
 CONTRIBUTING.md
 data
    cache
        module-classmap-cache.application.module.cache.php  docker-compose.yml
 Dockerfile
 LICENSE.md
 module
    Application
        config
        src
        test
        view
 phpcs.xml
 phpunit.xml.dist
 public
    css
       bootstrap.css
       bootstrap.css.map
       bootstrap.min.css
       bootstrap.min.css.map
       bootstrap-theme.css
       bootstrap-theme.css.map
       bootstrap-theme.min.css
       bootstrap-theme.min.css.map
       style.css
    fonts
       glyphicons-halflings-regular.eot
       glyphicons-halflings-regular.svg
       glyphicons-halflings-regular.ttf
       glyphicons-halflings-regular.woff
       glyphicons-halflings-regular.woff2
    img
       favicon.ico
       zf-logo-mark.svg
    index.php
    js
       bootstrap.js
       bootstrap.min.js
       jquery-3.1.0.min.js
    web.config
 README.md
 TODO.md
 Vagrantfile
 vendor
 autoload.php
 bin
    phpunit -> ../phpunit/phpunit/phpunit
    templatemap_generator.php -> ../zendframework/zend-
view/bin/templatemap_generator.php
    zf-development-mode -> ../zfcampus/zf-development-mode/bin/zf-
development-mode
 composer
    autoload_classmap.php
    autoload_namespaces.php
    autoload_psr4.php
    autoload_real.php
    ClassLoader.php
    installed.json
    LICENSE
 container-interop
    container-interop
 doctrine
    instantiator
 myclabs
    deep-copy
 phpdocumentor
    reflection-common
    reflection-docblock
    type-resolver
 phpspec
    prophecy
 phpunit
    php-code-coverage
    php-file-iterator
    php-text-template
    php-timer
    php-token-stream
    phpunit
    phpunit-mock-objects
 sebastian
    code-unit-reverse-lookup
    comparator
    diff
    environment
    exporter
    global-state
    object-enumerator
    recursion-context
    resource-operations
    version
 symfony
    yaml
 webmozart
    assert
 zendframework
    zend-component-installer
    zend-config
    zend-console
    zend-dom
    zend-escaper
    zend-eventmanager
    zend-http
    zend-loader
    zend-modulemanager
    zend-mvc
    zend-router
    zend-servicemanager
    zend-stdlib
    zend-test
    zend-uri
    zend-validator
    zend-view
 zfcampus
 zf-development-mode

73 directories, 55 files
The Zend Framework application consists of different folders. They are as follows −
Application − This directory contains your application. It will house the MVC system, as well as configurations, services used and your bootstrap file.
Config − This directory contains the configuration files of an application.
Data − This directory provides a place to store application data that is volatile and possibly temporary.
Module − Modules allow a developer to group a set of related controllers into a logically organized group.
Public − This is the applications document root. It starts the Zend application. It also contains the assets of the application like JavaScript, CSS, Images, etc.
Vendor − This directory contains composer dependencies.
Structure of the Application Modules
This is the main directory of your application. Zend Framework 2 introduces a powerful and flexible module system to organize the application efficiently. The Application module of the skeleton application (myapp) provides bootstrapping, error and routing configuration to the whole application. The structure of the Application module is as shown below −
 module
    Application
        config
           module.config.php
        src
           Controller
              IndexController.php
           Module.php
        test
           Controller
               IndexControllerTest.php
        view
            application
               index
                   index.phtml
            error
               404.phtml
               index.phtml
            layout
                layout.phtml
Let us cover each of these module directories in detail −
Application − This is root directory of the module. The name of the folder will match the name of the module and the name is also used as the PHP namespace of all the class defined inside the module. It will house the MVC system, as well as configurations, services used, and your bootstrap file.
Config − Independent configuration of the module.
Src − Main business logic of the application.
View − Contains design / presentation (HTML) files. For example, index.phtml.
src/Module.php − It is the heart of the module. It works as a front controller for the module. The Zend process src/Module.php file before processing any PHP Classes in this module.
Application/config/module.config.php − It is implemented for the router configuration and auto loading files.
Application/view/layout − Layouts represent the common parts of multiple views. For example, page header and footer. By default, layouts should be stored in the views/layoutsfolder.
All modules share the same or similar structure as that of the above Application module.
Zend Framework - Creating a Module
In this chapter, we will learn how to create a MVC based module in the Zend Framework. Let us create a module called as Tutorial to understand the module creation process.
Create a new PHP class named Module inside the myapp/module/Tutorial/src/ directory and implement the ConfigProviderInterface.
Set Tutorial as the namespace for the Module class.
Write a public function getConfig in the Module class and return the configuration file for the Tutorial Module.
The complete code for the Module class is as follows −
<?php
namespace Tutorial;
use Zend\ModuleManager\Feature\ConfigProviderInterface;
class Module implements ConfigProviderInterface {
   public function getConfig() {
      return include __DIR__ . '/../config/module.config.php';
   }
}
Configure the Tutorial module in the composer.json under the autoload section by using the following code.
"autoload": {
   "psr-4": {
      "Application\\": "module/Application/src/",
      "Tutorial\\": "module/Tutorial/src/"
   }
}
Update the application using the composer update command as shown below.
composer update
The composer command will do necessary change to the application and show the logs in the command prompt as shown below −
Loading composer repositories with package information
Updating dependencies (including require-dev)
   - Removing zendframework/zend-component-installer (0.3.0)
   - Installing zendframework/zend-component-installer (0.3.1)
   Downloading: 100%

   - Removing zendframework/zend-stdlib (3.0.1)
   - Installing zendframework/zend-stdlib (3.1.0)
   Loading from cache

   - Removing zendframework/zend-eventmanager (3.0.1)
   - Installing zendframework/zend-eventmanager (3.1.0)
   Downloading: 100%

   - Removing zendframework/zend-view (2.8.0)
   - Installing zendframework/zend-view (2.8.1)
   Loading from cache

   - Removing zendframework/zend-servicemanager (3.1.0)
   - Installing zendframework/zend-servicemanager (3.2.0)
   Downloading: 100%

   - Removing zendframework/zend-escaper (2.5.1)
   - Installing zendframework/zend-escaper (2.5.2)
   Loading from cache

   - Removing zendframework/zend-http (2.5.4)
   - Installing zendframework/zend-http (2.5.5)
   Loading from cache

   - Removing zendframework/zend-mvc (3.0.1)
   - Installing zendframework/zend-mvc (3.0.4)
   Downloading: 100%

   - Removing phpunit/phpunit (5.7.4)
   - Installing phpunit/phpunit (5.7.5)
   Downloading: 100%

Writing lock file
Generating autoload files
Create the module configuration file, module.config.php at /config/ with the following code −
<?php
namespace Tutorial;

use Zend\ServiceManager\Factory\InvokableFactory;
use Zend\Router\Http\Segment;
return [
   'controllers' => [
      'factories' => [Controller\TutorialController::class => InvokableFactory::class,],
   ],
   'view_manager' => [
      'template_path_stack' => ['tutorial' => __DIR__ . '/../view',],
   ],
];
The configuration file has three parts and they are as follows −
Controller configuration − Specify the controllers available inside the Module.
Routing configuration − Specify how the controllers in the module should be resolved into URLs.
View configuration − Specify the configuration related to view the engine such as the location of views, etc.
Configure the Tutorial module in the application level configuration file myapp/config/modules.config.php.
return ['Zend\Router', 'Zend\Validator', 'Application', 'Tutorial'];
Run the application by executing the composer serve at the root of the application folder.
We have successfully added a new module, but we still need to add the Controller, Routing and Views to successfully run the Tutorial module.
Zend Framework - Controllers
As discussed earlier, the controller plays an important role in the Zend MVC Framework. All the webpages in an application needs to be handled by a controller.
In the Zend MVC Framework, controllers are objects implementing the Zend/Stdlib/DispatchableInterface. The DispatchableInterface has a single method, dispatch, which gets the Request object as input, do some logic and returns Response an object as the output.
dispatch(Request $request, Response $response = null)
A simple example of a Controller object to return Hello World is as follows −
use Zend\Stdlib\DispatchableInterface;
use Zend\Stdlib\RequestInterface as Request;
use Zend\Stdlib\ResponseInterface as Response;
class HelloWorld implements DispatchableInterface {
   public function dispatch(Request $request, Response $response = null) {
      $response->setContent("Hello World!");
   }
}
The DispatchableInterface is basic and it needs lot of other interfaces to write high level controllers. Some of such interfaces are as follows −
InjectApplicationEventInterface − Used to inject events (Zend EventManager)
ServiceLocatorAwareInterface − Used to locate Services (Zend ServiceManager)
EventManagerAwareInterface − Used to manage events (Zend EventManager)
Keeping these things in mind, the Zend Framework provides lot of readymade controllers implementing these interfaces. The most important controllers are as explained below.
AbstractActionController
The AbstractActionController (Zend/Mvc/Controller/AbstractActionController) is the most used controller in the Zend MVC Framework. It has all the necessary features to write a typical web page. It allows routes (Routing is matching request url to a controller and one of its methods) to match an action. When matched, a method named after the action will be called by the controller.
For example, if a route test is matched and the route, test returns hello for action, then the helloAction method will be invoked.
Let us write our TutorialController using the AbstractActionController.
Create a new PHP class called TutorialController by extending the AbstractActionController and place it in the module/Tutorial/src/Controller/ directory.
Set the Tutorial\Controller as the namespace.
Write an indexAction method.
Return the ViewModel object from indexAction method. The ViewModel object is used to send data from the controller to view engine, which we will see in the subsequent chapters.
The complete code listing is as follows −
?php
namespace Tutorial\Controller;
use Zend\Mvc\Controller\AbstractActionController;
use Zend\View\Model\ViewModel;
class TutorialController extends AbstractActionController {
   public function indexAction() {
      return new ViewModel();
   }
}
We have successfully added the new TutorialController.
AbstractRestfulController
The AbstractRestfulController (Zend\Mvc\Controller\AbstractRestfulController) inspects the HTTP method of the incoming request and matches the action (method) by considering the HTTP methods
For example, the request with GET HTTP method either matches the getList() method or the get() method, if the id parameter is found in the request.
AbstractConsoleController
The AbstractConsoleController (Zend\Mvc\Controller\AbstractConsoleController) is like the AbstractActionController except that it only runs in the console environment instead of a browser.
Zend Framework - Routing
Routing maps Request URI to a specific controller's method. In this chapter, we will see how to implement the routes in a Zend Framework.
In general, any URI has three parts −
- Hostname segment,
- Path segment, and
- Query segment.
For example, in URI / URL − http://www.example.com/index?q=data, www.example.com is the Hostname Segment, index is the Path Segment and q=data is the Query Segment. Generally, routing checks the Page segment against a set of constrain. If any constrain matches, then it returns a set of values. One of the main value is the controller.
Routing also checks the host segment, query segment, request HTTP methods, request HTTP headers, etc., in a certain situation.
Route & RouteStack
Route is the main object in routing. Zend Framework has a special interface for route object, RouteInterface. All route object needs to implement RouteInterface. The complete listing of the RouteInterface is as follows −
namespace Zend\Mvc\Router;
use Zend\Stdlib\RequestInterface as Request;
interface RouteInterface {
   public static function factory(array $options = []);
   public function match(Request $request);
   public function assemble(array $params = [], array $options = []);
}
The main method is match. This match method checks the given request against the constrain defined in it. If any match is found, it returns the RouteMatch object. This RouteMatch object provides the details of the matched request as parameters. These parameters can be extracted from RouteObject using the getParams method.
The complete listing of the RouteObject is as follows −
namespace Zend\Mvc\Router;
class RouteMatch {
   public function __construct(array $params);
   public function setMatchedRouteName($name);
   public function getMatchedRouteName();
   public function setParam($name, $value);
   public function getParams();
   public function getParam($name, $default = null);
}
In general, a typical MVC application has many routes. Each of this route will be processed in LIFO order and a single route will be matched and returned. If no route is matched / returned, then the application returns Page not found error. Zend Framework provides an interface to process the routes, RouteStackInterface. This RouteStackInterface has the option to add / remove routes.
The complete listing of the RouteStackInterface is as follows −
namespace Zend\Mvc\Router;
interface RouteStackInterface extends RouteInterface {
   public function addRoute($name, $route, $priority = null);
   public function addRoutes(array $routes);
   public function removeRoute($name);
   public function setRoutes(array $routes);
}
Zend framework provides two implementations of the RouteStack interface and they are as follows −
- SimpleRouteStack
- TreeRouteStack
Type of Routes
Zend framework provides a lot of readymade route objects for all the situations under "Zend\Mvc\Router\Http" namespace. It is enough to select and use proper route object for the given situation.
The available routes are as follows −
Hostname − Used to match host part of the URI.
Literal − Used to match exact URI.
Method − Used to match HTTP method of the incoming request.
Part − Used to match the part of the URI path segment using custom logic.
Regex − Used to match the URI path segment by Regex Pattern.
Schema − Used to match the URI Schema such as http, https, etc.
Segment − Used to match URI path by splitting it into multiple segment.
Let us see how to write the most commonly used literal and segment Route. Routes are usually specified in each module's configuration file module.config.php.
Literal Route
Typically, routes are queried in a LIFO order. The Literal route is for doing the exact matching of the URI path.
It is defined as shown below −
$route = Literal::factory(array(
   'route' => '/path',
   'defaults' => array('controller' => 'Application\Controller\IndexController',
      'action' => 'index',),
));
The above route matches the /path in the request url and returns index as the action and IndexController as controller.
Segment Route
A segmented route is used for whenever your url is supposed to contain variable parameters.
It is described as given below −
$route = Segment::factory(array(
   'route' => '/:controller[/:action]',
   'constraints' => array(
      'controller' => '[a-zA-Z][a-zA-Z0-9_-]+',
      'action' => '[a-zA-Z][a-zA-Z0-9_-]+',
   ),
   'defaults' => array(
      'controller' => 'Application\Controller\IndexController',
      'action' => 'index',),
));
Here, Segments are denoted by a colon and followed by alphanumeric characters. If you keep a segment is optional then it is enclosed by brackets. Each segment may have constraints associated with it. Each constraint is a regular expression.
Configuring Route in Tutorial Module
Let us add a segment route in our Tutorial module. Update the tutorial module configuration file module.config.php available at myapp/module/Tutorial/config.
<?php
namespace Tutorial;
use Zend\ServiceManager\Factory\InvokableFactory;
use Zend\Router\Http\Segment;
return [
   'controllers' => [
      'factories' => [
         Controller\TutorialController::class => InvokableFactory::class,
      ],
   ],
   'router' => [
      'routes' => [
         'tutorial' => [
            'type'    => Segment::class,
               'options' => [
                  'route' => '/tutorial[/:action[/:id]]',
                  'constraints' => [
                     'action' => '[a-zA-Z][a-zA-Z0-9_-]*',
                     'id'     => '[0-9]+',
                  ],
                  'defaults' => [
                     'controller' => Controller\TutorialController::class,
                     'action'     => 'index',
                  ],
               ],
            ],
      ],
   ],
   'view_manager' => [
      'template_path_stack' => ['tutorial' => __DIR__ . '/../view',],
   ],
];
We have successfully added the routing for our Tutorial module. We are just one step behind in completing our Tutorial module. We need to add View for our module, which we will learn in the subsequent chapter.
Zend Framework - View Layer
A View Layer is the presentation layer of the MVC application. It separates the application logic from the presentation logic. In a typical PHP web application, all business logic and design are intermixed. Intermixing enables faster development in a small project. But, it fails miserably in large project, where lot of high level architecture is involved. To change the design of the web application, a developer needs to work on the business logic as well. This may be catastrophic resulting in breaking of business logic.
Zend Framework provides a well thought, clean, flexible and extendable View layer. The View layer is available as a separate module, Zend/View and integrate fine with Zend/Mvc module. The Zend View Layer is separated into multiple components interacting nicely with each other.
Its various components are as follows −
Variables Containers − Holds view layer's data.
View Models − Holds Variable Containers and design template.
Renderers − Process data and template from View Model and output a design representation, maybe the final html output.
Resolvers − Resolves template available in the View Model in such a way that the Renderer can consume.
View (Zend\View\View) − Maps request to the renderer and then renderer to response.
Rendering Strategies − Used by View to map request to renderer.
Response Strategies − Used by View to map renderer to response.
The view layer, View processes the ViewModel, resolves the template using a Resolver, render it using Rendering Strategy and finally outputs it using the Response Renderer.
View Layer Configuration
Like the controller, a View layer can be configured in a module's configuration file called as module.config.php. The main configuration is to specify where the templates are going to be placed. This can be accomplished by adding the following configuration in the module.config.php.
'view_manager' => [
   'template_path_stack' => ['tutorial' => __DIR__ . '/../view',],
]
By default, the View layer has a default behavior for all its components. For example, a ViewModel resolves the template name of a controller's action inside the template root by lowercase-module-name/lowercase-controller-name/lowercase-action-name rule. However, this can be overridden by the setTemplate() method of the ViewModel.
Controllers and View Layer
By default, a controller does not need to send any data to the view layer. It is enough to write the template in the proper place.
For example, in our example, TutorialController, the template needs to be placed at myapp/module/Tutorial/view/tutorial/tutorial/index.phtml. The index.phtml refers the PHP based template and it will be rendered by the PHPRenderer. There are other renderers such as JsonRenderer for json output and FeedRenderer for rss and atom output.
The complete listing is as follows −
<?php
namespace Tutorial\Controller;
use Zend\Mvc\Controller\AbstractActionController;
use Zend\View\Model\ViewModel;
class TutorialController extends AbstractActionController {
   public function indexAction() {
   }
}
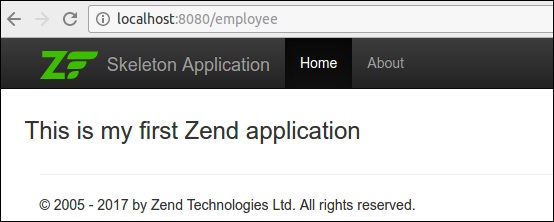
Zend Application Template
<div class = "row content">
   <h3>This is my first Zend application</h3>
</div>
Finally, we have successfully completed the Tutorial module and we can access it using url http://localhost:8080/tutorial.
Passing Data to View Layer
The simplest way to send the data to a view layer is to use the ViewModel arguments. The changed indexAction method is as follows −
public function indexAction() {
   $view = new ViewModel([
      'message' => 'Hello, Tutorial'
   ]);
   return $view;
}
Now, change the index.phtml file as follows −
<div class = "row content">
   <h3>This is my first Zend application</h3>
   <h4><?php echo $this->message?></h4>
</div>
View Helpers
A View Helper is used to write small, atomic functions to be used in templates. Zend framework provides an interface, Zend\View\Helper\HelperInterface to write standard view helpers.
A HelperInterface has just two methods,
setView() − This method accepts a Zend\View\Renderer\RendererInterface instance/implementation.
getView() − It is used to retrieve that instance.
The complete code listing of HelperInterface is as follows −
namespace Zend\View\Helper;
use Zend\View\Renderer\RendererInterface as Renderer;
interface HelperInterface {
   /**
      * Set the View object
      *
      * @param  Renderer $view
      * @return HelperInterface
   */
   public function setView(Renderer $view);
   /**
      * Get the View object
      *
      * @return Renderer
   */
   public function getView();
}
To use a helper in your view script, access it using $this->helperName().
Built-in Helpers
Zend Framework provides a lot of inbuilt helper function for various purposes. Some of the View Helpers available in the zend-mvc are as follows −
URL
URL helper is used to generate the URLs matching the routes defined in the application.
The definition of the URL helper is −
$this->url($name, $params, $options, $reuseMatchedParameters)
For example, in the tutorial module, the route is named as tutorial and it has two parameters action and id. We can use URL helper to generate two different URLs as shown below −
<a href = "<? = $this->url('tutorial'); ?>">Tutorial Index</a>
<a href = "<? = $this->url('tutorial', ['action' => 'show', 'id' =>10]); ?>">
   Details of Tutorial #10
</a>
The result will be as follows −
<a href = "/tutorial">Tutorial Index</a>
<a href = "/tutorial/show/10"> Details of Tutorial #10</a>
Placeholder
Placeholder helper is used to persist content between view scripts and view instances. It provides option to set data initially and then use it in later stages.
For example, we can set, say company name and then use it in all other places.
<?php $this->placeholder('companyname')->set("TutorialsPoint") ?>
<?= $this->placeholder('companyname'); ?>
A Placeholder provides some of the advanced options to generate complex content from PHP array and objects. It also has option to capture certain section of the template itself.
For example, the following code captures the template result in between and stores it in the productlist placeholder.
Class Product
class Product {
   public $name;
   public $description;
}
Controller
$p1 = new Product();
$p1->name = 'Car';
$p1->description = 'Car';
$p2 = new Product();
$p2->name = 'Cycle';
$p2->description = 'Cycle';
$view = new ViewModel(['products' => $products]);
Template
<!-- start capture -->
<?php $this->placeholder('productlist')->captureStart();
   foreach ($this->products as $product): ?>
<div>
   <h2><?= $product->name ?></h2>
   <p><?= $product->description ?></p>
</div>
<?php endforeach; ?>
<?php $this->placeholder('productlist')->captureEnd() ?>
<!-- end capture -->
<?= $this->placeholder('productlist') ?>
Result
<div class = "foo">
   <h2>Car</h2>
   <p>Car</p>
</div>
<div class = "foo">
   <h2>Cycle</h2>
   <p>Cycle</p>
</div>
Doctype
The Doctype helper is used to generate various html doctypes. It is concrete implementation of the Placeholder helper. The doctype can be set in a bootstrap file and config file.
The basic usage is shown below −
Application Bootstrap file
use Zend\View\Helper\Doctype;
$doctypeHelper = new Doctype();
$doctypeHelper->doctype('XHTML5');
Module Configuration
// module/Application/config/module.config.php:
return [
   /* ... */
   'view_manager' => [
      'doctype' => 'html5',
      /* ... */
   ],
];
Template
<?php echo $this->doctype() ?>
HeadTitle
The HeadTitle helper is used to generate the html title element. It is the concrete implementation of Placeholder helper. Zend provides an option to set the title in the module configuration file and it can be set at any level like site, module, controller, action, etc. A partial code for the HeadTitle is as follows −
Module
headTitleHelper->append($action);
$headTitleHelper->append($controller);
$headTitleHelper->append($module);
$headTitleHelper->append($siteName);
Template
<?= $this->headTitle() ?>
Result
action - controller - module - Zend Framework
HeadMeta
The HeadMeta helper is used to generate html meta tags. It is a concrete implementation of the Placeholder helper.
Template −
<?php
   $this->headMeta()->appendName('keywords', 'turorialspoint, zend framework, php');
   echo $this->headMeta()
?>
Result
<meta name = "keywords" content = "tutorialspoint, zend framework, php" />
HeadLink
The HeadLink helper is used to generate html links to include external resources. It is concrete implementation of the Placeholder helper.
Template
<?php
   // setting links in a view script:
   $this->headLink(['rel' => 'icon', 'href' => '/img/favicon.ico'], 'PREPEND')
      ->appendStylesheet('/styles/site.css')
      ->prependStylesheet('/styles/mystyle.css', 'screen', true, ['id' => 'mystyle']);

   // rendering the links from the layout:
   echo $this->headLink();
?>
Result
<link href = "/styles/mystyle.css" media = "screen" rel = "stylesheet"
   type = "text/css" id = "mystyle">
<link href = "/img/favicon.ico" rel = "icon">
<link href = "/styles/site.css" media = "screen" rel = "stylesheet" type = "text/css">
HeadStyle
The HeadStyle helper is used to generate inline CSS styles. It is concrete implementation of the Placeholder helper.
Template
<?php $this->headStyle()->appendStyle($styles); ?>
<?php echo $this->headStyle() ?>
HeadScript
The HeadScript is used to generate inline script or to include external scripts. It is concrete implementation of the Placeholder helper.
Template
<? $this->headScript()->appendFile(/js/sample.js);?>
<?php echo $this->headScript() ?>
InlineScript
The InlineScript is used to generate a script in both head and body section of the html template. It is derived from the HeadScript.
HTMLList
The HTMLList is used to generate ordered and unordered list. The definition of the HTMLList is as follows −
Definition
htmlList($items, $ordered, $attribs, $escape)
Template
$items = [
   '2015',
   ['March', 'November'],
   '2016',
];
echo $this->htmlList($items);
Result
<ul>
   <li>2015
      <ul>
         <li>March</li>
         <li>November</li>
      </ul>
   </li>
   <li>2016</li>
</ul>
Cycle
A Cycle is used to generate alternatives in a loop environment. It has assign, next and prev function.
Controller
$view = new ViewModel(['message' => 'Hello, Tutorial', 'data' => array('One', 'Two')]);
Template
<?php $this->cycle()->assign(['#F0F0F0', '#FFF'], 'colors'); ?>

<table>
   <?php foreach ($this->data as $datum): ?>
   <tr style = "background-color: <?= $this->cycle()->setName('colors')>next() ?>">
      <td><?= $this->escapeHtml($datum) ?></td>
   </tr>
   <?php endforeach ?>
</table>
Result
<table>
   <tr style = "background-color: #F0F0F0">
      <td>One</td>
   </tr>
   <tr style = "background-color: #FFF">
      <td>Two</td>
   </tr>
</table>
A few other important built-in helpers are as follows −
BasePath − The BasePath is used to generate path of the public folder of the application's root.
Partial − Partial is used to render a specific template in its own variable scope.
PartialLoop − PartialLoop is like Partial, but used in the looping environment.
Identity − Identity is used to retrieve the logged-in user's identity from the Authentication Service.
JSON − JSON is used in a restful environment, where the output is in JSON format. It emits proper HTTP header and disables the layout concept.
There are still lot of helpers available in Zend Framework such as the i18n helper, form helpers, pagination helpers, navigation helpers, etc.
Creating View Helpers
The Zend Framework provides a built-in AbstractHelper implementing HelperInterface to write view helpers.
The steps involved in writing a new helper are as follows −
Step 1 − Extend the class Zend\View\Helper\AbstractHelper.
Step 2 − Override the __invoke() function.
Step 3 − Set the configuration in the module.config.php file.
Step 4 − Use view helper in view scripts.
Let us now create a TestHelper
Create Helper folder at myapp/module/Tutorial/src/View directory. Write TestHelper inside Helper directory, TestHelper.php.
The complete listing is as follows −
<?php
namespace Tutorial\View\Helper;
use Zend\View\Helper\AbstractHelper;
class TestHelper extends AbstractHelper {
   public function __invoke() {
      $output = "I am from test helper";
      return htmlspecialchars($output, ENT_QUOTES, 'UTF-8');
   }
}
Set configuration in module.config.php.
'view_helpers' => [
   'aliases' => [
      'testHelper' => View\Helper\TestHelper::class,
   ],
   'factories' => [
      View\Helper\TestHelper::class => InvokableFactory::class,
   ],
],
Use the newly created TestHelper in the about view script.
<?= $this->testHelper() ?>
Zend Framework - Layout
A Layout represents the common parts of multiple views i.e. for example, page header and footer. By default, layouts should be stored in the view/layout folder.
A Layout configuration is defined under the view_manager section in the module.config.php.
The default configuration of the skeleton application is as follows −
'view_manager' => array(
   'display_not_found_reason' => true,
   'display_exceptions' => true,
   'doctype' => 'HTML5',
   'not_found_template' => 'error/404',
   'exception_template' => 'error/index',
   'template_map' => array(
      'layout/layout' => __DIR__ . '/../view/layout/layout.phtml',
      'application/index/index' => __DIR__ . '/../view/application/index/index.phtml',
      'error/404' => __DIR__ . '/../view/error/404.phtml',
      'error/index' => __DIR__ . '/../view/error/index.phtml',
   ),
   'template_path_stack' => array(
   __DIR__ . '/../view',
),
Here, the template_map is used to specify the layout. If layout is not found, then it will return an error. Let us have a look at the main layout of the skeleton application.
Layout.phtml
<?= $this->doctype() ?>
<html lang = "en">
   <head>
      <meta charset = "utf-8">
      <?= $this->headTitle('ZF Skeleton Application')->setSeparator(' - ')>
         setAutoEscape(false) ?>
      <?= $this->headMeta()
         ->appendName('viewport', 'width = device-width, initial-scale = 1.0')
         ->appendHttpEquiv('X-UA-Compatible', 'IE = edge')
      ?>

      <!-- Le styles -->
      <?= $this->headLink(['rel' => 'shortcut icon', 'type' =>
         'image/vnd.microsoft.icon',
         'href' => $this->basePath() . '/img/favicon.ico'])
         ->prependStylesheet($this->basePath('css/style.css'))
         ->prependStylesheet($this->basePath('css/bootstraptheme.min.css'))
         ->prependStylesheet($this->basePath('css/bootstrap.min.css'))
      ?>

      <!-- Scripts -->
      <?= $this->headScript()
         ->prependFile($this->basePath('js/bootstrap.min.js'))
         ->prependFile($this->basePath('js/jquery-3.1.0.min.js'))
      ?>
   </head>

   <body>
      <nav class = "navbar navbar-inverse navbar-fixed-top" role = "navigation">
         <div class = "container">
            <div class = "navbar-header">
               <button type = "button" class = "navbar-toggle" data-
                  toggle = "collapse" data-target = ".navbar-collapse">
                  <span class = "icon-bar"></span>
                  <span class = "icon-bar"></span>
                  <span class = "icon-bar"></span>
               </button>

               <a class = "navbar-brand" href = "<?= $this->url('home') ?>">
                  <img src = "<?= $this->basePath('img/zf-logo-mark.svg') ?>
                     " height = "28" alt = "Zend Framework <?= \Application\Module::
                     VERSION ?>"/> Skeleton Application
               </a>
            </div>

            <div class = "collapse navbar-collapse">
               <ul class = "nav navbar-nav">
                  <li class = "active"><a href = "<?=
                     $this->url('home') ?>">Home</a></li>
               </ul>
            </div>
         </div>
      </nav>

      <div class = "container">
         <?= $this->content ?>
         <hr>
         <footer>
            <p>© 2005 - <?= date('Y') ?> by Zend Technologies Ltd.
               All rights reserved.</p>
         </footer>
      </div>
      <?= $this->inlineScript() ?>
   </body>
</html>
As you analyze the layout, it mostly uses the view helpers, which we discussed in the previous chapter. As we look closer, the layout uses a special variable, $this->content. This variable is important as it will be replaced by the view script (template) of the actual requested page.
Creating a new layout
Let us create a new layout for our Tutorial module.
To begin with, let us create a tutorial.css file under the public/css directory.
 body {
   background-color: lightblue;
}
h1 {
   color: white;
   text-align: center;
}
Create a new layout file newlayout.phtml at the /myapp/module/Tutorial/view/layout/ and copy the content from existing layout. Then, Add the tutorial.css stylesheet using the HeadLink helper class inside the layout head section.
<?php echo $this->headLink()->appendStylesheet('/css/tutorial.css');?>
Add a new about link in the navigation section using the URL helper.
<li><a href = "<?= $this->url('tutorial', ['action' => 'about']) ?>">About</a></li>
This layout page is common for the tutorial module application. Update the view_manager section of the tutorial module configuration file.
'view_manager' => array(
   'template_map' => array(
      'layout/layout' => __DIR__ . '/../view/layout/newlayout.phtml'),
   'template_path_stack' => array('tutorial' => __DIR__ . '/../view',),
)
Add the aboutAction function in the TutorialController.
 public function aboutAction() {
}
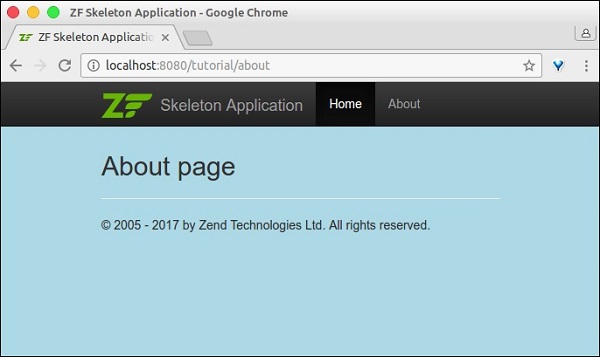
Add the about.phtml at myapp/module/Tutorial/view/tutorial/tutorial/ with the following content.
<h2>About page</h2>
Now, you are ready to finally run the application − http://localhost:8080/tutorial/about.
Zend Framework - Models & Database
In this chapter, we will discuss regarding the various models and the database of the Zend Framework.
Models in Zend Framework
A Model defines the logical data representation of the application. For example, in a shopping cart application Product, Customer, Cart and Orders are models. They define the properties of the entity it holds. Some of the concepts of models are as follows −
Controllers communicate with models and ask them to retrieve information they need. This retrieved information is then passed by the controller to the View. Finally, View will render the model as user consumable presentational data.
It is very rare that a model directly interacts with a view, but sometimes it may happen.
Models can talk with each other and aren't self-contained. They have relationships with each other. These relationships make it easier and quicker for a controller to get information, since it doesn't have to interact with different models; the models can do that themselves.
Let us take a look at a simple model MyModel
<?php
namespace Tutorial\Model;
class Book {
   public $id;
   public $author;
   public $title;
}
Database in Zend Framework
Zend framework provides a simple and feature-rich class, Zend\Db\TableGateway\TableGateway to find, insert, update and delete data from a database table.
Let us see how to connect the MySqlservice via PHP's PDO driver in Zend framework through the following steps.
Step 1: Create database in MySQL
Create database tutorials in the local MySQL server. We can use phpmyadmin or any other MySQL GUI tools for this purpose. Let us use the MySQL client in the command prompt. Connect to the mysql server and run the following command to create the tutorial database.
create database tutorials
Step 2: Create table in the tutorials db
Let us now create a database book in the tutorials db using the following SQL command.
use tutorials;
CREATE TABLE book (
   id int(11) NOT NULL auto_increment,
   author varchar(100) NOT NULL,
   title varchar(100) NOT NULL,
   PRIMARY KEY (id)
);
Step 3: Populate data in the book table
Populate the book table with sample data. Use the following SQL command.
INSERT INTO book (author, title) VALUES ('Dennis Ritchie', 'C Programming');
INSERT INTO book (author, title) VALUES ('James gosling', 'Java Programming');
INSERT INTO book (author, title) VALUES ('Rasmus Lerdorf', 'Programming PHP');
Step 4: Update Database Connection
Update the global configuration file, which is myapp/config/autoload/global.php with the necessary database drive information.
<?php
return array(
   'db' => array(
      'driver' => 'Pdo',
      'dsn' => 'mysql:dbname = tutorials;host = localhost',
      'driver_options' => array(
         PDO::MYSQL_ATTR_INIT_COMMAND => 'SET NAMES \'UTF8\''
      ),
   ),
   'service_manager' => array(
      'factories' => array(
         'Zend\Db\Adapter\Adapter' => 'Zend\Db\Adapter\AdapterServiceFactory',
      ),
   ),
);
Step 5: Update Database Credentials
Update the database credentials in the local configuration file, which is myapp/config/autoload/local.php. In this way, we can separate the local and live database connection credentials.
<?php
return array(
   'db' => array(
      'username' => '<user_name>',
      'password' => '<password>',
   ),
);
Step 6: Create Model for Book
Let us create a Model, Book in our module src directory. Generally, models are grouped under the Model folder /myapp/module/Tutorial/src/Model/Book.php.
<?php
namespace Tutorial\Model;
class Book {
   public $id;
   public $author;
   public $title;
}
Step 7: Implement exchangeArray in the book model
The TableGateway interacts with a model through the exchangeArray function. The standard argument of the exchangeArray function is the database result set stored as the PHP array. Using the exchangeArrayfunction, a model's property can be easily synced with the corresponding database table.
Update the model, Book as shown below −
<?php
namespace Tutorial\Model;
class Book {
   public $id;
   public $author;
   public $title;
   public function exchangeArray($data) {
      $this->id = (!empty($data['id'])) ? $data['id'] : null;
      $this->Author = (!empty($data['author'])) ? $data['author'] : null;
      $this->Title = (!empty($data['title'])) ? $data['title'] : null;
   }
}
Step 8: Use TableGateway to fetch book
Create a class, BookTable to fetch book information from the database. Create the class, BookTable in the Model folder itself.
<?php
namespace Tutorial\Model;
use Zend\Db\TableGateway\TableGatewayInterface;
class BookTable {
   protected $tableGateway;
   public function __construct(TableGatewayInterface $tableGateway) {
      $this->tableGateway = $tableGateway;
   }
   public function fetchAll() {
      $resultSet = $this->tableGateway->select();
      return $resultSet;
   }
}
We have used select() method of the TableGateway class to fetch the book information from the database. But, we have not used any reference to the table book in the code. The TableGateway is generic in nature and it can fetch data from any table by using certain configuration. Usually, these configurations are done in the module.config.php file, which we will discuss in the subsequent steps.
Step 9: Configure BookTable class
Update the tutorial module, Module.php with the getServiceConfig() method.
<?php
namespace Tutorial;
use Zend\Db\Adapter\AdapterInterface;
use Zend\Db\ResultSet\ResultSet;
use Zend\Db\TableGateway\TableGateway;
use Zend\ModuleManager\Feature\ConfigProviderInterface;

class Module implements ConfigProviderInterface {

   public function getConfig() {
      return include __DIR__ . '/../config/module.config.php';
   }
   public function getServiceConfig() {
      return [
         'factories' => [
            Model\BookTable::class => function ($container) {
               $tableGateway = $container->get(Model\BookTableGateway::class);
               $table = new Model\BookTable($tableGateway);
               return $table;
            },
            Model\BookTableGateway::class => function ($container) {
               $dbAdapter = $container->get(AdapterInterface::class);
               $resultSetPrototype = new ResultSet();
               $resultSetPrototype->setArrayObjectPrototype(new Model\Book());
               return new TableGateway('book', $dbAdapter, null, $resultSetPrototype);
            },
         ],
      ];
   }
}
Here, we have registered the BookTable class using the service manager. The BookTable class is used to fetch the book information and by registering it, we can access it wherever needed. Since, the registered services are shared, they increase performance, reduce the memory consumption, etc.
Another item, Model\BookTableGateway::class is the TableGateway object specialized for the Book model and is a dependency of the BookTable.
Step 10: Update TutorialController Configuration
We need the BookTable service in the tutorial controller to fetch the book information. To get the BookTable service, register it as constructor dependency in the TutorialController.
This Constructor dependency helps to get the BookTable service while the controller itself is in the initialization stage. Update the controller section of the tutorial module configuration, module.config.php as shown below.
'controllers' => [
   'factories' => [
      Controller\TutorialController::class => function($container) {
         return new Controller\TutorialController(
            $container->get(Model\BookTable::class)
         );
      },
   ],
],
Step 11: Update Tutorial Controller
This is done by adhering to the following three steps.
- Add constructor with BookTable as argument.
private $table;
public function __construct(BookTable $table) {
   $this->table = $table;
}
Fetch book information using the BookTable's fetchAll() method and register it into the view.
public function indexAction() {
   $view = new ViewModel([
      'data' => $this->table->fetchAll(),
   ]);
   return $view;
}
Display the book information in the view script.
<table class = "table">
   <tr>
      <th>Author</th>
      <th>Title</th>
      <th> </th>
   </tr>
   <?php foreach ($data as $sampledata) : ?>
   <tr>
      <td><?php echo $this->escapeHtml($data->author);?></td>
      <td><?php echo $this->escapeHtml($data->title);?></td>
   </tr>
   <?php endforeach ?>
</table>
Step 12: Run the application
Check the application by running − http://localhost:8080/tutorial.
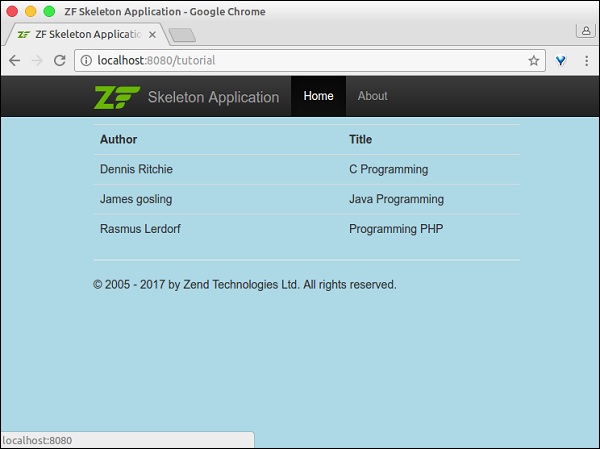
Zend Framework - Different Databases
As discussed in the last chapter, Zend framework provides a generic way to access the database using the Database Driver concept. Working with a database solely depends on the driver information and so, connecting with different database involves just changing the driver information.
Let us now change the book example to connect to the postgresql database with the following steps.
Step 1 − Create a database, tutorials in the local postgresql database using the following command −
CREATE DATABASE tutorials
Step 2 − Add book table. Move to the new database and execute the table creation script.
\c tutorials
CREATE TABLE book (
   id SERIAL NOT NULL,
   author varchar(100) NOT NULL,
   title varchar(100) NOT NULL,
   PRIMARY KEY (id)
);
Step 3 − Add sample book information using the following script −
INSERT INTO book (author, title) VALUES ('Dennis Ritchie', 'C Programming');
INSERT INTO book (author, title) VALUES ('James gosling', 'Java Programming');
INSERT INTO book (author, title) VALUES ('Rasmus Lerdorf', 'Programming PHP');
Step 4 − Change the driver information in the global.config file.
<?php
return array (
   'db' => array (
      'driver' => 'Pdo',
      'dsn' => 'pgsql:dbname = tutorials;host = localhost',
      'driver_options' => array (
      ),
   ),
);
Step 5 − Change the database credentials in the local.config file.
return array (
   'db' => array(
      'username' => '<username>',
      'password' => '<password>',
   ),
);
Step 6 − Finally, run the application http://localhost:8080/tutorial. The result is same as the MySQL application.
Zend Framework - Forms & Validation
Zend Framework provides a separate component, zend-form to accelerate the form creation and validation process. It connects the model and the view layer. It provides a set of form elements to create full-fledged html form from pre-defined models, an InputFilter class to validate the model against the form and options to bind the data from the form to the model and vice versa.
Install Form Component
The Zend form component can be installed using the Composer command as specified below −
composer require zendframework/zend-form
A Zend form framework has three subcomponents to manage the forms. They are as explained below in detail −
Elements − Used to define a single html input control mapped to a property in the model.
Fieldset − Used to group elements and other fieldset in a nested manner.
Form − Used to create an html form and consists of elements and fieldsets.
Zend Forms are usually created under the module//src/Form directory.
Example
Let us now create a simple form to add book into the database. To do this, we should adhere to the following steps −
Step 1: Create BookForm
Create the BookForm.php under the *myapp/module/Tutorial/src/Form directory. Add the following changes in the file −
<?php
namespace Tutorial\Form;
use Zend\Form\Form;

class BookForm extends Form {

   public function __construct($name = null) {
      parent::__construct('book');
      $this->add(array(
         'name' => 'id',
         'type' => 'Hidden',
      ));
      $this->add(array(
         'name' => 'author',
         'type' => 'Text',
         'options' => array(
            'label' => 'Author',
         ),
      ));
      $this->add(array(
         'name' => 'title',
         'type' => 'Text',
         'options' => array(
            'label' => 'Title',
         ),
      ));
      $this->add(array(
         'name' => 'submit',
         'type' => 'Submit',
         'attributes' => array(
            'value' => 'Go',
            'id' => 'submitbutton',
         ),
      ));
   }
}
The Form class provides an add method to map the model and its corresponding form details. we have created the BookForm by extending the Form class and added the form details for Book model.
Step 2: Update the book model, Book.php
Update the model, Book with filter and validation as specified below −
<?php
namespace Tutorial\Model;
use Zend\InputFilter\InputFilterInterface;
use Zend\InputFilter\InputFilterAwareInterface;
use Zend\InputFilter\InputFilter;

class Book implements InputFilterAwareInterface {
   public $id;
   public $author;
   public $title;
   protected $inputFilter;
   public function setInputFilter(InputFilterInterface $inputFilter) {
      throw new \Exception("Not used");
   }
   public function getInputFilter() {
      if (!$this->inputFilter) {
         $inputFilter = new InputFilter();
         $inputFilter->add(array(
            'name' => 'id',
            'required' => true,
            'filters' => array(
               array('name' => 'Int'),
            ),
         ));
         $inputFilter->add(array(
            'name' => 'author',
            'required' => true,
            'filters' => array(
               array('name' => 'StripTags'),
               array('name' => 'StringTrim'),
            ),
            'validators' => array(
               array(
                  'name' => 'StringLength',
                  'options' => array(
                     'encoding' => 'UTF-8',
                     'min' => 1,
                     'max' => 100,
                  ),
               ),
            ),
         ));
         $inputFilter->add(array(
            'name' => 'title',
            'required' => true,
            'filters' => array(
               array('name' => 'StripTags'),
               array('name' => 'StringTrim'),
            ),
            'validators' => array(
               array(
                  'name' => 'StringLength',
                  'options' => array(
                     'encoding' => 'UTF-8',
                     'min' => 1,
                     'max' => 100,
                  ),
               ),
            ),
         ));
         $this->inputFilter = $inputFilter;
      }
      return $this->inputFilter;
   }
   public function exchangeArray($data) {
      $this->id = (!empty($data['id'])) ? $data['id'] : null;
      $this->author = (!empty($data['author'])) ? $data['author'] : null;
      $this->title = (!empty($data['title'])) ? $data['title'] : null;
   }
}
Each model should implement the InputFilterAwareInterface. The InputFilterAwareInterface provides two methods, setInputFilter() and getInputFilter().
The getInputFilter is used to get the validation details of the model. Zend framework provides a rich set of filters and validators to validate the form. Some of the filters and validators used in the book model are as follows −
StripTags − Remove unwanted HTML.
StringTrim − Remove unnecessary white space.
StringLength validator − Ensure that the user does not enter more characters than the specified limit.
Step 3: Update the BookTable class
Include the saveBook method to add book to the database.
BookTable.php
<?php
namespace Tutorial\Model;
use Zend\Db\TableGateway\TableGatewayInterface;

class BookTable {
   protected $tableGateway;
   public function __construct(TableGatewayInterface $tableGateway) {
      $this->tableGateway = $tableGateway;
   }
   public function fetchAll() {
      $resultSet = $this->tableGateway->select();
      return $resultSet;
   }
   public function getBook($id) {
      $id  = (int) $id;
      $rowset = $this->tableGateway->select(array('id' => $id));
      $row = $rowset->current();
      if (!$row) {
         throw new \Exception("Could not find row $id");
      }
      return $row;
   }
   public function saveBook(Book $book) {
      $data = array (
         'author' => $book->author,
         'title'  => $book->title,
      );
      $id = (int) $book->id;
      if ($id == 0) {
         $this->tableGateway->insert($data);
      } else {
         if ($this->getBook($id)) {
            $this->tableGateway->update($data, array('id' => $id));
         } else {
            throw new \Exception('Book id does not exist');
         }
      }
   }
}
Step 4: Update the TutorialController class
Add a new action addAction in the tutorial controller myapp/module/Tutorial/src/Controller/TutorialController.php.
public function addAction() {
   $form = new BookForm();
   $form->get('submit')->setValue('Add');
   $request = $this->getRequest();
   if ($request->isPost()) {
      $book = new Book();
      $form->setInputFilter($book->getInputFilter());
      $form->setData($request->getPost());
      if ($form->isValid()) {
         $book->exchangeArray($form->getData());
         $this->bookTable->saveBook($book);

         // Redirect to list of Tutorial
         return $this->redirect()->toRoute('tutorial');
      }
   }
   return array('form' => $form);
}
The addAction method does the following processes −
Gets the request object.
Checks if the request's http method is a post method.
If request's http method is not post, it just renders the template, add.phtml
If the request's http method is not post, then it sets the inputfilter, gets the request data and sets it into the inputfiler.
Checks whether the form is valid using the isValid() method of Form class.
If the form is not valid, it again renders the template, add.phtml
If the form is valid, it saves the book into the database and redirects to the home page.
Step 5: Add the add.phtml template
Create a template add.phtml under myapp/module/Tutorial/view/tutorial/tutorial/add.phtml
Add.phtml
<?php
$title = 'Add new Book';
$this->headTitle($title);
?>
<h1><?php echo $this->escapeHtml($title); ?></h1>
<?php
if(!empty($form)) {
   $form->setAttribute('action', $this->url('tutorial', array('action' => 'add')));
   $form->prepare();
   echo $this->form()->openTag($form);
   echo $this->formHidden($form->get('id'));
   echo $this->formRow($form->get('author'))."<br>";
   echo $this->formRow($form->get('title'))."<br>";
   echo $this->formSubmit($form->get('submit'));
   echo $this->form()->closeTag();
}
Here, we are rendering the book form using the Form instance, $form.
Step 6: Run the Application
Now, we can run the application http://localhost:8080/tutorial/add.
Form Page
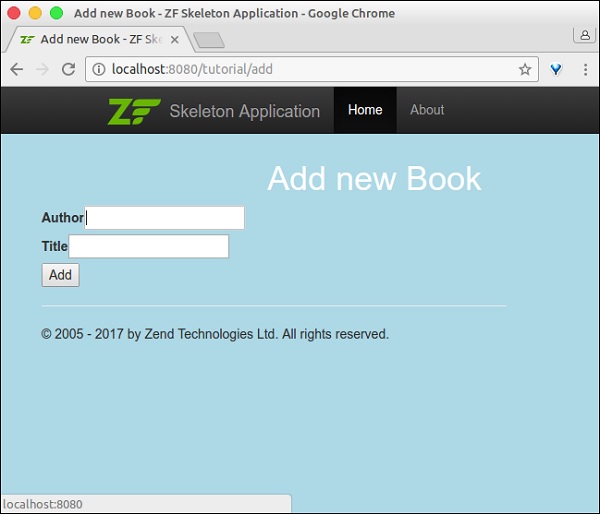
Validate Error Page
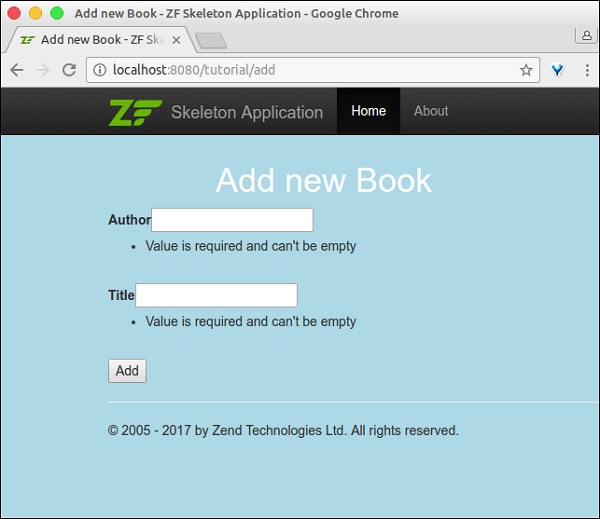
Zend Framework - File Uploading
File uploading is one of the main concept in form programming. Zend framework provides all the necessary items to upload files through the zend-form and the zend-inputfilter component.
FileInput Class
The zend-inputfilter component provides Zend\InputFilter\FileInput class to handle the html file input element <input type = 'file' />. The FileInput is like the other input filters with a few exceptions. They are as follows −
Since PHP saves the uploaded file details in $_FILES global array, the FileInput gathers the uploaded file information through $_FILES only.
Validation needs to be done before the FileInput class processes the data. It is the opposite behavior of the other input filters.
The Zend\Validator\File\UploadFile is the default validator to be used. The UploadFile validates the file input details.
To add a file upload type in a form, we need to use input type File. The partial code is as follows −
$form->add(array(
   'name' => 'imagepath',
   'type' => 'File',
   'options' => array('label' => 'Picture',),
));
Another class used in file uploading is Zend\Filter\File\RenameUpload. The RenameUpload is used to move the uploaded file to our desired location. The partial class to use file filter is as follows −
$file = new FileInput('imagepath');
$file->getValidatorChain()->attach(new UploadFile());
$file->getFilterChain()->attach(
   new RenameUpload([
      'target'    => './public/tmpuploads/file',
      'randomize' => true,
      'use_upload_extension' => true
   ]));
$inputFilter->add($file);
Here, the options of RenameUpload are as follows −
target − The destination path of the uploaded file.
randomize − Add a random string to prevent duplication of the uploaded file.
use_upload_extension − Append the file extension to the uploaded file to the target.
File Upload Working Example
Let us modify the tutorial module and include a picture upload feature.
Modify the database table
Let us add the imagepath column to the book table by executing the following SQL command −
ALTER TABLE `book` ADD `imagepath` VARCHAR(255) NOT NULL AFTER 'imagepath';
Update BookForm.php
Add the file input element to upload a picture in the book form myapp/module/Tutorial/src/Model/BookForm.php.
Include the following code in the __constructmethod of the BookForm class.
$this->add(array(
   'name' => 'imagepath',
   'type' => 'File',
   'options' => array ('label' => 'Picture',),
));
Update Book.php
Do the following changes in the Book class myapp/module/Tutorial/src/Model/Book.php.
Add a new property imagepath for the picture.
public $imagepath;
Update the getInputFilter method as shown below −
Add the FileInput filter for file input element.
Set the UploadFile validation to validate the file input element.
Configure the RenameUpload to move the uploaded file to the proper destination.
The partial code listing is as follows −
$file = new FileInput('imagepath');
$file->getValidatorChain()->attach(new UploadFile());
$file->getFilterChain()->attach(
   new RenameUpload([
      'target'    => './public/tmpuploads/file',
      'randomize' => true, 'use_upload_extension' => true
   ]));
$inputFilter->add($file);
Update the exchangeArray method to include the imagepath property. The imagepath may come from a form or a database. If the imagepath comes from a form, the format will be an array with the following specification −
array(1) {
   ["imagepath"] => array(5) {
      ["name"]     => string "myimage.png"
      ["type"]     => string "image/png"
      ["tmp_name"] => string
         "public/tmpuploads/file_<random_string>.<image_ext>"
      ["error"]    => int <error_number>
      ["size"]     => int <size>
   }
}
If the imagepath comes from a database, it will be a simple string. The partial code listing to parse an imagepath is as follows −
if(!empty($data['imagepath'])) {
   if(is_array($data['imagepath'])) {
      $this->imagepath = str_replace("./public", "", $data['imagepath']['tmp_name']);
   } else {
      $this->imagepath = $data['imagepath'];
   }
} else {
   $data['imagepath'] = null;
}
The complete listing of the Book model is as follows −
<?php
namespace Tutorial\Model;
use Zend\InputFilter\InputFilterInterface;
use Zend\InputFilter\InputFilterAwareInterface;
use Zend\Filter\File\RenameUpload;
use Zend\Validator\File\UploadFile;
use Zend\InputFilter\FileInput;
use Zend\InputFilter\InputFilter;

class Book implements InputFilterAwareInterface {
   public $id;
   public $author;
   public $title;
   public $imagepath;
   protected $inputFilter;
   public function setInputFilter(InputFilterInterface $inputFilter) {
      throw new \Exception("Not used");
   }
   public function getInputFilter() {
      if (!$this->inputFilter) {
         $inputFilter = new InputFilter();
         $inputFilter->add(array(
            'name' => 'id',
            'required' => true,
            'filters' => array(
               array('name' => 'Int'),
            ),
         ));
         $inputFilter->add(array(
            'name' => 'author',
            'required' => true,
            'filters' => array(
               array('name' => 'StripTags'),
               array('name' => 'StringTrim'),
            ),
            'validators' => array(
               array(
                  'name' => 'StringLength',
                  'options' => array(
                     'encoding' => 'UTF-8',
                     'min' => 1,
                     'max' => 100,
                  ),
               ),
            ),
         ));
         $inputFilter->add(array(
            'name' => 'title',
            'required' => true,
            'filters' => array(
               array('name' => 'StripTags'),
               array('name' => 'StringTrim'),
            ),
            'validators' => array(
               array(
                  'name' => 'StringLength',
                  'options' => array(
                     'encoding' => 'UTF-8',
                     'min' => 1,
                     'max' => 100,
                  ),
               ),
            ),
         ));
         $file = new FileInput('imagepath');
         $file->getValidatorChain()->attach(new UploadFile());
         $file->getFilterChain()->attach(
            new RenameUpload([
               'target'    => './public/tmpuploads/file',
               'randomize' => true,
               'use_upload_extension' => true
            ]));
            $inputFilter->add($file);
            $this->inputFilter = $inputFilter;
      }
      return $this->inputFilter;
   }
   public function exchangeArray($data) {
      $this->id = (!empty($data['id'])) ? $data['id'] : null;
      $this->author = (!empty($data['author'])) ? $data['author'] : null;
      $this->title = (!empty($data['title'])) ? $data['title'] : null;

      if(!empty($data['imagepath'])) {
         if(is_array($data['imagepath'])) {
            $this->imagepath = str_replace("./public", "",
               $data['imagepath']['tmp_name']);
         } else {
            $this->imagepath = $data['imagepath'];
         }
      } else {
         $data['imagepath'] = null;
      }
   }
}
Update BookTable.php
We have updated BookForm and the Book model. Now, we update the BookTable and modify the saveBook method. This is enough to include the imagepath entry in the data array, $data.
The partial code listing is as follows −
$data = array('author' => $book->author, 'title'  => $book->title,
   'imagepath' => $book->imagepath
);
The complete code listing of the BookTable class is as follows −
<?php
namespace Tutorial\Model;
use Zend\Db\TableGateway\TableGatewayInterface;

class BookTable {
   protected $tableGateway;
   public function __construct(TableGatewayInterface $tableGateway) {
      $this->tableGateway = $tableGateway;
   }
   public function fetchAll() {
      $resultSet = $this->tableGateway->select();
      return $resultSet;
   }
   public function getBook($id) {
      $id  = (int) $id;
      $rowset = $this->tableGateway->select(array('id' => $id));
      $row = $rowset->current();
      if (!$row) {
         throw new \Exception("Could not find row $id");
      }
      return $row;
   }
   public function saveBook(Book $book) {
      $data = array (
         'author' => $book->author,
         'title'  => $book->title,
         'imagepath' => $book->imagepath
      );
      $id = (int) $book->id;
      if ($id == 0) {
         $this->tableGateway->insert($data);
      } else {
         if ($this->getBook($id)) {
            $this->tableGateway->update($data, array('id' => $id));
         } else {
            throw new \Exception('Book id does not exist');
         }
      }
   }
}
Update addAction in the TutorialController.php: File upload information will be available in the $_FILES global array and it can be accessed using the Request's getFiles() method. So, merge both posted data and file upload information as shown below.
$post = array_merge_recursive(
   $request->getPost()->toArray(),
   $request->getFiles()->toArray()
);
The complete listing of the addAction() method is as follows −
public function addAction() {
   $form = new BookForm();
   $form->get('submit')->setValue('Add');
   $request = $this->getRequest();
   if ($request->isPost()) {
      $book = new Book();
      $form->setInputFilter($book->getInputFilter());
      $post = array_merge_recursive(
         $request->getPost()->toArray(),
         $request->getFiles()->toArray()
      );
      $form->setData($post);
      if ($form->isValid()) {
         $book->exchangeArray($form->getData());
         $this->bookTable->saveBook($book);

         // Redirect to list of Tutorial
         return $this->redirect()->toRoute('tutorial');
      }
   }
   return array('form' => $form);
}
Update View of the add.phtml
Finally, change the add.phtml and include the imagepath file input element as shown below −
echo $this->formRow($form->get('imagepath'))."<br>";
The complete listing is as follows −
<?php
$title = 'Add new Book';
$this->headTitle($title);
?>
<h1><?php echo $this->escapeHtml($title); ?></h1>
<?php
if(!empty($form)) {
   $form->setAttribute('action', $this->url('tutorial', array('action' => 'add')));
   $form->prepare();
   echo $this->form()->openTag($form);
   echo $this->formHidden($form->get('id'));
   echo $this->formRow($form->get('author'))."<br>";
   echo $this->formRow($form->get('title'))."<br>";
   echo $this->formRow($form->get('imagepath'))."<br>";
   echo $this->formSubmit($form->get('submit'));
   echo $this->form()->closeTag();
}
Run the application
Finally, run the application at http://localhost:8080/tutorial/add and add the new records.
The result will be as shown in the following screenshots −
Form Page
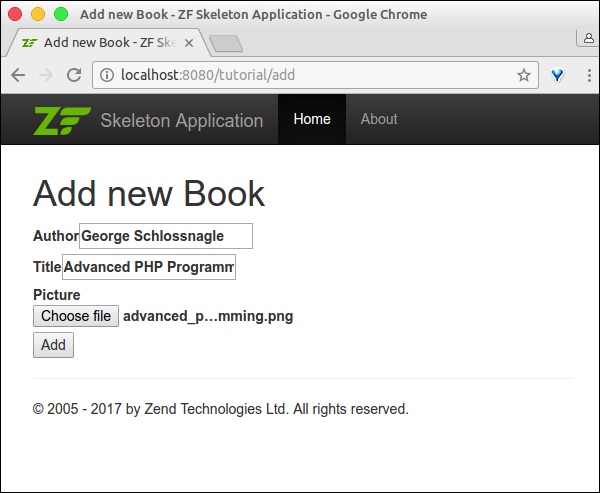
Index Page
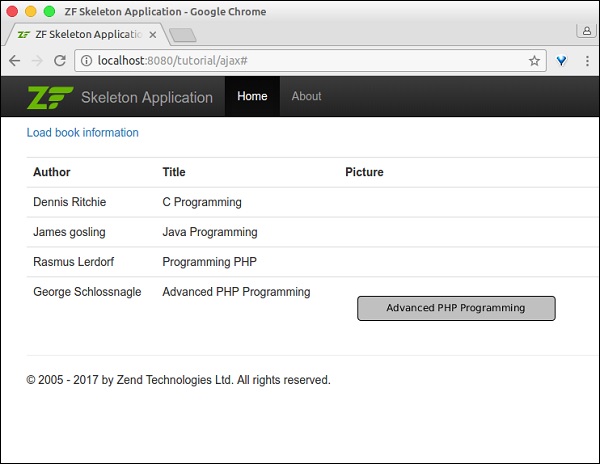
Zend Framework - Ajax
AJAX is a modern technology in web programming. It provides options to send and receive data in a webpage asynchronously, without refreshing the page. Zend framework provides an option to work with the json model through zend-view and zend-json component. Let us learn the Zend AJAX programming in this chapter.
Install json component
The Zend json component can be installed using the Composer command as specified below −
composer require zendframework/zend-json
Concept
Zend framework provides two methods to easily write an AJAX enabled web application. They are as follows −
The isXmlHttpRequest() method in the Request object If an AJAX request is made, the request object's isXmlHttpRequest() method returns true, otherwise false. This method is used to handle an AJAX request properly in the server side.
if ($request->isXmlHttpRequest()) {
   // Ajax request
} else {
   // Normal request
}
The Zend/View/Model/JsonModel The JsonModel is an alternative for ViewModel to be used exclusively for AJAX and the REST API scenarios. The JsonModel along with JsonStrategy (to be configured in the module's view manager block) encodes the model data into Json and returns it as a response instead of views (phtml).
AJAX Working Example
Let us add a new ajax page, ajax in the tutorial module and fetch the book information asynchronously. To do this, we should adhere to the following steps.
Step 1: Add JsonStrategy in module configuration
Update the view manager block in the tutorial module configuration file myapp/module/Tutorial/config/module.config.php. Then, JsonStrategy will work with JsonModel to encode and send the json data.
'view_manager' => [
   'template_map' => array
      ('layout/layout' => __DIR__ . '/../view/layout/newlayout.phtml'),
   'template_path_stack' => [
      'tutorial' => __DIR__ . '/../view',
   ],
   'strategies' => array('ViewJsonStrategy',),
],
Step 2: Add ajaxAction method in the TutorialController.php
Add the ajaxAction method in the TutorialController.php with the following code −
public function ajaxAction() {
   $data = $this->bookTable->fetchAll();
   $request = $this->getRequest();
   $query = $request->getQuery();
   if ($request->isXmlHttpRequest() || $query->get('showJson') == 1) {
      $jsonData = array();
      $idx = 0;
      foreach($data as $sampledata) {
         $temp = array(
            'author' => $sampledata->author,
            'title' => $sampledata->title,
            'imagepath' => $sampledata->imagepath
         );
         $jsonData[$idx++] = $temp;
      }
      $view = new JsonModel($jsonData);
      $view->setTerminal(true);
   } else {
      $view = new ViewModel();
   }
   return $view;
}
Here, ajaxAction will check whether the incoming request is AJAX or not. If the incoming request is AJAX, then the JsonModel will be created. Otherwise, a normal ViewModel will be created.
In both cases, the book information will be fetched from database and populated in the model. If the model is a JsonModel, then JsonStrategy will be invoked and it will encode the data as json and return as response.
The $query->get('showJson') == 1 is used for debugging purposes. Just add showJson=1 in the url and the page will display the json data.
Step 3: Add ajax.phtml
Now, add the view script ajax.phtml for the ajaxAction method. This page will have a link with the label Load book information.
Clicking that link will do an AJAX request, which will fetch the book information as Json data and shows the book information as a formatted table. The AJAX processing is done using the JQuery.
The complete code listing is as follows −
<a id = "loadbook" href = "#">Load book information</a>
</br> </br>

<table class = "table">
   <tbody id = "book">
   </tbody>
</table>

<script language = "javascript">
$(document).ready(function(){
   $("#loadbook").on("click", function(event){
      $.ajax({
         url:        '/tutorial/ajax',
         type:       'POST',
         dataType:   'json',
         async:      true,

         success: function(data, status) {
            var e = $('<tr><th>Author</th><th>Title</th><th>Picture</th></tr>');
            $('#book').html('');
            $('#book').append(e);

            for(i = 0; i < data.length; i++) {
               book = data[i];
               var e = $('<tr><td id = "author"></td><td id = "title"></td>
               <td id="imagepath"><img src = ""/></td></tr>');
               $('#author', e).html(book['author']);
               $('#title', e).html(book['title']);
               $('#imagepath img', e).attr('src', book['imagepath']);
               $('#book').append(e);
            }
         },
         error : function(xhr, textStatus, errorThrown) {
            alert('Ajax request failed.');
         }
      });
   });
});
</script>
Step 4: Run the application
Finally, run the application − http://localhost:8080/tutorial/ajax and click the Load book information link.
The result will be as shown below −
Ajax Page −
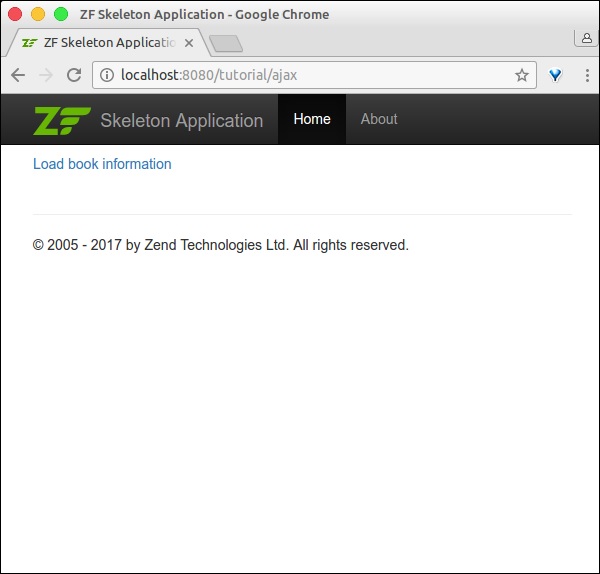
Ajax Page with Book Information
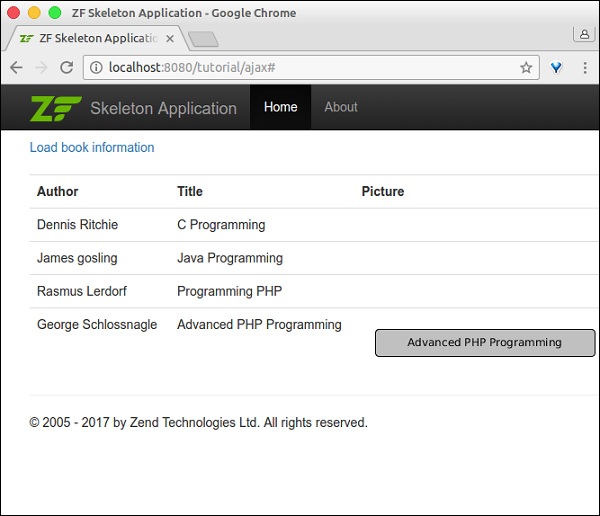
Ajax page with debugging information
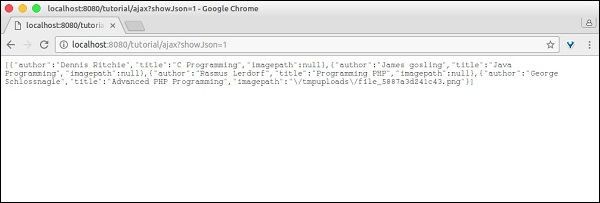
Zend Framework - Cookie Management
The Cookie is a very important concept in a web application. It provides the option to persist the user's data, usually a small piece of information in the browser itself for a limited period.
A Cookie is used to maintain the state of the web application. Zend framework provides a cookie module inside the zend-http component. This zend-http provides the HTTP abstraction and its implementation.
Installing the HTTP Component
The HTTP component can be easily installed using the Composer as specified in the code below.
composer require zendframework/zend-http
Concept
The zend-http provides the Zend\Http\Cookies class to manage cookies. It is used along with the Zend\Http\Client class, which is used to send a request to a web server. Cookies can be initialized as shown in the code below −
use Zend\Http\Cookies
$c = new Cookies();
When the HTTP client (Zend\Http\Client) first sends a URI request to the web server, it does not have any cookie. Once the request is received by the web server, it includes the cookie in its response object as the HTTP Header, Set-Cookie and sends it to the HTTP client. The HTTP client will extract the cookie from the http response and resent it as same HTTP Header in the subsequent request. Generally, each cookie will be mapped to a domain and a path of the domain.
The methods available in Cookies class are as follows −
addCookie(uri) − It is used to add a cookie into the request object of the given URI.
getCookie(cookieName, $cookieForm) − It is used to get the cookie, $cookieName available in the given URI, $uri. The third argument is how the cookie will be returned, either string or array.
fromResponse(uri) − It is used to extract cookies from the response object of the given URI.
addCookiesFromResponse − It is same as fromResponse, but it extracts and adds it again into the request object of the given URI.
isEmpty() − It is used to find whether the given Cookie object has any cookie or not.
reset() − It is used to clear all the cookies in the given URI.
In the next chapter, we will discuss regarding session management in the Zend Framework.
Zend Framework - Session Management
A Session is a very important concept in a web application. It provides the option to persist the user's data in the web server for a limited period of time. Zend framework provides a separate component, zend-session to handle the session information.
Install a Session Component
Session component can be installed using the Composer as specified below −
composer require zendframework/zend-session
Session Components
Zend framework provides six components to handle session management. All these components have been explained below −
Zend\Session\Container − The main API to read and write the session information.
Zend\Session\SessionManager − It is used to manage the entire lifecycle of a session.
Zend\Session\Storage − This is used to specify how the session data will be stored in the memory.
Zend\Session\SaveHandler − It is used to store and retrieve the session data into a physical location like RDBMS, Redis, MangoDB, etc.
Zend\Session\Validator − This is used to protect session from hijacking by cross-checking initial and subsequent request's remote address and user agent.
Zend\Session\Config\SessionConfig − It is used to configure how the session should behave.
The default configuration is enough to work with a session. Using the above components, all aspects of a session can be handled easily.
Session Component Example
Let us adhere to the following points to create a new page to understand a session in Zend framework. By default, it is enough to create an instance of a Container class to manage sessions.
Create a new action, sessionAction in TutorialController.
Initialize a Container object.
$c = new Container();
Check whether an arbitrary key count exists. If the key is not available, initialize the count with value 1. If it is available, increment the value as shown in the following code.
if (!isset($c->count)) {
   $c->count = 0;
} else {
   $c->count++;
}
Register the count in the ViewModel.
Create a template file for sessionAction, session.phtml in myapp/module/Tutorial/view/tutorial/tutorial/session.phtml and then render the count value.
Refreshing the page will increase the value of count in the session. The complete listing is as follows −
TutorialController.php
public function sessionAction() {
   $c = new Container();
   if (!isset($c->count)) {
      $c->count = 0;
   } else {
      $c->count++;
   }
   $view = new ViewModel([
      'count' => $c->count,
   ]);
   return $view;
}
session.pthml
Session data, COUNT = <?= $this->count ?>
Sample Result
Session data, Count = 5
Zend Framework - Authentication
Authentication is one of the most significant and must-have feature in any web application. Zend Framework provides a separate component to handle authentication, which is called as the zend-authentication.
Install an Authentication Component
The authentication component can be installed using the following Composer command.
composer require zendframework/zend-authentication
Concept
Usually, a developer writes a php function to authenticate the user details against a datasource. Once the authentication is done, the authentication details are persisted for subsequent requests. Zend Framework generalizes this concept and provides two classes, which are explained below −
Class 1 Zend\Authentication\Adaptor\AdaptorInterface
This class provides a single method, authenticate to write the authentication logic. The authenticate method returns an instance of Zend\Authentication\Result class.
This Result object holds the authentication status; identity if the authentication succeeds and an error message, if the authentication fails. The signature of the authenticate interface and result class is as follows −
AdaptorInterface
namespace Zend\Authentication\Adaptor;
public function authenticate() {
   // code
}
Result class
namespace Zend\Authentication;
class Result {
   public function __construct($code, $identity, array $messages = []);
}
The Zend Framework provides a default implementation to authenticate against the database, ldap, http basic and digest credentials. An Adaptor authenticates but does not persist the details for any future requests.
Class 2 Zend\Authentication\AuthenticationService
The AuthenticationService is the main component, which uses the already configured adaptor for authentication purposes. Once the authentication is done, it persists the authentication details and provides methods, hasIdentity() to check whether an identity is available, getIdentity() to get the authentication details and clearIdentity() to clear the authentication details.
The partial code listing to use this AuthenticationService is as follows −
$adap = new Adapter($username, $password);
$auth = new AuthenticationService();
$result = $auth->authenticate($adap);
if($result->isValid) {
   $identity = $auth->getIdentity();
} else {
   // process $result->getMessages()
}
// clear
$auth->clearIdentity();
The stuff related to authorization are packaged as two separate modules, which are zend-permissions-acl and zend-permissions-rbac. The zend-permissions-acl is based on the Access control list and the zend-permissions-rbac is based on the role based access control list. They provide high-level abstraction of ACL & RBAC concept and aids in writing the enterprise grade application.
Zend Framework - Email Management
The Zend Framework provides a separate component called as zend-mail to send email messages. The zend-mail component also provides an option to read and write email messages with attachments both in text and html format. Sending an email in Zend is much easier and simple to configure.
Let us go through the email concepts, basic settings, advanced settings such as SMTP transport, etc., in this chapter.
Install Mail Component
The mail component can be installed using the following Composer command.
composer require zendframework/zend-mail
Basic Email Configuration
A basic email consists of one or more recipients, a subject, a body and a sender. Zend provides Zend\Mail\Message class to create a new email message. To send an email using the zend-mail, you must specify at least one recipient as well as a message body.
The partial code to create a new mail message is as follows −
use Zend\Mail;
$mail = new Mail\Message();
$mail->setSubject('Zend email sample');
$mail->setBody('This is content of the mail message');
$mail->setFrom('sender@example.com', "sender-name");
$mail->addTo('recipient@test.com', "recipient-name");
Zend provides Zend\Mail\Sendmail class to send the mail message. Sendmail uses the php native mail function, mail to send the mail message and we can configure the transport layer using php configuration file.
The partial coding using Sendmail is as follow −
$transport = new Mail\Transport\Sendmail();
$transport->send($mail);
The zend-mail provides many transport layer and each may require many additional parameters such as username, password, etc
Email Management Methods
Some of the notable email management methods are as follows −
isValid − Messages without a From address is invalid.
isValid() : bool
setEncoding − Set the message encoding.
setEncoding(string $encoding) : void
getEncoding − Get the message encoding.
getEncoding() : string
setHeaders − Compose headers.
setHeaders(Zend\Mail\Headers $headers) : void
getHeaders − Access headers collection.
getHeaders() : Zend\Mail\Headers
setFrom − Set (overwrite) From addresses. It contains a key/value pairs where the key is the human readable name and the value is the email address.
setFrom(
   string|AddressInterface|array|AddressList|Traversable $emailOrAddressList,
      string|null $name
) : void
addFrom − Add a From address.
addFrom(
   string|AddressInterface|array|AddressList|Traversable $emailOrAddressOrList,
      string|null $name
) : void
getFrom − Retrieve list of From senders.
getFrom() : AddressList
setTo - Overwrite the address list in the To recipients.
setTo(
   string|AddressInterface|array|AddressList|Traversable $emailOrAddressList,
      null|string $name
) : void
setSubject − Set the message subject header value.
setSubject(string $subject) :void
setBody − Set the message body.
setBody(null|string|Zend\Mime\Message|object $body) : void
SMTP Transport Layer
The zend-mail provides options to send an email using the SMTP server through the Zend\Mail\Transport\Smtpclass. It is like Sendmail except that it has a few additional options to configure the SMTP host, port, username, password, etc.
The partial code is as follows −
use Zend\Mail\Transport\Smtp as SmtpTransport;
use Zend\Mail\Transport\SmtpOptions;
$transport = new SmtpTransport();
$options = new SmtpOptions([
   'name' => 'localhost',
   'host' =>'smtp.gmail.com',
   'port' => 465,
]);
$transport->setOptions($options);
Here,
name − Name of the SMTP host.
host − Remote hostname or IP address.
port − Port on which the remote host is listening.
Mail Concept Example
Let us follow the following points to write a simple php console application to understand the mail concept.
Create a folder mailapp.
Install zend-mail using the composer tool.
Create a php file Mail.php inside the mailapp folder.
Create the message using the Zend\Mail\Message.
$message = new Message();
$message->addTo('user1@gmail.com');
$message->addFrom('user2@gmail.com');
$message->setSubject('Hello!');
$message->setBody("My first Zend-mail application!");
Create the SMTP transport layer and add the necessary configuration.
// Setup SMTP transport using LOGIN authentication
$transport = new SmtpTransport();
$options = new SmtpOptions([
   'name' => 'localhost',
   'host' => 'smtp.gmail.com', // or any SMTP server
   'port' => 465, // port on which the SMTP server is listening
   'connection_class' => 'login',
   'connection_config' => [
      username' => '<your username>', 'password' => '<your password>',
      'ssl' => 'ssl'],
]);
$transport->setOptions($options);
Send the email using the send method.
$transport->send($message);
The complete listing, Mail.php is as follows −
<?php
require __DIR__ . '/vendor/autoload.php';

use Zend\Mail\Message;
use Zend\Mail\Transport\Smtp as SmtpTransport;
use Zend\Mail\Transport\SmtpOptions;

$message = new Message();
$message->addTo('user1@gmail.com');
$message->addFrom('user2@gmail.com');
$message->setSubject('Hello!');
$message->setBody("My first Zend-mail application!");

// Setup SMTP transport using LOGIN authentication
$transport = new SmtpTransport();
$options = new SmtpOptions([
   'name' => 'localhost',
   'host' => 'smtp.gmail.com', // or any SMTP server
   'port' => 465, // port on which the SMTP server is listening
   'connection_class' => 'login',
   'connection_config' => [
      'username' => '<your username>', 'password' => '<your password>',
      'ssl' => 'ssl'],
]);
$transport->setOptions($options);
$transport->send($message);
Now, run the application in the command prompt php Mail.php. This will send the mail as configured in the application.
Zend Framework - Unit Testing
In general, we can debug a PHP application by using the advanced debugger tool or by using simple commands like echo and die. In a web scenario, we need to test the business logics as well as the presentation layer. Forms in a web application can be tested by entering relevant test data to ensure that the forms are working as expected.
The design of a website can be tested manually by using a browser. These type of test processes can be automated using unit testing. A unit test is essential in large projects. These unit tests will help to automate the testing process and alert the developer when something goes wrong.
Setting up the PHPUnit
Zend framework integrates with the PHPUnit unit testing framework. To write a unit test for the Zend framework, we need to setup the PHPUnit, which can be easily done by using the following Composer command.
$ composer require --dev phpunit/phpunit
After executing the above command, you will get a response as shown in the following code block.
Using version ^5.7 for phpunit/phpunit
./composer.json has been updated
Loading composer repositories with package information
Updating dependencies (including require-dev)
Nothing to install or update
Writing lock file
Generating autoload files
Now, when you open the composer.json file, you will see the following changes −
"require-dev": {
   "phpunit/phpunit": "^5.7"
}
TestCase and Assertions
The Zend framework provides helper classes to unit test the controller. The TestCase is the main component in a PHPUnit framework to write the test cases and the Zend Framework provides an abstract implementation of the TestCase that is called as the AbstractHttpControllerTestCase.
This AbstractHttpControllerTestCase provides various Assert methods and can grouped by functionality. They are as follows −
Request Assertions − Used to assert the http request. For example, assertControllerName.
CSS Select Assertions − Used to check the response HTML using the HTML DOM model.
XPath Assertions − An alternative to the CSS select assertions based on the XPath.
Redirect Assertions − Used to check the page redirection.
Response Header Assertions − Used to check the response header like status code (assertResponseStatusCode)
Create Tests Directory
A unit test can be written separately for each module. All test related coding need to be created inside the test folder under the module's root directory.
For example, to write a test for the TutorialController available under the Tutorial module, the test class needs to be placed under myapp/module/Tutorial/test/Controller/ directory.
Example
Let us write a test class to unit test the TutorialController.
To begin with, we should write a class called TutorialControllerTest and extend it to the AbstractHttpControllerTestCase.
The next step is to write a Setup method to setup the test environment. This can be done by calling the setApplicationConfig method and passing our main application config file myapp/config/application.config.php
public function setUp() {
   $configOverrides = [];
   $this->setApplicationConfig(ArrayUtils::merge(
      include __DIR__ . '/../../../../config/application.config.php',
         $configOverrides
   ));
   parent::setUp();
}
Write one or more methods and call various assert methods depending on the requirement.
$this->assertMatchedRouteName('tutorial');
We have written the test class and the complete listing is as follows −
<?php
namespace TutorialTest\Controller;
use Tutorial\Controller\TutorialController;
use Zend\Stdlib\ArrayUtils;
use Zend\Test\PHPUnit\Controller\AbstractHttpControllerTestCase;

class TutorialControllerTest extends AbstractHttpControllerTestCase {
   public function setUp() {
      $configOverrides = [];
      $this->setApplicationConfig(ArrayUtils::merge(
         include __DIR__ . '/../../../../config/application.config.php',
            $configOverrides
      ));
      parent::setUp();
   }
   public function testIndexActionCanBeAccessed() {
      $this->dispatch('/tutorial', 'GET');
      $this->assertResponseStatusCode(200);
      $this->assertModuleName('tutorial');
      $this->assertControllerName(TutorialController::class);
      $this->assertControllerClass('TutorialController');
      $this->assertMatchedRouteName('tutorial');
   }
}
Now, open a command prompt, move on to application root directory and execute the phpunit executable available inside the vendor folder.
cd /path/to/app
./vendor/bin/phpunit ./vendor/bin/phpunit module/
   Tutorial/test/Controller/TutorialControllerTest.php
The result will be as shown in the following code block −
PHPUnit 5.7.5 by Sebastian Bergmann and contributors.
.1 / 1 (100%)
Time: 96 ms, Memory: 8.00MB
OK (1 test, 5 assertions)
Zend Framework - Error Handling
Failure of system needs to be handled effectively for the smooth running of the system. Zend Framework comes with a default error trapping that prints and logs the error as they occur. This same error handler is used to catch Exceptions.
The Error Handler displays errors when the debug is true and logs the error when the debug is false. Zend Framework has several exception classes and the built-in exception handling will capture any uncaught exception and render a useful page.
Default Error Handling
We can configure the default error settings in the application configuration file, myapp/module/Application/config/module.config.php.
The partial code sample is as follows −
'view_manager' => [
   'display_not_found_reason' => true,
   'display_exceptions'       => true,
   'doctype'                  => 'HTML5',
   'not_found_template'       => 'error/404',
   'exception_template'       => 'error/index',
   'template_map' => [
      'layout/layout'           => __DIR__ . '/../view/layout/layout.phtml',
      'application/index/index' => __DIR__ . '/../view/application/index/index.phtml',
      'error/404'               => __DIR__ . '/../view/error/404.phtml',
      'error/index'             => __DIR__ . '/../view/error/index.phtml',
   ],
   'template_path_stack' => [
      __DIR__ . '/../view',
   ],
],
Here, the display_exception, not_found_template, exception_template, error/404 and the error/index are error related configuration items and are self-explanatory.
The most important item among these is the error/index. This is the template shown when an exception occurs in the system. We can modify this template, myapp/module/Application/view/error/index.phtml to control the amount of error to be shown.
Zend Framework - Working Example
In this chapter, we will learn how to create a complete MVC based Employee Application in Zend Framework. Follow the steps given below.
Step 1: Module.php
First, we should create an Employee module inside the myapp/module/Employee/src/ directory and then implement the ConfigProviderInterface interface.
The complete code for the Module class is as follows −
<?php
namespace Employee;
use Zend\ModuleManager\Feature\ConfigProviderInterface;
class Module implements ConfigProviderInterface {
   public function getConfig() {
      return include __DIR__ . '/../config/module.config.php';
   }
}
Step 2: composer.json
Configure the Tutorial module in composer.json under the autoload section by using the following code.
"autoload": {
   "psr-4": {
      "Application\\": "module/Application/src/",
      "Tutorial\\": "module/Tutorial/src/",
      "Employee\\": "module/Employee/src/"
   }
}
Now, update the application using a composer update command.
composer update
The Composer command will do the necessary changes to the application and show the logs as shown in the command prompt below.
Loading composer repositories with package information
Updating dependencies (including require-dev)
   - Removing zendframework/zend-component-installer (0.3.0)
   - Installing zendframework/zend-component-installer (0.3.1)
   Downloading: 100%

   - Removing zendframework/zend-stdlib (3.0.1)
   - Installing zendframework/zend-stdlib (3.1.0)
   Loading from cache

   - Removing zendframework/zend-eventmanager (3.0.1)
   - Installing zendframework/zend-eventmanager (3.1.0)
   Downloading: 100%

   - Removing zendframework/zend-view (2.8.0)
   - Installing zendframework/zend-view (2.8.1)
   Loading from cache

   - Removing zendframework/zend-servicemanager (3.1.0)
   - Installing zendframework/zend-servicemanager (3.2.0)
   Downloading: 100%

   - Removing zendframework/zend-escaper (2.5.1)
   - Installing zendframework/zend-escaper (2.5.2)
   Loading from cache

   - Removing zendframework/zend-http (2.5.4)
   - Installing zendframework/zend-http (2.5.5)
   Loading from cache

   - Removing zendframework/zend-mvc (3.0.1)
   - Installing zendframework/zend-mvc (3.0.4)
   Downloading: 100%

   - Removing phpunit/phpunit (5.7.4)
   - Installing phpunit/phpunit (5.7.5)
   Downloading: 100%

Writing lock file
Generating autoload files
Step 3: module.config.php for the Employee Module
Create the module configuration file, module.config.php under the myapp/module/Employee/config with the following code.
<?php
namespace Employee;
use Zend\ServiceManager\Factory\InvokableFactory;
use Zend\Router\Http\Segment;
return [
   'controllers' => [
      'factories' => [
         Controller\EmployeeController::class => InvokableFactory::class,
      ],
   ],
   'view_manager' => [
      'template_path_stack' => ['employee' => __DIR__ . '/../view',],
   ],
];
Now, configure the Employee module in the application level configuration file myapp/config/modules.config.php.
return ['Zend\Router', 'Zend\Validator', 'Application', 'Tutorial', 'Employee'];
Step 4: EmployeeController
Create a new PHP class, EmployeeController by extending the AbstractActionController and place it at the myapp/module/Employee/src/Controller directory.
The complete code listing is as follows −
<?php
namespace Employee\Controller;
use Zend\Mvc\Controller\AbstractActionController;
use Zend\View\Model\ViewModel;
class EmployeeController extends AbstractActionController {
   public function indexAction() {
      return new ViewModel();
   }
}
Step 5: Router Configuration
Let us add a segment route in our Employee module. Update the employee module configuration file, module.config.php available at myapp/module/Employee/config.
<?php
namespace Employee;
use Zend\ServiceManager\Factory\InvokableFactory;
use Zend\Router\Http\Segment;
return [
   'controllers' => [
      'factories' => [
         Controller\EmployeeController::class => InvokableFactory::class,
      ],
   ],
   'router' => [
      'routes' => [
         'employee' => [
            'type' => Segment::class,
            'options' => [
               'route' => '/employee[/:action[/:id]]',
               'constraints' => [
                  'action' => '[a-zA-Z][a-zA-Z0-9_-]*',
                  'id' => '[0-9]+',
               ],
               'defaults' => [
                  'controller' => Controller\EmployeeController::class,
                  'action' => 'index',
               ],
            ],
         ],
      ],
   ],
   'view_manager' => [
      'template_path_stack' => [
         'employee' => __DIR__ . '/../view',
      ],
   ],
];
We have successfully added the routing for our Employee module. The next step is to create a view script for the Employee application.
Step 6: Create ViewModel
Create a file called as index.phtml under the myapp/module/Employee/view/employee/employee directory.
Add the following changes in the file −
<div class = "row content">
   <h3>This is my first Zend application</h3>
</div>
Move to EmployeeController.php file and edit the following changes,

<?php
namespace Employee\Controller;
use Zend\Mvc\Controller\AbstractActionController;
use Zend\View\Model\ViewModel;
class EmployeeController extends AbstractActionController {
   public function indexAction() {
      return new ViewModel();
   }
}
Finally, we have successfully completed the Employee module. we can access it using the following url − http://localhost:8080/employee.
Result
In the next step, we will perform add, edit and delete data operations in the employee application. To perform these operations, we should first create a database model. It is described in the next step.
Step 7: Create a Model
Let us create a model, Employee in our module src directory. Generally, models are grouped under the Model folder (myapp/module/Employee/src/Model/Employee.php)
<?php
namespace Employee\Model;
class Employee {
   public $id;
   public $emp_name;
   public $emp_job;
}
Step 8: MySQL Table
Create a database named as tutorials in the local MYSQL server using the following command −
create database tutorials;
Let us create a table named as employee in the database using following SQL command −
use tutorials;
CREATE TABLE employee (
   id int(11) NOT NULL auto_increment,
   emp_name varchar(100) NOT NULL,
   emp_job varchar(100) NOT NULL,
   PRIMARY KEY (id)
);
Insert data into the employee table using the following query −
INSERT INTO employee (emp_name, emp_job) VALUES ('Adam',  'Tutor');
INSERT INTO employee (emp_name, emp_job) VALUES ('Bruce',  'Programmer');
INSERT INTO employee (emp_name, emp_job) VALUES ('David',  'Designer');
Step 9: Update the Database Configuration
Update the Global Configuration file, myapp/config/autoload/global.php with the necessary database drive information.
return [
   'db' => [
      'driver' => 'Pdo',
      'dsn' => 'mysql:dbname = tutorials;host=localhost',
      'driver_options' => [PDO::MYSQL_ATTR_INIT_COMMAND => 'SET NAMES \'UTF8\''],
   ],
];
Now, Update the database credentials in the local configuration file myapp/config/autoload/local.php. In this way, we can separate local and live database connection credentials.
<?php
return array(
   'db' => array('username' => '<user_name>', 'password' => '<password>',),
);
Step 10: Implement exchangeArray
Implement exchangeArray function in Employee model.
<?php
namespace Employee\Model;
class Employee {
   public $id;
   public $emp_name;
   public $emp_job;
   public function exchangeArray($data) {
      $this->id = (!empty($data['id'])) ? $data['id'] : null;
      $this->emp_name = (!empty($data['emp_name'])) ? $data['emp_name'] : null;
      $this->emp_job = (!empty($data['emp_job'])) ? $data['emp_job'] : null;
   }
}
Step 11: Use TableGateway to fetch the Employee Data
Create the class, EmployeeTable in the Model folder itself. It is defined in the following code block.
<?php
namespace Employee\Model;
use Zend\Db\TableGateway\TableGatewayInterface;
class EmployeeTable {
   protected $tableGateway;
   public function __construct(TableGatewayInterface $tableGateway) {
      $this->tableGateway = $tableGateway;
   }
   public function fetchAll() {
      $resultSet = $this->tableGateway->select();
      return $resultSet;
   }
}
Step 12: Configure EmployeeTable Class
Update employee service in Module.php using getServiceConfig() method
<?php
namespace Employee;
use Zend\Db\Adapter\AdapterInterface;
use Zend\Db\ResultSet\ResultSet;
use Zend\Db\TableGateway\TableGateway;
use Zend\ModuleManager\Feature\ConfigProviderInterface;

class Module implements ConfigProviderInterface {
   public function getConfig() {
      return include __DIR__ . '/../config/module.config.php';
   }
   public function getServiceConfig() {
      return [
         'factories' => [
            Model\EmployeeTable::class => function (    $container) {
               $tableGateway = $container>get( Model\EmployeeTableGateway::class);
               $table = new Model\EmployeeTable($tableGateway);
               return $table;
            },
            Model\EmployeeTableGateway::class => function ($container) {
               $dbAdapter = $container->get(AdapterInterface::class);
               $resultSetPrototype = new ResultSet();
               $resultSetPrototype->setArrayObjectPrototype(new Model\Employee());
               return new TableGateway('employee', $dbAdapter, null, $resultSetPrototype);
            },
         ],
      ];
   }
}
Step 13: Add Employee Service in Controller
Update the controller section of the Employee Module Configuration in − myapp/module/config/module.config.php as shown below.
'controllers' => [
   'factories' => [
      Controller\EmployeeController::class => function($container) {
         return new Controller\EmployeeController(
            $container->get(Model\EmployeeTable::class)
         );
      },
   ],
]
Step 14: Add Constructor for EmployeeController
Add the constructor with EmployeeTable as the argument and edit the following changes.
<?php
namespace Employee\Controller;
use Zend\Mvc\Controller\AbstractActionController;
use Zend\View\Model\ViewModel;
use Employee\Model\Employee;
use Employee\Model\EmployeeTable;

class EmployeeController extends AbstractActionController {
   private $table;
   public function __construct(EmployeeTable $table) {
      $this->table = $table;
   }
   public function indexAction() {
      $view = new ViewModel([
         'data' => $this->table->fetchAll(),
      ]);
      return $view;
   }
}
Step 15: Display Employee Information in the view script index.phtml
Move to the file − index.phtml and make the following changes −
<?php
$title = 'Employee application';
$this->headTitle($title);
?>

<table class="table">
   <tr>
      <th>Employee Name</th>
      <th>Employee Job</th>
      <th>Edit/Delete operations</th>
   </tr>
   <?php foreach ($data as $empdata) : ?>
   <tr>
      <td><?php echo $this->escapeHtml($empdata->emp_name);?></td>
      <td><?php echo $this->escapeHtml($empdata->emp_job);?></td>
      <td>
         <a href="<?php echo $this->url('employee',
            array('action'=>'edit', 'id' =>$empdata->id));?>">Edit</a>
         <a href="<?php echo $this->url('employee',
            array('action'=>'delete', 'id' => $empdata->id));?>">Delete</a>
      </td>
   </tr>
   <?php endforeach; ?>
</table>
Now we have successfully created a database model and can fetch the records within the application.
Request the application using the url − http://localhost:8080/employee.
Result
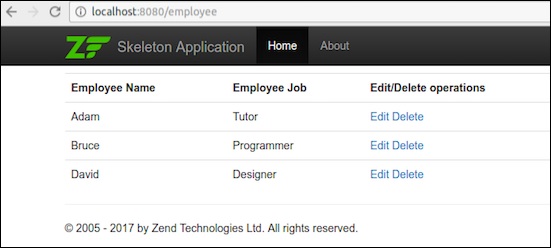
The next step explains about the insert, edit and delete data operations in the employee module.
Step 16: Create an Employee Form
Create a file called EmployeeForm.php in myapp/module/Employee/src/Form directory. It is described in the code block below.
<?php
namespace Employee\Form;
use Zend\Form\Form;

class EmployeeForm extends Form {
   public function __construct($name = null) {
      /
      / we want to ignore the name passed
      parent::__construct('employee');
      $this->add(array(
         'name' => 'id',
         'type' => 'Hidden',
      ));
      $this->add(array(
         'name' => 'emp_name',
         'type' => 'Text',
         'options' => array(
            'label' => 'Name',
         ),
      ));
      $this->add(array(
         'name' => 'emp_job',
         'type' => 'Text',
         'options' => array(
            'label' => 'Job',
         ),
      ));
      $this->add(array(
         'name' => 'submit',
         'type' => 'Submit',
         'attributes' => array(
            'value' => 'Go',
            'id' => 'submitbutton',
         ),
      ));
   }
}
Step 17: Update the Employee Model
Update the employee model and implement the InputFilterAwareInterface. Move to the directory myapp/module/Employee/src/Employee/Model and add the following changes in the Employee.phpfile.
<?php
namespace Employee\Model;

// Add these import statements
use Zend\InputFilter\InputFilter;
use Zend\InputFilter\InputFilterAwareInterface;
use Zend\InputFilter\InputFilterInterface;

class Employee implements InputFilterAwareInterface {
   public $id;
   public $emp_name;
   public $emp_job;
   protected $inputFilter;
   public function exchangeArray($data) {
      $this->id = (isset($data['id'])) ? $data['id'] : null;
      $this->emp_name = (isset($data['emp_name'])) ? $data['emp_name'] : null;
      $this->emp_job = (isset($data['emp_job']))  ? $data['emp_job'] : null;
   }

   // Add content to these methods:
   public function setInputFilter(InputFilterInterface $inputFilter) {
      throw new \Exception("Not used");
   }
   public function getInputFilter() {
      if (!$this->inputFilter) {
         $inputFilter = new InputFilter();
         $inputFilter->add(array(
            'name' => 'id',
            'required' => true,
            'filters' => array(
               array('name' => 'Int'),
            ),
         ));
         $inputFilter->add(array(
            'name' => 'emp_name',
            'required' => true,
            'filters' => array(
               array('name' => 'StripTags'),
               array('name' => 'StringTrim'),
            ),
            'validators' => array(
               array('name' => 'StringLength',
                        'options' => array(
                           'encoding' => 'UTF-8',
                           'min' => 1,
                           'max' => 50,
                        ),
                    ),
                ),
            ));
         $inputFilter->add(array(
            'name' => 'emp_job',
            'required' => true,
            'filters' => array(
               array('name' => 'StripTags'),
               array('name' => 'StringTrim'),
            ),
            'validators' => array(
               array('name' => 'StringLength',
                  'options' => array(
                     'encoding' => 'UTF-8',
                     'min' => 1,
                     'max' => 50,
                  ),
                  ),
               ),
         ));
         $this->inputFilter = $inputFilter;
      }
      return $this->inputFilter;
   }
}
Step 18: Add addAction in the Employee Controller
Add the following changes in the EmployeeController class.
<?php
use Zend\Mvc\Controller\AbstractActionController;
use Zend\View\Model\ViewModel;
use Employee\Model\Employee;
use Employee\Model\EmployeeTable;
use Employee\Form\EmployeeForm;

public function addAction() {
   $form = new EmployeeForm();
   $form->get('submit')->setValue('Add');
   $request = $this->getRequest();

   if ($request->isPost()) {
      $employee = new Employee();
      $form->setInputFilter($employee->getInputFilter());
      $form->setData($request->getPost());

      if ($form->isValid()) {
         $employee->exchangeArray($form->getData());
         $this->table->saveEmployee($employee);

         // Redirect to list of employees
         return $this->redirect()->toRoute('employee');
      }
   }
   return array('form' => $form);
}
Step 19: Add save functionality in the EmployeeTable class
Add the following two functions in the EmployeeTable class myapp/module/Employee/src/Model/EmployeeTable.php
public function getEmployee($id) {
   $id  = (int) $id;
   $rowset = $this->tableGateway->select(array('id' => $id));
   $row = $rowset->current();
   if (!$row) {
      throw new \Exception("Could not find row $id");
   }
   return $row;
}
public function saveEmployee(Employee $employee) {
   $data = array (
      'emp_name' => $employee->emp_name,
      'emp_job'  => $employee->emp_job,
   );
   $id = (int) $employee->id;
   if ($id == 0) {
      $this->tableGateway->insert($data);
   } else {
      if ($this->getEmployee($id)) {
         $this->tableGateway->update($data, array('id' => $id));
      } else {
         throw new \Exception('Employee id does not exist');
      }
   }
}
Step 20: Create View script for AddAction method, Add.phtml
Add the following changes in the Add.phtml file in the − myapp/module/view/employee/employee.
<?php
   $title = 'Add new employee';
   $this->headTitle($title);
?>
<h1><?php echo $this->escapeHtml($title); ?></h1>

<?php
   $form->setAttribute('action', $this->url('employee', array('action' => 'add')));
   $form->prepare();
   echo $this->form()->openTag($form);
   echo $this->formHidden($form->get('id'));
   echo $this->formRow($form->get('emp_name'))."<br>";
   echo $this->formRow($form->get('emp_job'))."<br>";
   echo $this->formSubmit($form->get('submit'));
   echo $this->form()->closeTag();
Request the application using the url, http://localhost:8080/employee/add
Result
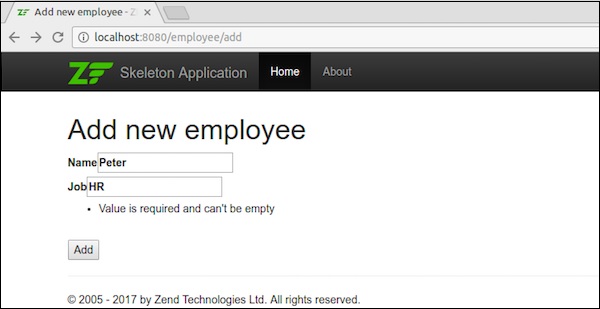
Once the data has been added, it will redirect to the home page.
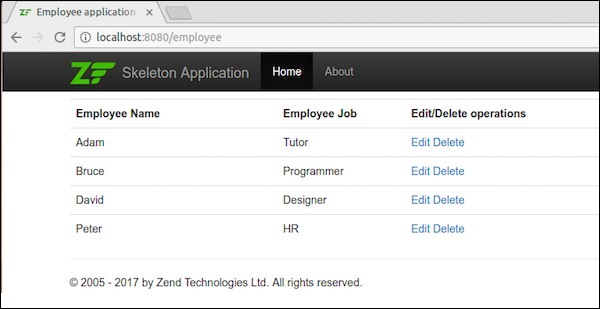
Step 21: Edit Employee Records
Let us perform the editing data operations in the Employee module. Update the following changes in the Employeecontroller.php.
public function editAction() {
   $id = (int) $this->params()->fromRoute('id', 0);
   if (!$id) {
      return $this->redirect()->toRoute('employee', array(
         'action' => 'add'
      ));
   }
   try {
      $employee = $this->table->getEmployee($id);
   } catch (\Exception $ex) {
      return $this->redirect()->toRoute('employee', array(
         'action' => 'index'
      ));
   }
   $form = new EmployeeForm();
   $form->bind($employee);
   $form->get('submit')->setAttribute('value', 'Edit');
   $request = $this->getRequest();

   if ($request->isPost()) {
      $form->setInputFilter($employee->getInputFilter());
      $form->setData($request->getPost());
      if ($form->isValid()) {
         $this->table->saveEmployee($employee);

         // Redirect to list of employees
         return $this->redirect()->toRoute('employee');
      }
   }
   return array('id' => $id, 'form' => $form,);
}
Here, we look for the id, which is in the matched route and then load the employee details for the editing operation.
Step 22: Employee.php
Now add the following changes in the Employee.php file, which resides in the − myapp/module/Employee/src/Employee/Model/ directory.
public function getArrayCopy() {
   return get_object_vars($this);
}
Here, the Zend\Stdlib\Hydrator\ArraySerializable expects to find two methods in the model: getArrayCopy() and exchangeArray().
In which, the exchangeArray() is used for iteration. This function is used for binding the data from the employee table.
Now, we need to create a view script for editAction().
Step 23: Create Edit.phtml
Create a view script file in the module/Employee/view/employee/employee/edit.phtml
<?php
   $title = 'Edit employee records';
   $this->headTitle($title);
?>
<h1><?php echo $this->escapeHtml($title); ?></h1>

<?php
$form = $this->form;
$form->setAttribute('action', $this->url(
   'employee',
   array('action' => 'edit', 'id' => $this->id,)
));
$form->prepare();
echo $this->form()->openTag($form);
echo $this->formHidden($form->get('id'));
echo $this->formRow($form->get('emp_name'))."<br>";
echo $this->formRow($form->get('emp_job'))."<br>";
echo $this->formSubmit($form->get('submit'));
echo $this->form()->closeTag();
Editing the employee details is shown in the following screenshot.
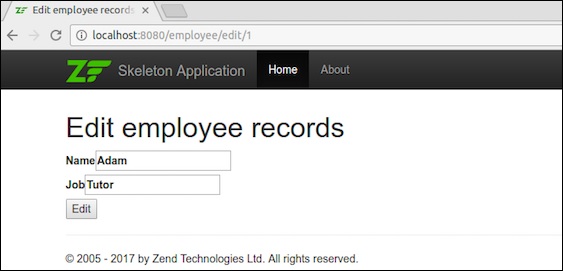
Once the data has been edited, it will redirect to the home page.
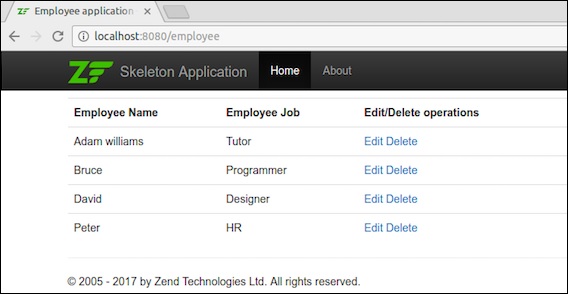
Step 24: Add deleteEmployee method
Add the deleteEmployee method in the EmployeeTable class myapp/module/Employee/src/Model/EmployeeTable.php
public function deleteEmployee($id) {
   $this->tableGateway->delete(['id' => (int) $id]);
}
Step 25: Delete the Employee Records
Let us now perform the deleting data operations in the Employee module. Add the following method, deleteAction in the EmployeeController class.
public function deleteAction() {
   $id = (int) $this->params()->fromRoute('id', 0);
   if (!$id) {
      return $this->redirect()->toRoute('employee');
   }
   $request = $this->getRequest();
   if ($request->isPost()) {
      $del = $request->getPost('del', 'No');
      if ($del == 'Yes') {
         $id = (int) $request->getPost('id');
         $this->table->deleteEmployee($id);
      }
      return $this->redirect()->toRoute('employee');
   }
   return array(
      'id' => $id,
      'employee' => $this->table->getEmployee($id)
   );
}
Here, the deleteEmployee() method deletes the employee by his id and redirects to the employees list page (home page).
Let us now create a corresponding view scripts for the deleteAction() method.
Step 26: Create a View Script
Create a file named delete.phtml in the − myapp/module/Employee/view/employee/employee/delete.phtml and add the following code in it.
<?php
   $title = 'Delete an employee record';
   $this->headTitle($title);
?>
<h1><?php echo $this->escapeHtml($title); ?></h1>

'<?php echo $this->escapeHtml($employee->emp_name); ?>' by
'<?php echo $this->escapeHtml($employee->emp_job); ?&'?
<?php
   $url = $this->url('employee', array('action' => 'delete', 'id' => $this->id,));
?>

<form action ="<?php echo $url; ?>" method = "post">
   <div>
      <input type = "hidden" name = "id" value = "<?php echo (int) $employee->id; ?>" />
      <input type = "submit" name = "del" value = "Yes" />
      <input type = "submit" name = "del" value = "No" />
   </div>
</form>
Now, delete any employee using the edit link in the home page and the result will be as shown in the following screenshot.
Result
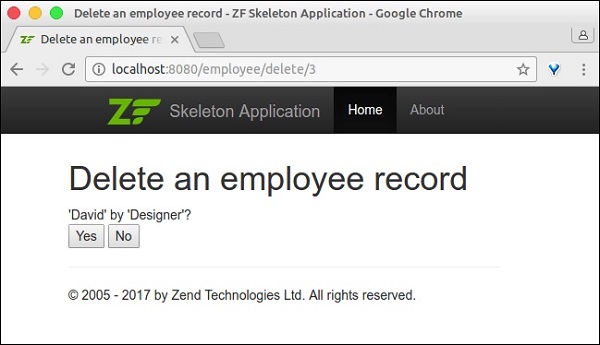
We have successfully completed the Employee module by implementing all necessary features.
Conclusion
In the current competitive environment, Zend framework is placed at the top spot by the developer. It provides abstractions to any program or any type of an application in the PHP language. It is a matured framework and supports modern PHP language features. It is fun, professional, evolving and keeping pace with the current technology.
