- Vim - Home
- Vim - Introduction
- Vim - Installation & Configuration
- Vim - It’s friends
- Vim - Getting familiar
- Vim - Getting help
- Vim - Editing
- Vim - Navigating
- Vim - Revisiting Editing
- Vim - Searching
- Vim - Working With Multiple Things
- Vim - Markers
- Vim - Macros
- Vim - Registers
- Vim - Folding
- Vim - Diff
- Vim - Plug-ins
- Vim - Using Vim as IDE
- Vim - Remote File Editing
- Vim - Tips & Tricks
- Vim - Personalization
- Vim - Conclusion
Vim - Using Vim As Ide
We can configure Vim to use it as an IDE. In this section, we will discuss following items
- Syntax highlighting
- Smart indentation
- Bounce
- Execute shell commands
- Configuring ctags and csope
- Auto-completion and auto-suggestion
Syntax highlighting
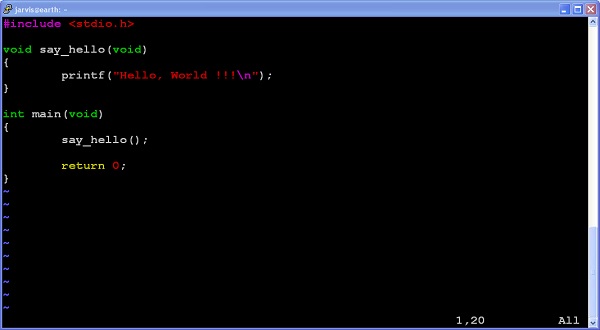
Syntax highlighting is one of the important features of IDE. To enable syntax highlighting use −
:syntax on
For instance, below image show syntax highlighting for C code −
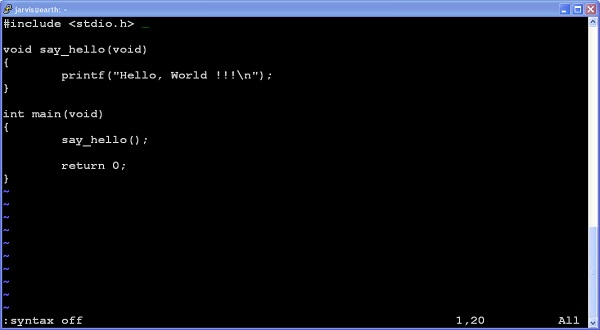
To disable syntax highlighting use −
:syntax off
When syntax highlighting is disabled, it will show following output −
Smart indentation
To perform auto and smart indentation use following commands −
: set autoindent
: set smartindent
In addition to this you can use below command to auto-indent C code −
: set cindent
Bounce
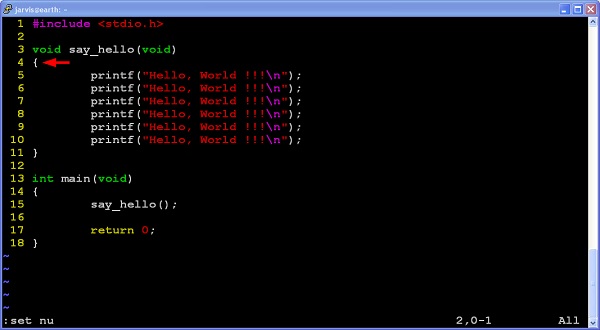
If you are using programming language which uses curly braces to combine multiple statements then % key will be your friend. This key will jump between start and end of curly braces quickly.
For instance, you are at line 11 and execute % command then it will move cursor the line 4. Below image shows this −
Execute shell commands
To execute single command from Vim editor user −
:!<command>
For instance, to execute pwd command use following syntax −
:!pwd
However, if you want to multiple shell commands then execute following command −
:shell
Above command will give you terminal access, where you can execute multiple commands. Once you are done with it, just type exit command which will return back to Vim session.
Configure ctags and cscope
Combination of ctags and csope provides many useful features like go to function definition, go to function declaration, find function calls, search file, and many more. Perform below steps to configure these tool −
- Generate tags using following command −
$ ctags <file>
This command will generate new file namely tags
- Provide tag file to vim using following command −
:set tags = tag
- Now move your cursor under function name and press Ctrl + ] to go to function definition.
- Use Ctrl + t to come back to previous position.
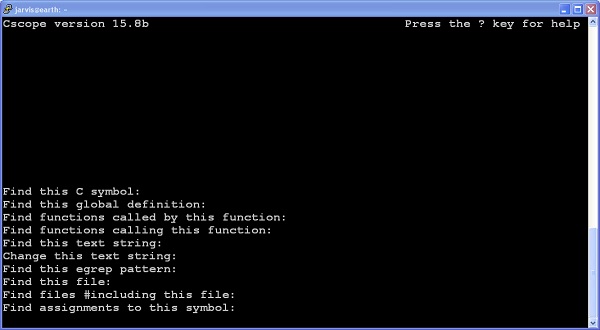
To install and configure cscope perform following steps −
- Install cscope
$ sudo apt-get install cscope
- Generate ctags and launch main window
$ cscope R
- User Ctrl + d to close cscope window
Auto-completion and auto-suggesting
We can use following commands for auto-completion −
| Sr.No | Command & Description |
|---|---|
| 1 | Ctrl + x Ctrl + N
Word completion |
| 2 | Ctrl + x Ctrl + L
Line completion |
| 3 | Ctrl + x Ctrl + F
File name completion |
Note that we have to use these commands in insert mode.
