- Vibe Coding - Home
- Vibe Coding - Overview
- Vibe Coding - Process
- Vibe Coding vs Traditional Programming
- Vibe Coding - Effective Prompts
- Vibe Coding - Product Requirement and Design
- Vibe Coding - Vibe Coding Tools
- Vibe Coding - Google AI Studio
- Vibe Coding - Firebase Studio
- Vibe Coding - Gemini Code Assist
- Vibe Coding - Claude AI
- Vibe Coding - Copilot
- Vibe Coding - Replit
- Vibe Coding - Pitfalls and Solutions
- Vibe Coding - Creating a Sample Project
Vibe Coding Useful Resources
Vibe Coding - Using Google AI Studio
Using Google AI studio is very easy. It is ideal for prototyping where we want to visualize our creative idea quickly and share it with stakeholders in a visually appealing manner. Google AI studio starts with a single prompt and creates a live app within seconds.
Step 1: Describe what you want in the application
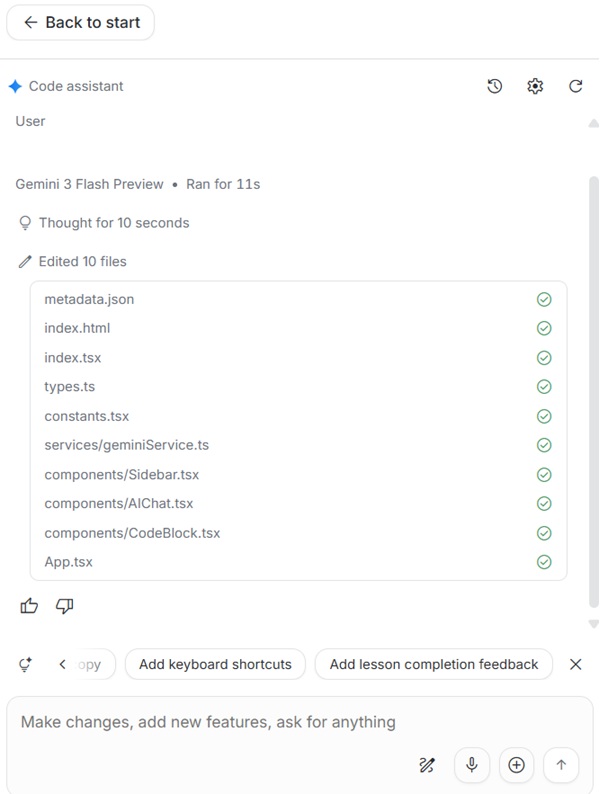
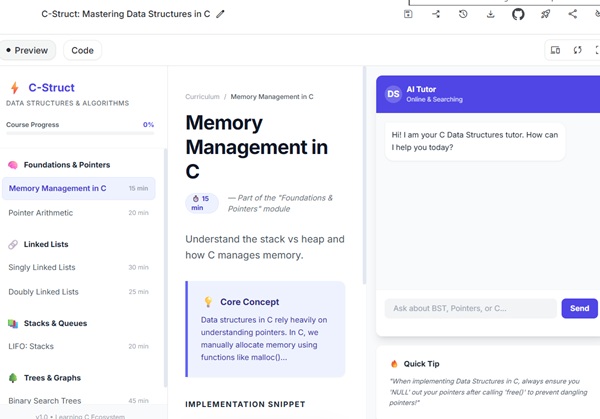
Open Google AI studio and in main text field, enter the idea and click on build button. Once you run the prompt, Gemini, the generative AI of Googles starts working, showing you the progress of the application code being generated. Once code is generated, it shows the preview of the application in the right side.
For example, set following prompt −
Create an online class website for data structures in C.
Step 2: Refine App
Once app is available for live preview, use the chat interface to improve further. Gemini suggests many quick enhancements as well under chat interface. You can add features, new visuals and much more.
For example, set following prompt −
Use a light green background and titles should be black.
In our case, Gemini provided many useful suggestions like - Add interactive visualizations, add quizes per lesson, improve code copy block, add keyboard shortcut, add lesson completion feedback.
Step 3: Deploy App
Once prototype is ready, you can deploy app over cloud in single click. You can even share the source code link with other developers. Code can be downloaded and run locally as well.
