 Data Structure
 Networking
 RDBMS
RDBMS Operating System
 Java
Java MS Excel
 iOS
iOS HTML
HTML CSS
CSS Android
 Python
 C Programming
 C++
C++ C#
C# MongoDB
 MySQL
MySQL Javascript
 PHP
PHP
- Selected Reading
- UPSC IAS Exams Notes
- Developer's Best Practices
- Questions and Answers
- Effective Resume Writing
- HR Interview Questions
- Computer Glossary
- Who is Who
Tracking bird migration using Python-3
In some Research works, Researchers uses GPS modules to track the animal behavior. They can track how they are travelling to different places in different time of a year etc.
In this example we use that kind of dataset to get an idea, how Birds are moving in different places. In this dataset there are the location details from GPS module are stored. The complete dataset is in CSV form. In that file, there are different fields. The first one is Bird Id, then date_time, Latitude, longitude and speed.
For this Task, we need some modules that can be used in Python codes.
We are using matplotlib, pandas, and cartopy modules. To install them into the Anaconda, please follow these commands. These will install some other important modules when it needs.
conda install -c conda-forge matplotlib
conda install -c anaconda pandas
conda install -c scitools/label/archive cartopy
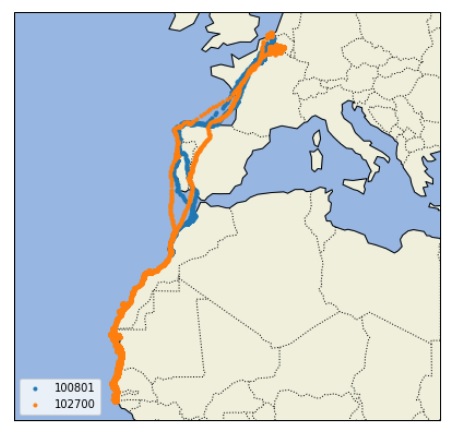
At first we will plot the location using the latitude and longitude values. There are two birds in the dataset, so using two different colors, we can visualize the tracking locations
Example code
import pandas as pd
from matplotlib import pyplot as plt
df = pd.read_csv('bird_tracking.csv')
cr = df.groupby('bird_id').groups
cr_groups = df.groupby('bird_id')
group_list = []
for group in cr:
   group_list.append(group)
plt.figure(figsize=(7, 7))
#Create graph from dataset using the first group of cranes
for group in group_list:
   x,y = cr_groups.get_group(group).longitude, cr_groups.get_group(group).latitude
   plt.plot(x,y, marker='o', markersize=2)
plt.show()
Output

Now we can plot this tracking results on the actual Geographical Map to visualize the exact way, which is used by those birds.
Example code
import pandas as pd
import cartopy.crs as ccrs
import cartopy.feature as cfeature
import matplotlib.pyplot as plt
df = pd.read_csv("bird_tracking.csv")
bird_id = pd.unique(birddata.bird_id)
# Setup the projection to display the details into map
projection = ccrs.Mercator()
plt.figure(figsize=(7,7))
axes = plt.axes(projection=projection)
axes.set_extent((-30.0, 25.0, 50.0, 10.0))
axes.add_feature(cfeature.LAND)
axes.add_feature(cfeature.OCEAN)
axes.add_feature(cfeature.COASTLINE)
axes.add_feature(cfeature.BORDERS, linestyle=':')
for id in bird_id:
   index = df['bird_id'] == id
   x = df.longitude[index]
   y = df.latitude[index]
   axes.plot(x,y,'.', transform=ccrs.Geodetic(), label=id)
plt.legend(loc="lower left")
plt.show()
Output


