- TestNG - Home
- TestNG - Overview
- TestNG - Environment
- TestNG - Writing Tests
- TestNG - Basic Annotations
- TestNG - Execution Procedure
- TestNG - Executing Tests
- TestNG - Suite Test
- TestNG - Ignore a Test
- TestNG - Group Test
- TestNG - Exception Test
- TestNG - Dependency Test
- TestNG - Parameterized Test
- TestNG - Run JUnit Tests
- TestNG - Test Results
- TestNG - Annotation Transformers
- TestNG - Asserts
- TestNG - Parallel Execution
- TestNG - Plug with ANT
- TestNG - Plug with Eclipse
- TestNG - TestNG - vs JUnit
TestNG - Plug with Eclipse
To set up TestNG with Eclipse, follow the steps given below −
Step 1: Download TestNG Archive
Download the latest version of TestNG jar file from http://www.testng.org
| OS | Archive name |
|---|---|
| Windows | testng-7.4.jar |
| Linux | testng-7.4.jar |
| Mac | testng-7.4.jar |
We assume you have copied the above JAR file in /work/testng folder.
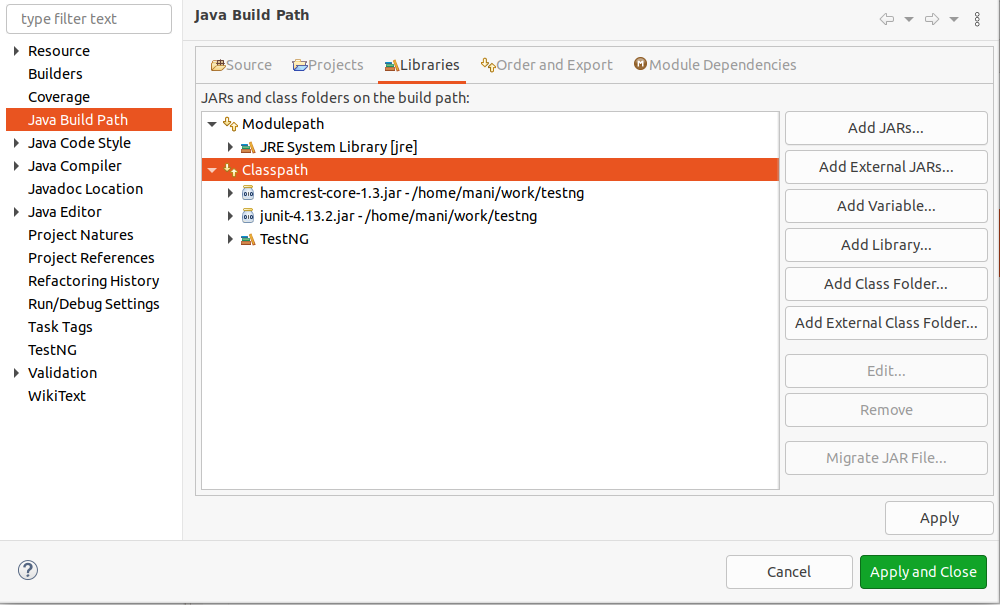
Step 2: Set Eclipse environment
Open eclipse → right click on the project and go to property → Build Path → Configure Build Path and add the testng-7.4.jar in the libraries using Add External Jar button.
We assume that your Eclipse has inbuilt TestNG plug-in; if it is not available, then please get the latest version using the update site.
In your Eclipse IDE, select Help / Eclipse Marketplace.
Search for Testng. You will get the TestNG in the list. Click on Install as shown below:
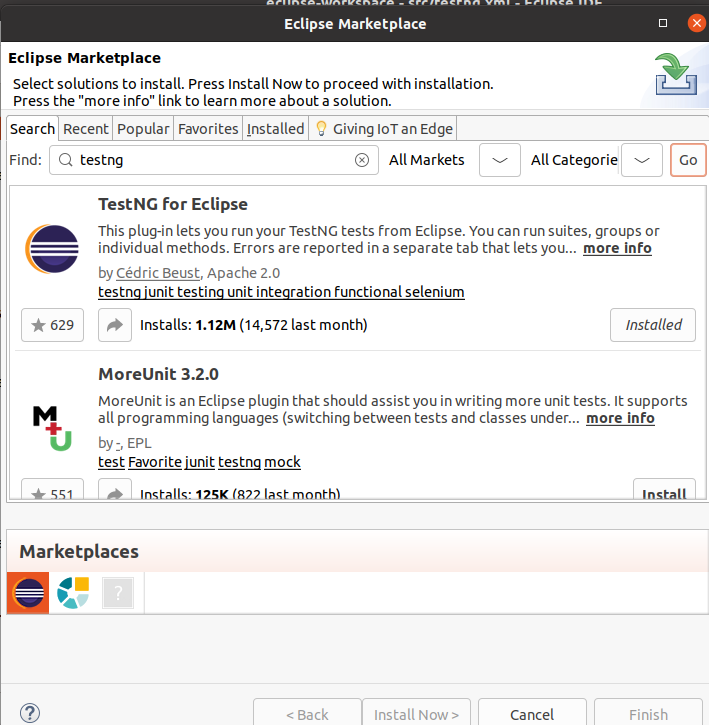
Now, your Eclipse is ready for the development of TestNG test cases.
Step 3: Verify TestNG Installation in Eclipse
Create a project TestNGProject in Eclipse at any location.
Create a class MessageUtil to test in the project.
/*
* This class prints the given message on console.
*/

public class MessageUtil {

   private String message;

   //Constructor
   //@param message to be printed
   public MessageUtil(String message) {
      this.message = message;
   }

   // prints the message
   public String printMessage() {
      System.out.println(message);
      return message;
   }
}
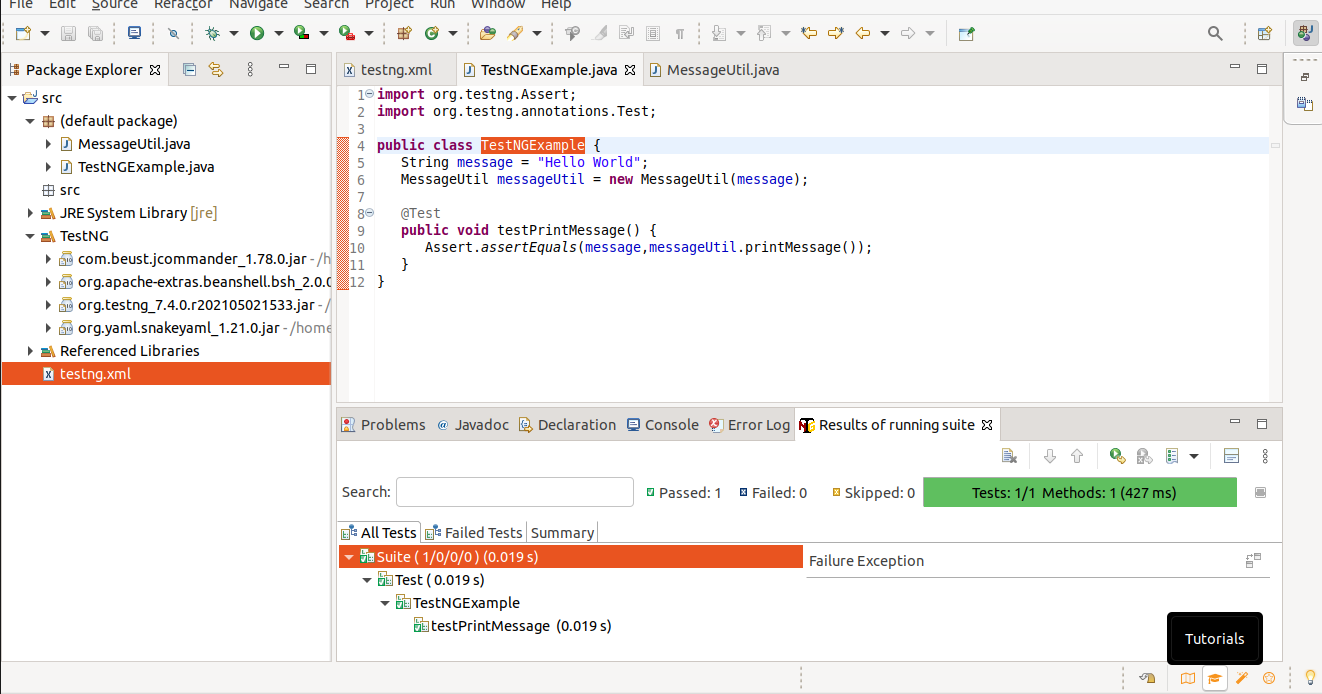
Create a test class TestNGExample in the project.
import org.testng.Assert;
import org.testng.annotations.Test;

public class TestNGExample {
   String message = "Hello World";
   MessageUtil messageUtil = new MessageUtil(message);

   @Test
   public void testPrintMessage() {
      Assert.assertEquals(message,messageUtil.printMessage());
   }
}
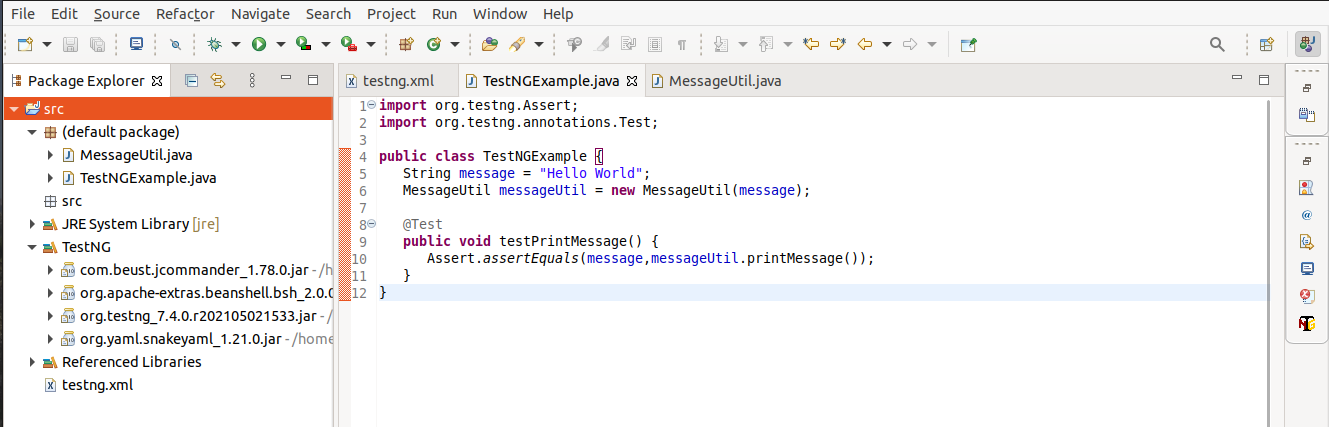
The project structure should be as follows −
Finally, verify the output of the program by right-clicking on the program and running as TestNG.
Verify the result.