- Struts2 - Home
- Struts2 - Basic MVC Architecture
- Struts2 - Overview
- Struts2 - Environment Setup
- Struts2 - Architecture
- Struts2 - Examples
- Struts2 - Configuration
- Struts2 - Actions
- Struts2 - Interceptors
- Struts2 - Result Types
- Struts2 - Value Stack/OGNL
- Struts2 - File Uploads
- Struts2 - Database Access
- Struts2 - Sending Email
- Struts2 - Validations
- Struts2 - Localization
- Struts2 - Type Conversion
- Struts2 - Themes/Templates
- Struts2 - Exception Handling
- Struts2 - Annotations
- Struts 2 Integrations
- Struts2 - Spring
- Struts2 - Tiles
- Struts2 - Hibernate
- Struts 2 Useful Resources
- Struts2 - Questions and Answers
- Struts2 - Quick Guide
- Struts2 - Useful Resources
- Struts2 - Discussion
Struts 2 - Validations Framework
In this chapter, we shall look deeper into Struts validation framework. At the Struts core, we have the validation framework that assists the application to run the rules to perform validation before the action method is executed.
Client side validation is usually achieved using Javascript. However, one should not rely upon client side validation alone. The best practices suggest that the validation should be introduced at all levels of your application framework. Now let us look at two ways of adding validation to our Struts project.
Here, we will take an example of an Employee whose name and age should be captured using a simple page, and we will put these two validations to make sure that the user always enters a name and age which should be in a range between 28 and 65.
Let us start with the main JSP page of the example.
Create Main Page
Let us write main page JSP file index.jsp, which will be used to collect Employee related information mentioned above.
<%@ page language = "java" contentType = "text/html; charset = ISO-8859-1"
   pageEncoding = "ISO-8859-1"%>
<%@ taglib prefix = "s" uri = "/struts-tags"%>
<!DOCTYPE html PUBLIC "-//W3C//DTD HTML 4.01 Transitional//EN"
   "http://www.w3.org/TR/html4/loose.dtd">

<html>
   <head>
      <title>Employee Form</title>
   </head>

   <body>
      <s:form action = "empinfo" method = "post">
         <s:textfield name = "name" label = "Name" size = "20" />
         <s:textfield name = "age" label = "Age" size = "20" />
         <s:submit name = "submit" label = "Submit" align="center" />
      </s:form>
   </body>
</html>
The index.jsp makes use of Struts tag, which we have not covered yet, but we will study them in tags related chapters. But for now, just assume that the s:textfield tag prints a input field, and the s:submit prints a submit button. We have used label property for each tag which creates label for each tag.
Create Views
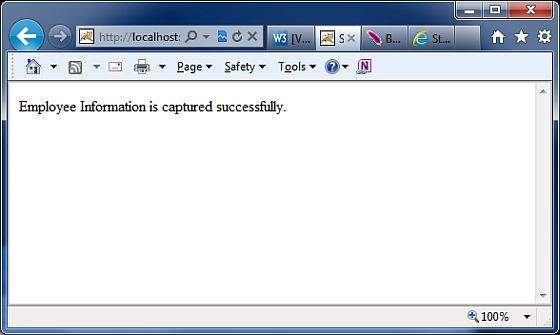
We will use JSP file success.jsp which will be invoked in case defined action returns SUCCESS.
<%@ page language = "java" contentType = "text/html; charset = ISO-8859-1"
   pageEncoding = "ISO-8859-1"%>
<%@ taglib prefix = "s" uri = "/struts-tags"%>
<!DOCTYPE html PUBLIC "-//W3C//DTD HTML 4.01 Transitional//EN"
   "http://www.w3.org/TR/html4/loose.dtd">

<html>
   <head>
      <title>Success</title>
   </head>

   <body>
      Employee Information is captured successfully.
   </body>
</html>
Create Action
So let us define a small action class Employee, and then add a method called validate() as shown below in Employee.java file. Make sure that your action class extends the ActionSupport class, otherwise your validate method will not be executed.
package com.tutorialspoint.struts2;

import com.opensymphony.xwork2.ActionSupport;

public class Employee extends ActionSupport {
   private String name;
   private int age;

   public String execute() {
       return SUCCESS;
   }

   public String getName() {
       return name;
   }

   public void setName(String name) {
       this.name = name;
   }

   public int getAge() {
       return age;
   }

   public void setAge(int age) {
       this.age = age;
   }

   public void validate() {
      if (name == null || name.trim().equals("")) {
         addFieldError("name","The name is required");
      }

      if (age < 28 || age > 65) {
         addFieldError("age","Age must be in between 28 and 65");
      }
   }
}
As shown in the above example, the validation method checks whether the 'Name' field has a value or not. If no value has been supplied, we add a field error for the 'Name' field with a custom error message. Secondly, we check if entered value for 'Age' field is in between 28 and 65 or not, if this condition does not meet we add an error above the validated field.
Configuration Files
Finally, let us put everything together using the struts.xml configuration file as follows −
<?xml version = "1.0" Encoding = "UTF-8"?>
<!DOCTYPE struts PUBLIC
   "-//Apache Software Foundation//DTD Struts Configuration 2.0//EN"
   "http://struts.apache.org/dtds/struts-2.0.dtd">

<struts>
   <constant name = "struts.devMode" value = "true" />
   <package name = "helloworld" extends = "struts-default">

      <action name = "empinfo"
         class = "com.tutorialspoint.struts2.Employee"
         method = "execute">
         <result name = "input">/index.jsp</result>
         <result name = "success">/success.jsp</result>
      </action>

   </package>
</struts>
Following is the content of web.xml file −
<?xml version = "1.0" Encoding = "UTF-8"?>
<web-app xmlns:xsi = "http://www.w3.org/2001/XMLSchema-instance"
   xmlns = "http://java.sun.com/xml/ns/javaee"
   xmlns:web = "http://java.sun.com/xml/ns/javaee/web-app_2_5.xsd"
   xsi:schemaLocation = "http://java.sun.com/xml/ns/javaee
   http://java.sun.com/xml/ns/javaee/web-app_3_0.xsd"
   id = "WebApp_ID" version = "3.0">

   <display-name>Struts 2</display-name>

   <welcome-file-list>
      <welcome-file>index.jsp</welcome-file>
   </welcome-file-list>

   <filter>
      <filter-name>struts2</filter-name>
      <filter-class>
         org.apache.struts2.dispatcher.FilterDispatcher
      </filter-class>
   </filter>

   <filter-mapping>
      <filter-name>struts2</filter-name>
      <url-pattern>/*</url-pattern>
   </filter-mapping>
</web-app>
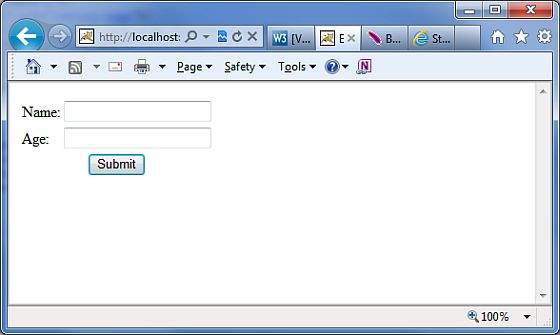
Now, right click on the project name and click Export > WAR File to create a War file. Then deploy this WAR in the Tomcat's webapps directory. Finally, start Tomcat server and try to access URL http://localhost:8080/HelloWorldStruts2/index.jsp. This will produce the following screen −
Now do not enter any required information, just click on Submit button. You will see the following result −
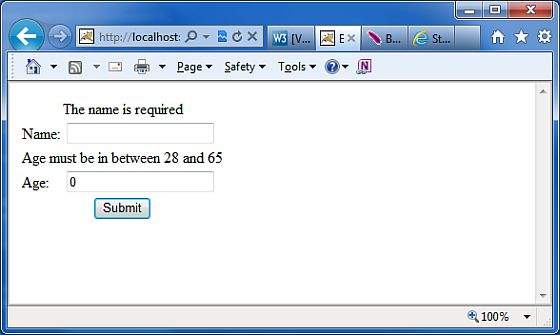
Enter the required information but enter a wrong From field, let us say name as "test" and age as 30, and finally click on Submit button. You will see the following result −
How this Validation Works?
When the user presses the submit button, Struts 2 will automatically execute the validate method and if any of the if statements listed inside the method are true, Struts 2 will call its addFieldError method. If any errors have been added, then Struts 2 will not proceed to call the execute method. Rather the Struts 2 framework will return input as the result of calling the action.
Hence, when validation fails and Struts 2 returns input, the Struts 2 framework will redisplay the index.jsp file. Since, we used Struts 2 form tags, Struts 2 will automatically add the error messages just above the form filed.
These error messages are the ones we specified in the addFieldError method call. The addFieldError method takes two arguments. The first, is the form field name to which the error applies and the second, is the error message to display above that form field.
addFieldError("name","The name is required");
To handle the return value of input we need to add the following result to our action node in struts.xml.
<result name = "input">/index.jsp</result>
XML Based Validation
The second method of doing validation is by placing an xml file next to the action class. Struts2 XML based validation provides more options of validation like email validation, integer range validation, form validation field, expression validation, regex validation, required validation, requiredstring validation, stringlength validation and etc.
The xml file needs to be named '[action-class]'-validation.xml. So, in our case we create a file called Employee-validation.xml with the following contents −
<!DOCTYPE validators PUBLIC
   "-//OpenSymphony Group//XWork Validator 1.0.2//EN"
   "http://www.opensymphony.com/xwork/xwork-validator-1.0.2.dtd">

<validators>
   <field name = "name">
      <field-validator type = "required">
         <message>
            The name is required.
         </message>
      </field-validator>
   </field>

   <field name = "age">
     <field-validator type = "int">
         <param name = "min">29</param>
         <param name = "max">64</param>
         <message>
            Age must be in between 28 and 65
         </message>
      </field-validator>
   </field>
</validators>
Above XML file would be kept in your CLASSPATH ideally along with class file. Let us have our Employee action class as follows without having validate() method −
package com.tutorialspoint.struts2;

import com.opensymphony.xwork2.ActionSupport;

public class Employee extends ActionSupport{
   private String name;
   private int age;

   public String execute() {
       return SUCCESS;
   }

   public String getName() {
       return name;
   }

   public void setName(String name) {
       this.name = name;
   }

   public int getAge() {
       return age;
   }

   public void setAge(int age) {
       this.age = age;
   }
}
Rest of the setup will remain as it is i the previous example, now if you will run the application, it will produce same result what we received in previous example.
The advantage of having an xml file to store the configuration allows the separation of the validation from the application code. You could get a developer to write the code and a business analyst to create the validation xml files. Another thing to note is the validator types that are available by default.
There are plenty more validators that come by default with Struts. Common validators include Date Validator, Regex validator and String Length validator. Check the following link for more detail Struts - XML Based Validators.
