- Struts2 - Home
- Struts2 - Basic MVC Architecture
- Struts2 - Overview
- Struts2 - Environment Setup
- Struts2 - Architecture
- Struts2 - Examples
- Struts2 - Configuration
- Struts2 - Actions
- Struts2 - Interceptors
- Struts2 - Result Types
- Struts2 - Value Stack/OGNL
- Struts2 - File Uploads
- Struts2 - Database Access
- Struts2 - Sending Email
- Struts2 - Validations
- Struts2 - Localization
- Struts2 - Type Conversion
- Struts2 - Themes/Templates
- Struts2 - Exception Handling
- Struts2 - Annotations
- Struts 2 Integrations
- Struts2 - Spring
- Struts2 - Tiles
- Struts2 - Hibernate
- Struts 2 Useful Resources
- Struts2 - Questions and Answers
- Struts2 - Quick Guide
- Struts2 - Useful Resources
- Struts2 - Discussion
Struts 2 - File Uploads
The Struts 2 framework provides built-in support for processing file upload using "Form-based File Upload in HTML". When a file is uploaded, it will typically be stored in a temporary directory and they should be processed or moved by your Action class to a permanent directory to ensure the data is not lost.
Note − Servers may have a security policy in place that prohibits you from writing to directories other than the temporary directory and the directories that belong to your web application.
File uploading in Struts is possible through a pre-defined interceptor called FileUpload interceptor which is available through the org.apache.struts2.interceptor.FileUploadInterceptor class and included as part of thedefaultStack. Still you can use that in your struts.xml to set various paramters as we will see below.
Create View Files
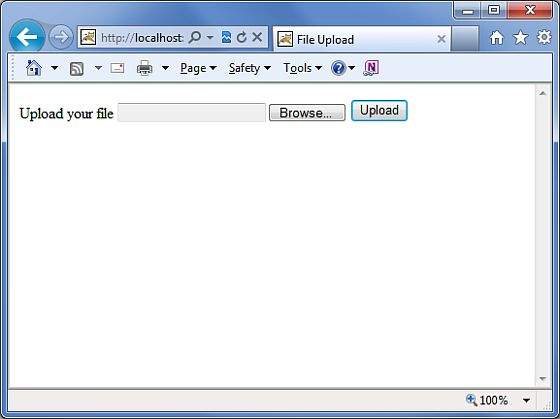
Let us start with creating our view which will be required to browse and upload a selected file. So let us create an index.jsp with plain HTML upload form that allows the user to upload a file −
<%@ page language = "java" contentType = "text/html; charset = ISO-8859-1"
   pageEncoding = "ISO-8859-1"%>
<%@ taglib prefix = "s" uri = "/struts-tags"%>
<!DOCTYPE html PUBLIC "-//W3C//DTD HTML 4.01 Transitional//EN"
   "http://www.w3.org/TR/html4/loose.dtd">

<html>
   <head>
      <title>File Upload</title>
   </head>

   <body>
      <form action = "upload" method = "post" enctype = "multipart/form-data">
         <label for = "myFile">Upload your file</label>
         <input type = "file" name = "myFile" />
         <input type = "submit" value = "Upload"/>
      </form>
   </body>
</html>
There is couple of points worth noting in the above example. First, the form's enctype is set to multipart/form-data. This should be set so that file uploads are handled successfully by the file upload interceptor. The next point noting is the form's action method upload and the name of the file upload field - which is myFile. We need this information to create the action method and the struts configuration.
Next, let us create a simple jsp file success.jsp to display the outcome of our file upload in case it becomes success.
<%@ page contentType = "text/html; charset = UTF-8" %>
<%@ taglib prefix = "s" uri = "/struts-tags" %>

<html>
   <head>
      <title>File Upload Success</title>
   </head>

   <body>
      You have successfully uploaded <s:property value = "myFileFileName"/>
   </body>
</html>
Following will be the result file error.jsp in case there is some error in uploading the file −
<%@ page contentType = "text/html; charset = UTF-8" %>
<%@ taglib prefix = "s" uri = "/struts-tags" %>

<html>
   <head>
      <title>File Upload Error</title>
   </head>

   <body>
      There has been an error in uploading the file.
   </body>
</html>
Create Action Class
Next, let us create a Java class called uploadFile.java which will take care of uploading file and storing that file at a secure location −
package com.tutorialspoint.struts2;

import java.io.File;
import org.apache.commons.io.FileUtils;
import java.io.IOException;

import com.opensymphony.xwork2.ActionSupport;

public class uploadFile extends ActionSupport {
   private File myFile;
   private String myFileContentType;
   private String myFileFileName;
   private String destPath;

   public String execute() {
      /* Copy file to a safe location */
      destPath = "C:/apache-tomcat-6.0.33/work/";

      try {
         System.out.println("Src File name: " + myFile);
         System.out.println("Dst File name: " + myFileFileName);

         File destFile  = new File(destPath, myFileFileName);
         FileUtils.copyFile(myFile, destFile);

      } catch(IOException e) {
         e.printStackTrace();
         return ERROR;
      }

      return SUCCESS;
   }

   public File getMyFile() {
      return myFile;
   }

   public void setMyFile(File myFile) {
      this.myFile = myFile;
   }

   public String getMyFileContentType() {
      return myFileContentType;
   }

   public void setMyFileContentType(String myFileContentType) {
      this.myFileContentType = myFileContentType;
   }

   public String getMyFileFileName() {
      return myFileFileName;
   }

   public void setMyFileFileName(String myFileFileName) {
      this.myFileFileName = myFileFileName;
   }
}
The uploadFile.java is a very simple class. The important thing to note is that the FileUpload interceptor along with the Parameters Interceptor does all the heavy lifting for us.
The FileUpload interceptor makes three parameters available for you by default. They are named in the following pattern −
[your file name parameter] − This is the actual file that the user has uploaded. In this example it will be "myFile"
[your file name parameter]ContentType − This is the content type of the file that was uploaded. In this example it will be "myFileContentType"
[your file name parameter]FileName − This is the name of the file that was uploaded. In this example it will be "myFileFileName"
The three parameters are available for us, thanks to the Struts Interceptors. All we have to do is to create three parameters with the correct names in our Action class and automatically these variables are auto wired for us. So, in the above example, we have three parameters and an action method that simply returns "success" if everything goes fine otherwise it returns "error".
Configuration Files
Following are the Struts2 configuration properties that control file uploading process −
| Sr.No | Properties & Description |
|---|---|
| 1 | struts.multipart.maxSize The maximum size (in bytes) of a file to be accepted as a file upload. Default is 250M. |
| 2 | struts.multipart.parser The library used to upload the multipart form. By default is jakarta |
| 3 | struts.multipart.saveDir The location to store the temporary file. By default is javax.servlet.context.tempdir. |
In order to change any of these settings, you can use constant tag in your applications struts.xml file, as I did to change the maximum size of a file to be uploaded.
Let us have our struts.xml as follows −
<?xml version = "1.0" Encoding = "UTF-8"?>
<!DOCTYPE struts PUBLIC
   "-//Apache Software Foundation//DTD Struts Configuration 2.0//EN"
   "http://struts.apache.org/dtds/struts-2.0.dtd">

<struts>
   <constant name = "struts.devMode" value = "true" />
   <constant name = "struts.multipart.maxSize" value = "1000000" />
   <package name = "helloworld" extends = "struts-default">
      <action name = "upload" class = "com.tutorialspoint.struts2.uploadFile">
         <result name = "success">/success.jsp</result>
         <result name = "error">/error.jsp</result>
      </action>
   </package>
</struts>
Since, FileUpload interceptor is a part of the default Stack of interceptors, we do not need to configure it explicity. But, you can add <interceptor-ref> tag inside <action>. The fileUpload interceptor takes two parameters (a) maximumSize and (b) allowedTypes.
The maximumSize parameter sets the maximum file size allowed (the default is approximately 2MB). The allowedTypes parameter is a comma-separated list of accepted content (MIME) types as shown below −
<action name = "upload" class = "com.tutorialspoint.struts2.uploadFile">
   <interceptor-ref name = "basicStack">
   <interceptor-ref name = "fileUpload">
      <param name = "allowedTypes">image/jpeg,image/gif</param>
   </interceptor-ref>
   <result name = "success">/success.jsp</result>
   <result name = "error">/error.jsp</result>
</action>
Following is the content of web.xml file −
<?xml version = "1.0" Encoding = "UTF-8"?>
<web-app xmlns:xsi = "http://www.w3.org/2001/XMLSchema-instance"
   xmlns = "http://java.sun.com/xml/ns/javaee"
   xmlns:web = "http://java.sun.com/xml/ns/javaee/web-app_2_5.xsd"
   xsi:schemaLocation = "http://java.sun.com/xml/ns/javaee
   http://java.sun.com/xml/ns/javaee/web-app_3_0.xsd"
   id = "WebApp_ID" version = "3.0">

   <display-name>Struts 2</display-name>

   <welcome-file-list>
      <welcome-file>index.jsp</welcome-file>
   </welcome-file-list>

   <filter>
      <filter-name>struts2</filter-name>
      <filter-class>
         org.apache.struts2.dispatcher.FilterDispatcher
      </filter-class>
   </filter>

   <filter-mapping>
      <filter-name>struts2</filter-name>
      <url-pattern>/*</url-pattern>
   </filter-mapping>
</web-app>
Now Right click on the project name and click Export > WAR File to create a War file. Then deploy this WAR in the Tomcat's webapps directory. Finally, start Tomcat server and try to access URL http://localhost:8080/HelloWorldStruts2/upload.jsp. This will produce the following screen −
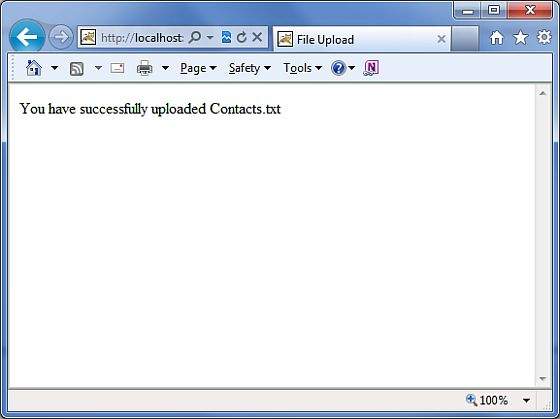
Now select a file "Contacts.txt" using Browse button and click upload button which will upload the file on your serve and you should see the next page. You can check the uploaded file should be saved in C:\apache-tomcat-6.0.33\work.
Note that the FileUpload Interceptor deletes the uploaded file automatically so you would have to save uploaded file programmatically at some location before it gets deleted.
Error Messages
The fileUplaod interceptor uses several default error message keys −
| Sr.No | Error Message Key & Description |
|---|---|
| 1 | struts.messages.error.uploading A general error that occurs when the file could not be uploaded. |
| 2 | struts.messages.error.file.too.large Occurs when the uploaded file is too large as specified by maximumSize. |
| 3 | struts.messages.error.content.type.not.allowed Occurs when the uploaded file does not match the expected content types specified. |
You can override the text of these messages in WebContent/WEB-INF/classes/messages.properties resource files.
