
Article Categories
- All Categories
-
 Data Structure
-
 Networking
-
 RDBMS
RDBMS
-
 Operating System
-
 Java
Java
-
 MS Excel
-
 iOS
iOS
-
 HTML
HTML
-
 CSS
CSS
-
 Android
-
 Python
-
 C Programming
-
 C++
C++
-
 C#
C#
-
 MongoDB
-
 MySQL
MySQL
-
 Javascript
-
 PHP
PHP
-
 Economics & Finance
Share Powerpoint Presentation through Facebook
Using Microsoft’s PowerPoint software, people create new presentation for marketing, office, or college purpose, there are number of ways to share those presentations with others. Although, people can use these presentation as a slideshow for next business meeting, and collage guy or office people can use it to present their project at college or office. People can significantly increase number of eyes to see it by sharing it on a social media site such as Facebook. Using social media site Facebook, people can share slideshows, digital resumes and other PowerPoint presentations. This is quite simple to achieve by first converting PowerPoint presentations (.ppt) file to a video file. PowerPoint presentations file can be saved in “.wmv” (Windows Media Video) file format. Facebook supports this file format, and using this file format user can directly upload file to Facebook.
This article provides detail explanation on,
How to convert a PowerPoint presentations (.ppt) file to a video file using Microsoft PowerPoint
How to upload the converted presentation video file to personal Facebook account
In Windows Operating System
Method 1 − Upload PowerPoint to Facebook as video
Step 1
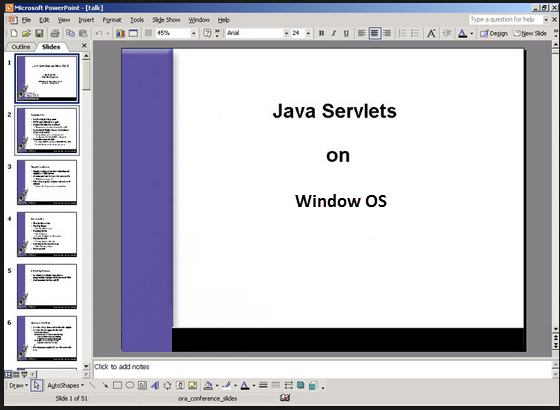
Choose and open the PowerPoint presentation that user likes to upload on Facebook.
Step 2
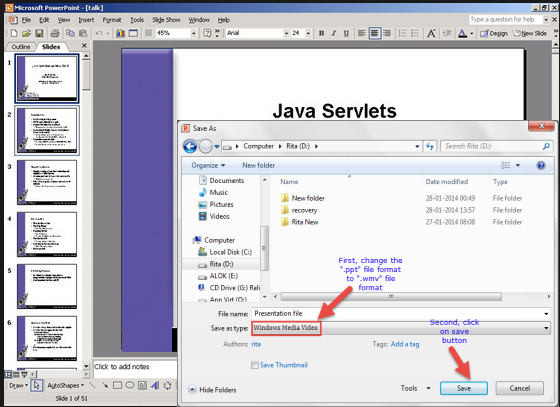
Convert .ppt file format to .wmv file format (Save the PowerPoint presentations file as a Windows Media Video file). To do this conversion,
From the standard toolbar, click on the File tab → Save As.
In the Save As dialog box, user can change the “File name” or can keep the same how as it was earlier. The “Save as Type” dropdown menu facilitates users to convert “.ppt” file to “.wmv” file format, from “Save as Type” dropdown menu select Windows Media Video. This conversion may take several minutes to complete.
Step 3
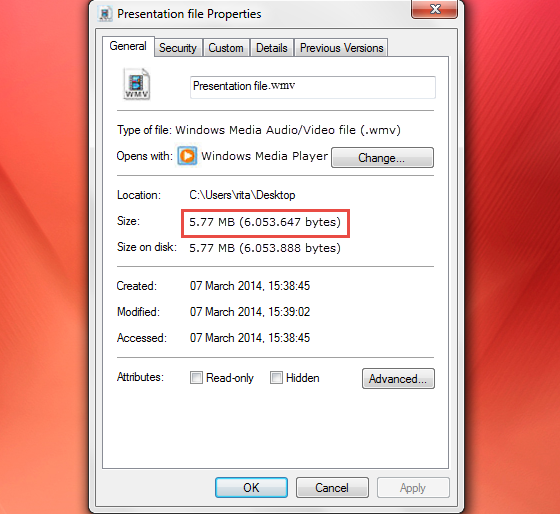
Make sure that the video file size should not exceed the maximum file size supported by Facebook, to check the file size of .wmv file,
Right click on .wmv file to select properties from context menu
In properties dialog box, click on the general tab to view the size of the file in megabits (MB). Check that the file size should not exceed the maximum file size (1, 024 MB).
Step 4
Ensure that the video should be too long, to check that,
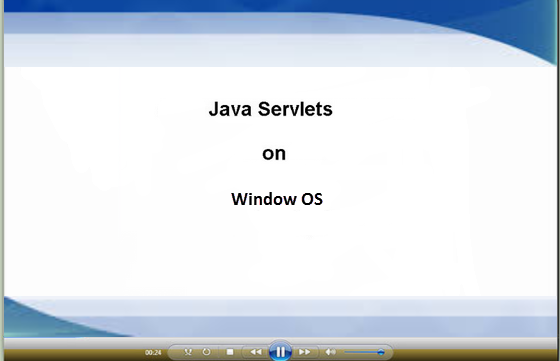
Open, the created .wmv file in any Windows media player application, to check the exact length of the video file
Make sure that the file should not run more than 20 minutes
Step 5
Choose web browser to permit pop-ups from Facebook,
In IE, click on Tools → Options → Privacy tab from Internet Options dialogue box and then click on Settings in the Pop-Up Blocker menu. Enter http://www.facebook.com/ in the field labeled address of website, press enter and click the close button. An exception for Facebook has been added to IE.
In Mozilla Firefox, click on Tools → Options → contents option → exceptions button. Enter http://www.facebook.com/ into the field labeled address of website and click OK. An exception for Facebook has been added to Firefox.
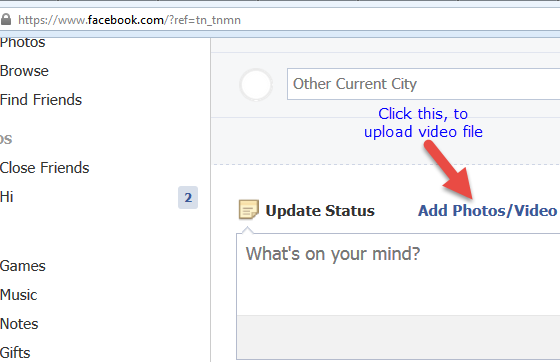
Step 6
Open Facebook account using username and password. Click on the “Add Photos/Video” option to open video upload dialogue box, facilitates users to share their favourite photos and video with Facebook friends.
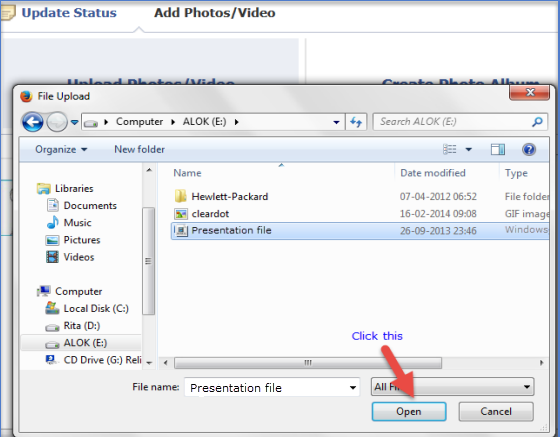
Step 7
Once user click on “Add Photos/Video, it opens “Upload Photos/Video”, after clicking on “Upload Photos/Video” it opens File Uploader to upload Photos/Videos file, choose the file that user wants to upload and click on open. This process will load Photos/Video from the hard drive to Facebook.
Step 8
Terms and condition at the time of upload process,
The Terms of Agreement window will appear, read the Terms of Agreement and click the “I Agree” button to begin the upload process.
Depends on the size of the video and your Internet connection speed, the upload process may take several minutes to complete.
The process will successfully upload the PowerPoint presentation file to Facebook.
Method 2 − Upload using SlideShare app on Facebook
Before implementing this method, just go to the slideshare.net, create an account to read the information, because without knowing about SlideShare app, user cannot upload PPT to Facebook using SlideShare app.
After reading about SlideShare app, go to Facebook, login to the account using Username and Password and search for Slideshare, get it and add it to the application section. This process will display the SlideShare page on Facebook with “sync SlideShare.net Account” option. Combine both account (Facebook account and SlideShare account).
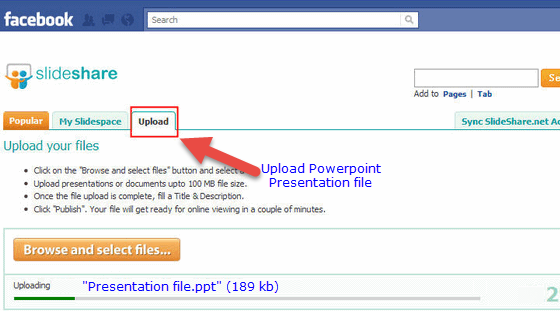
One all above process successfully done, click on the “Upload” button to upload PowerPoint to Facebook. After uploading PPT into “My Slidespace” section, click on the “Post to Wall” option.
This process will also upload the PowerPoint presentation file to Facebook, but sometime it erases animations, transitions, music and video clips.
Method 3 − Using Google Docs
Google Docs is one of best web app to upload and edit the presentation file in the cloud, does not requires any other software to support Google Docs in its upload process.
Just login to Google Docs and upload the PowerPoint file on it. To do this, click on the “Share” tab on the top right of the main page and choose “Share”, this will facilitate users to see the PowerPoint or the chosen persons.

Next, click on “Publish/Embed” to visualize the presentation available to everybody on the web and Google Docs offers the embed code that can be used on the blog, take that URL and post it on Facebook so that everybody can see the PowerPoint presentation.
Conclusion
The above 3 awesome methods explains that how to share the PowerPoint presentations on Facebook with ease in less time.

3K+ Views
