
Article Categories
- All Categories
-
 Data Structure
-
 Networking
-
 RDBMS
RDBMS
-
 Operating System
-
 Java
Java
-
 MS Excel
-
 iOS
iOS
-
 HTML
HTML
-
 CSS
CSS
-
 Android
-
 Python
-
 C Programming
-
 C++
C++
-
 C#
C#
-
 MongoDB
-
 MySQL
MySQL
-
 Javascript
-
 PHP
PHP
-
 Economics & Finance
Share confidential folders in windows 7 homegroup
Windows 7 introduced simplified file and folder sharing capabilities that allow users to share content across Homegroups, Workgroups, or domain networks without complex IP configuration. While standard folders can be shared easily through right-click context menus, sharing system folders like Program Files, AppData, and other core directories requires additional security configuration due to Windows 7's strict protection policies.
Prerequisites
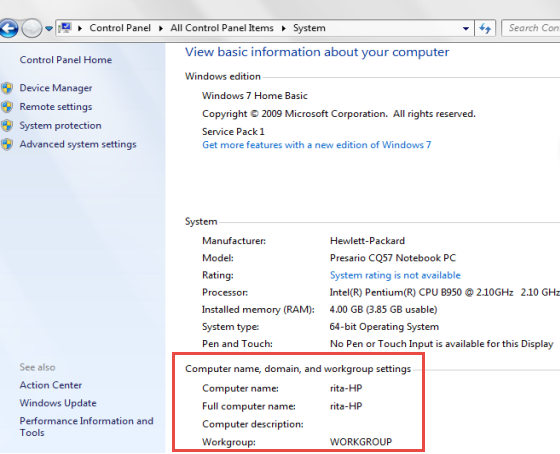
Before configuring share settings, verify your network setup and permissions:
Administrative privileges − Required to modify sharing permissions for system folders
Network type − Identify whether your computer belongs to a Homegroup, Workgroup, or domain
Same workgroup − All participating computers must be in the same workgroup
To check your workgroup, right-click Computer and select Properties, or navigate to Control Panel > System to view domain and workgroup settings.
Step-by-Step Sharing Process
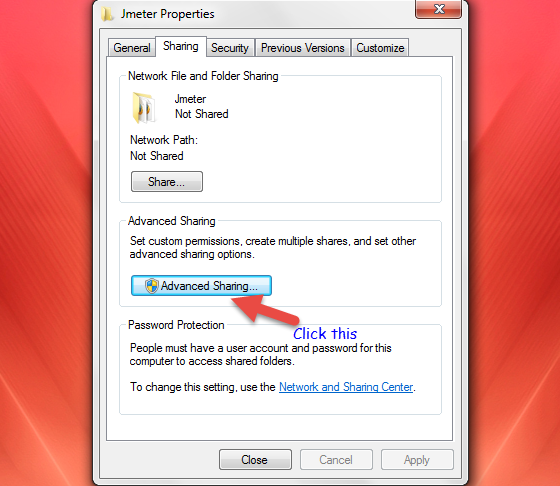
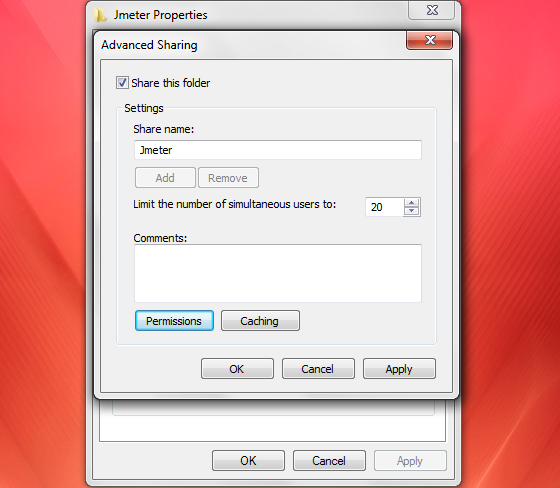
Step 1 − Access Advanced Sharing
Right-click the target folder and select Properties. In the Properties dialog, click the Sharing tab, then click Advanced Sharing.
Step 2 − Enable Folder Sharing
In the Advanced Sharing dialog, check the Share this folder option. The system will automatically populate the Share name field with the folder name, or you can enter a custom name. Click the Permissions button to configure access rights.
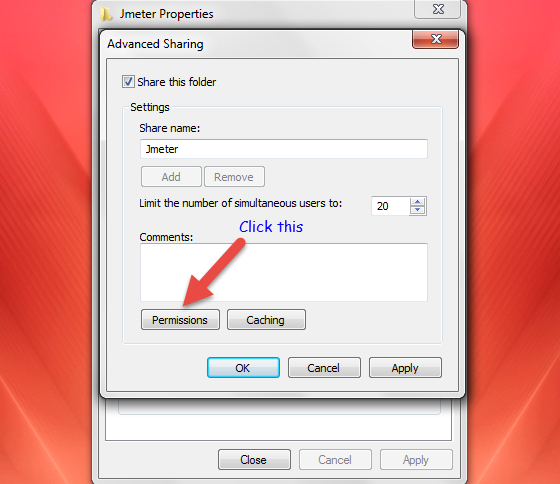
Step 3 − Configure Permissions
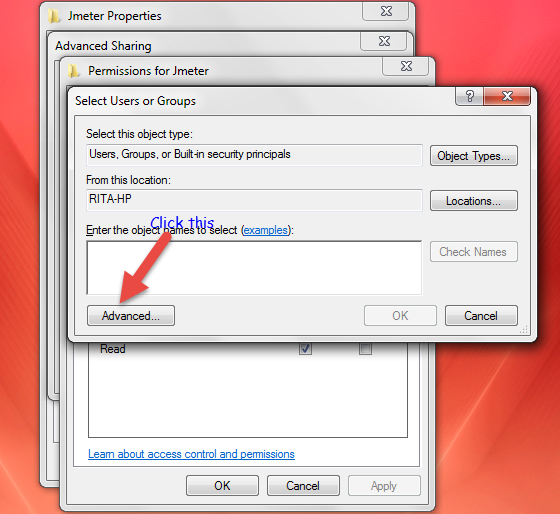
The Permissions dialog allows you to modify access rights for user groups and individual users. To add HomeGroup access, click the Add button.
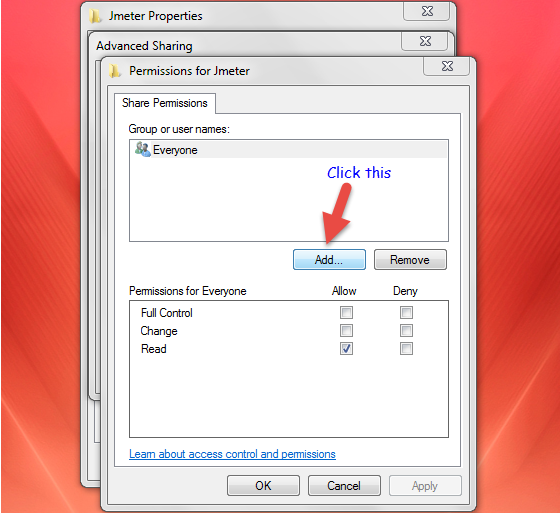
Step 4 − Add HomeGroup User
In the Select Users or Groups dialog, click Advanced to access the user search functionality.
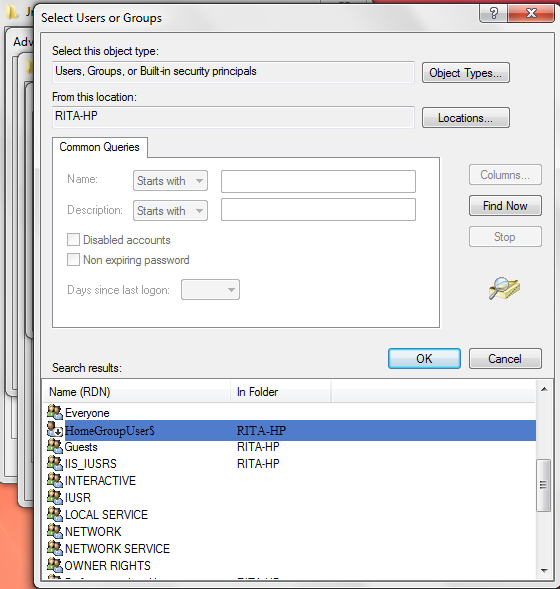
Click Find Now to display available users and groups. Scroll through the search results and select HomeGroupUser$, then click OK.
Step 5 − Set Access Permissions
The HomeGroupUser object now appears in the object names section. Click OK to return to the Permissions dialog.
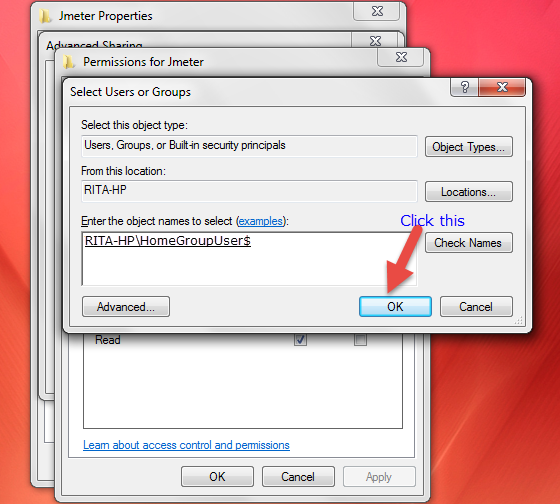
Select HomeGroupUser$ and check Full Control to grant complete access permissions. Click Apply and then OK.
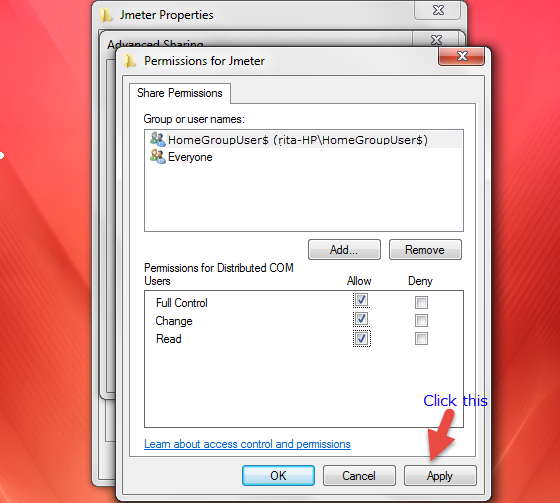
Step 6 − Complete Configuration
Return to the Advanced Sharing dialog and click OK to confirm the sharing configuration.
Finally, click OK in the folder Properties dialog to complete the sharing process.
Important Notes
System restart − You may need to restart your computer or disable/enable network connections for changes to take effect
Security consideration − Only share system folders when absolutely necessary, as this can expose sensitive system files
Network discovery − Ensure network discovery is enabled on all computers in the homegroup
Conclusion
Sharing confidential folders in Windows 7 Homegroups requires careful configuration of advanced sharing permissions, particularly when dealing with system directories. This process enables secure file access across networked computers while maintaining appropriate security controls for sensitive system folders.

193 Views
