- RxJS - Home
- RxJS - Overview
- RxJS - Environment Setup
- RxJS - Latest Updates
- RxJS - Observables
- RxJS - Operators
- RxJS - Working with Subscription
- RxJS - Working with Subjects
- RxJS - Working with Scheduler
- RxJS - Working with RxJS & Angular
- RxJS - Working with RxJS & ReactJS
- RxJS Useful Resources
- RxJS - Quick Guide
- RxJS - Useful Resources
- RxJS - Discussion
RxJS - Environment Setup
In this chapter, we are going to install RxJS. To work with RxJS, we need the following setup −
- NodeJS
- Npm
- RxJS package installation
NODEJS and NPM Installation
It is very easy to install RxJS using npm. You need to have nodejs and npm installed on your system. To verify if NodeJS and npm is installed on your system, try to execute the following command in your command prompt.
E:\>node -v && npm -v
v10.15.1
6.4.1
In case you are getting the version, it means nodejs and npm is installed on your system and the version is 10 and 6 right now on the system.
If it does not print anything, install nodejs on your system. To install nodejs, go to the homepage https://nodejs.org/en/download/ of nodejs and install the package based on your OS.
The download page of nodejs will look like the following −
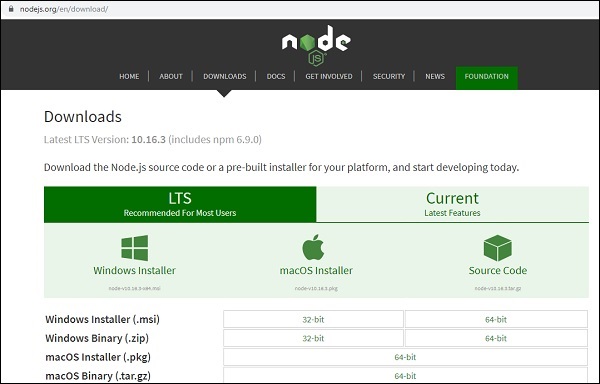
Based on your OS, install the required package. Once nodejs is installed, npm will also be installed along with it. To check if npm is installed or not, type npm v in the terminal. It should display the version of the npm.
RxJS Package Installation
To start with RxJS installation, first create a folder called rxjsproj/ where we will practice all RxJS examples.
Once the folder rxjsproj/ is created, run command npm init, for project setup as shown below
E:\>mkdir rxjsproj
E:\>cd rxjsproj
E:\rxjsproj>npm init
Npm init command will ask few questions during execution, just press enter and proceed. Once the execution of npm init is done, it will create package.json inside rxjsproj/ as shown below −
rxjsproj/
   package.json
Now you can install rxjs using below command −
npm install ---save-dev rxjs
E:\rxjsproj>npm install --save-dev rxjs
npm notice created a lockfile as package-lock.json. You should commit this file.

npm WARN rxjsproj@1.0.0 No description
npm WARN rxjsproj@1.0.0 No repository field.

+ rxjs@6.5.3
added 2 packages from 7 contributors and audited 2 packages in 21.89s
found 0 vulnerabilities
We are done with RxJS installation. Let us now try to use RxJS, for that create a folder src/ inside rxjsproj/
So, now, we will have the folder structure as shown below −
rxjsproj/
   node_modules/
   src/
   package.json
Inside src/ create a file testrx.js, and write the following code −
testrx.js
import { of } from 'rxjs;
import { map } from 'rxjs/operators';

map(x => x * x)(of(1, 2, 3)).subscribe((v) => console.log(`Output is: ${v}`));
When we go to execute the above code in command prompt, using command − node testrx.js, it will display error for import, as nodejs does not know what to do with import.
To make import work with nodejs, we need to install ES6 modules package using npm as shown below −
E:\rxjsproj\src>npm install --save-dev esm
npm WARN rxjsproj@1.0.0 No description
npm WARN rxjsproj@1.0.0 No repository field.

+ esm@3.2.25
added 1 package from 1 contributor and audited 3 packages in 9.32s
found 0 vulnerabilities
Once the package is installed, we can now execute testrx.js file as shown below −
E:\rxjsproj\src>node -r esm testrx.js
Output is: 1
Output is: 4
Output is: 9
We can see the output now, that shows RxJS is installed and ready to use. The above method will help us test RxJS in the command line. In case, you want to test RxJS in the browser, we would need some additional packages.
Testing RxJS in Browser
Install following packages inside rxjsproj/ folder −
npm install --save-dev babel-loader @babel/core @babel/preset-env webpack webpack-cli webpack-dev-server
E:\rxjsproj>npm install --save-dev babel-loader
@babel/core @babel/preset-env webpack webpack-cli webpack-dev-server

npm WARN rxjsproj@1.0.0 No description
npm WARN rxjsproj@1.0.0 No repository field.
npm WARN optional SKIPPING OPTIONAL DEPENDENCY: fsevents@1.2.9
(node_modules\fsevents):
npm WARN notsup SKIPPING OPTIONAL DEPENDENCY: Unsupported platform for fsevents@
1.2.9: wanted {"os":"darwin","arch":"any"} (current: {"os":"win32","arch":"x64"})

+ webpack-dev-server@3.8.0
+ babel-loader@8.0.6
+ @babel/preset-env@7.6.0
+ @babel/core@7.6.0
+ webpack-cli@3.3.8
+ webpack@4.39.3
added 675 packages from 373 contributors and audited 10225 packages in 255.567s
found 0 vulnerabilities
To start the server to execute our Html file, we will use webpack-server. The command "publish" in package.json will help us start as well as pack all the js files using webpack . The packed js files which are our final js file to be used is saved at the path /dev folder.
To use webpack, we need to run npm run publish command and the command is added in package.json as shown below −
Package.json
{
   "name": "rxjsproj",
   "version": "1.0.0",
   "description": "",
   "main": "index.js",
   "scripts": {
      "publish":"webpack && webpack-dev-server --output-public=/dev/",
      "test": "echo \"Error: no test specified\" && exit 1"
   },
   "author": "",
   "license": "ISC",
   "devDependencies": {
      "@babel/core": "^7.6.0",
      "@babel/preset-env": "^7.6.0",
      "babel-loader": "^8.0.6",
      "esm": "^3.2.25",
      "rxjs": "^6.5.3",
      "webpack": "^4.39.3",
      "webpack-cli": "^3.3.8",
      "webpack-dev-server": "^3.8.0"
   }
}
To work with webpack we must first create a file called webpack.config.js that has the configuration details for webpack to work.
The details in the file are as follows −
var path = require('path');

module.exports = {
   entry: {
      app: './src/testrx.js'
   },
   output: {
      path: path.resolve(__dirname, 'dev'),
      filename: 'main_bundle.js'
   },
   mode:'development',
   module: {
      rules: [
         {
            test:/\.(js)$/,
            include: path.resolve(__dirname, 'src'),
            loader: 'babel-loader',
            query: {
               presets: ['@babel/preset-env']
            }
         }
      ]
   }
};
The structure of the file is as shown above. It starts with a path that gives the current path details.
var path = require('path'); //gives the current path
Next is module.exports object which has properties entry, output, and module. Entry is the start point. Here, we need to give the start js file we want to compile.
entry: {
   app: './src/testrx.js'
},
path.resolve(_dirname, src/testrx.js) -- will look for src folder in the directory and testrx.js in that folder.
Output
output: {
   path: path.resolve(__dirname, 'dev'),
   filename: 'main_bundle.js'
},
The output is an object with path and filename details.path will hold the folder in which the compiled file will be kept and the filename will tell the name of the final file to be used in your .html file.
Module
module: {
   rules: [
      {
         test:/\.(js)$/,
         include: path.resolve(__dirname, 'src'),
         loader: 'babel-loader',
         query: {
            presets: ['@babel/preset-env']
         }
      }
   ]
}
Module is object with rules details which has properties i.e. test, include, loader, query. The test will hold details of all the js file ending with .js and .jsx. It has the pattern which will look for .js at the end in the entry point given.
Include tells the folder to be used for looking at the files.
The loader uses babel-loader for compiling code.
The query has property presets which is an array with value '@babel/preset-env. It will transpile the code as per the ES environment you need.
The final folder structure will be as follows −
rxjsproj/
   node_modules/
   src/
      testrx.js
   index.html
   package.json
   webpack.config.js
Run Command
npm run publish will create dev/ folder with main_bundle.js file in it. The server will be started and you can test your index.html in the browser as shown below.
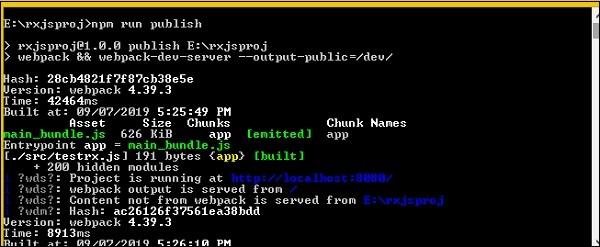
Open the browser and hit the url − http://localhost:8080/

The output is shown in the console.
