
Article Categories
- All Categories
-
 Data Structure
-
 Networking
-
 RDBMS
RDBMS
-
 Operating System
-
 Java
Java
-
 MS Excel
-
 iOS
iOS
-
 HTML
HTML
-
 CSS
CSS
-
 Android
-
 Python
-
 C Programming
-
 C++
C++
-
 C#
C#
-
 MongoDB
-
 MySQL
MySQL
-
 Javascript
-
 PHP
PHP
-
 Economics & Finance
Programming 8051 using Keil Software
In this section we will see how to write and execute programs for 8051 microcontroller using the Keil Software.
Download Keil
Here is the download link of Keil. You can download it and install it very easily. We are using C51 version for 8051 devices.
https://www.keil.com/download/product/

Use Keil to write programs for 8051 Microcontroller
Start the Keil software. Go to the Project > New Project then choose a location to store your program, and give a name and Save.
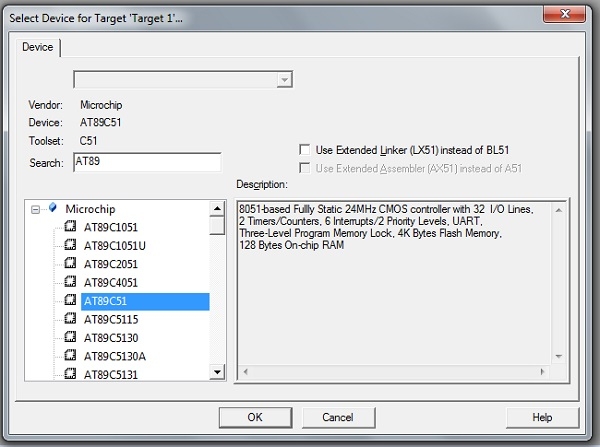
Now in the next window select the device from different manufacturers. We are selecting Microchip, and then by expanding we are selecting AT89C51 device and click ok.
Now go to the New in the menu and select New. It will open a new editor to write code.
Go to the save option and save the program file with .c extension.
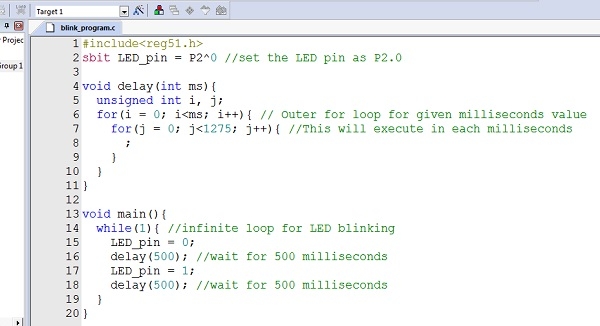
Write the code for 8051 Microcontroller. (Here we are using a code for blinking LED in 500 ms)
Now from the left panel, select Source Group 1, and Add Existing Files to Group ‘Source Group 1’. Then select the program (c file) then add and close
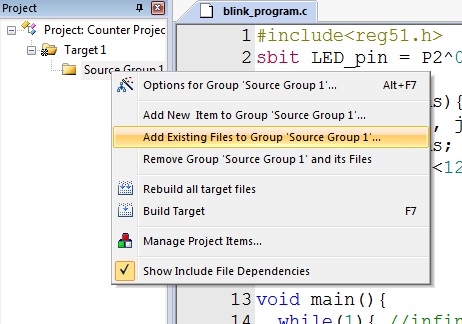 .
.Now go to the Project > Build Target to build the project. If there is some error the building will be failed, after correcting the errors it can be build.
Now click on the Target1 from the left panel and select Options for Target ‘Target1’. Then set the xtal (MHz) value to 11.0592. Check mark on the Use On Chip ROM. Then go to the output tab. In this tab check Create Hex File, and click OK. Then build it again.
By uploading this hex file into the 8051 microcontroller the program can be loaded into it. And it will work.
Example
Here we have used the following code −
#include<reg51.h>
sbit LED_pin = P2^0; //set the LED pin as P2.0
void delay(int ms){
   unsigned int i, j;
   for(i = 0; i< ms; i++){
      // Outer for loop for given milliseconds value
      for(j = 0; j < 1275; j++){
         //execute in each milliseconds;
      }
   }
}
void main(){
   while(1){
      //infinite loop for LED blinking
      LED_pin = 0;
      delay(500); //wait for 500 milliseconds
      LED_pin = 1;
      delay(500); //wait for 500 milliseconds
   }
}
Output
The connection is like below


30K+ Views
