- Pole Vault - Home
- Pole Vault - Overview
- Pole Vault - How to Play?
- Pole Vault - Rules
- Pole Vault - Champions
Pole Vault - How to Play?
Before going deep into the techniques, one should know the basics to get started with pole vault. Some of the basics are described keeping in view of a right-handed athlete. For a left-handed athlete, the direction should be reversed.
The Grip
With making shoulders wide apart, hands should be placed roughly on the pole. Your right hand palm should face up and left hand palm should face down. The best way to know about the grip is to start with a random step. Place the pole at the backside of the box and then by grabbing the pole with your right hand, make full extension of the arm above the head.

In case, you want to locate the perfect take-off spot, plant the toe of your left foot on the ground directly below your right hand. Till your left hand comes in contact with the pole, keep it up with shoulders being in square position. During this process, the position of both of your palms should be inward. By following the above procedure, you can get an overall idea about the gripping and take off position.
Carrying the Pole
From the position of take-off, do the following two things −
- Right hand should be brought to the hip level.
- Left hand should be lowered up to the level of chest.
Keep the tip of the pole in upward position but not in perfectly vertical position.
Initially, to carry the pole easily, the tip of the pole should face upward but with gradual progress, slowly it will come down as the right hand will move upwards by pivoting towards left. Just keep one thing in your mind that the tip of the pole should be maintained at your eye level before the plant.
Running Approach
During the running phase, the body posture should be upright. During the initial phase of the running, if an athlete wants, he can lean a little bit forward but with the advancement of the approach he has to regain back the straight position. The main purpose of this phase is to develop speed and rhythm needed during the take-off time.
One should keep focus on one fact that the ground contact should be made directly underneath the body and should be as quick as possible. It is necessary to count the take-off steps indeed. For the beginners, 3-5 take-off steps would be a nice approach. For a full approach run, 7-9 steps is more than sufficient. Maintaining the pole in a balanced position during the running phase is an art and should be practised well during the practice session. However, a slight bouncing motion is allowed.
Planting the Vault
Planting is a critical process of Pole Vault where the athlete converts the horizontal height into vertical height. To achieve this, he has to be a bit slower and lengthen his strides, as this will give him a good lift. After the last take-off stride, planting is made and the order of leg that is followed over here will be left-right-left.
As soon as the last take-off step touches the ground, the level of the pole should be maintained at eye level. Instead of extending the arm towards the back of the plant box, raise the tip of the pole vertically upward.
By the time the right foot touches the ground, the level of the pole should be parallel with the runaway and your right hand should be near the ear level. During this phase, the position of the left hand should be in bending position directly in front of the face. Extension of the arm should be made above the head as the take-off step touches the ground. Keep your right hand above the forehead.
Do not keep both the hands above the forehead level, as it will give rise to far take-off step which in turn will create problem in developing a successful vertical lift. To practice it more precisely, follow the drill every day.
By carrying the pole high, walk several steps with a feel for left foot.
With the passage of time, slowly lower the pole with keeping in mind that left foot will be used for planting purpose.
As soon as the left foot touches the ground, forward pushing of the pole should be done with uplifting.
Try to maintain the pole as close as possible to your body by pushing the bottom arm all way forward.
Just before take-off foot hits the ground, extension of the pole must be made 100% with the bottom arms.
Take-off and Drive Swing
As soon as you leave the ground, the take-off is initiated. Full extension of your arms and hitting of the tip of the pole to the plant box should happen at the same time during this phase. Make sure that the pole tip does not get jammed at the plant box as this will cause a heavy damage of energy and as a result of which the vertical movement of the pole will not occur.
You should avoid the clothes lining effect which occurs when you take-off in a hurry without waiting for the tip to get connected with the plant box. As soon as you take-off with your left foot, hold the pole with a much pressure with both of your hands and try to achieve a reverse C position where extension of the take-off leg will be behind the body and right hand behind the head.
Move the chest up forward and try to move in between the hands. Now it is the time to do drive swinging where you will be pushing and driving the pole to a vertical level but this would never be with the hands. Now to master this art, there is a small drill for you known as rock-back drill.
The step-by-step procedure is as follows −
- Get a good plant of the pole tip in the plant box.
- Now swing on till the level of your shoulders.
- Tuck on it and bring the bottom arm elbow into it.
- Now stay on the shoulders level over there.
- Safely and slowly land back on the pit.
Initially use short runs and low grips and as you get comfortable with this drill, increase the height of the hand grip one at a time.
The Swing Up
The pole continues to move vertically up and the athlete completes his drive swing. Here the performer has to push the take-off leg from the reverse C position and make a whip so that it will swing in the reverse direction. Swinging power directly depends upon the run of approach and the take-off. Upward pulling movement of the body should not be made and during the time of short drill, the left arm should collapse and come closer to the chest level.
Extension-Pull-Turn
Most of the energy of the athlete is lost during the plant or take-off process. If the vault is planted successfully, it will give you energy during the unbending process and will lift you up. As you reach to the top of the pole, turning is important at that point and you can take the help of your hands for the pulling process. If you are a left hander, take the right foot and start the turning process.
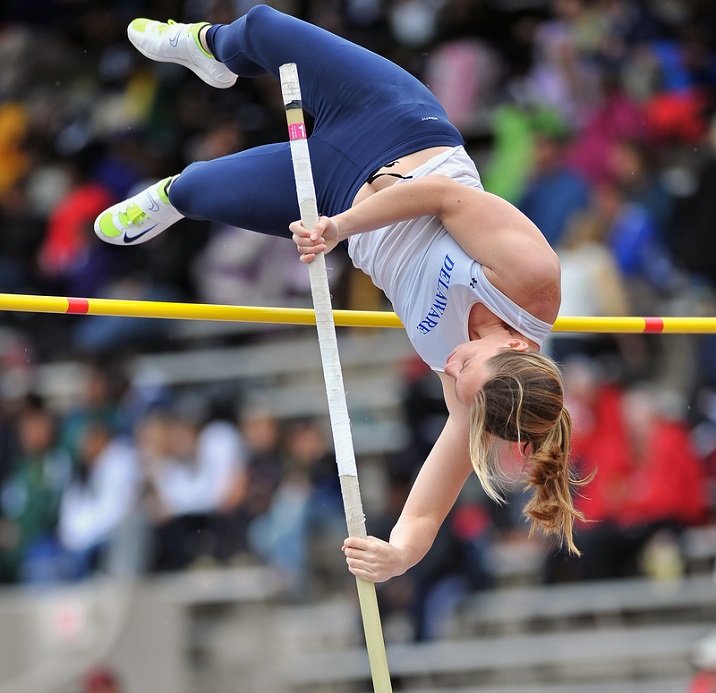
Flyaway / Clearance
As you start to push yourself back from the top of the pole, legs start to pike around the bar. During this position, release the bottom hand first from the pole. Try to pass your hips over the bar without knocking it off. To create a hollow chest, your thumb should point down. Now make a final push off with your top hand and release the pole.
