- PhantomJS - Home
- PhantomJS - Overview
- PhantomJS - Environment Setup
- PhantomJS - Object
- PhantomJS - Methods
- PhantomJS - Properties
- PhantomJS - Methods
- PhantomJS - Events/Callbacks
- PhantomJS - Child Process Module
- File System Module
- PhantomJS - Properties
- PhantomJS - Methods
- System Module
- PhantomJS - Properties
- Web Server Module
- PhantomJS - Properties
- PhantomJS - Methods
- Miscellaneous
- Command Line Interface
- PhantomJS - Screen Capture
- PhantomJS - Page Automation
- PhantomJS - Network Monitoring
- PhantomJS - Testing
- PhantomJS - REPL
- PhantomJS - Examples
- PhantomJS Useful Resources
- PhantomJS - Quick Guide
- PhantomJS - Useful Resources
- PhantomJS - Discussion
PhantomJS - Examples
In this chapter, we are providing a few more practical examples to understand some important features of PhantomJS.
Example 1 - Find the Page Speed
In this example, we will use PhantomJS to find the page speed for any given page URL.
var page = require('webpage').create(),
   system = require('system'),
   t, address;

if (system.args.length === 1) {
   console.log('Usage: loadspeed.js <some URL>');
   phantom.exit(1);
} else {
   t = Date.now();
   address = system.args[1];

   page.open(address, function (status) {
      if (status !== 'success') {
         console.log('FAIL to load the address');
      } else {
         t = Date.now() - t;

         console.log('Page title is ' + page.evaluate(function () {
            return document.title;
         }));
         console.log('Loading time ' + t + ' msec');
      }
      phantom.exit();
   });
}
The above program generates the following output.
Command − phantomjs pagespeed.js http://www.google.com
Page title is Google
Loading time 1396 msec
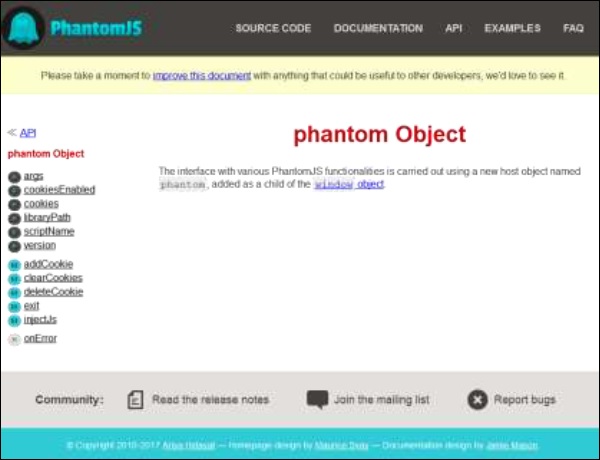
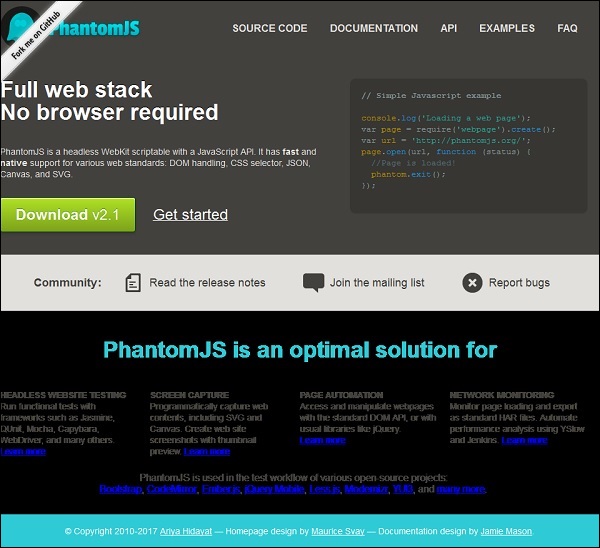
Example 2 - Send a Click Event to a Page
In the following example, we will use PhantomJS to send a click event to a page.
var page = require('webpage').create();
page.onConsoleMessage = function(str) {
   console.log(str);
}
page.open('http://phantomjs.org/api/phantom/', function(status) {
   page.render('beforeclick.png');
   console.log(page.url);

   var element = page.evaluate(function() {
      return document.querySelector('img[src = "http://phantomjs.org/img/phantomjslogo.png"]');
   });
   page.sendEvent('click', element.offsetLeft, element.offsetTop, 'left');

   window.setTimeout(function () {
      console.log(page.url);
      page.render('afterclick.png');
      phantom.exit();
   }, 5000);
   console.log('element is ' + element);
});
The above program generates the following output.
http://phantomjs.org/api/phantom/
element is [object Object]
http://phantomjs.org/
Our program will create the following two png images in the bin folder. These two images show the difference before and after the execution of the above program.
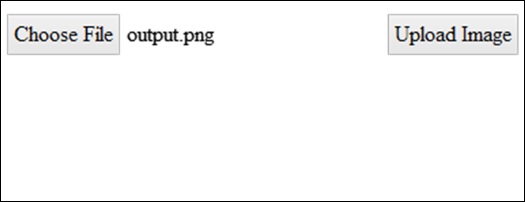
Example 3 - Submit a Form
The following example shows how to submit a form using PhantomJS.
var wpage = require('webpage').create();
wpage.open("http://localhost/tasks/submitform.html", function(status) {
   console.log(status);
   wpage.uploadFile('input[name = fileToUpload]', 'output.png');
   wpage.render("sform.png");

   var element = wpage.evaluate(function() {
      return document.querySelector('input[type = "submit"]');
      // getting details of submit button using queryselector.
   });
   wpage.sendEvent('click', element.offsetLeft, element.offsetTop, 'left');

   // sendevent is used to send click event and also giving the left and top
      position of the submit button.

   window.setTimeout(function () {
      console.log(wpage.url);
      wpage.render("submit.png");  // screenshot is saved in submit.png
      phantom.exit();
   }, 5000);
   console.log('element is ' + element);
});
submitform.html
The following code shows how to use the submitform.html file.
<html>
   <head>
      <title>Window 2</title>
   </head>

   <body>
      <form action = "submitform.php" method = "post" enctype = "multipart/form-data"
         id = "form1">
         <input type = "file" name = "fileToUpload" id = "fileToUpload">
         <input type = "submit" value = "Upload Image" name = "submit">
      </form>
   </body>

</html>
Once the form is submitted, it goes to submitform.php.
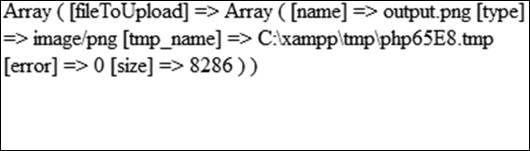
submitform.php
submitform.php is just printing the details of the files.
<?php
   print_r($_FILES);
?>
The above program generates the following output.
Success
element is [object Object]
http://localhost/tasks/submitform.php
Images
Following are the images for file upload and form submit.