- NHibernate - Home
- NHibernate - Overview
- NHibernate - Architecture
- NHibernate - Orm
- NHibernate - Environment Setup
- NHibernate - Getting Started
- NHibernate - Basic Orm
- NHibernate - Basic Crud Operations
- NHibernate - Profiler
- Add Intelliesnse To Mapping File
- NHibernate - Data Types Mapping
- NHibernate - Configuration
- NHibernate - Override Configuration
- NHibernate - Batch Size
- NHibernate - Caching
- NHibernate - Mapping Component
- NHibernate - Relationships
- NHibernate - Collection Mapping
- NHibernate - Cascades
- NHibernate - Lazy Loading
- NHibernate - Inverse Relationships
- NHibernate - Load/Get
- NHibernate - Linq
- NHibernate - Query Language
- NHibernate - Criteria Queries
- NHibernate - QueryOver Queries
- NHibernate - Native Sql
- NHibernate - Fluent Hibernate
NHibernate - Getting Started
In this chapter, we will look at how to start a simple example using NHibernate. We will be building a simple console application. To create a console application, we will use Visual Studio 2015, which contains all of the features you need to create, test your application using the NHibernate package.
Following are the steps to create a project using project templates available in the Visual Studio.
Step 1 − Open the Visual studio and click File → New → Project menu option.
Step 2 − A new Project dialog opens.
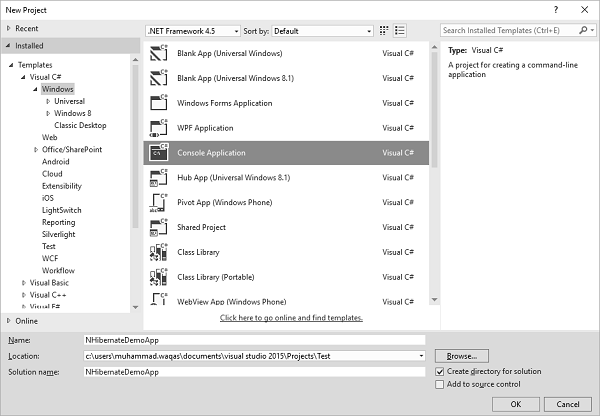
Step 3 − From the left pane, select Templates → Visual C# → Windows.
Step 4 − In the middle pane, select Console Application.
Step 5 − Enter the project name, NHibernateDemoApp, in the Name field and click Ok to continue.
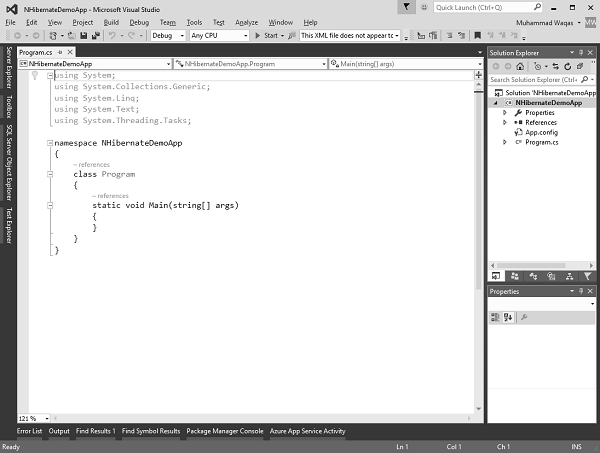
Step 6 − Once the project is created by Visual Studio, you will see a number of files displayed in the Solution Explorer window.
As you know that we have created a simple console application project, now we need to include the NHibernate package to our console project.
Go to the Tools menu and select NuGet Package Manager → Package Manager Console, it will open the Package Manager Console window.
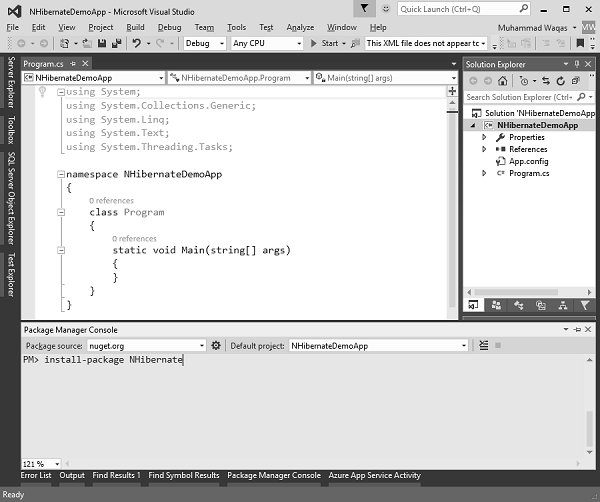
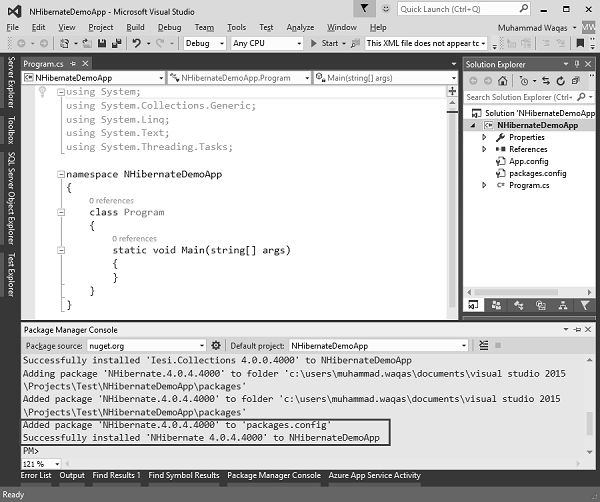
Specify the command shown in the above Package Manager Console window and press enter, it will download all the NHibernate dependencies and create references to all of the required assemblies. Once the installation is finished, you will see the message as shown in the following image.
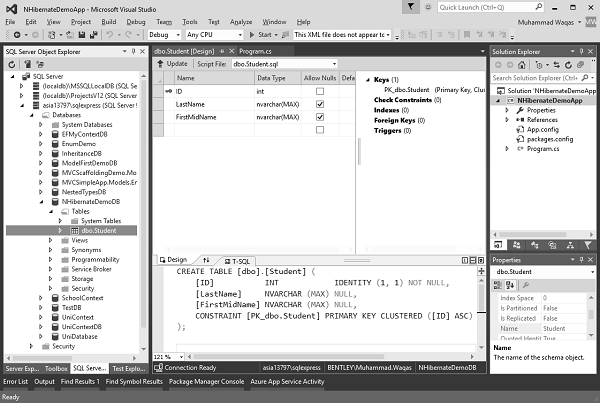
Now that we have NHibernate added, we can now start implementation. So, we are going to start out by mapping a very simple table called Student, which simply has an integer primary key called ID and a FirstName and LastName column.
We need a class to represent this student, so lets create a new class called Student by right clicking on the project in the solution explorer and then select Add → Class which will open the Add New Item dialog box.
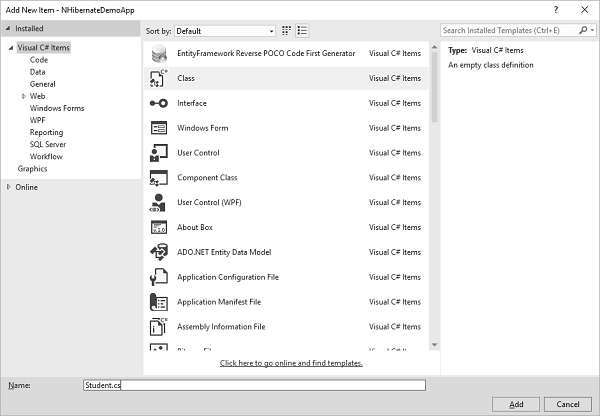
Enter Student.cs in the name field, click the Add button. In this Student class, we need to have our integer primary key called ID, and we need to create this string, FirstName and LastName fields as shown in the following complete implementation of Student class.
using System;
using System.Collections.Generic;
using System.Linq;
using System.Text;
using System.Threading.Tasks;

namespace NHibernateDemoApp {

   class Student {
      public virtual int ID { get; set; }
      public virtual string LastName { get; set; }
      public virtual string FirstMidName { get; set; }
   }
}
When dealing with models in NHibernate application, it is easiest to make all of your fields virtual. So this is our simple NHibernate model that we will use and will map this to the back end database.
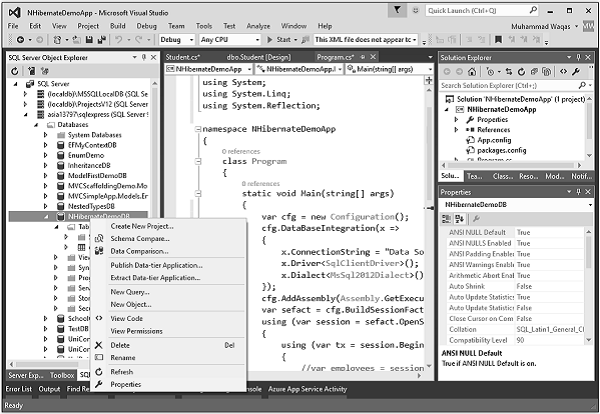
Now lets go to the Main method in the Program class and create a new NHibernate configuration object.
The first thing that we need to provide is the connection string. This is a database specific connection string and the easiest way to find the connection string is that right click on the database in SQL Server Object Explorer and select Properties.
It will open the Properties Window, now scroll down and you will see the Connection String field in the Properties window.
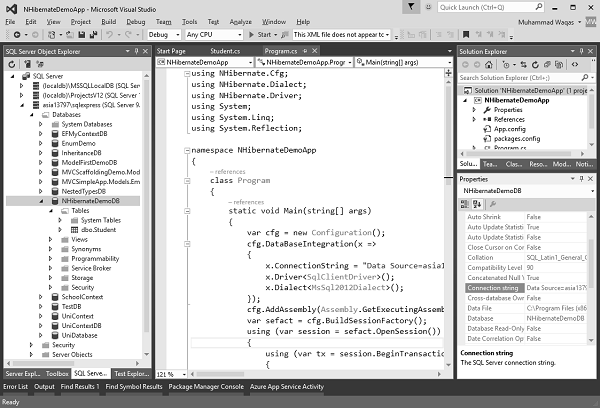
Copy the Connection string and specify in your code. Following is the implementation of Main method in which we need configuration for NHibernate.
using NHibernate.Cfg;
using NHibernate.Dialect;
using NHibernate.Driver;

using System;
using System.Linq;
using System.Reflection;

namespace NHibernateDemoApp {

   class Program {

      static void Main(string[] args) {
         var cfg = new Configuration();

         String Data Source = asia13797\\sqlexpress;
         String Initial Catalog = NHibernateDemoDB;
         String Integrated Security = True;
         String Connect Timeout = 15;
         String Encrypt = False;
         String TrustServerCertificate = False;
         String ApplicationIntent = ReadWrite;
         String MultiSubnetFailover = False;

         cfg.DataBaseIntegration(x = > { x.ConnectionString = "Data Source +
            Initial Catalog + Integrated Security + Connect Timeout + Encrypt +
            TrustServerCertificate + ApplicationIntent + MultiSubnetFailover";


            x.Driver<SqlClientDriver>();
            x.Dialect<MsSql2008Dialect>();
         });

         cfg.AddAssembly(Assembly.GetExecutingAssembly());

         var sefact = cfg.BuildSessionFactory();

         using (var session = sefact.OpenSession()) {

            using (var tx = session.BeginTransaction()) {
               //perform database logic
               tx.Commit();
            }

            Console.ReadLine();
         }
      }
   }
}
After the connection string, we need to supply a driver, which is the SQLClientDriver and then we also need to provide it a dialect, which version of SQL Server, and we are going to use MS SQL 2008.
NHibernate now knows how to connect to the database. The other thing we need to do is to provide it a list of models that we will map.
We can do this by adding an assembly, so by specifying the Assembly.GetExecutingAssembly and this is where program will find mapping files. Mapping files tell NHibernate how to go from C# classes into database tables.
SessionFactory compiles all the metadata necessary for initializing NHibernate. SessionFactory can be used to build sessions, which are roughly analogous to database connections. So the appropriate way is to use it in the using block. I can say var session equals sessionFactory.OpenSession and I'm going to want to do this inside of its transaction.
Once the session is opened, we can tell the session to begin a new transaction and we can then perform some logic in here. So perform some database logic and finally commit that transaction.
