- MVVM - Home
- MVVM – Introduction
- MVVM - Advantages
- MVVM - Responsibilities
- MVVM - First Application
- MVVM - Hooking Up Views
- MVVM - Hooking Up ViewModel
- MVVM - WPF Data Bindings
- MVVM - WPF Data Templates
- MVVM - ViewModel Communication
- MVVM - Hierarchies & Navigation
- MVVM - Validations
- MVVM - Dependency Injection
- MVVM - Events
- MVVM - Unit Testing
- MVVM - Frameworks
- MVVM - Interview Questions
MVVM WPF Data Templates
A template describes the overall look and visual appearance of the control. For each control there is a default template associated with it which gives the appearance to that control. In WPF application, you can easily create your own templates when you want to customize the visual behavior and visual appearance of a control. Connectivity between the logic and template can be achieved by data binding.
In MVVM, there is another primary form which is known as ViewModel first construction.
ViewModel first construction approach leverages the capabilities of implicit data templates in WPF.
Implicit data templates can automatically select an appropriate template from the current resource dictionary for an element that uses data binding. They do this based on the type of data object which is rendered by data binding. First, you need to have some element that is binding to a data object.
Lets take a look at our simple example again in which you will understand how you can do view model first leveraging data templates, specifically implicit data templates. Here is the implementation of our StudentViewModel class.
using MVVMDemo.Model;
using System.Collections.ObjectModel;

namespace MVVMDemo.ViewModel {

   public class StudentViewModel {

      public StudentViewModel() {
         LoadStudents();
      }

      public ObservableCollection<Student> Students {
         get;
         set;
      }

      public void LoadStudents() {
         ObservableCollection<Student> students = new ObservableCollection<Student>();

         students.Add(new Student { FirstName = "Mark", LastName = "Allain" });
         students.Add(new Student { FirstName = "Allen", LastName = "Brown" });
         students.Add(new Student { FirstName = "Linda", LastName = "Hamerski" });

         Students = students;
      }
   }
}
You can see that the above ViewModel is unchanged. We will continue with same example from the previous chapter. This ViewModel class just exposes the Students collection property and populates it on construction. Let's go to the StudentView.xaml file, remove the existing implementation and define a data template in Resources section.
<UserControl.Resources>
   <DataTemplate x:Key = "studentsTemplate">

      <StackPanel Orientation = "Horizontal">
         <TextBox Text = "{Binding Path = FirstName, Mode = TwoWay}"
            Width = "100" Margin = "3 5 3 5"/>

         <TextBox Text = "{Binding Path = LastName, Mode = TwoWay}"
            Width = "100" Margin = "0 5 3 5"/>

         <TextBlock Text = "{Binding Path = FullName, Mode = OneWay}"
            Margin = "0 5 3 5"/>
      </StackPanel>

   </DataTemplate>
</UserControl.Resources>
Now add a list box and data bind that list box to Students property as shown in the following code.
<ListBox ItemsSource = "{Binding Students}" ItemTemplate = "{StaticResource studentsTemplate}"/>
In the Resource section, the DataTemplate has a key of studentsTemplate and then to actually use that template, we need to use the ItemTemplate property of a ListBox. So now you can see that we instruct the listbox to go use that specific template for rendering out those Students. Following is the complete implementation of StudentView.xaml file.
<UserControl x:Class = "MVVMDemo.Views.StudentView"
   xmlns = "http://schemas.microsoft.com/winfx/2006/xaml/presentation"
   xmlns:x = "http://schemas.microsoft.com/winfx/2006/xaml"
   xmlns:mc = "http://schemas.openxmlformats.org/markup-compatibility/2006"
   xmlns:d = "http://schemas.microsoft.com/expression/blend/2008"
   xmlns:local = "clr-namespace:MVVMDemo.Views"
   xmlns:viewModel = "clr-namespace:MVVMDemo.ViewModel"
   xmlns:vml = "clr-namespace:MVVMDemo.VML"
   vml:ViewModelLocator.AutoHookedUpViewModel = "True"
   mc:Ignorable = "d" d:DesignHeight = "300" d:DesignWidth = "300">

   <UserControl.Resources>
      <DataTemplate x:Key = "studentsTemplate">

         <StackPanel Orientation = "Horizontal">
            <TextBox Text = "{Binding Path = FirstName, Mode = TwoWay}"
               Width = "100" Margin = "3 5 3 5"/>

            <TextBox Text = "{Binding Path = LastName, Mode = TwoWay}"
               Width = "100" Margin = "0 5 3 5"/>

            <TextBlock Text = "{Binding Path = FullName, Mode = OneWay}"
               Margin = "0 5 3 5"/>

         </StackPanel>

      </DataTemplate>
   </UserControl.Resources>

   <Grid>
      <ListBox
         ItemsSource = "{Binding Students}"
         ItemTemplate = "{StaticResource studentsTemplate}"/>
   </Grid>

</UserControl>
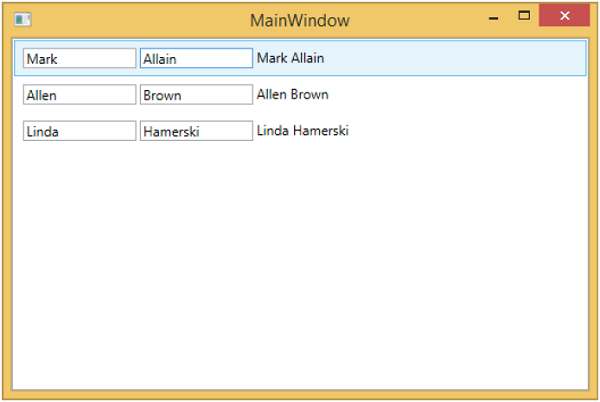
When the above code is compiled and executed, you will see the following window, which contains one ListBox. Each ListBoxItem contains the Student class object data which are displayed on TextBlock and Text boxes.
To make this an implicit template, we need to remove the ItemTemplate property from a list box and add a DataType property in our template definition as shown in the following code.
<UserControl.Resources>
   <DataTemplate DataType = "{x:Type data:Student}">

      <StackPanel Orientation = "Horizontal">
         <TextBox Text = "{Binding Path = FirstName, Mode = TwoWay}"
            Width = "100" Margin = "3 5 3 5"/>

         <TextBox Text = "{Binding Path = LastName, Mode = TwoWay}"
            Width = "100" Margin = "0 5 3 5"/>

         <TextBlock Text = "{Binding Path = FullName, Mode = OneWay}"
            Margin = "0 5 3 5"/>

      </StackPanel>

   </DataTemplate>
</UserControl.Resources>

<Grid>
   <ListBox ItemsSource = "{Binding Students}"/>
</Grid>
In DataTemplate, the x:Type markup extension is very important which is like a type of operator in XAML. So, basically we need to point to the Student data type which is in MVVMDemo.Model namespace. Following is the updated complete XAML file.
<UserControl x:Class="MVVMDemo.Views.StudentView"
   xmlns = "http://schemas.microsoft.com/winfx/2006/xaml/presentation"
   xmlns:x = "http://schemas.microsoft.com/winfx/2006/xaml"
   xmlns:mc = "http://schemas.openxmlformats.org/markup-compatibility/2006"
   xmlns:d = "http://schemas.microsoft.com/expression/blend/2008"
   xmlns:local = "clr-namespace:MVVMDemo.Views"
   xmlns:viewModel = "clr-namespace:MVVMDemo.ViewModel"
   xmlns:data = "clr-namespace:MVVMDemo.Model"
   xmlns:vml = "clr-namespace:MVVMDemo.VML"
   vml:ViewModelLocator.AutoHookedUpViewModel = "True"
   mc:Ignorable = "d" d:DesignHeight = "300" d:DesignWidth = "300">

   <UserControl.Resources>
      <DataTemplate DataType = "{x:Type data:Student}">

         <StackPanel Orientation = "Horizontal">
            <TextBox Text = "{Binding Path = FirstName, Mode = TwoWay}"
               Width = "100" Margin = "3 5 3 5"/>

            <TextBox Text = "{Binding Path = LastName, Mode = TwoWay}"
               Width = "100" Margin = "0 5 3 5"/>

            <TextBlock Text = "{Binding Path = FullName, Mode = OneWay}"
               Margin = "0 5 3 5"/>

         </StackPanel>

      </DataTemplate>
   </UserControl.Resources>

   <Grid>
      <ListBox ItemsSource = "{Binding Students}"/>
   </Grid>

</UserControl>
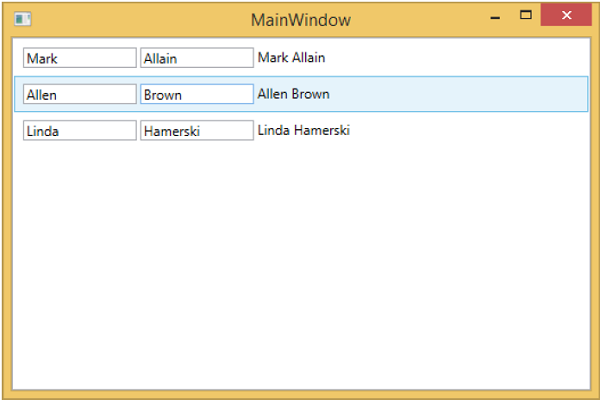
When you run this application again, you will still get the same rendering of the Students with data template because it's automatically mapping the type of the object being rendered by locating the appropriate DataTemplate.
We recommend you to execute the above example in a step-by-step method for better understanding.
