- MVVM - Home
- MVVM – Introduction
- MVVM - Advantages
- MVVM - Responsibilities
- MVVM - First Application
- MVVM - Hooking Up Views
- MVVM - Hooking Up ViewModel
- MVVM - WPF Data Bindings
- MVVM - WPF Data Templates
- MVVM - ViewModel Communication
- MVVM - Hierarchies & Navigation
- MVVM - Validations
- MVVM - Dependency Injection
- MVVM - Events
- MVVM - Unit Testing
- MVVM - Frameworks
- MVVM - Interview Questions
MVVM Hierarchies & Navigation
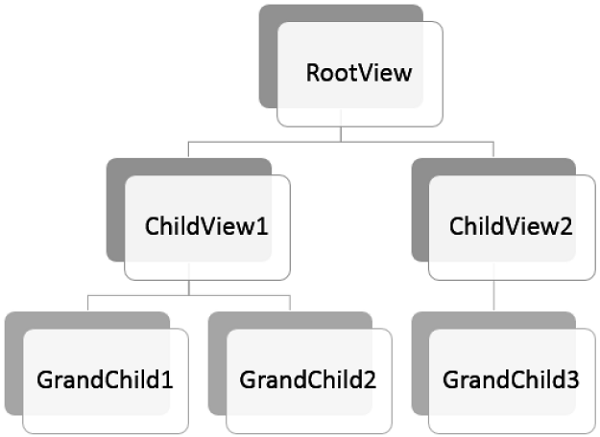
When building MVVM applications, you typically decompose complex screens of information into a set of parent and child views, where the child views are contained within the parent views in panels or container controls, and forms a hierarchy of use themselves.
After decomposing the complex Views it doesnt mean that each and every piece of child content that you separate into its own XAML file necessarily needs to be an MVVM view.
The chunk of content just provides the structure to render something to the screen and does not support any input or manipulation by the user for that content.
It may not need a separate ViewModel, but it could just be a chunk XAML that renders based on properties exposed by the parents ViewModel.
Finally, if you have a hierarchy of Views and ViewModels, the parent ViewModel can become a hub for communications so that each child ViewModel can remain decoupled from the other child ViewModels and from their parent as much as possible.
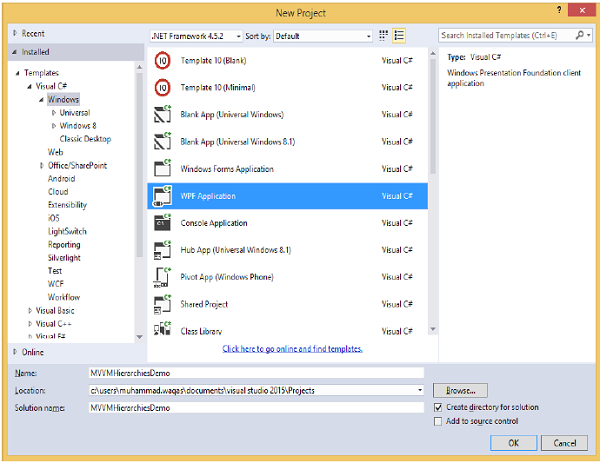
Lets take a look at an example in which we will define a simple hierarchy between different views. Create a new WPF Application project MVVMHierarchiesDemo
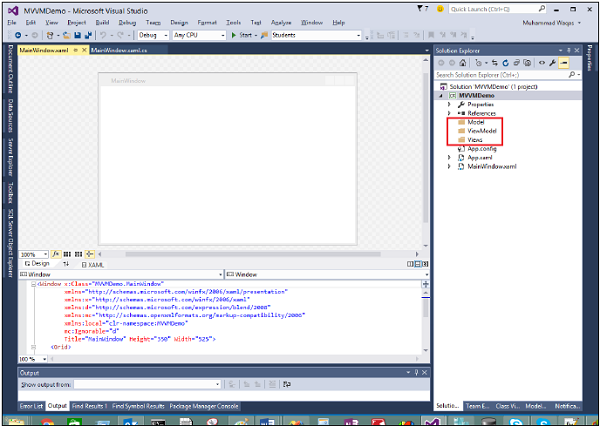
Step 1 − Add the three folders (Model, ViewModel, and Views) into your project.
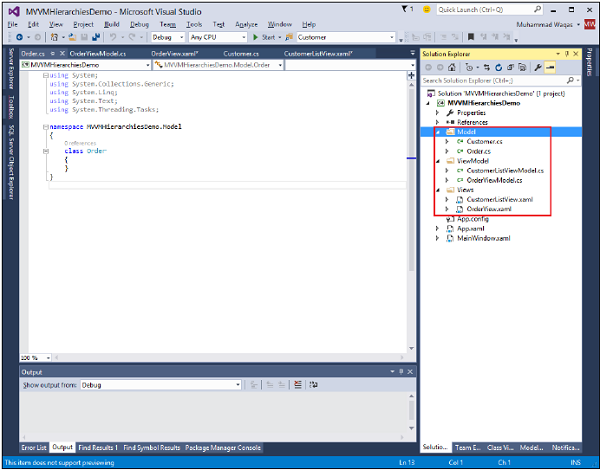
Step 2 − Add Customer and Order classes in Model folder, CustomerListView and OrderView in Views folder, and CustomerListViewModel and OrderViewModel in ViewModel folder as shown in the following image.
Step 3 − Add textblocks in both CustomerListView and OrderView. Here is CustomerListView.xaml file.
<UserControl x:Class="MVVMHierarchiesDemo.Views.CustomerListView"
   xmlns = "http://schemas.microsoft.com/winfx/2006/xaml/presentation"
   xmlns:x = "http://schemas.microsoft.com/winfx/2006/xaml"
   xmlns:mc = "http://schemas.openxmlformats.org/markup-compatibility/2006"
   xmlns:d = "http://schemas.microsoft.com/expression/blend/2008"
   xmlns:local = "clr-namespace:MVVMHierarchiesDemo.Views"
   mc:Ignorable = "d"
   d:DesignHeight = "300" d:DesignWidth = "300">

   <Grid>
      <TextBlock Text = "Customer List View"/>
   </Grid>

</UserControl>
Following is the OrderView.xaml file.
<UserControl x:Class = "MVVMHierarchiesDemo.Views.OrderView"
   xmlns = "http://schemas.microsoft.com/winfx/2006/xaml/presentation"
   xmlns:x ="http://schemas.microsoft.com/winfx/2006/xaml"
   xmlns:mc ="http://schemas.openxmlformats.org/markup-compatibility/2006"
   xmlns:d ="http://schemas.microsoft.com/expression/blend/2008"
   xmlns:local = "clr-namespace:MVVMHierarchiesDemo.Views" mc:Ignorable = "d"
   d:DesignHeight = "300" d:DesignWidth = "300">

   <Grid>
      <TextBlock Text = "Order View"/>
   </Grid>

</UserControl>
Now we need something to host these views, and a good place for that in our MainWindow because it is a simple application. We need a container control that we can place our views and switch them in a navigation fashion. For this purpose, we need to add ContentControl in our MainWindow.xaml file and we will be using its content property and bind that to a ViewModel reference.
Now define the data templates for each view in a resource dictionary. Following is the MainWindow.xaml file. Note how each data template maps a data type (the ViewModel type) to a corresponding View.
<Window x:Class = "MVVMHierarchiesDemo.MainWindow"
   xmlns = "http://schemas.microsoft.com/winfx/2006/xaml/presentation"
   xmlns:x = "http://schemas.microsoft.com/winfx/2006/xaml"
   xmlns:d = "http://schemas.microsoft.com/expression/blend/2008"
   xmlns:mc = "http://schemas.openxmlformats.org/markup-compatibility/2006"
   xmlns:local = "clr-namespace:MVVMHierarchiesDemo"
   xmlns:views = "clr-namespace:MVVMHierarchiesDemo.Views"
   xmlns:viewModels = "clr-namespace:MVVMHierarchiesDemo.ViewModel"
   mc:Ignorable = "d"
   Title = "MainWindow" Height = "350" Width = "525">

   <Window.DataContext>
      <local:MainWindowViewModel/>
   </Window.DataContext>

   <Window.Resources>
      <DataTemplate DataType = "{x:Type viewModels:CustomerListViewModel}">
         <views:CustomerListView/>
      </DataTemplate>

      <DataTemplate DataType = "{x:Type viewModels:OrderViewModel}">
         <views:OrderView/>
      </DataTemplate>
   </Window.Resources>

   <Grid>
      <ContentControl Content = "{Binding CurrentView}"/>
   </Grid>

</Window>
Anytime the current view model is set to an instance of a CustomerListViewModel, it will render out a CustomerListView with the ViewModel is hooked up. Its an order ViewModel, it'll render out OrderView and so on.
We now need a ViewModel that has a CurrentViewModel property and some logic and commanding to be able to switch the current reference of ViewModel inside the property.
Let's create a ViewModel for this MainWindow called MainWindowViewModel. We can just create an instance of our ViewModel from XAML and use that to set the DataContext property of the window. For this, we need to create a base class to encapsulate the implementation of INotifyPropertyChanged for our ViewModels.
The main idea behind this class is to encapsulate the INotifyPropertyChanged implementation and provide helper methods to the derived class so that they can easily trigger the appropriate notifications. Following is the implementation of BindableBase class.
using System;
using System.Collections.Generic;
using System.ComponentModel;
using System.Linq;
using System.Runtime.CompilerServices;
using System.Text;
using System.Threading.Tasks;

namespace MVVMHierarchiesDemo {

   class BindableBase : INotifyPropertyChanged {

      protected virtual void SetProperty<T>(ref T member, T val,
         [CallerMemberName] string propertyName = null) {
            if (object.Equals(member, val)) return;

            member = val;
            PropertyChanged(this, new PropertyChangedEventArgs(propertyName));
      }

      protected virtual void OnPropertyChanged(string propertyName) {
         PropertyChanged(this, new PropertyChangedEventArgs(propertyName));
      }

      public event PropertyChangedEventHandler PropertyChanged = delegate { };
   }
}
Now it's time to actually start doing some view switching using our CurrentViewModel property. We just need some way to drive the setting of this property. And we're going to make it so that the end user can command going to the customer list or to the order view. First add a new class in your project which will implement the ICommand interface. Following is the implementation of ICommand interface.
using System;
using System.Windows.Input;

namespace MVVMHierarchiesDemo {

   public class MyICommand<T> : ICommand {

      Action<T> _TargetExecuteMethod;
      Func<T, bool> _TargetCanExecuteMethod;

      public MyICommand(Action<T> executeMethod) {
         _TargetExecuteMethod = executeMethod;
      }

      public MyICommand(Action<T> executeMethod, Func<T, bool> canExecuteMethod) {
         _TargetExecuteMethod = executeMethod;
         _TargetCanExecuteMethod = canExecuteMethod;
      }

      public void RaiseCanExecuteChanged() {
         CanExecuteChanged(this, EventArgs.Empty);
      }

      #region ICommand Members

      bool ICommand.CanExecute(object parameter) {

         if (_TargetCanExecuteMethod != null) {
            T tparm = (T)parameter;
            return _TargetCanExecuteMethod(tparm);
         }

         if (_TargetExecuteMethod != null) {
            return true;
         }

         return false;
      }

      // Beware - should use weak references if command instance lifetime is
         longer than lifetime of UI objects that get hooked up to command

      // Prism commands solve this in their implementation

      public event EventHandler CanExecuteChanged = delegate { };

      void ICommand.Execute(object parameter) {
         if (_TargetExecuteMethod != null) {
            _TargetExecuteMethod((T)parameter);
         }
      }

      #endregion
   }
}
We now need to set up some top level navigation to these to ViewModels and logic for that switching should belong inside MainWindowViewModel. For this we're going to use a method called on navigate that takes a string destination and returns the CurrentViewModel property.
private void OnNav(string destination) {

   switch (destination) {
      case "orders":
         CurrentViewModel = orderViewModelModel;
      break;
      case "customers":
      default:
         CurrentViewModel = custListViewModel;
      break;
   }
}
For navigation of these different Views, we need to add two buttons in our MainWindow.xaml file. Following is the complete XAML file implementation.
<Window x:Class = "MVVMHierarchiesDemo.MainWindow"
   xmlns = "http://schemas.microsoft.com/winfx/2006/xaml/presentation"
   xmlns:x = "http://schemas.microsoft.com/winfx/2006/xaml"
   xmlns:d = "http://schemas.microsoft.com/expression/blend/2008"
   xmlns:mc = "http://schemas.openxmlformats.org/markup-compatibility/2006"
   xmlns:local = "clr-namespace:MVVMHierarchiesDemo"
   xmlns:views = "clr-namespace:MVVMHierarchiesDemo.Views"
   xmlns:viewModels = "clr-namespace:MVVMHierarchiesDemo.ViewModel"
   mc:Ignorable = "d"
   Title = "MainWindow" Height = "350" Width = "525">

   <Window.DataContext>
      <local:MainWindowViewModel/>
   </Window.DataContext>

   <Window.Resources>
      <DataTemplate DataType = "{x:Type viewModels:CustomerListViewModel}">
         <views:CustomerListView/>
      </DataTemplate>

      <DataTemplate DataType = "{x:Type viewModels:OrderViewModel}">
         <views:OrderView/>
      </DataTemplate>
   </Window.Resources>

   <Grid>
      <Grid.RowDefinitions>
         <RowDefinition Height = "Auto" />
         <RowDefinition Height = "*" />
      </Grid.RowDefinitions>

      <Grid x:Name = "NavBar">
         <Grid.ColumnDefinitions>
            <ColumnDefinition Width = "*" />
            <ColumnDefinition Width = "*" />
            <ColumnDefinition Width = "*" />
         </Grid.ColumnDefinitions>

         <Button Content = "Customers"
            Command = "{Binding NavCommand}"
            CommandParameter = "customers"
            Grid.Column = "0" />

         <Button Content = "Order"
            Command = "{Binding NavCommand}"
            CommandParameter = "orders"
            Grid.Column = "2" />
      </Grid>

      <Grid x:Name = "MainContent" Grid.Row = "1">
         <ContentControl Content = "{Binding CurrentViewModel}" />
      </Grid>

   </Grid>

</Window>
Following is the complete MainWindowViewModel implementation.
using MVVMHierarchiesDemo.ViewModel;
using MVVMHierarchiesDemo.Views;

using System;
using System.Collections.Generic;
using System.Linq;
using System.Text;
using System.Threading.Tasks;

namespace MVVMHierarchiesDemo {

   class MainWindowViewModel : BindableBase {

      public MainWindowViewModel() {
         NavCommand = new MyICommand<string>(OnNav);
      }

      private CustomerListViewModel custListViewModel = new CustomerListViewModel();

      private OrderViewModel orderViewModelModel = new OrderViewModel();

      private BindableBase _CurrentViewModel;

      public BindableBase CurrentViewModel {
         get {return _CurrentViewModel;}
         set {SetProperty(ref _CurrentViewModel, value);}
      }

      public MyICommand<string> NavCommand { get; private set; }

      private void OnNav(string destination) {

         switch (destination) {
            case "orders":
               CurrentViewModel = orderViewModelModel;
               break;
            case "customers":
            default:
               CurrentViewModel = custListViewModel;
               break;
         }
      }
   }
}
Derive all of your ViewModels from BindableBase class. When the above code is compiled and executed, you will see the following output.
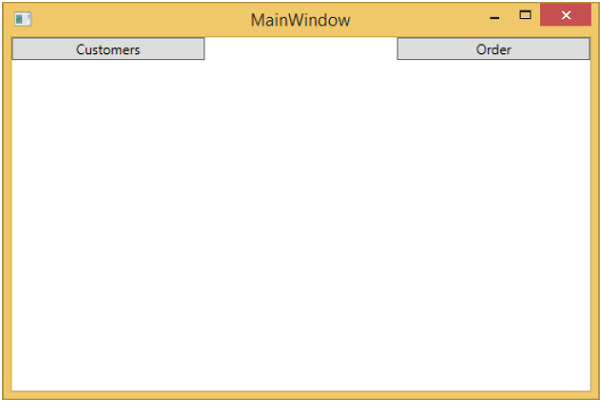
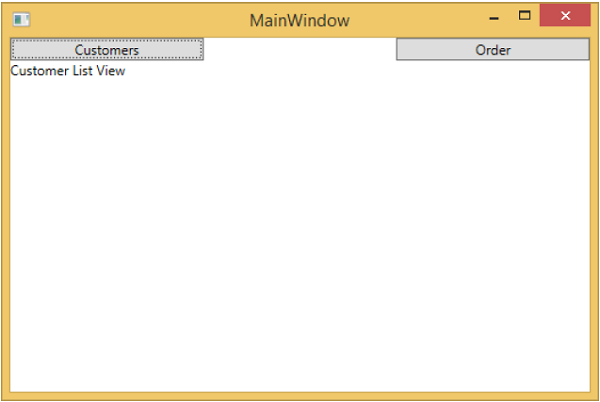
As you can see, we have added only two buttons and a CurrentViewModel on our MainWindow. If you click any button then it will navigate to that particular View. Lets click on Customers button and you will see that the CustomerListView is displayed.
We recommend you to execute the above example in a step-by-step manner for better understanding.
