- Microsoft Azure - Home
- Cloud Computing - Overview
- Microsoft Azure - Windows
- Microsoft Azure - Components
- Microsoft Azure - Compute Module
- Microsoft Azure - Fabric Controller
- Microsoft Azure - Storage
- Microsoft Azure - Blobs
- Microsoft Azure - Queues
- Microsoft Azure - Tables
- Microsoft Azure - CDN
- Microsoft Azure - Applications
- Microsoft Azure - Security
- Microsoft Azure - Datacenters
- Microsoft Azure - Scenarios
- Microsoft Azure - Management Portal
- Azure - Create Virtual Network
- Azure - Deploying Virtual Machines
- Azure - Endpoint Configuration
- Azure - Point-to-Site Connectivity
- Azure - Site-to-Site Connectivity
- Microsoft Azure - Traffic Manager
- Microsoft Azure - PowerShell
- Azure - Monitoring Virtual Machines
- Azure - Setting Up Alert Rules
- Azure - Application Deployment
- Microsoft Azure - Backup & Recovery
- Azure - Self-Service Capabilities
- Azure - Multi-Factor Authentication
- Azure - Forefront Identity Manager
- Azure - Data Import & Export Job
- Microsoft Azure - Websites
- Microsoft Azure - Scalability
- Microsoft Azure - Disk Configuration
- Microsoft Azure - Disk Caching
- Microsoft Azure - Personalize Access
- Azure - Personalize Company Brand
- Azure - Self-Service Password Reset
- Microsoft Azure - Self-Service Group
- Microsoft Azure - Create a Group
- Azure - Security Reports & Alerts
- Azure - Orchestrated Recovery
- Microsoft Azure - Health Monitoring
- Microsoft Azure - Upgrades
- Microsoft Azure Useful Resources
- Microsoft Azure - Quick Guide
- Microsoft Azure - Useful Resources
- Microsoft Azure - Discussion
Azure - Personalize Company Branding
When a company has many applications, they might want to have the companys look and feel on the sign-in page of those applications. There could be several objectives behind this, including marketing. Companies that use Azure Active Directory for identity management can do it by customizing the appearance of the sign-in page.
This feature is available for basic and premium editions of Azure Active Directory. You wont find this in free edition.
If you dont have subscription to basic or premium edition you can have a free trial of premium edition.
Active Free Trial of Azure Active Directory (ADD) Premium Edition
Step 1 − Login to your Azure Management Portal.
Step 2 − Go to Azure Active Directory you want to work with.
Step 3 − Click on Licenses tab from the top menu as shown in the following image.
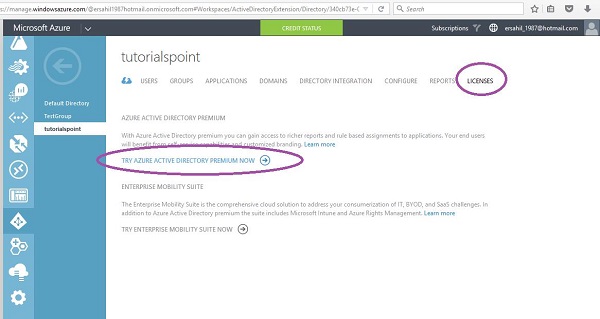
Step 4 − Click Try Azure Active Directory Premium Now and it will be activated for that directory.
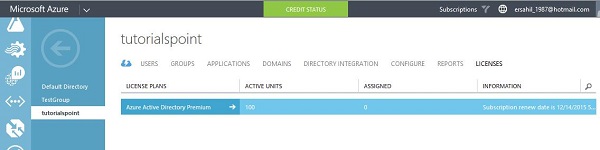
Refresh your page as it might take a few seconds to update and show up on your portal. Once it is activated, you will see the plan under Licenses tab.
Customize Branding
Before moving ahead, make sure that the images (logo, background, square background) you want to display on the sign-in page are of correct sizes and dimensions. If you dont take care of this, you would waste your time uploading images and then ultimately you will find that branding changes are not done. Here are certain specifications −
| Image | Size in kb | Recommended Dimensions | Maximum Dimensions | Supported Format |
|---|---|---|---|---|
| Logo | 5-10 | 60-280 | 60-300 | png/jpeg |
| Square Logo | 5-10 | 240-240 | 240-240 | png/jpeg |
| Square Logo Dark Theme | 5-10 | 240-240 | 240-240 | png/jpeg |
| Sign-in page illustration | 500 (300 recommended) | 1420-1200 | 1420-1200 | Png/jpeg/gif |
Step 1 − Go to the directory you want to work with.
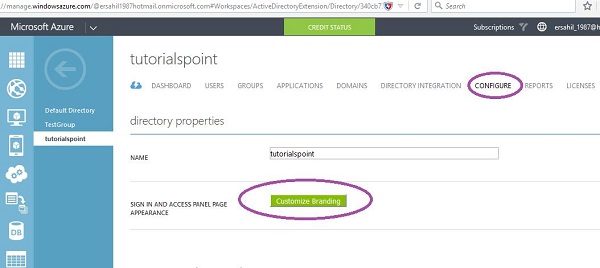
Step 2 − Click on Configure tab from the top menu.
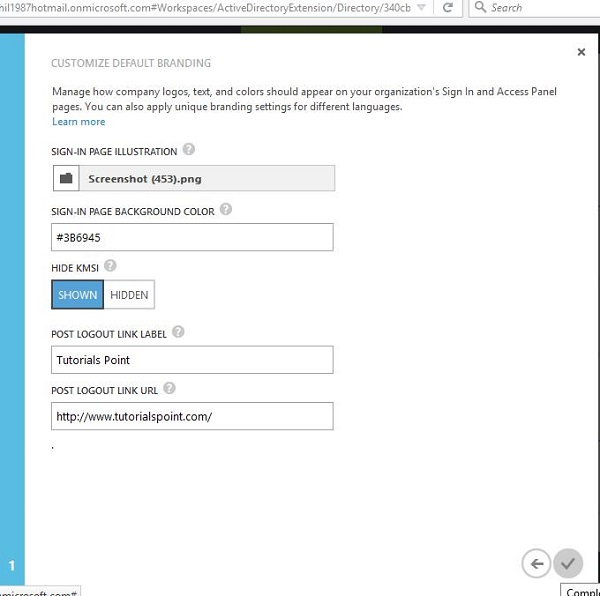
Step 3 − Click Customize Branding button. The following pop-up will appear.
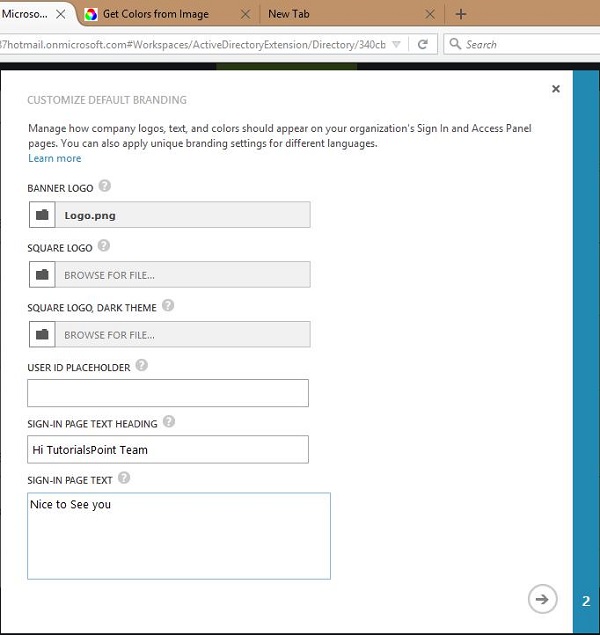
Step 4 − Enter the details and upload the images.
Step 5 − Click Next and enter the details.
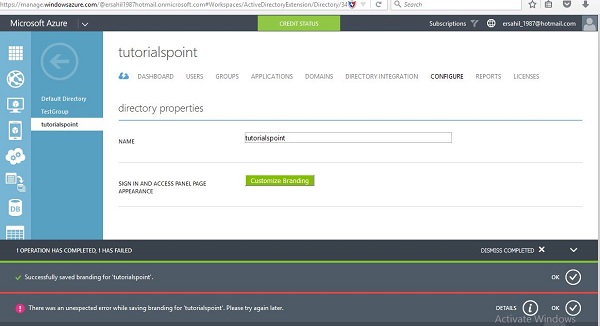
After you are done, do look for the notifications at the bottom of the window to make sure that changes are accepted. In the following image, you can see a notification in red outline which shows that it wasnt successful in a previous attempt and threw an error. If the changes are not accepted and an error occurs, click Details button to find the cause. Usually this occurs when the size and dimension of images to be uploaded are not correct.
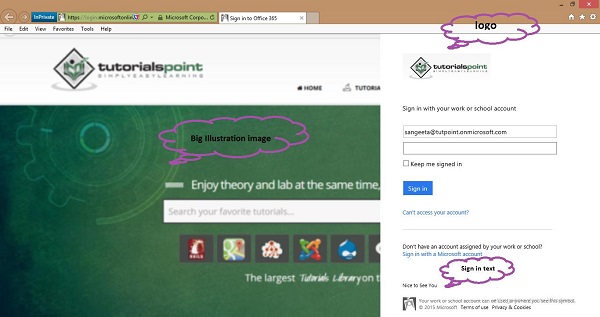
Login with Customized Sign-in Page
When you sign in to your organizations application, you will see your logo, big illustration image and sign-in text on that page. For example, lets sign in to Office 365 using organizations account.
Things to Consider
Domain name should be active.
It might take up to an hour for changes to appear on the sign-in page.
To test, choose in-private session of internet explorer (or corresponding session in other browser where cookies dont affect your browsing).
