- Microsoft Azure - Home
- Cloud Computing - Overview
- Microsoft Azure - Windows
- Microsoft Azure - Components
- Microsoft Azure - Compute Module
- Microsoft Azure - Fabric Controller
- Microsoft Azure - Storage
- Microsoft Azure - Blobs
- Microsoft Azure - Queues
- Microsoft Azure - Tables
- Microsoft Azure - CDN
- Microsoft Azure - Applications
- Microsoft Azure - Security
- Microsoft Azure - Datacenters
- Microsoft Azure - Scenarios
- Microsoft Azure - Management Portal
- Azure - Create Virtual Network
- Azure - Deploying Virtual Machines
- Azure - Endpoint Configuration
- Azure - Point-to-Site Connectivity
- Azure - Site-to-Site Connectivity
- Microsoft Azure - Traffic Manager
- Microsoft Azure - PowerShell
- Azure - Monitoring Virtual Machines
- Azure - Setting Up Alert Rules
- Azure - Application Deployment
- Microsoft Azure - Backup & Recovery
- Azure - Self-Service Capabilities
- Azure - Multi-Factor Authentication
- Azure - Forefront Identity Manager
- Azure - Data Import & Export Job
- Microsoft Azure - Websites
- Microsoft Azure - Scalability
- Microsoft Azure - Disk Configuration
- Microsoft Azure - Disk Caching
- Microsoft Azure - Personalize Access
- Azure - Personalize Company Brand
- Azure - Self-Service Password Reset
- Microsoft Azure - Self-Service Group
- Microsoft Azure - Create a Group
- Azure - Security Reports & Alerts
- Azure - Orchestrated Recovery
- Microsoft Azure - Health Monitoring
- Microsoft Azure - Upgrades
- Microsoft Azure Useful Resources
- Microsoft Azure - Quick Guide
- Microsoft Azure - Useful Resources
- Microsoft Azure - Discussion
Microsoft Azure - Compute Module
In the last chapter, we explained how to create an Azure account. In this chapter, you will find step by step explanation of each component −
Step 1 − First, login in to your Azure account.
Step 2 − Click New at the left bottom corner and drag your cursor to Compute.
Now you will see a list of models under Compute Model as shown in the following image.

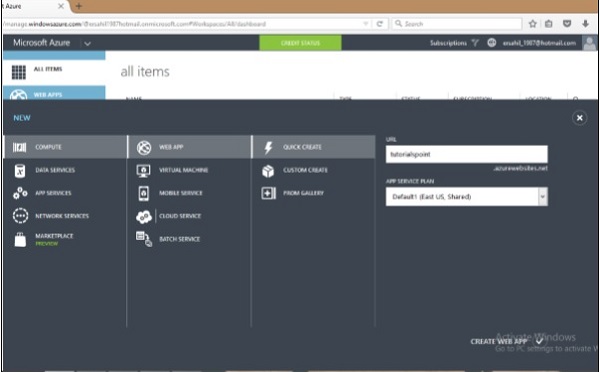
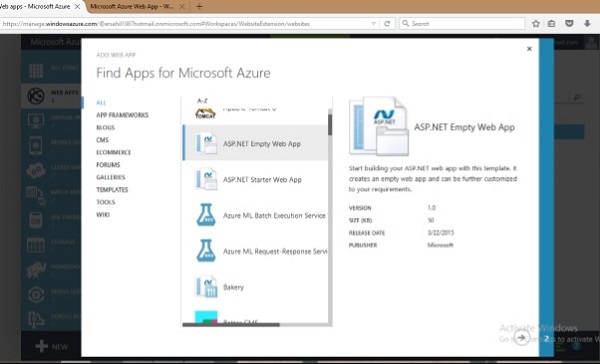
Create a Web App
Step 1 − Click Web App.
Step 2 − Click Quick Create and enter the URL and choose a service plan from the dropdown list as shown in the following image.
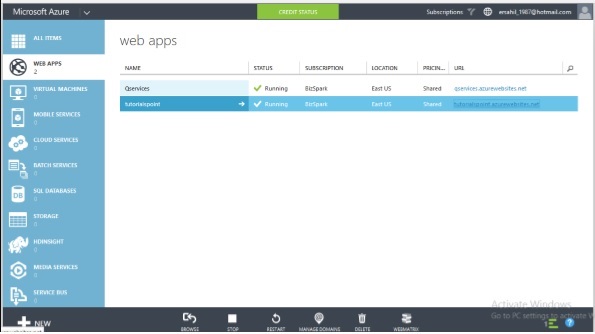
When you go back to the main screen, it will show the website just created. And when you click the website URL, it will take you to the website.
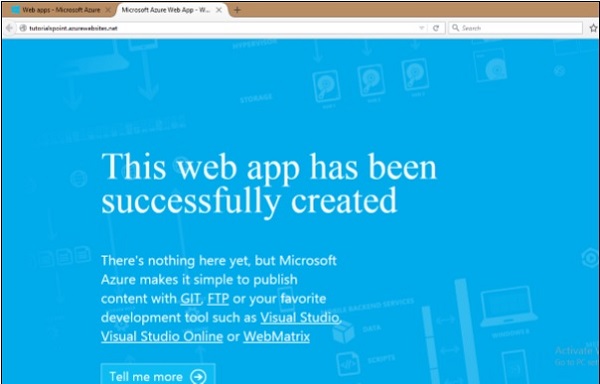
The following image shows how your website will look when you click the URL.
Similarly, you can choose From Gallery when creating a web app instead of Quick Create. This will let you choose the development framework in which you want to create your app.
Windows Azure supports .Net, Java, PHP, Python, Node.js and Ruby. There are several ways of publishing the code to Azure server. It can be published using FTP, FTPs, Microsoft Web Deploy technology. Various source control tools such as GitHub, Dropbox and Codeplex can also be used to publish the code. It provides a very interactive interface to keep track of changes that have been published already and also unpublished changes.
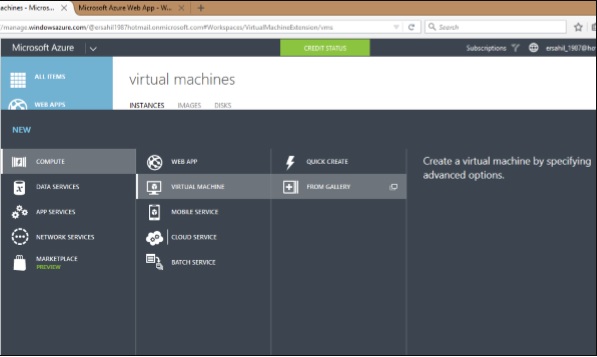
Create a Virtual Machine
Step 1 − Click on Virtual Machine from the list.
Step 2 − Then click From Gallery.
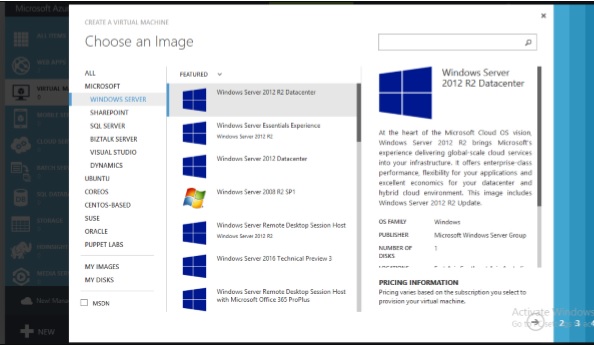
Step 3 − Choose the Operating System or Program you want to run.
Step 4 − Choose the configuration and fill in the details.
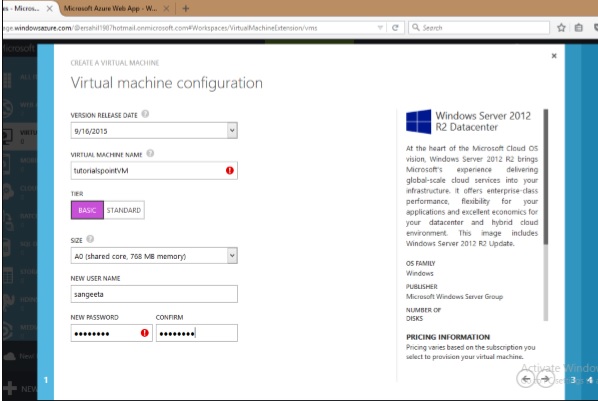
The Username and Password you set up here will be needed to access the virtual machine every time.
On the next two screens you can leave the default values on for the first time.
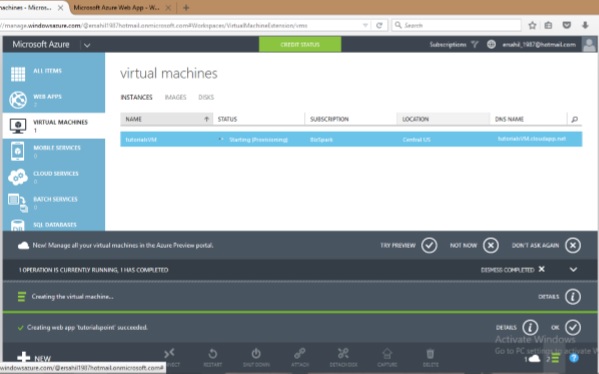
Step 5 − The virtual machine just created will be displayed when you click on Virtual Machine on the left panel as shown in following image. It might take a few minutes to show up.
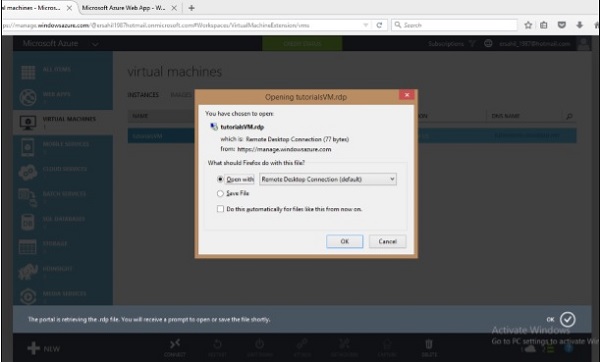
Step 6 − Once the machine is created you can connect to it by clicking on the connect icon displayed at the bottom of the screen. It will save a .rpd file on your machine as shown in the following image. Chose save file on the screen and it will save in downloads or the in the set location on your machine.
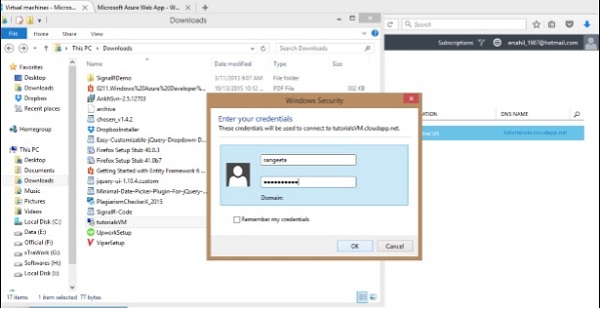
Step 7 − Open that .rpd file and you can connect to the VM by filling in the credentials into the following screen.
You can also use your own image by capturing the image of an existing virtual machine or virtual hard drive. Virtual machines are beneficial in several ways.
A user can try new operating system without actually installing them.
A VM can be deleted when you are done with the operating system.
New versions of an operating system can be tried and tested before the user installs them on the machine.
VM provides a very economical and hassle free way of using a development framework or a tool that runs on specific version of OS.
Creating a Mobile Service
Mobile services compute hosting model is optimized to provide a cloud backend for applications that run on mobile devices. For creating a mobile service −
Step 1 − Select Mobile services under Compute and click on create. A new window will be open as shown in the following image.

Step 2 − Fill in the URL. Select the database, region and backend.
Step 3 − Tick the check box if you want to configure the advance push settings. This option allows us to configure our Mobile Service to use an existing notification hub or specify the name of a new one. If you leave this checkbox unmarked, a new hub will be created in a new namespace with a default name.
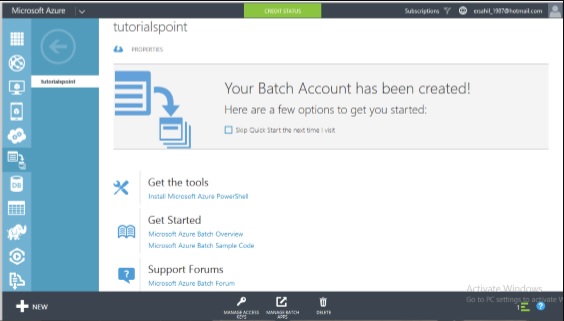
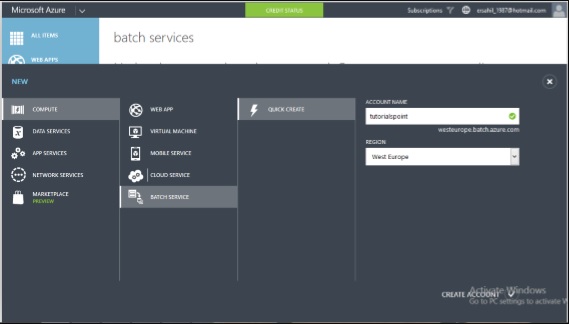
Creating Batch Service
Batch service is needed when a large scale application is run and a parallel high performing computing is required. The developers can create batches to run a task parallel that eases the workload at no extra cost. Azure charges for only the virtual machines which are being used. They can schedule a task, put them in queues and manage the workload in cloud. Batch creation does not involve setting up a separate VM, cluster or job scheduling.
To creating a batch service follow the similar steps for creating other services under Compute model. The following image shows how a batch service can be created quickly.
Once you have created a batch service, you can see the details by selecting it from the left panel. The following image pops up on the screen.