- Malware Removal - Home
- Malware Removal - Overview
- Malware Removal - How It Works
- Malware Removal - Types
- Detection Techniques
- Preparation for Removal
- Malware Removal - Process
- Malware Removal - Protection
- Malware Removal - Removal Tools
Malware Removal - McAfee Stinger
McAfee Stinger is a standalone utility used to detect and remove specific viruses. However, it is not a substitute for full antivirus protection, but a specialized tool to assist administrators and users when dealing with an infected system. Stinger now includes Real Protect - a real-time behavior detection technology that monitors suspicious activity on an endpoint. Real Protect leverages machine learning and automated behavioral based classification in the cloud to detect zero-day malware in real-time.
It can be downloaded from − https://www.mcafee.com/en-in/antivirus.html
It is a specialized tool to assist administrators and users when dealing with an infected system. Stinger utilizes next-generation scan technology, including rootkit scanning and scan performance optimizations. It detects and removes threats identified under the "Threat List" option under the Advanced Menu options in the Stinger application.
McAfee Stinger now detects and removes GameOver Zeus and CryptoLocker.
Installation of McAfee Stinger
To install McAfee Stinger antivirus on your system, we should follow the steps given below.
Step 1 − After downloading McAfee Stinger antivirus, we should click on the .exe file. This will open the end user license agreement as shown in the following screenshot.
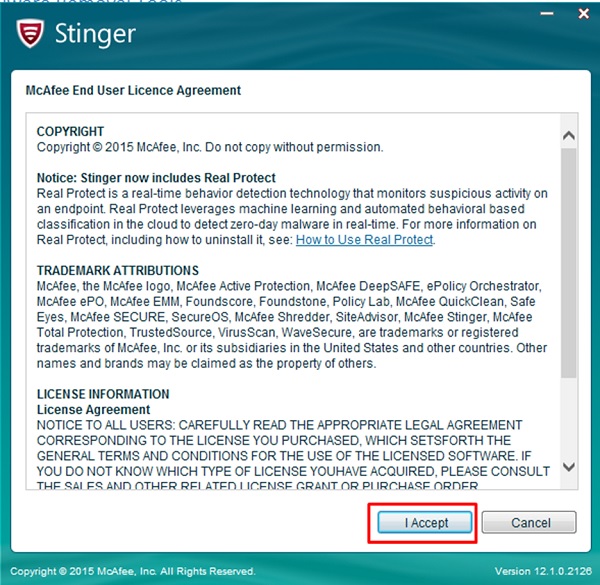
Step 2 − Click on the I Accept button and then the following screenshot will appear.
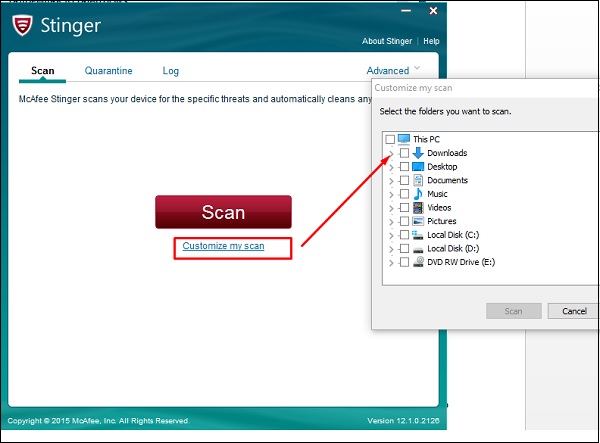
By default, Stinger scans for Rootkits, Running Processes, Loaded Modules, Registry and Directory Locations that are used by malware on a machine to keep scan times minimal. If necessary, click the "Customize my scan" button to add additional drives/directories to scan.
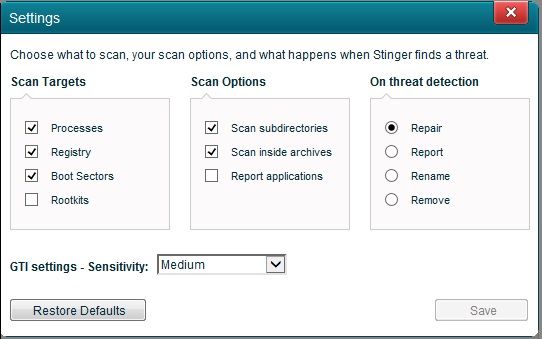
By default, Stinger will repair any infected files it finds on your system.
Step 3 − Stinger leverages GTI File Reputation and runs network heuristics at medium level by default. If you select "High" or "Very High" level, McAfee Labs recommends that you set the "On threat detection" action to "Report" only for the first scan.
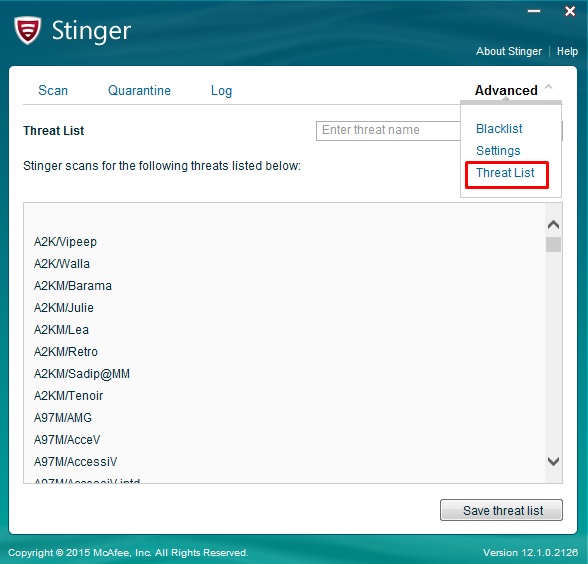
Step 4 − If we click on the Threat List on the right upper corner of the screen, we will see all the malwares that this anti-malware has fixed or can fix.
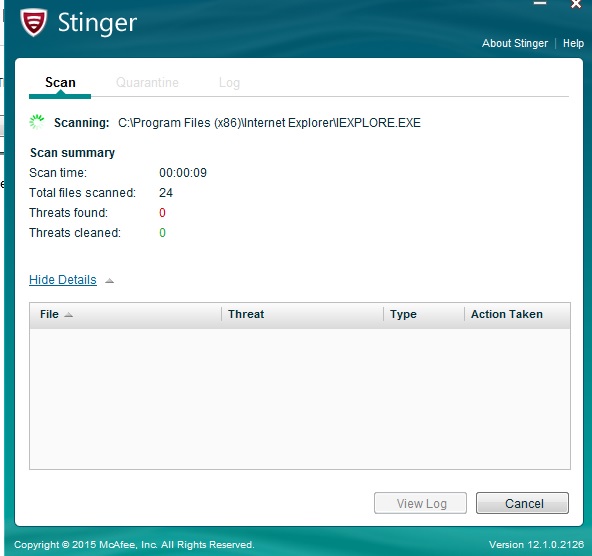
Step 5 − Click the Scan button to begin scanning the specified drives/directories and the process will continue as shown in the screenshot below.