
 Data Structure
 Networking
 RDBMS
RDBMS Operating System
 Java
Java MS Excel
 iOS
iOS HTML
HTML CSS
CSS Android
 Python
 C Programming
 C++
C++ C#
C# MongoDB
 MySQL
MySQL Javascript
 PHP
PHP
- Selected Reading
- UPSC IAS Exams Notes
- Developer's Best Practices
- Questions and Answers
- Effective Resume Writing
- HR Interview Questions
- Computer Glossary
- Who is Who
Making Two Screen App in Snack
In React native apps, multiple screens are often needed. And the user needs to go from one screen to the other screen. In this article, two different approaches are used to make the two-screen apps where the user can go from one screen to the other and back. In Example 1, the createStackNavigator module from 'react-navigation' is used to implement the navigation while in Example 2, for creating the navigation the createSwitchNavigator is used.
Algorithm
Algorithm 1
Step 1 ? Import createStackNavigator from 'react-navigation'
Step 2 ? Make the App.js and write the code for navigation from one screen to another in javascript files.
Step 3 ? Make Two Screen as classes My_Home and My_School in App.js file.
Step 4 ? Set the navopt such as title and the headerStyle.
Step 5 ? Write the code to navigate from My_Home to My_School and back to My_Home.
Step 6 ? View the results online on Web View instantly.
Algorithm 2
Step 1 ? Make a screens folder and create the javascript files called FirstScreen.js and SecondScreen.js. Write the code in these files for FirstScrr and SecondScrr.
Step 2 ? Import the modules called createAppContainer and also createSwitchNavigator from the library 'react-navigation'.
Step 3 ? Make the App.js and write the code for going from FirstScrr to SecondScrr and then back to FirstScrr.
Step 4 ? Use the onPress() function of the button to go from FirstScrr to SecondScrr and then back to FirstScrr.
Step 5 ? View the results online on Web View instantly.
Multiple Approaches
We have provided the solution in different approaches.
By Using createStackNavigator from 'react-navigation'
Using createAppContainer and also the createSwitchNavigator from library 'react-navigation'
Let's see the program along with its output one by one.
Approach 1: Using createStackNavigator from 'react-navigation'
Important files in the project
App.js
Package.json
Two image files myhome.jpg and myschool.jpg
App.js : This is the main javascript file.
Example
import {Component} from 'react';
import { Button,Image, View } from 'react-native';
import {createStackNavigator} from 'react-navigation';

export default class TheTwoScreenApp extends Component {
   render() {
      return <TheTwoScreenNavigator />;
   }
}

class My_Home extends Component {
   navopt = {
      title: 'The Home',
      headerStyle: {backgroundColor:"#499AC8"}
   };
   render() {
      return (
         <View
            style={{
               flex: 1,
               justifyContent: 'center'
            }}>

            <Image
               style={{ width: 300, height: 300, margin:15 }}
               source={require('./myhome.jpg')} />
            <Button
               title="Go to Your School"
               onPress={() =>
              this.props.navigation.navigate('My_School')
            }
            />
         </View>
      );
   }
}

class My_School extends Component {
   navopt = {
      title: 'The School',
      headerStyle: {backgroundColor:"#499AC8"}
   };
   render() {
      return (
         <View
            style={{
               flex: 1,
               justifyContent: 'center',
            }}>
            <Image
               style={{ width: 300, height: 300, margin:15 }}
               source={require('./myschool.jpg')} />
            <Button
               title="Go back to Your Home"
               onPress={() =>
               this.props.navigation.navigate('My_Home')
            }
            />
         </View>
      );
   }
}
const TheTwoScreenNavigator = createStackNavigator(
   {
      My_Home: My_Home,
      My_School: My_School,
   },
);
Package.json : This is the file that contains the required dependencies.
Example
{
   "dependencies": {
      "react-navigation": "2.0.0-rc.2",
      "@expo/vector-icons": "^13.0.0"
   }
}
Viewing The Result
The Starting Screen Output
The result can be seen online.
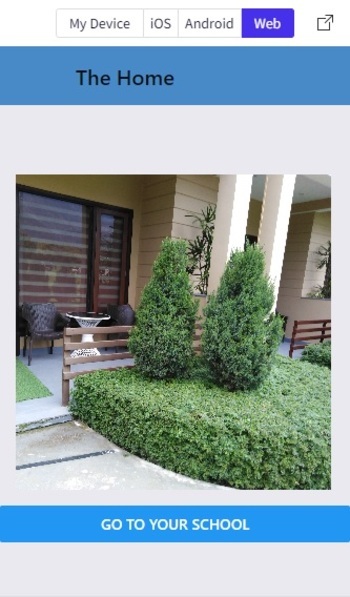
Showing the Starting Screen (The Home) as the Web View
The Next Screen Output
If the user clicks a button from the First Screen, the navigation leads to the Next Screen.
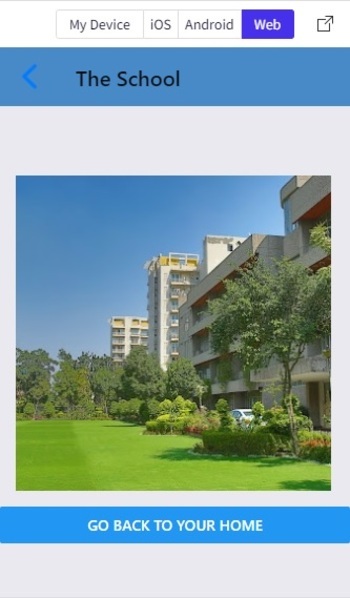
Showing the Next Screen (The School) as the Web View.
Approach 2: By using createAppContainer and also the createSwitchNavigator from library 'react-navigation'
Important files in the project
Folder name screens include FirstScreen.js and SecondScreen.js
App.js
Two image files myhome.jpg and myschool.jpg
FirstScreen.js : This is the javascript file that contains the code for the FirstScrr
Example
import {Component} from 'react';
import {View,Button, Text, Image, StyleSheet} from 'react-native';

export default class FirstScrr extends Component {
   render() {
      return (
         <View style={styles.mainSpace}>
            <Text style={{textAlign:"center", fontSize:30, color: "#357EC7"}}>The Home</Text>
            <Image
                style={{ width: 304, height: 304, margin:15, paddingTop: 40}}
               source={require('../myhome.jpg')} />
            <Button
               title="Go to Your School"
               onPress={() =>
               this.props.navigation.navigate('SecondScrr')
            }
            />
         </View>
      );
   }
}
const styles = StyleSheet.create({
   mainSpace: {
      flex: 1,
      alignItems: 'center',
      justifyContent: 'center',
      marginTop: 36,
      backgroundColor: '#ecf0f1',
   },
});
SecondScreen.js : This is the javascript file that contains the code for the Second Screen
Example
import{Component}from'react';
import{View,Button,Text,Image,StyleSheet}from'react-native';

exportdefaultclassSecondScrrextendsComponent{
   render(){
      return(
         <Viewstyle={styles.mainSpace}>
            <Textstyle={{textAlign:"center",fontSize:30,color:"#357EC7"}}>TheSchool</Text>
            <Image
               style={{width:304,height:304,margin:15}}
               source={require('../myschool.jpg')}/>
            <Button
               title="GobacktoYourHome"
               onPress={()=>
                  this.props.navigation.navigate('FirstScrr')
            }
            />
         </View>
      );
   }
}
conststyles=StyleSheet.create({
   mainSpace:{
      flex:1,
      alignItems:'center',
      justifyContent:'center',
      marginTop:36,
      backgroundColor:'#ecf0f1',
   },
});
App.js : This is the main javascript file for this project.
Example
import {Component} from 'react';
import {View} from 'react-native';
import { createAppContainer, createSwitchNavigator } from 'react-navigation';
import FirstScrr from './screens/FirstScreen';
import SecondScrr from './screens/SecondScreen';

export default class TheTwoScreenDemoExample extends Component {
   render() {
      return (
         <View>
            <AppBox />
         </View>
      );
   }
}

var AppNav = createSwitchNavigator({
   FirstScrr: FirstScrr,
   SecondScrr: SecondScrr,
});

const AppBox = createAppContainer(AppNav);
Viewing The Result
The FirstScreen Output
The result can be seen online.
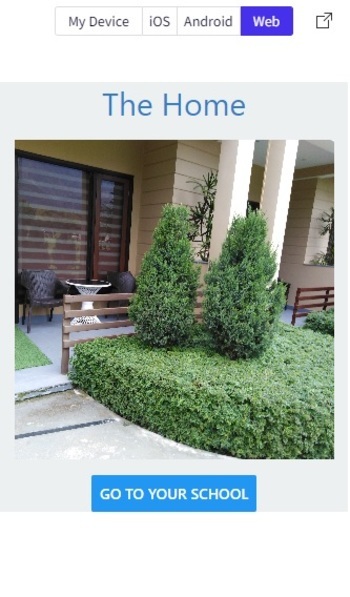
Showing the FirstScreen as the Web View
The SecondScreen Output
If the user clicks a button from the FirstScreen, the navigation leads to the SecondScreen.
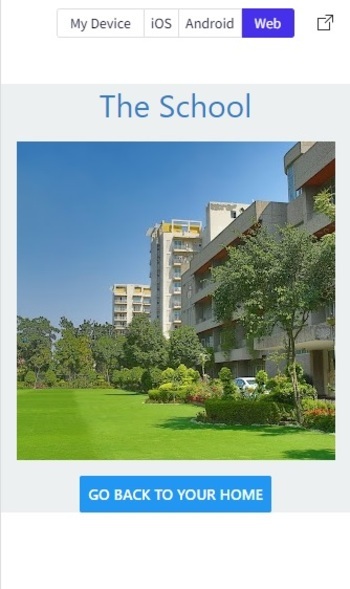
Showing the second screen as the Web View.
In this article, two ways to work with more than one screen in an app are shown. The process of how to navigate from one screen to the other screen is given using two different navigation approaches. In the first approach, the StackNavigator is used while in the second approach, the SwitchNavigator is used.

503 Views
