- Mahout - Home
- Mahout - Introduction
- Mahout - Machine Learning
- Mahout - Environment
- Mahout - Recommendation
- Mahout - Clustering
- Mahout - Classification
Mahout - Environment
This chapter teaches you how to setup mahout. Java and Hadoop are the prerequisites of mahout. Below given are the steps to download and install Java, Hadoop, and Mahout.
Pre-Installation Setup
Before installing Hadoop into Linux environment, we need to set up Linux using ssh (Secure Shell). Follow the steps mentioned below for setting up the Linux environment.
Creating a User
It is recommended to create a separate user for Hadoop to isolate the Hadoop file system from the Unix file system. Follow the steps given below to create a user:
Open root using the command su.
- Create a user from the root account using the command useradd username.
Now you can open an existing user account using the command su username.
Open the Linux terminal and type the following commands to create a user.
$ su
password:
# useradd hadoop
# passwd hadoop
New passwd:
Retype new passwd
SSH Setup and Key Generation
SSH setup is required to perform different operations on a cluster such as starting, stopping, and distributed daemon shell operations. To authenticate different users of Hadoop, it is required to provide public/private key pair for a Hadoop user and share it with different users.
The following commands are used to generate a key value pair using SSH, copy the public keys form id_rsa.pub to authorized_keys, and provide owner, read and write permissions to authorized_keys file respectively.
$ ssh-keygen -t rsa
$ cat ~/.ssh/id_rsa.pub >> ~/.ssh/authorized_keys
$ chmod 0600 ~/.ssh/authorized_keys
Verifying ssh
ssh localhost
Installing Java
Java is the main prerequisite for Hadoop and HBase. First of all, you should verify the existence of Java in your system using java -version. The syntax of Java version command is given below.
$ java -version
It should produce the following output.
java version "1.7.0_71"
Java(TM) SE Runtime Environment (build 1.7.0_71-b13)
Java HotSpot(TM) Client VM (build 25.0-b02, mixed mode)
If you dont have Java installed in your system, then follow the steps given below for installing Java.
Step 1
Download java (JDK <latest version> - X64.tar.gz) by visiting the following link: Oracle
Then jdk-7u71-linux-x64.tar.gz is downloaded onto your system.
Step 2
Generally, you find the downloaded Java file in the Downloads folder. Verify it and extract the jdk-7u71-linux-x64.gz file using the following commands.
$ cd Downloads/
$ ls
jdk-7u71-linux-x64.gz
$ tar zxf jdk-7u71-linux-x64.gz
$ ls
jdk1.7.0_71 jdk-7u71-linux-x64.gz
Step 3
To make Java available to all the users, you need to move it to the location /usr/local/. Open root, and type the following commands.
$ su
password:
# mv jdk1.7.0_71 /usr/local/
# exit
Step 4
For setting up PATH and JAVA_HOME variables, add the following commands to ~/.bashrc file.
export JAVA_HOME=/usr/local/jdk1.7.0_71
export PATH= $PATH:$JAVA_HOME/bin
Now, verify the java -version command from terminal as explained above.
Downloading Hadoop
After installing Java, you need to install Hadoop initially. Verify the existence of Hadoop using Hadoop version command as shown below.
hadoop version
It should produce the following output:
Hadoop 2.6.0
Compiled by jenkins on 2014-11-13T21:10Z
Compiled with protoc 2.5.0
From source with checksum 18e43357c8f927c0695f1e9522859d6a
This command was run using /home/hadoop/hadoop/share/hadoop/common/hadoopcommon-2.6.0.jar
If your system is unable to locate Hadoop, then download Hadoop and have it installed on your system. Follow the commands given below to do so.
Download and extract hadoop-2.6.0 from apache software foundation using the following commands.
$ su
password:
# cd /usr/local
# wget http://mirrors.advancedhosters.com/apache/hadoop/common/hadoop-
2.6.0/hadoop-2.6.0-src.tar.gz
# tar xzf hadoop-2.6.0-src.tar.gz
# mv hadoop-2.6.0/* hadoop/
# exit
Installing Hadoop
Install Hadoop in any of the required modes. Here, we are demonstrating HBase functionalities in pseudo-distributed mode, therefore install Hadoop in pseudo-distributed mode.
Follow the steps given below to install Hadoop 2.4.1 on your system.
Step 1: Setting up Hadoop
You can set Hadoop environment variables by appending the following commands to ~/.bashrc file.
export HADOOP_HOME=/usr/local/hadoop
export HADOOP_MAPRED_HOME=$HADOOP_HOME
export HADOOP_COMMON_HOME=$HADOOP_HOME
export HADOOP_HDFS_HOME=$HADOOP_HOME

export YARN_HOME=$HADOOP_HOME
export HADOOP_COMMON_LIB_NATIVE_DIR=$HADOOP_HOME/lib/native

export PATH=$PATH:$HADOOP_HOME/sbin:$HADOOP_HOME/bin
export HADOOP_INSTALL=$HADOOP_HOME
Now, apply all changes into the currently running system.
$ source ~/.bashrc
Step 2: Hadoop Configuration
You can find all the Hadoop configuration files at the location $HADOOP_HOME/etc/hadoop. It is required to make changes in those configuration files according to your Hadoop infrastructure.
$ cd $HADOOP_HOME/etc/hadoop
In order to develop Hadoop programs in Java, you need to reset the Java environment variables in hadoop-env.sh file by replacing JAVA_HOME value with the location of Java in your system.
export JAVA_HOME=/usr/local/jdk1.7.0_71
Given below are the list of files which you have to edit to configure Hadoop.
core-site.xml
The core-site.xml file contains information such as the port number used for Hadoop instance, memory allocated for file system, memory limit for storing data, and the size of Read/Write buffers.
Open core-site.xml and add the following property in between the <configuration>, </configuration> tags:
<configuration>
<property>
<name>fs.default.name</name>
<value>hdfs://localhost:9000</value>
</property>
</configuration>
hdfs-site.xm
The hdfs-site.xml file contains information such as the value of replication data, namenode path, and datanode paths of your local file systems. It means the place where you want to store the Hadoop infrastructure.
Let us assume the following data:
dfs.replication (data replication value) = 1

(In the below given path /hadoop/ is the user name.
hadoopinfra/hdfs/namenode is the directory created by hdfs file system.)
namenode path = //home/hadoop/hadoopinfra/hdfs/namenode

(hadoopinfra/hdfs/datanode is the directory created by hdfs file system.)
datanode path = //home/hadoop/hadoopinfra/hdfs/datanode
Open this file and add the following properties in between the <configuration>, </configuration> tags in this file.
<configuration>
   <property>
      <name>dfs.replication</name>
      <value>1</value>
   </property>

   <property>
      <name>dfs.name.dir</name>
      <value>file:///home/hadoop/hadoopinfra/hdfs/namenode</value>
   </property>

   <property>
      <name>dfs.data.dir</name>
      <value>file:///home/hadoop/hadoopinfra/hdfs/datanode</value>
   </property>
</configuration>
Note: In the above file, all the property values are user defined. You can make changes according to your Hadoop infrastructure.
mapred-site.xml
This file is used to configure yarn into Hadoop. Open mapred-site.xml file and add the following property in between the <configuration>, </configuration> tags in this file.
<configuration>
   <property>
      <name>yarn.nodemanager.aux-services</name>
      <value>mapreduce_shuffle</value>
   </property>
</configuration>
mapred-site.xml
This file is used to specify which MapReduce framework we are using. By default, Hadoop contains a template of mapred-site.xml. First of all, it is required to copy the file from mapred-site.xml.template to mapred-site.xml file using the following command.
$ cp mapred-site.xml.template mapred-site.xml
Open mapred-site.xml file and add the following properties in between the <configuration>, </configuration> tags in this file.
<configuration>
   <property>
      <name>mapreduce.framework.name</name>
      <value>yarn</value>
   </property>
</configuration>
Verifying Hadoop Installation
The following steps are used to verify the Hadoop installation.
Step 1: Name Node Setup
Set up the namenode using the command hdfs namenode -format as follows:
$ cd ~
$ hdfs namenode -format
The expected result is as follows:
10/24/14 21:30:55 INFO namenode.NameNode: STARTUP_MSG:
/************************************************************
STARTUP_MSG: Starting NameNode
STARTUP_MSG: host = localhost/192.168.1.11
STARTUP_MSG: args = [-format]
STARTUP_MSG: version = 2.4.1
...
...
10/24/14 21:30:56 INFO common.Storage: Storage directory
/home/hadoop/hadoopinfra/hdfs/namenode has been successfully formatted.
10/24/14 21:30:56 INFO namenode.NNStorageRetentionManager: Going to retain
1 images with txid >= 0
10/24/14 21:30:56 INFO util.ExitUtil: Exiting with status 0
10/24/14 21:30:56 INFO namenode.NameNode: SHUTDOWN_MSG:
/************************************************************
SHUTDOWN_MSG: Shutting down NameNode at localhost/192.168.1.11
************************************************************/
Step 2: Verifying Hadoop dfs
The following command is used to start dfs. This command starts your Hadoop file system.
$ start-dfs.sh
The expected output is as follows:
10/24/14 21:37:56
Starting namenodes on [localhost]
localhost: starting namenode, logging to /home/hadoop/hadoop-
2.4.1/logs/hadoop-hadoop-namenode-localhost.out
localhost: starting datanode, logging to /home/hadoop/hadoop-
2.4.1/logs/hadoop-hadoop-datanode-localhost.out
Starting secondary namenodes [0.0.0.0]
Step 3: Verifying Yarn Script
The following command is used to start yarn script. Executing this command will start your yarn demons.
$ start-yarn.sh
The expected output is as follows:
starting yarn daemons
starting resource manager, logging to /home/hadoop/hadoop-2.4.1/logs/yarn-
hadoop-resourcemanager-localhost.out
localhost: starting node manager, logging to /home/hadoop/hadoop-
2.4.1/logs/yarn-hadoop-nodemanager-localhost.out
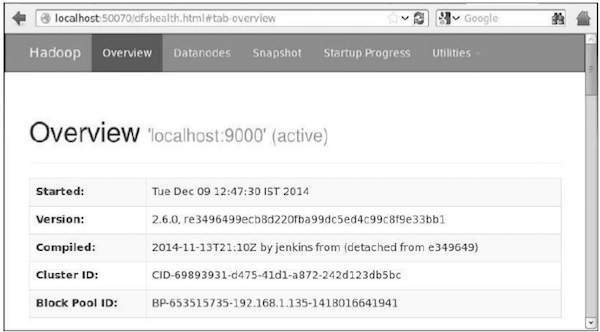
Step 4: Accessing Hadoop on Browser
The default port number to access hadoop is 50070. Use the following URL to get Hadoop services on your browser.
http://localhost:50070/
Step 5: Verify All Applications for Cluster
The default port number to access all application of cluster is 8088. Use the following URL to visit this service.
http://localhost:8088/

Downloading Mahout
Mahout is available in the website Mahout. Download Mahout from the link provided in the website. Here is the screenshot of the website.

Step 1
Download Apache mahout from the link https://mahout.apache.org/ using the following command.
[Hadoop@localhost ~]$ wget
http://mirror.nexcess.net/apache/mahout/0.9/mahout-distribution-0.9.tar.gz
Then mahout-distribution-0.9.tar.gz will be downloaded in your system.
Step2
Browse through the folder where mahout-distribution-0.9.tar.gz is stored and extract the downloaded jar file as shown below.
[Hadoop@localhost ~]$ tar zxvf mahout-distribution-0.9.tar.gz
Maven Repository
Given below is the pom.xml to build Apache Mahout using Eclipse.
<dependency>
   <groupId>org.apache.mahout</groupId>
   <artifactId>mahout-core</artifactId>
   <version>0.9</version>
</dependency>

<dependency>
   <groupId>org.apache.mahout</groupId>
   <artifactId>mahout-math</artifactId>
   <version>${mahout.version}</version>
</dependency>

<dependency>
   <groupId>org.apache.mahout</groupId>
   <artifactId>mahout-integration</artifactId>
   <version>${mahout.version}</version>
</dependency>
