- ML - Home
- ML - Introduction
- ML - Getting Started
- ML - Basic Concepts
- ML - Ecosystem
- ML - Python Libraries
- ML - Applications
- ML - Life Cycle
- ML - Required Skills
- ML - Implementation
- ML - Challenges & Common Issues
- ML - Limitations
- ML - Reallife Examples
- ML - Data Structure
- ML - Mathematics
- ML - Artificial Intelligence
- ML - Neural Networks
- ML - Deep Learning
- ML - Getting Datasets
- ML - Categorical Data
- ML - Data Loading
- ML - Data Understanding
- ML - Data Preparation
- ML - Models
- ML - Supervised Learning
- ML - Unsupervised Learning
- ML - Semi-supervised Learning
- ML - Reinforcement Learning
- ML - Supervised vs. Unsupervised
- Machine Learning Data Visualization
- ML - Data Visualization
- ML - Histograms
- ML - Density Plots
- ML - Box and Whisker Plots
- ML - Correlation Matrix Plots
- ML - Scatter Matrix Plots
- Statistics for Machine Learning
- ML - Statistics
- ML - Mean, Median, Mode
- ML - Standard Deviation
- ML - Percentiles
- ML - Data Distribution
- ML - Skewness and Kurtosis
- ML - Bias and Variance
- ML - Hypothesis
- Regression Analysis In ML
- ML - Regression Analysis
- ML - Linear Regression
- ML - Simple Linear Regression
- ML - Multiple Linear Regression
- ML - Polynomial Regression
- Classification Algorithms In ML
- ML - Classification Algorithms
- ML - Logistic Regression
- ML - K-Nearest Neighbors (KNN)
- ML - Naïve Bayes Algorithm
- ML - Decision Tree Algorithm
- ML - Support Vector Machine
- ML - Random Forest
- ML - Confusion Matrix
- ML - Stochastic Gradient Descent
- Clustering Algorithms In ML
- ML - Clustering Algorithms
- ML - Centroid-Based Clustering
- ML - K-Means Clustering
- ML - K-Medoids Clustering
- ML - Mean-Shift Clustering
- ML - Hierarchical Clustering
- ML - Density-Based Clustering
- ML - DBSCAN Clustering
- ML - OPTICS Clustering
- ML - HDBSCAN Clustering
- ML - BIRCH Clustering
- ML - Affinity Propagation
- ML - Distribution-Based Clustering
- ML - Agglomerative Clustering
- Dimensionality Reduction In ML
- ML - Dimensionality Reduction
- ML - Feature Selection
- ML - Feature Extraction
- ML - Backward Elimination
- ML - Forward Feature Construction
- ML - High Correlation Filter
- ML - Low Variance Filter
- ML - Missing Values Ratio
- ML - Principal Component Analysis
- Reinforcement Learning
- ML - Reinforcement Learning Algorithms
- ML - Exploitation & Exploration
- ML - Q-Learning
- ML - REINFORCE Algorithm
- ML - SARSA Reinforcement Learning
- ML - Actor-critic Method
- ML - Monte Carlo Methods
- ML - Temporal Difference
- Deep Reinforcement Learning
- ML - Deep Reinforcement Learning
- ML - Deep Reinforcement Learning Algorithms
- ML - Deep Q-Networks
- ML - Deep Deterministic Policy Gradient
- ML - Trust Region Methods
- Quantum Machine Learning
- ML - Quantum Machine Learning
- ML - Quantum Machine Learning with Python
- Machine Learning Miscellaneous
- ML - Performance Metrics
- ML - Automatic Workflows
- ML - Boost Model Performance
- ML - Gradient Boosting
- ML - Bootstrap Aggregation (Bagging)
- ML - Cross Validation
- ML - AUC-ROC Curve
- ML - Grid Search
- ML - Data Scaling
- ML - Train and Test
- ML - Association Rules
- ML - Apriori Algorithm
- ML - Gaussian Discriminant Analysis
- ML - Cost Function
- ML - Bayes Theorem
- ML - Precision and Recall
- ML - Adversarial
- ML - Stacking
- ML - Epoch
- ML - Perceptron
- ML - Regularization
- ML - Overfitting
- ML - P-value
- ML - Entropy
- ML - MLOps
- ML - Data Leakage
- ML - Monetizing Machine Learning
- ML - Types of Data
- Machine Learning - Resources
- ML - Quick Guide
- ML - Cheatsheet
- ML - Interview Questions
- ML - Useful Resources
- ML - Discussion
Machine Learning - Basic Concepts
Machine learning, as we know, is a subset of artificial intelligence that involves training computer algorithms to automatically learn patterns and relationships in data. Here are some basic concepts of machine learning −
Data
Data is the foundation of machine learning. Without data, there would be nothing for the algorithm to learn from. Data can come in many forms, including structured data (such as spreadsheets and databases) and unstructured data (such as text and images). The quality and quantity of the data used to train the machine learning algorithm are crucial factors that can significantly impact its performance.
Feature
In machine learning, features are the variables or attributes used to describe the input data. The goal is to select the most relevant and informative features that will allow the algorithm to make accurate predictions or decisions. Feature selection is a crucial step in the machine learning process because the performance of the algorithm is heavily dependent on the quality and relevance of the features used.
Model
A machine learning model is a mathematical representation of the relationship between the input data (features) and the output (predictions or decisions). The model is created using a training dataset and then evaluated using a separate validation dataset. The goal is to create a model that can accurately generalize to new, unseen data.
Training
Training is the process of teaching the machine learning algorithm to make accurate predictions or decisions. This is done by providing the algorithm with a large dataset and allowing it to learn from the patterns and relationships in the data. During training, the algorithm adjusts its internal parameters to minimize the difference between its predicted output and the actual output.
Testing
Testing is the process of evaluating the performance of the machine learning algorithm on a separate dataset that it has not seen before. The goal is to determine how well the algorithm generalizes to new, unseen data. If the algorithm performs well on the testing dataset, it is considered to be a successful model.
Overfitting
Overfitting occurs when a machine learning model is too complex and fits the training data too closely. This can lead to poor performance on new, unseen data because the model is too specialized to the training dataset. To prevent overfitting, it is important to use a validation dataset to evaluate the model's performance and to use regularization techniques to simplify the model.
Underfitting
Underfitting occurs when a machine learning model is too simple and cannot capture the patterns and relationships in the data. This can lead to poor performance on both the training and testing datasets. To prevent underfitting, we can use several techniques such as increasing model complexity, collect more data, reduce regularization, and feature engineering.
It is important to note that preventing underfitting is a balancing act between model complexity and the amount of data available. Increasing model complexity can help prevent underfitting, but if there is not enough data to support the increased complexity, overfitting may occur instead. Therefore, it is important to monitor the model's performance and adjust the complexity as necessary.
Why & When to Make Machines Learn?
We have already discussed the need for machine learning, but another question arises that in what scenarios we must make the machine learn? There can be several circumstances where we need machines to take data-driven decisions with efficiency and at a huge scale. The followings are some of such circumstances where making machines learn would be more effective −
Lack of human expertise
The very first scenario in which we want a machine to learn and take data-driven decisions, can be the domain where there is a lack of human expertise. The examples can be navigations in unknown territories or spatial planets.
Dynamic scenarios
There are some scenarios which are dynamic in nature i.e. they keep changing over time. In case of these scenarios and behaviors, we want a machine to learn and take data-driven decisions. Some of the examples can be network connectivity and availability of infrastructure in an organization.
Difficulty in translating expertise into computational tasks
There can be various domains in which humans have their expertise,; however, they are unable to translate this expertise into computational tasks. In such circumstances we want machine learning. The examples can be the domains of speech recognition, cognitive tasks etc.
Machine Learning Model
Before discussing the machine learning model, we must need to understand the following formal definition of ML given by professor Mitchell −
A computer program is said to learn from experience E with respect to some class of tasks T and performance measure P, if its performance at tasks in T, as measured by P, improves with experience E.
The above definition is basically focusing on three parameters, also the main components of any learning algorithm, namely Task(T), Performance(P) and experience (E). In this context, we can simplify this definition as −
ML is a field of AI consisting of learning algorithms that −
Improve their performance (P)
At executing some task (T)
Over time with experience (E)
Based on the above, the following diagram represents a Machine Learning Model −
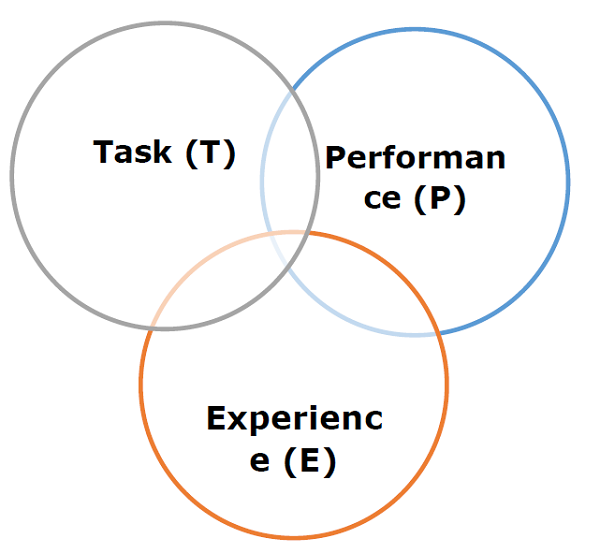
Let us discuss them more in detail now −
Task(T)
From the perspective of problem, we may define the task T as the real-world problem to be solved. The problem can be anything like finding best house price in a specific location or to find best marketing strategy etc. On the other hand, if we talk about machine learning, the definition of task is different because it is difficult to solve ML based tasks by conventional programming approach.
A task T is said to be a ML based task when it is based on the process and the system must follow for operating on data points. The examples of ML based tasks are Classification, Regression, Structured annotation, Clustering, Transcription etc.
Experience (E)
As name suggests, it is the knowledge gained from data points provided to the algorithm or model. Once provided with the dataset, the model will run iteratively and will learn some inherent pattern. The learning thus acquired is called experience(E). Making an analogy with human learning, we can think of this situation as in which a human being is learning or gaining some experience from various attributes like situation, relationships etc. Supervised, unsupervised and reinforcement learning are some ways to learn or gain experience. The experience gained by out ML model or algorithm will be used to solve the task T.
Performance (P)
An ML algorithm is supposed to perform task and gain experience with the passage of time. The measure which tells whether ML algorithm is performing as per expectation or not is its performance (P). P is basically a quantitative metric that tells how a model is performing the task, T, using its experience, E. There are many metrics that help to understand the ML performance, such as accuracy score, F1 score, confusion matrix, precision, recall, sensitivity etc.
