 Data Structure
 Networking
 RDBMS
RDBMS Operating System
 Java
Java MS Excel
 iOS
iOS HTML
HTML CSS
CSS Android
 Python
 C Programming
 C++
C++ C#
C# MongoDB
 MySQL
MySQL Javascript
 PHP
PHP
- Selected Reading
- UPSC IAS Exams Notes
- Developer's Best Practices
- Questions and Answers
- Effective Resume Writing
- HR Interview Questions
- Computer Glossary
- Who is Who
Implementing Photomosaics in Python
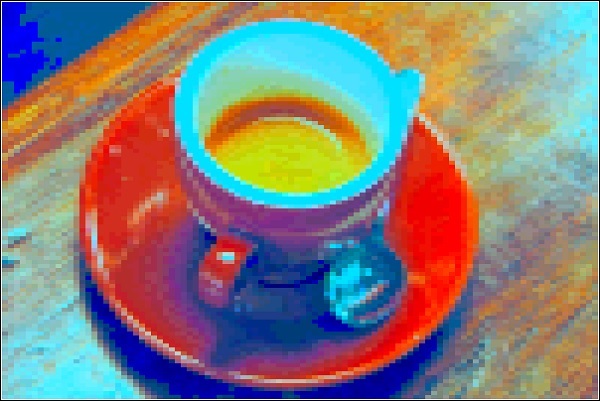
The photomosaic is a technique, where we can split our image into a grid of squares. Each square will be replaced by some other images or colors. So when we want to see the actual image from a certain distance, we can see the actual image, but if we come closer, we can see the grid of different colored blocks.
In this case we are using a Python module called photomosaic. Using this module, we can easily create some photomosaics. To install it please follow this link. It will also download the scikit learn module.
sudo pip3 install photomosaic
This module has some features. These are listed below −
- Here we can use different size of tiles.
- We can set smaller tiles for detailed part of an image.
- Use flicker api to get large collection of images to use as tiles
In this article, we will see how to implement this module for photomosaics in a very simple way.
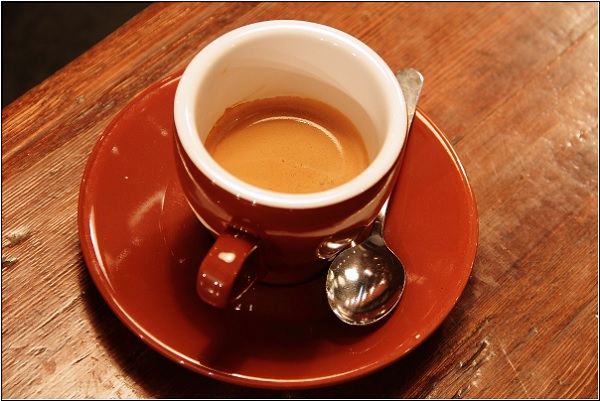
We are using an image from skimage library.
Main Image

Steps to create photomosaic
- Take the actual image (here image from skimage library)
- define the grid tile size
- Provide a location to create colorful RGB image blocks as pool
- Set the folder as Pool for the photomosaic
- Turn into photomosaic using the pool and the grid size.
- Save the image
- exit
Example code
from skimage.io import *
import sys
import photomosaic asphmos
from skimage import data
image = data.coffee() #Get coffee image from skimage
#Get the mosaic size from the command line argument.
mos_size = (int(sys.argv[1]), int(sys.argv[2]))
#create all image squares and generate pool
phmos.rainbow_of_squares('square/')
square_pool = phmos.make_pool('square/*.png')
#Create the mosaic image and save
mosaic = phmos.basic_mosaic(image, square_pool, mos_size)
imsave('mosaic_op.png', mosaic)
Output (First Run, Grid size is 100 x 100)
$ python3 225.Photomosaic.py 100 100
5832it [00:02, 2506.05it/s]
analyzing pool: 100%|| 5832/5832 [00:08<00:00, 717.90it/s]
/usr/local/lib/python3.6/dist-packages/skimage/transform/_warps.py:105: UserWarning: The default mode, 'constant', will be changed to 'reflect' in skimage 0.15.
warn("The default mode, 'constant', will be changed to 'reflect' in "
/usr/local/lib/python3.6/dist-packages/skimage/transform/_warps.py:110: UserWarning: Anti-aliasing will be enabled by default in skimage 0.15 to avoid aliasing artifacts when down-sampling images.
warn("Anti-aliasing will be enabled by default in skimage 0.15 to "
partitioning: depth 0: 100%|| 10000/10000 [00:00<00:00, 852292.94it/s]
analyzing tiles: 100%|| 10000/10000 [00:00<00:00, 93084.50it/s]
matching: 100%|| 10000/10000 [00:00<00:00, 30864.50it/s]
drawing mosaic: 100%|| 10000/10000 [00:00<00:00, 13227.12it/s]
/usr/local/lib/python3.6/dist-packages/skimage/util/dtype.py:141: UserWarning: Possible precision loss when converting from float64 to uint8
.format(dtypeobj_in, dtypeobj_out))

Output (Second Run, Grid size is 500 x 500)
$ python3 225.Photomosaic.py 500 500
5832it [00:02, 2634.16it/s]
analyzing pool: 100%|| 5832/5832 [00:08<00:00, 709.54it/s]
/usr/local/lib/python3.6/dist-packages/skimage/transform/_warps.py:105: UserWarning: The default mode, 'constant', will be changed to 'reflect' in skimage 0.15.
warn("The default mode, 'constant', will be changed to 'reflect' in "
/usr/local/lib/python3.6/dist-packages/skimage/transform/_warps.py:110: UserWarning: Anti-aliasing will be enabled by default in skimage 0.15 to avoid aliasing artifacts when down-sampling images.
warn("Anti-aliasing will be enabled by default in skimage 0.15 to "
partitioning: depth 0: 100%|| 250000/250000 [00:00<00:00, 456159.45it/s]
analyzing tiles: 100%|| 250000/250000 [00:02<00:00, 113937.01it/s]
matching: 100%|| 250000/250000 [00:07<00:00, 32591.43it/s]
drawing mosaic: 100%|| 250000/250000 [00:02<00:00, 104349.90it/s]
/usr/local/lib/python3.6/dist-packages/skimage/util/dtype.py:141: UserWarning: Possible precision loss when converting from float64 to uint8
.format(dtypeobj_in, dtypeobj_out))


Advertisements
