
Article Categories
- All Categories
-
 Data Structure
-
 Networking
-
 RDBMS
RDBMS
-
 Operating System
-
 Java
Java
-
 MS Excel
-
 iOS
iOS
-
 HTML
HTML
-
 CSS
CSS
-
 Android
-
 Python
-
 C Programming
-
 C++
C++
-
 C#
C#
-
 MongoDB
-
 MySQL
MySQL
-
 Javascript
-
 PHP
PHP
-
 Economics & Finance
How to use Ejs in JavaScript?
EJS is a templating language that allows us to generate HTML markup using plain JavaScript. It provides a simple and intuitive way to generate dynamic content in our web applications, making it easier to manage and organize our code. EJS is easy to use and can be integrated into any JavaScript project with just a few steps.
In this tutorial, we will learn the basics of how to use EJS in JavaScript, including how to set up our project, create an EJS template, and render the template to generate dynamic HTML output.
Steps to Use EJS in a JavaScript Application
Users can follow the steps below to use EJS in their JavaScript application.
Step 1 ? First, we will install EJS using npm.
npm install ejs
Step 2 ? Next, in our JavaScript file, we need to require EJS using require('ejs').
const ejs = require('ejs');
Step 3 ? After that, we can create an EJS template as a string or in a separate .ejs file.
For example, we can create a simple EJS template as follows ?
const template = '<h1>Hello <%= name %></h1>';
Step 4 ? Next, we can use the ejs.render() function to render the EJS template and generate dynamic HTML output. We must pass in an object containing the data we want to use in the template.
For example, we can render the above template with the following data ?
const data = { name: 'World' };
const html = ejs.render(template, data);
Step 5 ? Now, we can use a server-side JavaScript platform such as Node.js to process the EJS code and send the rendered HTML to the client's web browser.
For example, we can create a simple Node.js server file as follows ?
const express = require('express');
const ejs = require('ejs');
const app = express();

const template = '<h1>Hello <%= name %></h1>';

app.get('/', (req, res) => {
   const data = { name: 'World' };
   const html = ejs.render(template, data);
   res.send(html);
});

app.listen(3000, () => {
   console.log('Server listening on port 3000');
});
Step 6 ? Finally, we can output the generated HTML to the browser, the console, or a file.
Basic EJS Template Example
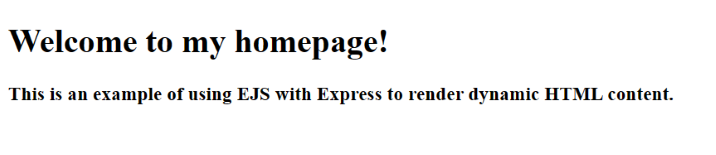
In the example below, we use EJS with Express to render dynamic HTML content.
In the index.js file, we first import the required dependencies: express and ejs. Then, we set EJS as the view engine for the application.
Next, we define a route to render the index.ejs file using res.render(). We pass in an object called data that contains properties for the title, heading, and description of the page.
In the index.ejs file, we use EJS syntax to interpolate the values passed from the data object into the HTML template.
index.js
const express = require('express');
const app = express();
const ejs = require('ejs');

// Set EJS as the view engine
app.set('view engine', 'ejs');

// Define a route to render the index page
app.get('/', (req, res) => {
   const data = {
      title: 'My Homepage',
      heading: 'Welcome to my homepage!',
      description: 'This is an example of using EJS with Express to render dynamic HTML content.'
   };
   res.render('index', data);
});

// Start the server
app.listen(3000, () => {
   console.log('Server started on port 3000');
});
views/index.ejs
<!DOCTYPE html>
<html>
<head>
   <title><%= title %></title>
</head>
<body>
   <h1><%= heading %></h1>
   <h3><%= description %></h3>
</body>
</html>
Output
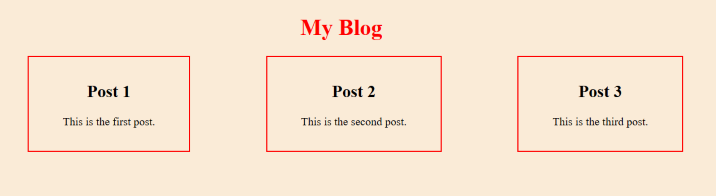
Loop Example with EJS
In this example, we use the EJS template engine to render a dynamic HTML page displaying a list of blog posts.
Here, we're using a loop to iterate through an array of posts and display them on the page. We're also using EJS tags to interpolate values from the data object into the HTML.
index.js
const express = require('express');
const app = express();
const ejs = require('ejs');

// Set EJS as the view engine
app.set('view engine', 'ejs');

// Define a route to render the index page
app.get('/', (req, res) => {
   const data = {
      title: 'My Blog',
      posts: [
         { title: 'Post 1', body: 'This is the first post.' },
         { title: 'Post 2', body: 'This is the second post.' },
         { title: 'Post 3', body: 'This is the third post.' }
      ]
   };
   res.render('index', data);
});

// Start the server
app.listen(3000, () => {
   console.log('Server started on port 3000');
});
views/index.ejs
<!DOCTYPE html>
<html>
<head>
   <title><%= title %></title>
   <style>
      body {
         background-color: antiquewhite;
         text-align: center;
      }
      h1 {
         color: red;
      }
      ul {
         list-style-type: none;
         display: flex;
         flex-direction: row;
         justify-content: space-around;
      }
      li {
         border: 2px solid red;
         padding: 1rem 3rem;
      }
   </style>
</head>
<body>
   <h1><%= title %></h1>
   <ul>
      <% for (let i = 0; i < posts.length; i++) { %>
      <li>
         <h2><%= posts[i].title %></h2>
         <p><%= posts[i].body %></p>
      </li>
      <% } %>
   </ul>
</body>
</html>
Output
EJS Syntax Overview
EJS uses simple tags to embed JavaScript code into HTML templates:
-
<%= %>- Outputs the escaped value -
<%- %>- Outputs the raw unescaped value -
<% %>- Control flow (loops, conditionals) -
<%# %>- Comments (not included in output)
Conclusion
EJS is a powerful templating engine that simplifies dynamic HTML generation in JavaScript applications. By mastering EJS syntax and integration with Express, you can create dynamic web pages that display data from databases or APIs efficiently.

8K+ Views
