 Data Structure
 Networking
 RDBMS
RDBMS Operating System
 Java
Java MS Excel
 iOS
iOS HTML
HTML CSS
CSS Android
 Python
 C Programming
 C++
C++ C#
C# MongoDB
 MySQL
MySQL Javascript
 PHP
PHP
- Selected Reading
- UPSC IAS Exams Notes
- Developer's Best Practices
- Questions and Answers
- Effective Resume Writing
- HR Interview Questions
- Computer Glossary
- Who is Who
How to Style the Selected Label of a Radio Button?
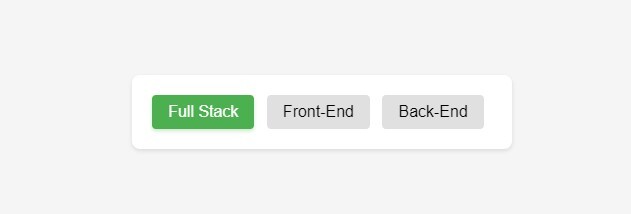
In this article, we will style the label for the radio button which is currently selected. CSS also allows you to eliminate the default radio button and style the selected and unselected states of the labels. This will be accomplished with the help of the :checked pseudo class. Additionally adjacent sibling selectors will be used to achieve this effect.
Styling the Selected Label of a Radio Button
To begin with, we set the display property of the original circular radio button to none and it disappears from view. Next, we apply default styles to the label elements for unselected states. We will set the display property of the label to inline-block and apply other styles like background, padding, font and the cursor.
Now with the :checked pseudo-class along with the adjacent sibling selector (+). This selector in particular helps us to ensure that the styles will be applied only to the label that follows a checked radio input.
Example Code
Here in the code example you can see we have style a liitle bit to make it more sttractive radio buttons. You can try your own style to make it more attaractive.
<!DOCTYPE html>
<html>
<head>
    <title>Styled Radio Button Labels</title>
    <style>
        body,
        html {
            display: flex;
            align-items: center;
            justify-content: center;
            height: 100vh;
            margin: 0;
            background-color: #f5f5f5;
            font-family: Arial, sans-serif;
        }

        .radio-container {
            background: white;
            padding: 20px;
            border-radius: 8px;
            box-shadow: 0 2px 4px rgba(0,0,0,0.1);
        }

        .radio-container input[type="radio"] {
            opacity: 0;
            width: 0;
            position: fixed;
        }

        .radio-container label {
            display: inline-block;
            background-color: #e0e0e0;
            padding: 8px 16px;
            font-size: 16px;
            cursor: pointer;
            margin-right: 8px;
            border-radius: 4px;
            transition: all 0.3s ease;
        }

        .radio-container input[type="radio"]:checked + label {
            background-color: #4caf50;
            color: #fff;
            box-shadow: 0 2px 4px rgba(76, 175, 80, 0.3);
        }

        .radio-container label:hover {
            background-color: #dcdcdc;
            transform: translateY(-1px);
        }

        .radio-container input[type="radio"]:focus + label {
            outline: 2px solid #4caf50;
            outline-offset: 2px;
        }

        /* Adding responsive design */
        @media (max-width: 480px) {
            .radio-container {
                display: flex;
                flex-direction: column;
                gap: 10px;
            }

            .radio-container label {
                margin-right: 0;
                text-align: center;
            }
        }
    </style>
</head>
<body>
    <div class="radio-container">
        <input type="radio" id="option1" name="options" checked>
        <label for="option1">Full Stack</label>
        <input type="radio" id="option2" name="options">
        <label for="option2">Front-End</label>
        <input type="radio" id="option3" name="options">
        <label for="option3">Back-End</label>
    </div>
</body>
</html>
Output


