 Data Structure
 Networking
 RDBMS
RDBMS Operating System
 Java
Java MS Excel
 iOS
iOS HTML
HTML CSS
CSS Android
 Python
 C Programming
 C++
C++ C#
C# MongoDB
 MySQL
MySQL Javascript
 PHP
PHP
- Selected Reading
- UPSC IAS Exams Notes
- Developer's Best Practices
- Questions and Answers
- Effective Resume Writing
- HR Interview Questions
- Computer Glossary
- Who is Who
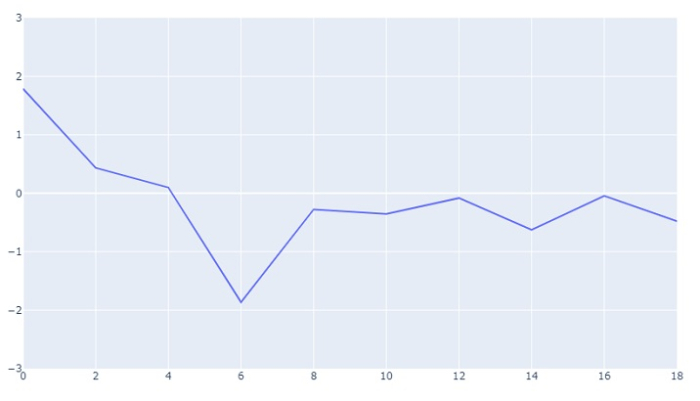
How to set the range of Y-axis in Python Plotly?
Plotly supports to the range on both X and Y axis. Let us understand how to set the range of Y-axis in Plotly.
plotly.graph_objects is used to generate figures. It contains a lot of methods to customize charts and render a chart in HTML format.
Create a numpy module and generate random ranges for both X and Y axis.
Create Figure() method to plot X and Y axis with mode as lines
Create update_layout() method and set the Y-axis range.
Follow the steps given to set the range of Y-axis in Plotly.
Step 1 ? Import plotly
Import plotly.graphs_objs module and alias as go
import plotly.graphs_objs as go
Step 2 ? Import numpy
Import numpy module and alias as np and set the random seed value.
import numpy as np
np.random.seed(3)
Step 3 ? Generate random number on X-axis
Let us generate a list of random range of numbers on X-axis.
x = list(range(0,20,2))
Step 4 ? Generate random number on Y-axis
Generate random number on Y-axis as follows ?
y = np.random.randn(10)
Step 5 ? Generate the scatter plot
Let us generate the scatter plot with the following coordinates ?
fig = go.Figure(data=go.Scatter(x=x, y=y, mode='lines'))
Step 6 ? Set the Y-axis range
Set the Y-axis range using update_layout() method.
fig.update_layout(yaxis_range=[-3,3])
Step 7 ? Display the figure
Display the figure using show() method.
fig.show()
Example
The complete code to set the range of Y-axis in Python Plotly is as follows ?
# Importing Libraries
import plotly.graph_objs as go
import numpy as np

np.random.seed(3)

# generating numbers ranging from 0 to 18 on X-axis
x = list(range(0,20,2))

# generating random numbers on y-axis
y = np.random.randn(10)

# plotting scatter plot on x and y data with
# 'lines' as mode
fig = go.Figure(data=go.Scatter(x=x, y=y, mode='lines'))

# setting the y-axis range from -3 to 3
fig.update_layout(yaxis_range=[-3,3])

# to display the figure in the output screen
fig.show()
Output
It will show the following output on the browser ?


