
 Data Structure
 Networking
 RDBMS
RDBMS Operating System
 Java
Java MS Excel
 iOS
iOS HTML
HTML CSS
CSS Android
 Python
 C Programming
 C++
C++ C#
C# MongoDB
 MySQL
MySQL Javascript
 PHP
PHP
- Selected Reading
- UPSC IAS Exams Notes
- Developer's Best Practices
- Questions and Answers
- Effective Resume Writing
- HR Interview Questions
- Computer Glossary
- Who is Who
How to lock specified cells without protecting the whole worksheet?
Locking a cell is important. It allows the user to preserve the integrity of certain cells that contain important formulas, data, or formatting. On the other hand, when a cell is unlocked, it means that it can be edited even when the worksheet is locked. This is typically done for cells where you want to allow users to input data or make changes while the rest of the worksheet remains protected. By selectively locking and unlocking cells, the user can control the level of access and editing permissions for different parts of a protected worksheet. Locking specific cells means that only the required or needed cells are locked. However, the decision of selecting cells for locking is purely based on user demand or requirement.
This article contains a brief example that demonstrates the process of locking the cells to protect the sheet. While the second example, guides the process of locking the cells, by using the kutools.
Example 1: To Lock specified cells in Excel without protecting the worksheet
Step 1
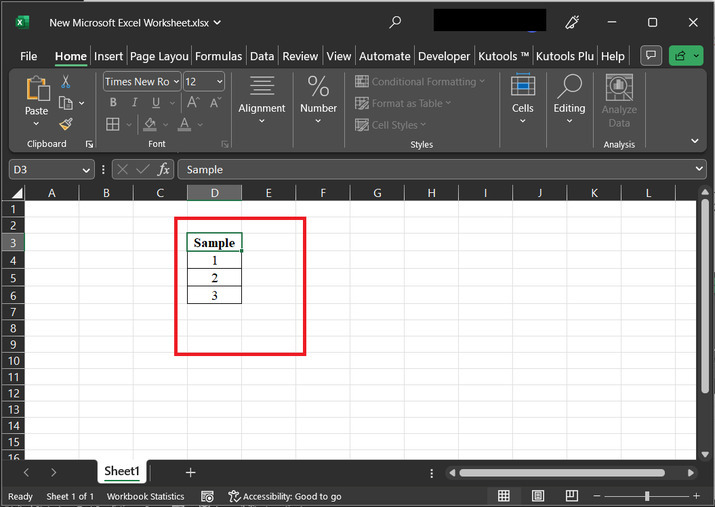
To lock the cells, consider below the snapshot for the sheet. This worksheet contains a few cells to show the data processing.
Step 2
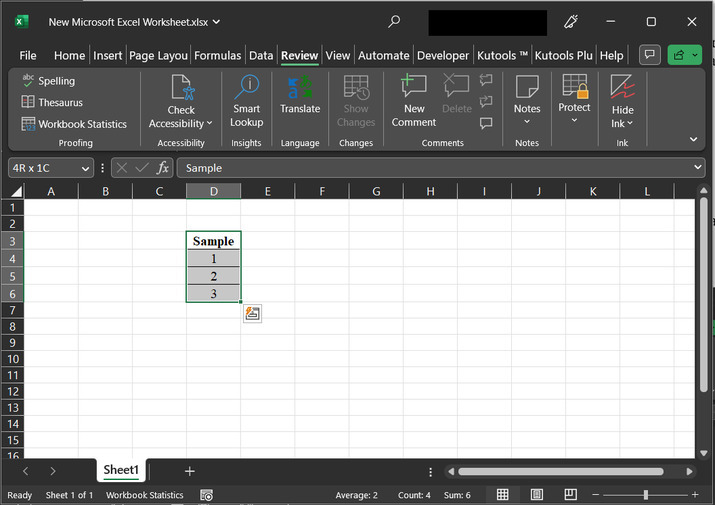
Now, users need to lock the available cells. Firstly, select the available cell, by using the "Ctrl" key and down navigation keys. This step will highlight the selected cells with grey color as shown below ?
Step 3
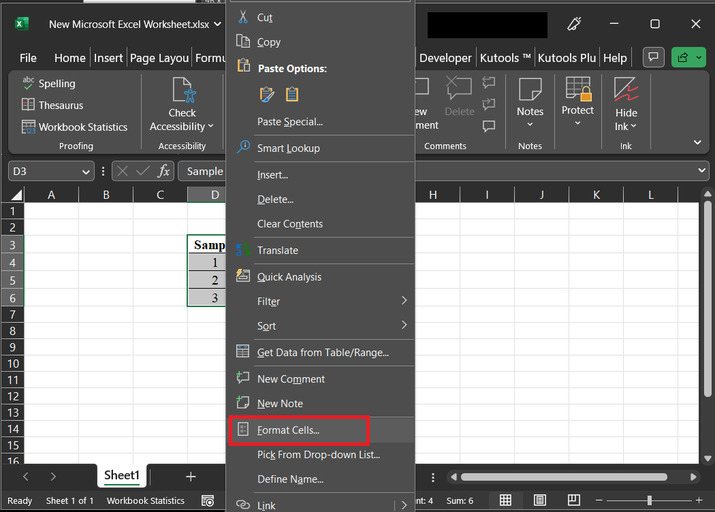
Now use right-click to obtain the required cell options. Right-click will display a list of options such as cut, copy, paste, quick analysis, and many others. From the provided list of options, choose the option "Format cells".
Step 4
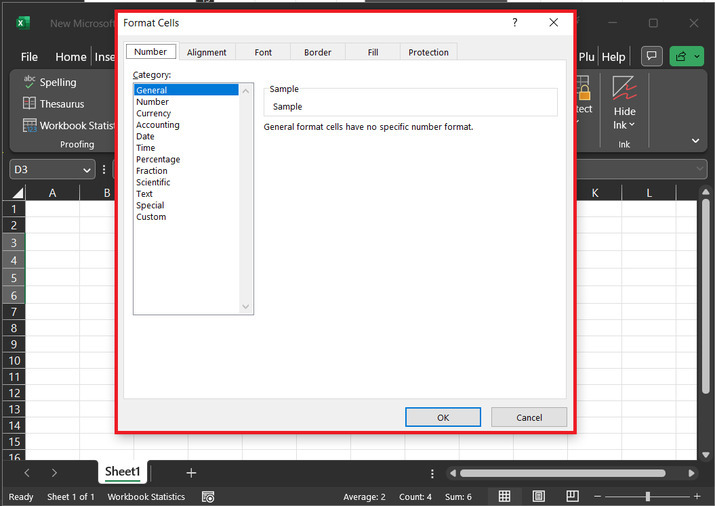
The above step will open a "Format Cells" dialog box, consider the below-depicted image for proper reference ?
Step 5
Click on the "Protection" tab, and then click on "Locked" cell. Finally, click on the "OK" button.
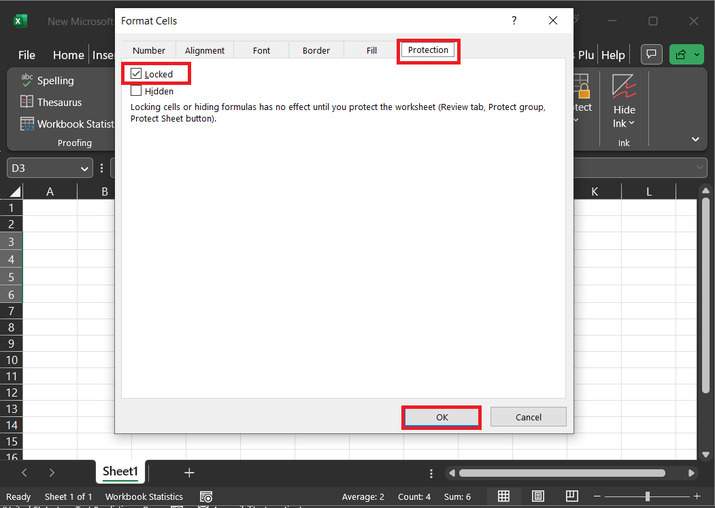
Hence, the required sheet is locked.
Example 2: To Lock specified cells in Excel without protecting the worksheet
Step 1
Now, users need to lock the available cells. Firstly, select the available cell, by using the "Ctrl" and navigation keys, as shown below?
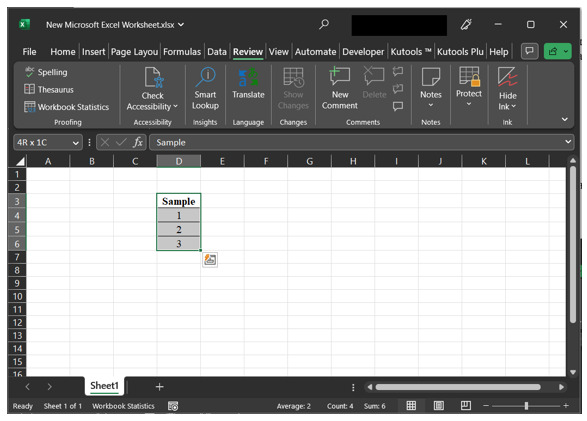 Step 2
To use the kutool, click on the "Kutools Plus" tab, and then click on the "Worksheets & Sheets" options, After that click on the option "Worksheet Design". Consider the below-depicted image for reference ?
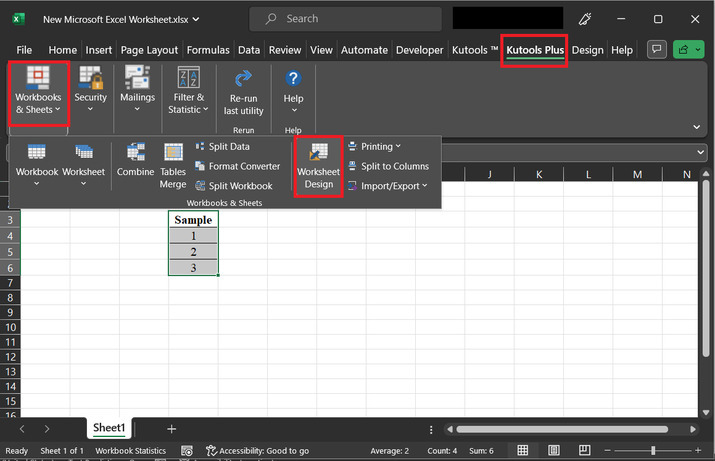
Step 3
After that design tab will open automatically, click on the "Selection Lock" option, to apply the lock to selected cells.
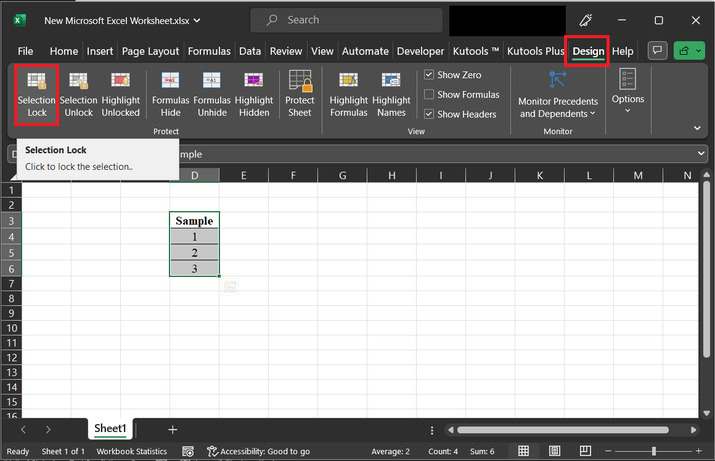
Step 4
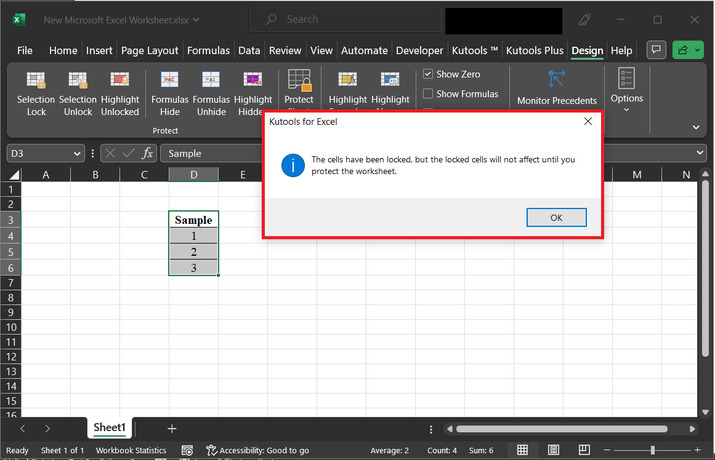
The above step will provide a lock to the selected cells, but to obtain the complete functionality, user need to click on protect the sheet, same message is also displayed in the below depicted snapshot ?
Conclusion
In this article, users will learn the process of making the protected sheet, editable, and then locking the required cell. This article briefs the two most common ways to achieve this task. The first example describes the method of using the format cell option, while the second example briefs the process of using the kutools. All the provided steps are precise, detailed, and thorough.

