
Article Categories
- All Categories
-
 Data Structure
-
 Networking
-
 RDBMS
RDBMS
-
 Operating System
-
 Java
Java
-
 MS Excel
-
 iOS
iOS
-
 HTML
HTML
-
 CSS
CSS
-
 Android
-
 Python
-
 C Programming
-
 C++
C++
-
 C#
C#
-
 MongoDB
-
 MySQL
MySQL
-
 Javascript
-
 PHP
PHP
-
 Economics & Finance
How to group Multiple Option/Radio Buttons in Excel
Grouping will save a lot of time when users need to perform the same task repeatedly. In more, simple word changes made to the single sheet will be reflected in multiple grouped sheets simultaneously. radio/ open buttons are a type of control buttons available in Excel. A group of multiple open/radio buttons can be created by using two form buttons and by using two ActiveX buttons. Both processes are based on almost based on same steps. But the second process will need a few extra steps to perform the same tasks. In short, it can be said that using the second provided strategy will consume more time, than the first one. But we are explaining it because it is also one of the popular methods used to perform the task.
Example to group Multiple Open/Radio Buttons in Excel
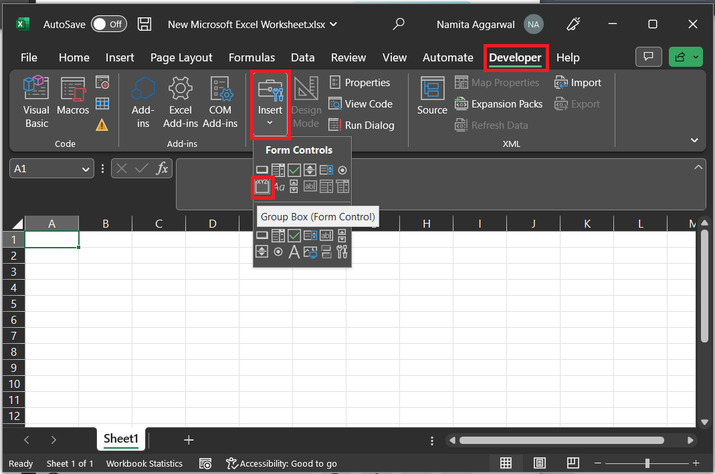
Step 1
Firstly, open an excel sheet. After that go to the "developer" tab and from the "control" section go to the "insert" open. This will open the below depicted list of options, go to the "Form control" section and choose the "group box" control.
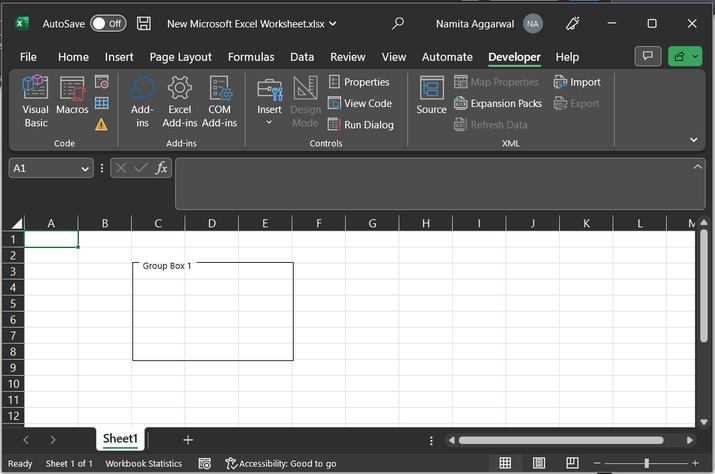
Step 2
Go to the excel sheet and draw a rectangular group box, as shown below:
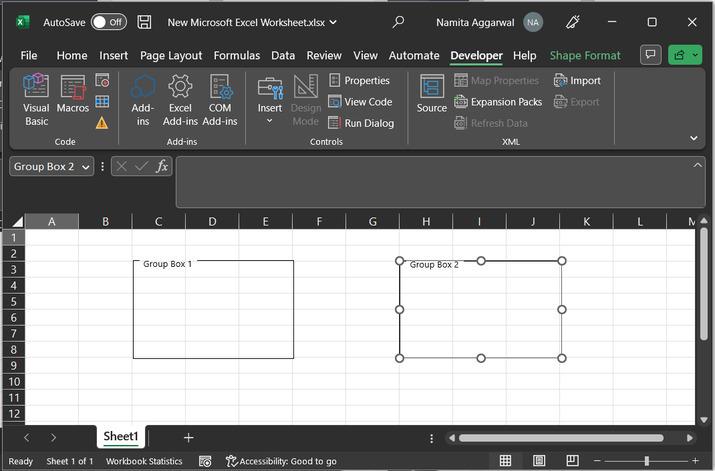
Step 3
Similarly, draw one more group box. As shown below:
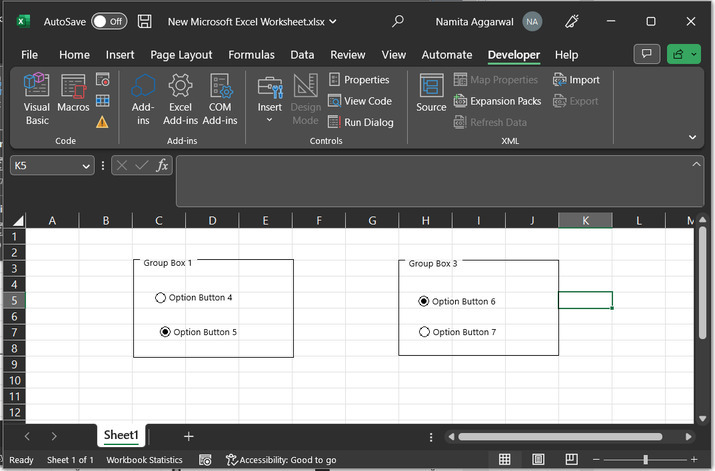
Step 4
After that go to the "Developer" tab Insert choose "Option Button" from "form controls".

Step 5
Drag and drop four "option" buttons to the above-created group box.
Example 2
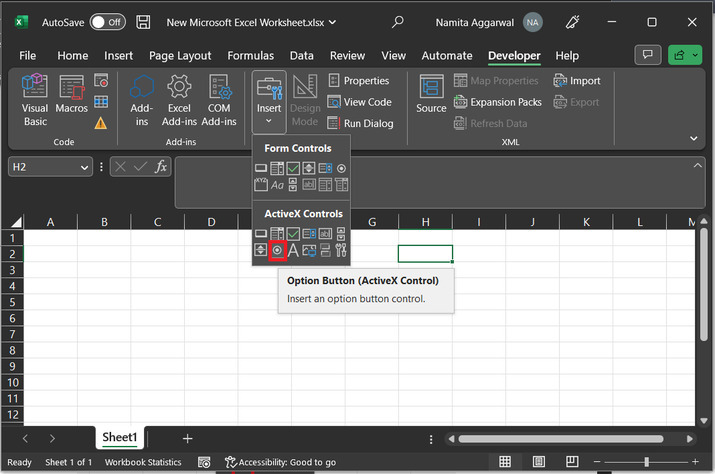
Step 1
Firstly, open an excel sheet. After that go to the "developer" tab and from the "control" section go to the "insert" open. This will open the below depicted list of options, Go to the "ActiveX controls" section and choose the "option button" control.
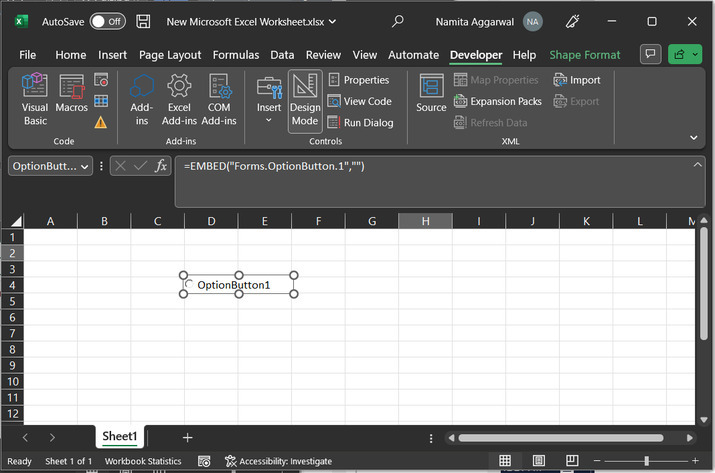
Step 2
Drop the control to the sheet, by drawing a rectangle at any required location. After this the control will appear as given below:
Step 3
Go to the button and press "Ctrl+D". This will draw another button on sheet.
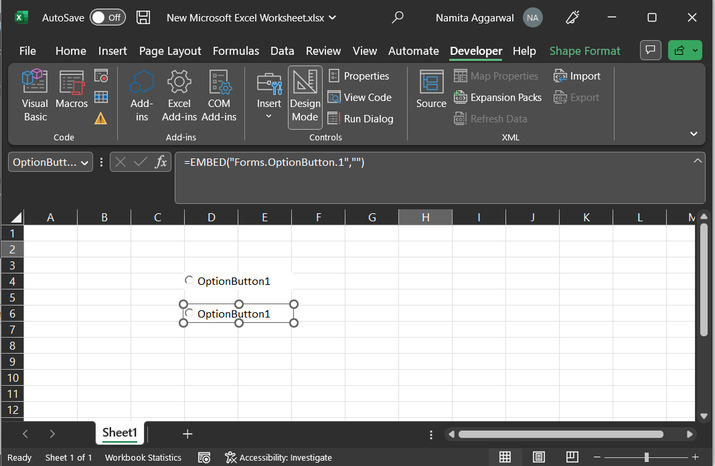
Step 4
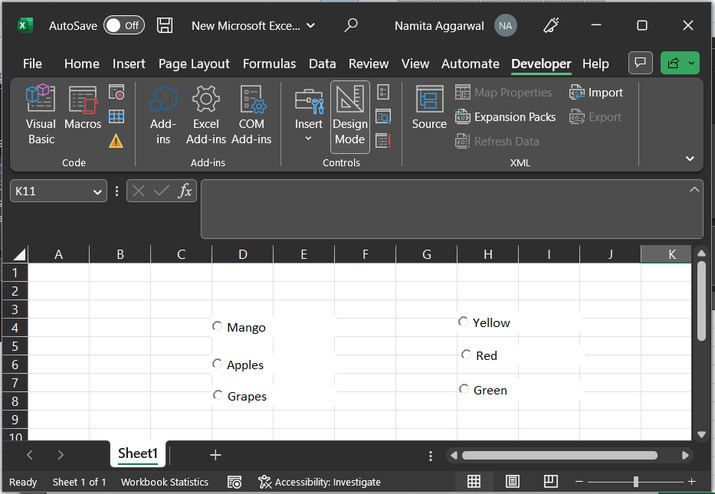
Use the same process "6" times and create 6 options buttons and align them as shown below:
Step 5
After that right click on first "OptionButton1" and select "Edit".

Step 6
Right-click on the button and select "OptionButton Object". After that click on "Edit".
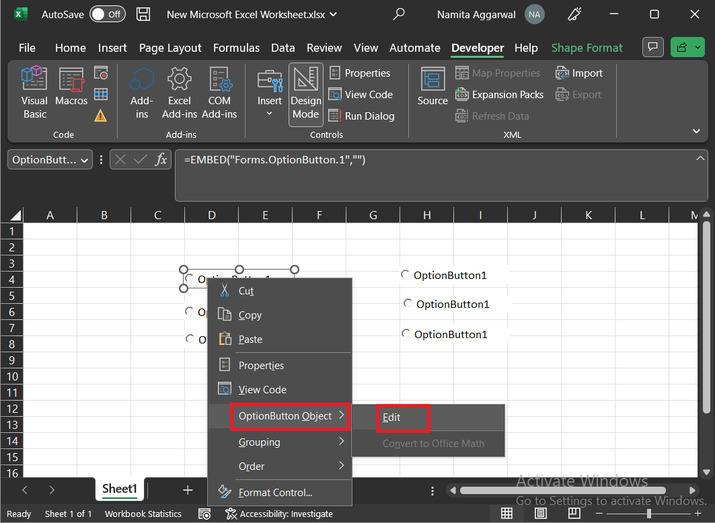
This will make the field editable.
Step 7
Rename all the option as specified below:
Step 8
After that let?s group the option. Click on "Mango" and select "Properties".
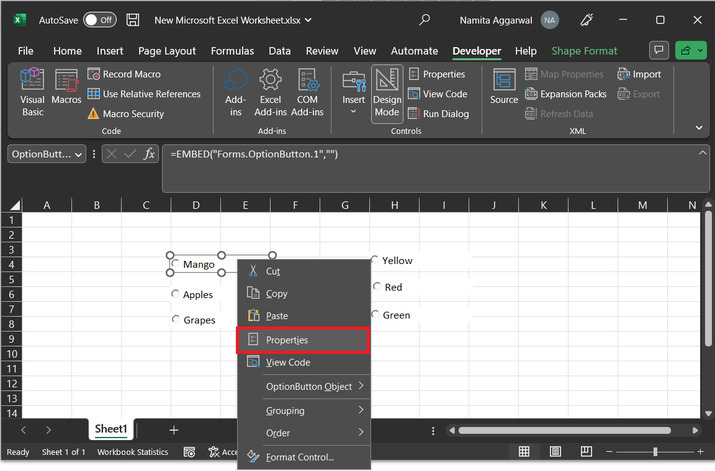
Step 9
This will open the below given "properties" dialog box. Go to GroupName and write "A".
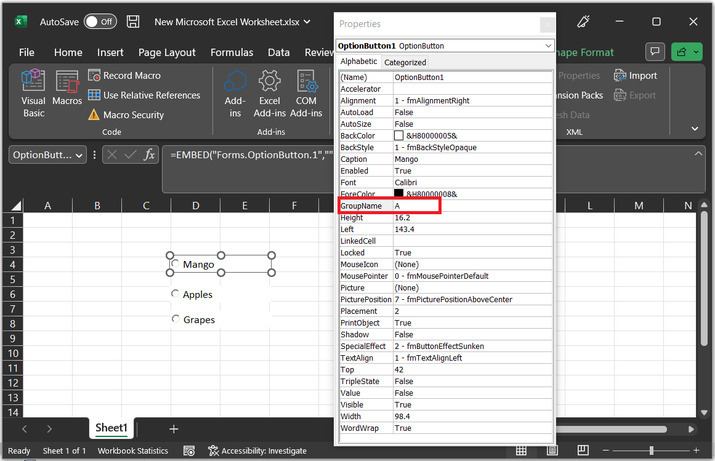
Similarly, set value for "Apples" and "Grapes".
Step 10
After that right click on "Yellow" and select the option "Properties".
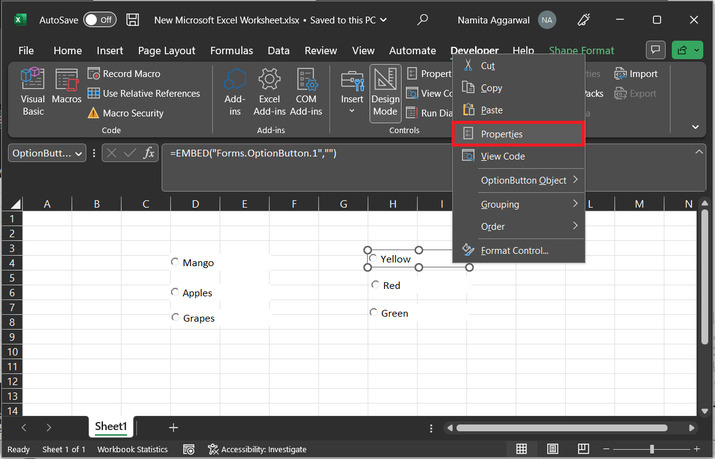
Step 11
After that edit the "GroupName" option and write "B" in the front column.
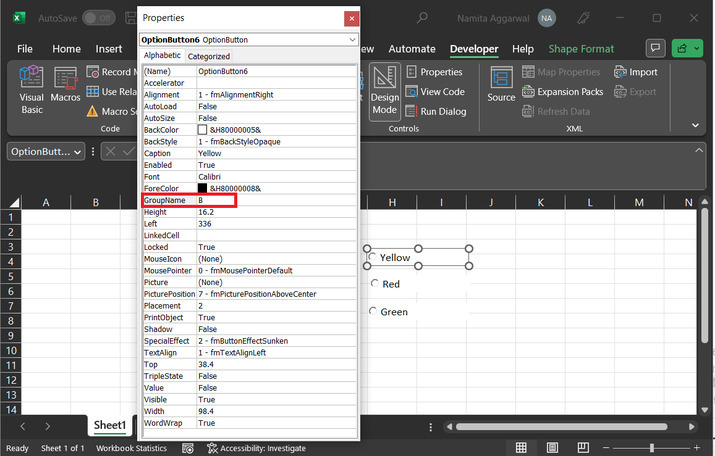
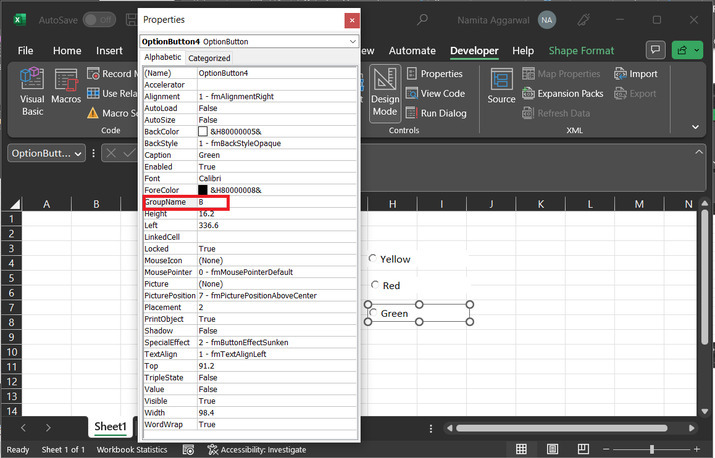
Step 12
Similarly, edit the GroupName as "B" for "Red".

Similarly edit the GroupName as "B" for "Red", and "Green".
Conclusion
This tutorial provides a simple illustration for two examples, first example is based on the "form control", while the second example is based on the option "ActiveX". After the successful execution of all the steps, the user will be able to solve the provided problem efficiently and effectively.

10K+ Views
