
Article Categories
- All Categories
-
 Data Structure
-
 Networking
-
 RDBMS
RDBMS
-
 Operating System
-
 Java
Java
-
 MS Excel
-
 iOS
iOS
-
 HTML
HTML
-
 CSS
CSS
-
 Android
-
 Python
-
 C Programming
-
 C++
C++
-
 C#
C#
-
 MongoDB
-
 MySQL
MySQL
-
 Javascript
-
 PHP
PHP
-
 Economics & Finance
How to Generate Random Yes or No in Excel?
Random values are used to obtain results. These results can be used to perform simulations, to understand the pattern of different system components. It is useful when users require a large data set to evaluate some common feature. Generating random yes or no can be useful for pole or opinion-related services. This article allows users to use two methods to generate random Yes or No. The first method is based on the use of predefined formulas presented in Excel. On the other hand, the second method is focused on using the kutool to make the work easier.
Example 1: To generate random Yes or No in Excel by using the predefined formula:
Step 1:
To understand the working example, it is better to create a worksheet with the below-given fields. Please note the currently active cell of this Excel sheet is the A2 cell.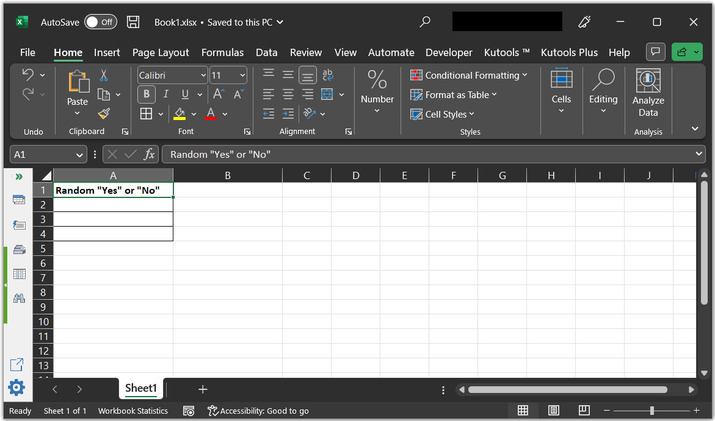
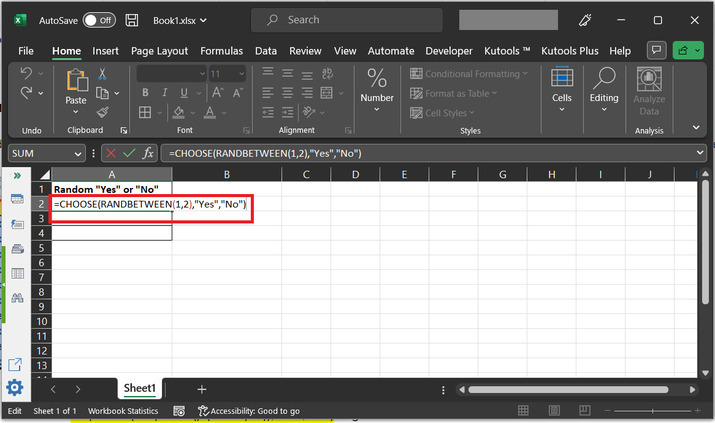
Step 2:
Now, type the formula to the active cell. Required formula is "=CHOOSE(RANDBETWEEN(1,2),"Yes","No")".
Explanation of the above-listed formula:
CHOOSE() function is used to produce any specified location in the Excel sheet.
RANDBETWEEN() method is used to generate random numbers between the provided cell references. For this case, the two possible choices are 1 and 2. According to the generated number "Yes" and "No" will be displayed.
"Yes" and "No" are two possible required output segments.
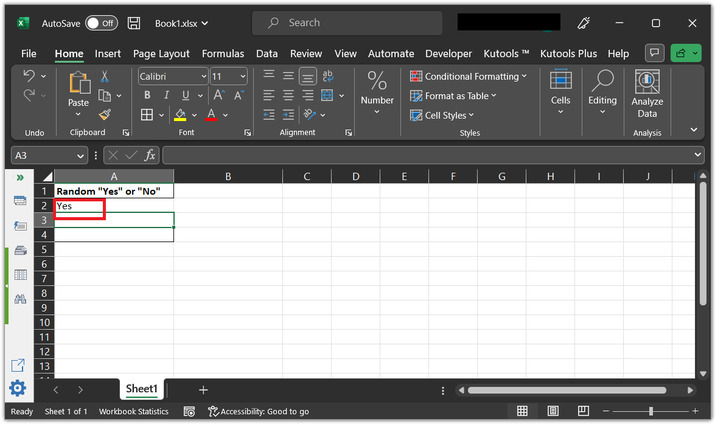
Step 3:
After typing the above formula. Press the "Enter" key on the keyboard. This will print the result on the active A2 cell, as specified below:
Example 2: To generate random Yes or No in Excel by using kutools
Step 1:
To understand the working example, it is better to create a worksheet with the below-given fields. Please note the currently active cell of this Excel sheet is the A2 cell.

Step 2
Go to the "kutools" tab, and then choose the "Editing" tab. Under the "editing" section, click on the "Insert" option. After that choose the "Insert Random Data" option from the appeared dialog list.

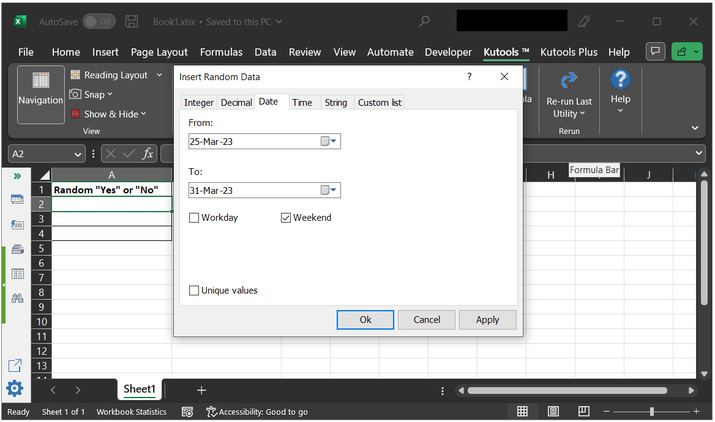
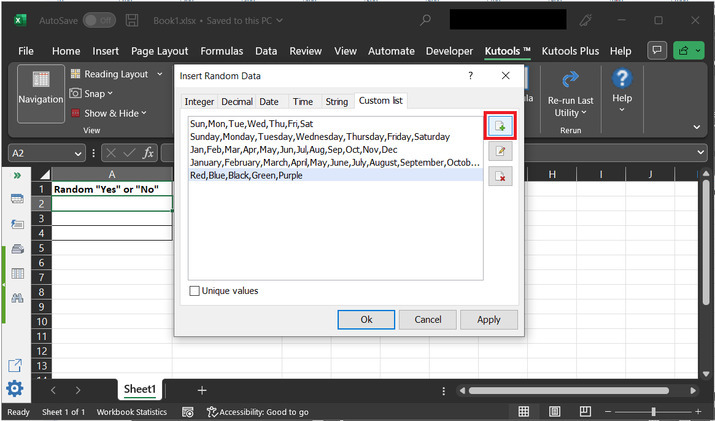
Step 3:
The above step will instantly open an "Insert Random Data" dialog box as shown below:
Step 4:
Since here users are interested to add new options values such as "Yes" and "No". Therefore, go to the "custom list" option. In the dialog box click on "+" sign button, as highlighted below:
Step 5:
This will open the "Kutool for Excel" dialog box, as depicted below:
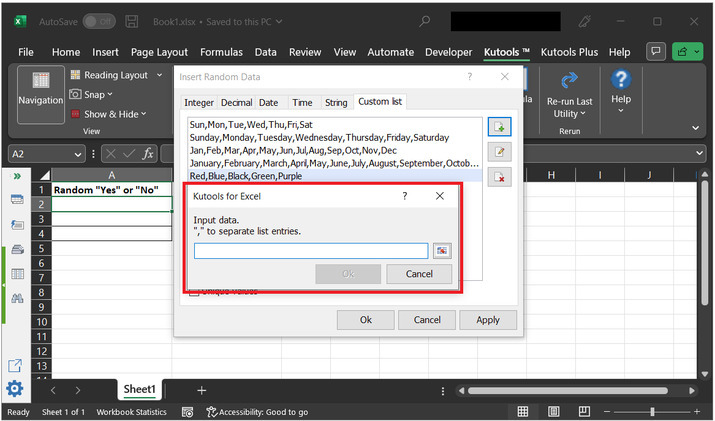
Step 6:
In the input data section, type "Yes" and "No", (user "," to show the difference between the provided input) to the available input label, and finally click on "Ok".
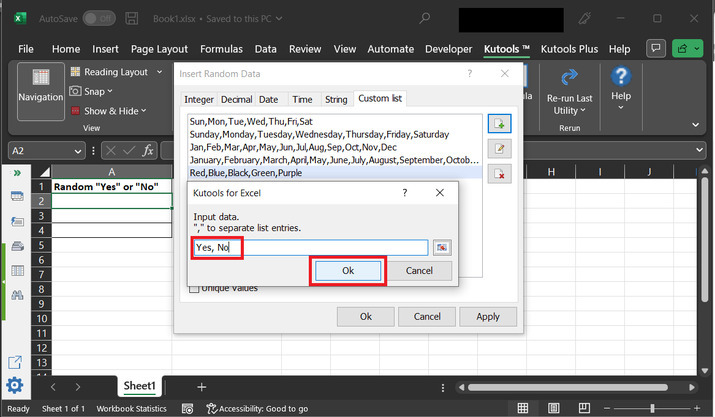
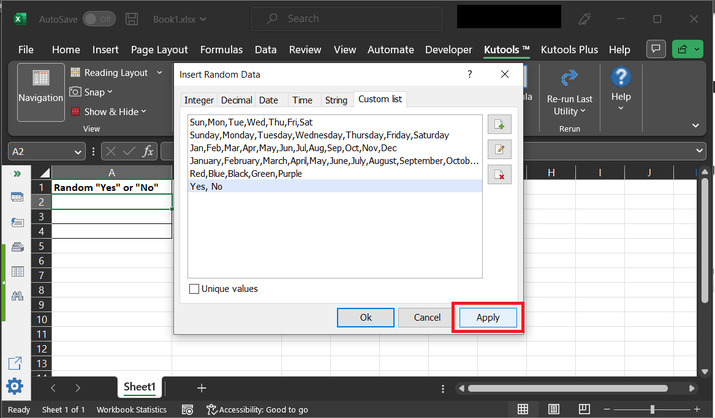
Step 7:
Finally, click on the "Apply" button. This will apply to the changes made in earlier steps.
Step 8:
This will generate the output provided below in the Excel sheet.

Conclusion:
This article allows users to understand the way to generate the random "Yes" or "No". Two different examples are illustrated in the given article. Here, the first example focuses on using the predefined Excel formula, while the next example, allows the user to generate the same required output by simply using the kutools.

2K+ Views
