- Docker - Home
- Docker - Overview
- Docker - Installing on Linux
- Docker - Installation
- Docker - Hub
- Docker - Images
- Docker - Containers
- Docker - Registries
- Docker - Compose
- Docker - Working With Containers
- Docker - Architecture
- Docker - Layers
- Docker - Container & Hosts
- Docker - Configuration
- Docker - Containers & Shells
- Docker - Dockerfile
- Docker - Building Files
- Docker - Public Repositories
- Docker - Managing Ports
- Docker - Web Server
- Docker - Commands
- Docker - Container Linking
- Docker - Data Storage
- Docker - Volumes
- Docker - Networking
- Docker - Security
- Docker - Toolbox
- Docker - Cloud
- Docker - Build Cloud
- Docker - Logging
- Docker - Continuous Integration
- Docker - Kubernetes Architecture
- Docker - Working of Kubernetes
- Docker - Generative AI
- Docker - Hosting
- Docker - Best Practices
- Docker - Setting Node.js
- Docker - Setting MongoDB
- Docker - Setting NGINX
- Docker - Setting ASP.Net
- Docker - Setting MySQL
- Docker - Setting Go
- Docker - Setting Rust
- Docker - Setting Apache
- Docker - Setting MariaDB
- Docker - Setting Jupyter
- Docker - Setting Portainer
- Docker - Setting Rstudio
- Docker - Setting Plex
- Docker Setting - Flame
- Docker Setting - PostgreSql
- Docker Setting - Mosquitto
- Docker Setting - Grafana
- Docker Setting - Nextcloud
- Docker Setting - Pawns
- Docker Setting - Ubuntu
- Docker Setting - RabbitMQ
- Docker - Setting Python
- Docker - Setting Java
- Docker - Setting Redis
- Docker - Setting Alpine
- Docker - Setting BusyBox
- Docker Setting - Traefik
- Docker Setting - WordPress
- Docker Useful Resources
- Docker - Quick Guide
- Docker - Useful Resources
- Docker - Discussion
Docker - Setting MongoDB
Docker has changed the way we develop, deploy, and manage applications, thanks to its amazing containerization features that provide stable and consistent packaged environments.
Containerizing your application's MongoDB database will help in smoothening development, testing, and deployment processes. This chapter walks you through setting up a MongoDB instance inside a Docker container and creating a basic Node.js application to interact with it and perform the basic CRUD operations.
Prerequisites
Before we start, make sure you have the following −
- Docker installation − Visit https://www.docker.com/get-started, download, and install Docker.
- Node.js and npm (or yarn) installed − You will need to download Node.js from https://nodejs.org/ and install it. NPM, the Node Package Manager, already comes with Node.js.
- Docker basics − Knowing the most common Docker concepts, like images and containers, along with associated commands, comes quite in handy.
- MongoDB knowledge − The basics of MongoDB databases, collections, and documents are enough to get started.
This chapter will illustrate a simple application using Node.js and the MongoDB Node.js driver. Using this, we can talk directly to the MongoDB database running in our Docker container and perform many types of CRUD operations.
Setting up the MongoDB Docker Image
Lets pull the official MongoDB Docker image. This image will have a pre-installed MongoDB database and its dependencies. You can open your terminal and run the following command −
$ docker pull mongo

After you run this command, you will have the latest MongoDB image downloaded from Docker Hub.
Running the MongoDB Container
Once you have downloaded the MongoDB image, we can create and run a MongoDB container. Let's run the container with the default configuration −
$ docker run --name my-mongo -d -p 27017:27017 mongo
- --name my-mongo − This will assign a name to the container for easy reference.
- -d − This will run the container in detached mode, allowing it to run in the background.

Now, you can see that the above command has started a MongoDB instance in a Docker container called my-mongo.
In the next step, lets create a basic Node.js application to interact with this MongoDB container.
Creating a Basic Node.js Application
Let's create a new Node.js project directory −
mkdir mongo-app
cd mongo-app
Initialize a new Node.js project −
npm init -y

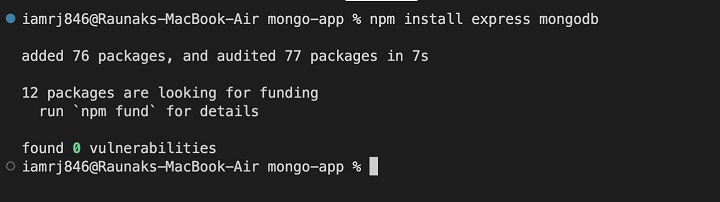
Install the required dependencies −
npm install express mongodb
- Express − For creating a basic web server.
- Mongodb − For interacting with the MongoDB database.
Heres the project directory structure that you can use −
mongo-app/

 public/

    index.html

    script.js

 index.js

 package.json

 Dockerfile
You can use the following code in the package.json file −
{

   "name": "mongo-app",

   "version": "1.0.0",

   "description": "",

   "main": "index.js",

   "scripts": {

      "start": "node index.js"

   },

   "dependencies": {

      "express": "^4.18.2",

      "mongodb": "^5.1.0"

   }

}
For the index.html file, you can use the below code −
<!DOCTYPE html>
<html lang="en">
<head>
   <meta charset="UTF-8">
   <meta name="viewport" content="width=device-width, initial-scale=1.0">
   <title>MongoDB App</title>
   <link rel="stylesheet"
      href="https://cdn.jsdelivr.net/npm/bootstrap@5.3.2/dist/css/bootstrap.min.css"
      integrity="sha384-T9q7tLry9TisE8/rc7QbIoQlf0a1abtAXTGmgx2uNW4yLz+96QGzOx4Hv48j/tO/g"
      crossorigin="anonymous">
</head>
<body>
   <div class="container">
      <h1>MongoDB Data</h1>
      <table class="table">
         <thead>
            <tr>
               <th>Name</th>
               <th>Age</th>
               <th>Actions</th>
            </tr>
         </thead>
         <tbody id="data-table">
         </tbody>
      </table>

      <form id="create-form">
         <div class="mb-3">
            <label for="name" class="form-label">Name</label>
            <input type="text" class="form-control" id="name" name="name">
         </div>
         <div class="mb-3">
            <label for="age" class="form-label">Age</label>
            <input type="number" class="form-control" id="age" name="age">
         </div>
         <button type="submit" class="btn btn-primary">Create</button>
      </form>
   </div>

   <script src="https://cdn.jsdelivr.net/npm/bootstrap@5.3.2/dist/js/bootstrap.bundle.min.js"
      integrity="sha384-C8y58qfLpiX6G0/BajmQXmvnEp7h0/8L1p96aq39e2Tx3SftdD65JFe6O4BQIy7V"
      crossorigin="anonymous"></script>
   <script src="script.js"></script>
</body>
</html>
Explanation
- We've included the Bootstrap CSS and JavaScript files for styling.
- The HTML structure includes a table to display data and a form for creating new records.
- We've added a script tag to link to a script.js file where we'll handle the JavaScript logic.
Lets update the index.js file so that it can serve the index.html file and handle the data fetching, insertion, update, and delete requests.
const express = require('express');
const MongoClient = require('mongodb').MongoClient;
const path = require('path');
const bodyParser = require('body-parser');
const ObjectId = require('mongodb').ObjectId;

const app = express();
const port = 3000;

app.use(bodyParser.json());
app.use(express.static(path.join(__dirname, 'public')));

const uri = "mongodb://my-mongo:27017"; // Replace with your MongoDB connection string
const client = new MongoClient(uri);

async function run() {
   try {
      await client.connect();
      const database = client.db('mydatabase');
      const collection = database.collection('mycollection');

      app.get('/data', async (req, res) => {
         const result = await collection.find().toArray();
         res.json(result);
      });

      app.post('/create', async (req, res) => {
         const { name, age } = req.body;
         const result = await collection.insertOne({ name, age });
         res.json(result);
      });

      app.put('/update/:id', async (req, res) => {
         const { id } = req.params;
         const { name, age } = req.body;
         const result = await collection.updateOne({ _id: new ObjectId(id) }, { $set: { name, age } });
         res.json(result);
      });

      app.delete('/delete/:id', async (req, res) => {
         const { id } = req.params;
         const result = await collection.deleteOne({ _id: new ObjectId(id) });
         res.json(result);
      });

      app.listen(port, () => {
         console.log(`Server listening on port ${port}`);
      });
   } catch (err) {
      console.error(err);
   }
}

run().catch(console.dir);
Please note that we will have to create a script.js file in the public directory to handle fetching data and submitting the form.
const dataTableBody = document.getElementById('data-table');
const createForm = document.getElementById('create-form');

// Fetch data from the server
fetch('/data')
   .then(response => response.json())
   .then(data => {
      data.forEach(item => {
         const row = document.createElement('tr');
         const nameCell = document.createElement('td');
         const ageCell = document.createElement('td');
         nameCell.textContent = item.name;
         ageCell.textContent = item.age;
         row.appendChild(nameCell);
         row.appendChild(ageCell);
         dataTableBody.appendChild(row);
      });
   })
   .catch(error => console.error(error));

// Handle form submission
createForm.addEventListener('submit', (event) => {
   event.preventDefault();
   const name = document.getElementById('name').value;
   const age = document.getElementById('age').value;

   fetch('/create', {
      method: 'POST',
      headers: {
         'Content-Type': 'application/json'
      },
      body: JSON.stringify({ name, age })
   })
   .then(response => response.json())
   .then(data => {
      console.log('Data created:', data);
      // Optionally, update the UI with the newly created data
   })
   .catch(error => console.error(error));
});

// Handle update button click
dataTableBody.addEventListener('click', (event) => {
   if (event.target.classList.contains('update-btn')) {
      const id = event.target.dataset.id;
      const nameInput = prompt('Enter new name');
      const ageInput = prompt('Enter new age');
      if (nameInput !== null && ageInput !== null) {
         fetch(`/update/${id}`, {
            method: 'PUT',
            headers: {
               'Content-Type': 'application/json'
            },
            body: JSON.stringify({ name: nameInput, age: ageInput })
         })
         .then(response => response.json())
         .then(data => {
            console.log('Data updated:', data);
            // Update the UI with the updated data
         })
         .catch(error => console.error(error));
      }
   }
});

// Handle delete button click
dataTableBody.addEventListener('click', (event) => {
   if (event.target.classList.contains('delete-btn')) {
      const id = event.target.dataset.id;
      if (confirm('Are you sure you want to delete this record?')) {
         fetch(`/delete/${id}`, {
            method: 'DELETE'
         })
         .then(response => response.json())
         .then(data => {
            console.log('Data deleted:', data);
            // Remove the row from the UI
         })
         .catch(error => console.error(error));
      }
   }
});
Next, lets create a Dockerfile for this NodeJS application.
Creating the Dockerfile
Before we create the Dockerfile, let's recap the application's components −
- Node.js application
- MongoDB database (running in a separate container)
- Dependencies: express, mongodb, body-parser
Dockerfile Content
Here's a basic Dockerfile for your application −
# Use a Node.js base image

FROM node:18-alpine

# Set the working directory

WORKDIR /app

# Copy package.json and package-lock.json (if present)

COPY package*.json ./

# Install dependencies

RUN npm install

# Copy the rest of the application code

COPY . .

# Expose the port your app will listen on

EXPOSE 3000

# Start the app

CMD [ "node", "index.js" ]
Explanation of the Dockerfile
- FROM node:18-alpine: This will use a Node.js 18 Alpine Linux-based image as the base image. Note that Alpine Linux is a lightweight distribution.
- WORKDIR /app − Sets the working directory inside the container to /app.
- COPY package*.json ./ − It will copy the package.json and package-lock.json files to the working directory.
- RUN npm install − Installs the dependencies listed in package.json.
- COPY . . − Copies the entire project directory to the container.
- EXPOSE 3000 − Exposes port 3000 for the Node.js application.
- CMD [ "node", "index.js" ] − Specifies the command to run when the container starts.
Building and Running the Docker Image
To build the Docker image −
$ docker build -t my-mongo-app .

You can replace my-mongo-app with your desired image name.
To run the container −
$ docker run -dp 3000:3000 --name my-mongo-app-container my-mongo-app

The above command will map port 3000 on your host to port 3000 in the container.
Now, you can open the localhost:3000 in your browser and perform the CRUD operations from the forms.
Conclusion
To sum up, in this chapter, we have understood how to run a MongoDB container and a simple NodeJs and Express application to perform CRUD operations in the database.
While this setup works well for local testing and development purposes, however, for production and complex applications, it is recommended to use a more reliable way to run MongoDB and NodeJS or any other backend application. You can use a container orchestration tool like Kubernetes or Docker Swarm which will provide more flexibility to scale and work with a large number of containers and networks.
FAQs on Setting MongoDB in Docker
1. How do I connect a Node.js application to a Dockerized MongoDB?
Connect your Node.js application to a Dockerized MongoDB using a MongoDB Node.js driver. Configure the connection string with the right hostname, usually `mongodb`, and with the correct port. Never forget that your Node.js application and the MongoDB container need to be on the same network.
2. How do I manage data persistence for MongoDB in a Docker container?
Setting up persistence for MongoDB data storage inside a Docker container can be achieved using Volumes. The volume allows the mapping of one directory in your host machine into a container. All data written to the MongoDB database will be safely stored in the host volume, so you don't lose your data when your container is stopped.
3. What are the common challenges when setting up MongoDB and Node.js in Docker?
Common issues are network connectivity between the containers, data volume configuration, and management of environment variables. Ensure proper mapping of ports, mounting of volumes, and passing of environment variables. Better yet, maintain multi-container setups through the use of Docker Compose.
