 Data Structure
 Networking
 RDBMS
RDBMS Operating System
 Java
Java MS Excel
 iOS
iOS HTML
HTML CSS
CSS Android
 Python
 C Programming
 C++
C++ C#
C# MongoDB
 MySQL
MySQL Javascript
 PHP
PHP
- Selected Reading
- UPSC IAS Exams Notes
- Developer's Best Practices
- Questions and Answers
- Effective Resume Writing
- HR Interview Questions
- Computer Glossary
- Who is Who
How to create a Scatter Plot with several colors in Matplotlib?
A scatter plot is a data visualisation that displays the relationship between two variables. A marker or symbol is placed on the plot at the coordinates corresponding to each data point's values for the two variables, representing that data point. The graphic can aid in finding patterns, trends, and outliers in the data.
Scatter plots and other types of data visualisation can be made using the well-known Python module Matplotlib. By giving a list of colours that each plot point should belong to, the user may use Matplotlib to produce a scatter plot with various hues. This way, we can use the plot to visually depict a third variable or category.
Use the scatter function in Matplotlib and the c parameter to pass in the x and y data and a list of colours to produce a scatter plot. Moreover, the user may add labels, captions, and legends to the plot to offer context and details about the data. We can learn more about the connections between variables and spot any intriguing trends or patterns by examining the plot that results.
Using C Parameter
The colour of each marker in a scatter plot is specified by the c parameter of Matplotlib's scatter function. Depending on how the user wishes to relate the colours to the data, it can take various forms.
The scatter plot's markers will all have the same colour if the c parameter is passed a single-colour string or a tuple of RGBA values. For instance, a scatter plot with blue markers would be produced if c='blue' or c=(0.0, 0.0, 1.0, 1.0).
Syntax
import matplotlib.pyplot as plt
plt.scatter(x, y, c=colors)
Data that will be plotted on the x and y axes are denoted by the letters x and y. c parameter defines the marker's shade of colour. The cmap argument can map this to a colormap as a single colour, a series of colours, or a series of values.
Example 1
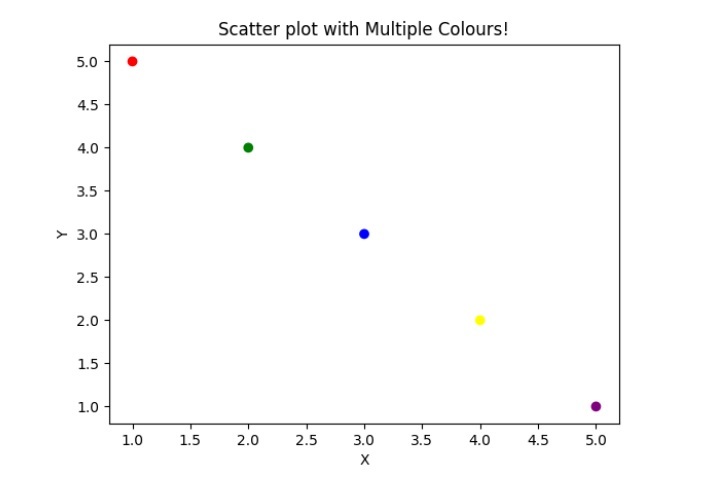
In this example, we create a scatter plot with several colours. We supply a colour for each point in the colours list and the coordinates for each point in the x and y lists. These lists are then passed to the scatter() method, where the colour for each point is specified by setting c=colors. Lastly, we display the plot using plt.show() and add labels and a title using plt.xlabel(), plt.ylabel(), and plt.title().
import matplotlib.pyplot as plt

# Define x, y, and colors for each point
x = [1, 2, 3, 4, 5]
y = [5, 4, 3, 2, 1]
colors = ['red', 'green', 'blue', 'yellow', 'purple']

# Create a scatter plot with multiple colors
plt.scatter(x, y, c=colors)

# Add labels and title
plt.xlabel('X')
plt.ylabel('Y')
plt.title('Scatter plot with Multiple Colours!')

plt.show()
Output

Example 2
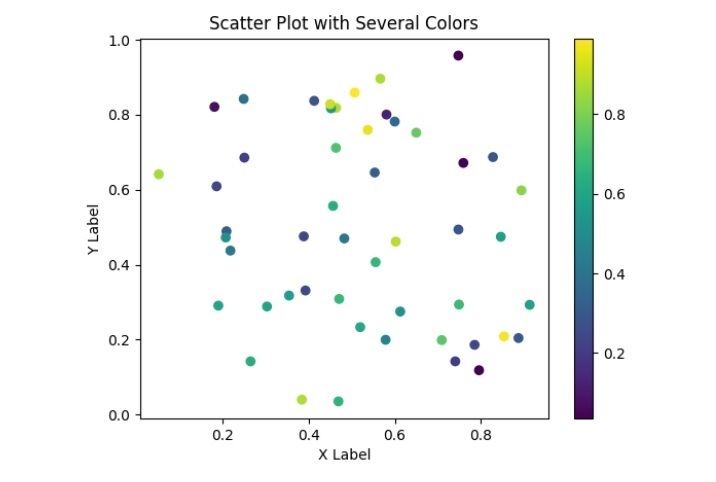
In this example, we use Matplotlib to make a scatter plot with many colours. We import Matplotlib and NumPy, two required libraries. Then, we use the NumPy rand function to produce some random x and y data and a list of random colours for each point in the scatter plot. The scatter function is then used to construct a scatter plot with various colours using the x, y, and c parameters. The c option specifies the list of colours to be used for each point. The mapping between the colour values and their associated values is then displayed by adding a colour bar using the color bar function. This can help decipher the significance of the colours used in the story.
Lastly, we use the xlabel, ylabel, and title methods to add labels and a title to the plot. This can aid in supplying context and details about the data that is being plotted.
import matplotlib.pyplot as plt
import numpy as np

# Generating some random data
x = np.random.rand(50)
y = np.random.rand(50)
colors = np.random.rand(50)

# Creating a scatter plot with different colors
plt.scatter(x, y, c=colors)

# Adding a color bar
plt.colorbar()

# Add labels and a title
plt.xlabel('X Label')
plt.ylabel('Y Label')
plt.title('Scatter Plot with Several Colors')

# Show the plot
plt.show()
Output

Executing a code showing a scatter plot with various colours can guide us in understanding the connections between the different variables in our data. The plot will also have labels and a title to explain further the data being displayed.

