 Data Structure
 Networking
 RDBMS
RDBMS Operating System
 Java
Java MS Excel
 iOS
iOS HTML
HTML CSS
CSS Android
 Python
 C Programming
 C++
C++ C#
C# MongoDB
 MySQL
MySQL Javascript
 PHP
PHP
- Selected Reading
- UPSC IAS Exams Notes
- Developer's Best Practices
- Questions and Answers
- Effective Resume Writing
- HR Interview Questions
- Computer Glossary
- Who is Who
How to autofill a field in JavaScript same as another?
Automatically filling in a field in JavaScript is a common need in web forms, where one field copies the value from another. This feature eliminates the need to write the same information in one or more fields.
This is useful in real-life scenarios, such as filling in the forms where the user has entered the permanent address and has to add a temporary address. If both the addresses are the same, using the autofilling feature, he can automatically copy the permanent address into the temporary address. This article explains how to create autofill features in JavaScript.
Core Concept: Copying Field Values
The main concept is that if the two fields are to be the same, you have to create an autofilling feature in the form of a button that will insert the value of one field in the other. You can do this using JavaScript addEventListeners and changing the Document Object Model (DOM).
Implementing Autofill in JavaScript
The following are the implementation steps for doing this:
- Set Up the HTML Structure: Firstly, you need to set up the HTML structure, which consists of two input fields for the source and the target addresses and a button that triggers the autofill action.
-
Write the JavaScript Logic:
- Use document.querySelector() to select the button element.
- Use document.querySelectorAll() to select both input fields (source and target).
- Add an event listener to the button that copies the value from the first field (source) to the second field (target).
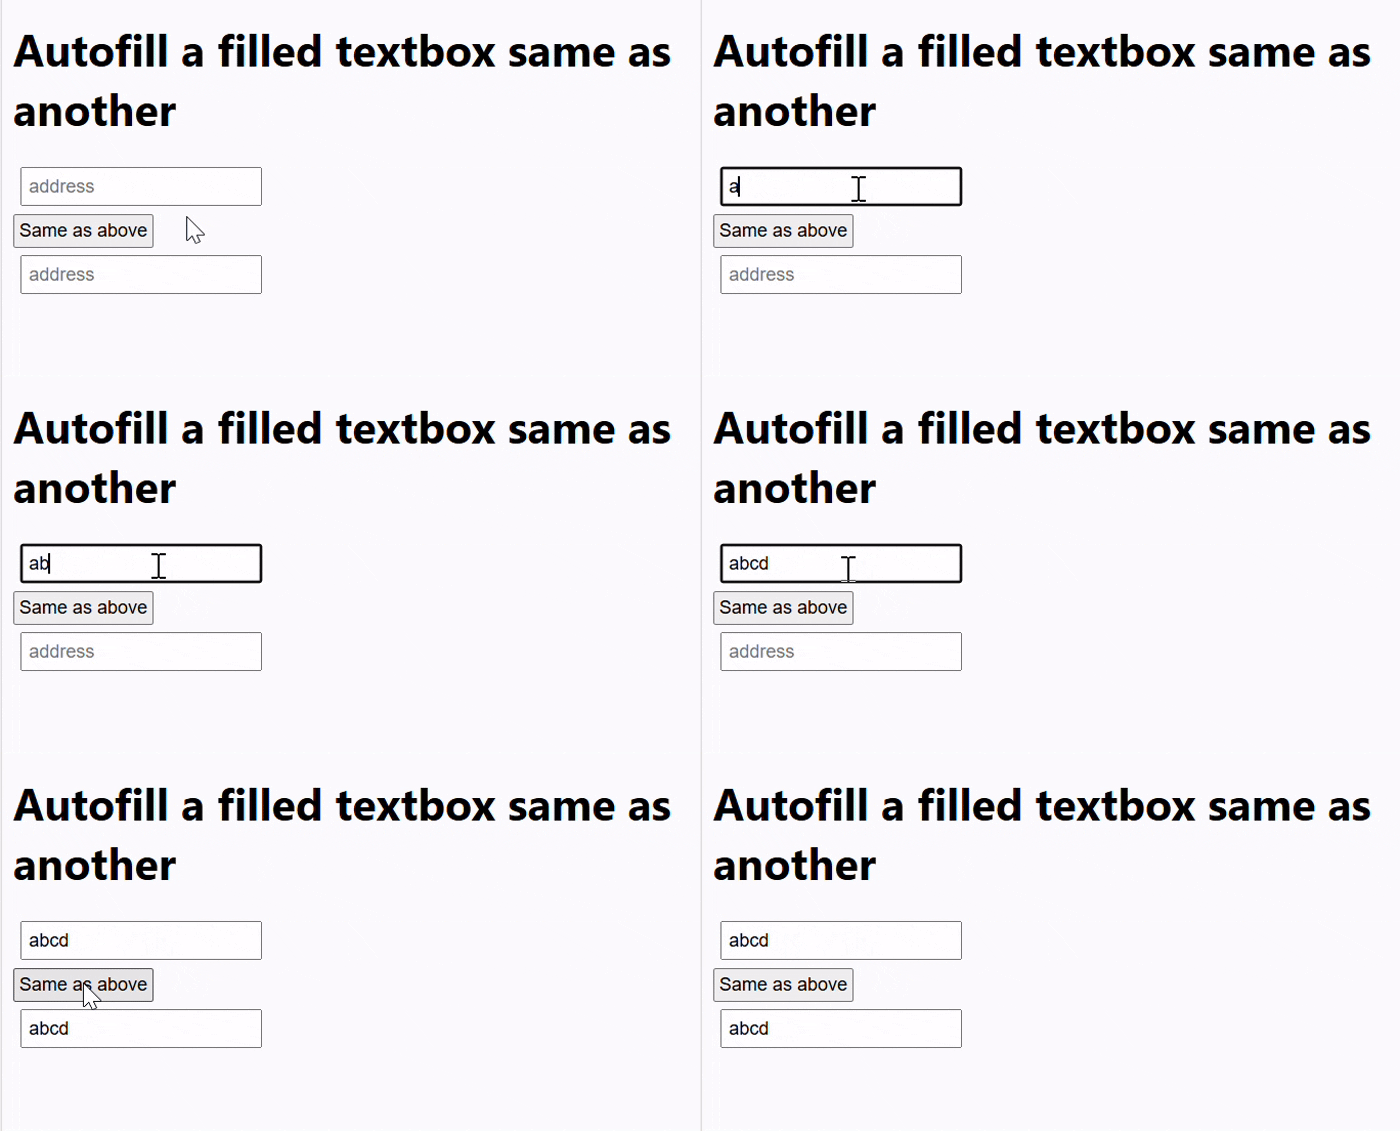
- Test the Functionality: After writing the JavaScript logic, check the functionality by clicking the button and verifying the second input field should be filled with the same value as the first.
Code Implementation
Here is the simple code implementation following the above steps:
<!DOCTYPE html>
<html>
<head>
<title>Document</title>
<style>
    body {
        font-family: "Segoe UI", Tahoma, Geneva, Verdana, sans-serif;
    }
    input {
        padding: 5px;
        margin: 5px;
        display: block;
    }
    button {
        padding: 3px;
    }
</style>
</head>
<body>
<h1>Autofill a filled textbox same as another</h1>
<input type="text" class="addr" placeholder="address" />
<button class="Btn">Same as above</button>
<input type="text" class="addr" placeholder="address" />
<script>
    let BtnEle = document.querySelector(".Btn");
    let addrEle = document.querySelectorAll(".addr");
    BtnEle.addEventListener("click", () => {
        addrEle[1].value = addrEle[0].value;
    });
</script>
</body>
</html>
Output

JavaScript Code Explanation
The following is a simple code explanation of the above code:
- The document.querySelector(".Btn") selects the button element using its class in BtnEle.
- The document.querySelectorAll(".addr") selects all input fields with the class addr in the addrEle. This returns a NodeList, which is an array-like object.
- The addEventListener adds an event listener to the button. When the button is clicked, the function inside the listener is executed.
- Then, copies the value from the first input field (addrEle) to the second input field (addrEle).
Conclusion
In this article, we have seen a simple and effective way to automatically fill in form fields in JavaScript. It makes things easier for users by reducing the need to enter the same information multiple times. Whether it's activated by a button click or updates in real time, this feature can improve how easy the form is to use.

