
 Data Structure
 Networking
 RDBMS
RDBMS Operating System
 Java
Java MS Excel
 iOS
iOS HTML
HTML CSS
CSS Android
 Python
 C Programming
 C++
C++ C#
C# MongoDB
 MySQL
MySQL Javascript
 PHP
PHP
- Selected Reading
- UPSC IAS Exams Notes
- Developer's Best Practices
- Questions and Answers
- Effective Resume Writing
- HR Interview Questions
- Computer Glossary
- Who is Who
How to add Tokens to the test network Metamask?
Today In the computer industry, testing becomes more inclined to better quality and optimization, without any delay in operation and execution of business requirements. Developing good quality products and services without incorporating higher costs into their production becomes a tedious task.
And this becomes more problematic when we are in blockchain technology where everything is linked to crypto transactions even for small amounts of transactions. The testing environment gives us a better solution to pre-production in blockchain development where we can use Test Tokens, also known asTest Faucets for our smart contract deployment.
These test Faucets have no value in the real transactions over the blockchain network which means it behaves like a dummy token just to give an experience of real transactions in the development phase.
Today we will learn how to add Test tokens or Test Faucets in Metamask Wallet.
First Stage ? Setup Metamask Wallet Account
Step 1 ? Go to https://metamask.io/ or search Metamask on google and click on the Metamask official website and click on download for chrome.
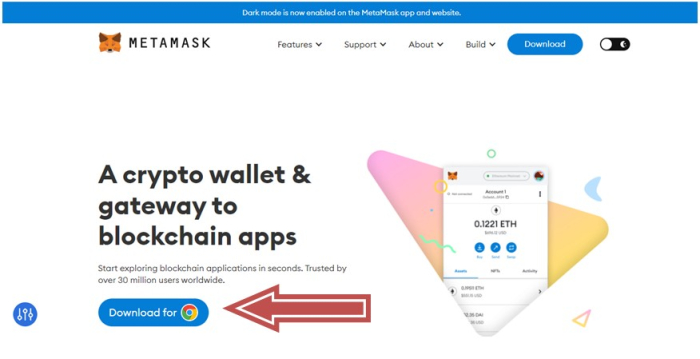
Step 2 ? When you click on download for chrome it takes you to a google extension page where you will be able to add an extension of the meta mask.
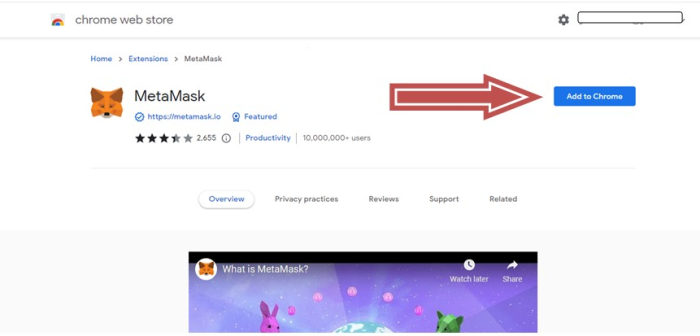
This extension gives you a user interface to interact with your wallet without the installation of software on your device.
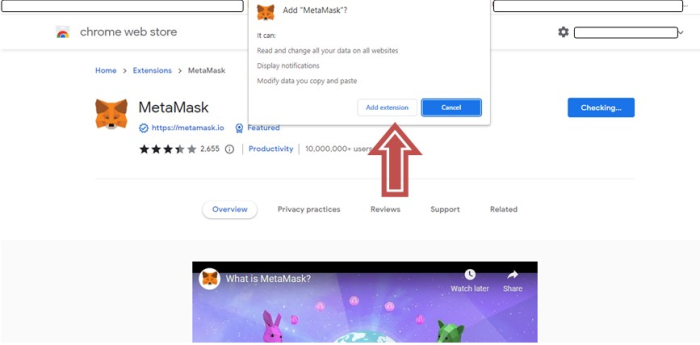
Step 3 ? Now that you have added the extension let's Configure Your wallet by pressing the tab "Get Started".
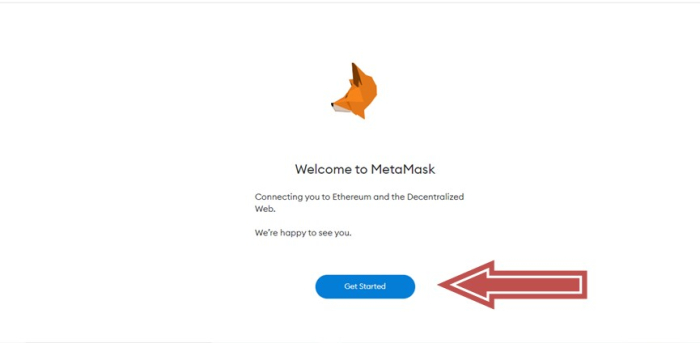
Step 4 ? Create a User Id or an account by the "Create Wallet" tab if you are new. Otherwise, you can log into your existing account with the "Import Wallet" tab.
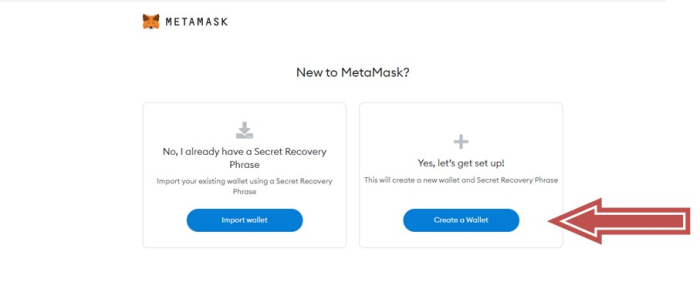
We are creating a new account to demonstrate account creation by clicking "Create Wallet".
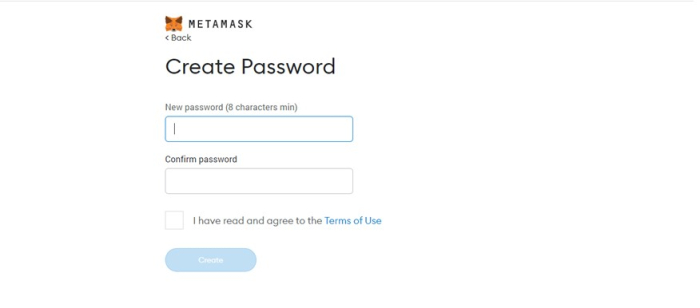
Step 5 ? Enter a new password and confirm the same password by entering it again. Once done click on the terms of use box and then click on Create.
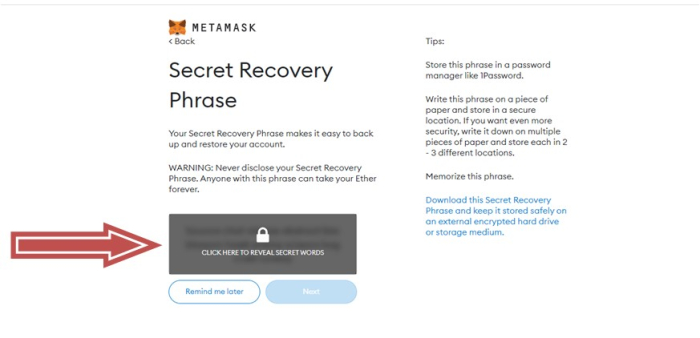
Step 6 ? Now a recovery phrase will be shown on your desktop which helps you in account recovery if you forget your credentials.
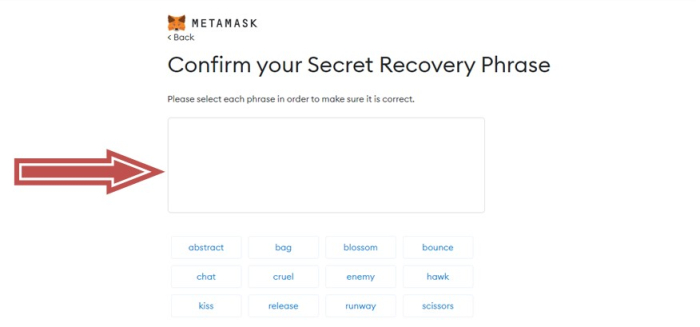
Step 7 ? Once you enter the recovery key for verification in the process of account creation you are good to go with your wallet setup.
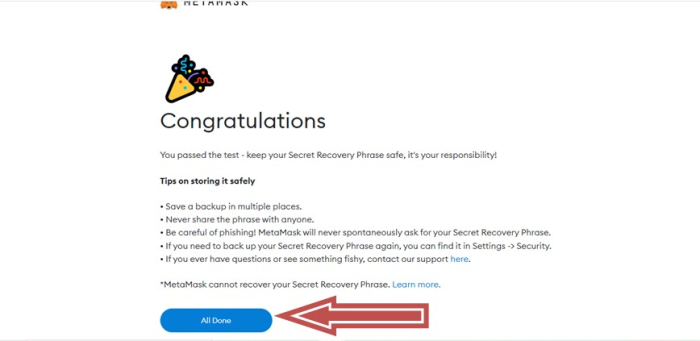
Step 8 ? Your wallet account has been created.

Second Stage ? Setup Test Network to add Test Faucet
Step 1 ? When your account has been created you will notice that you have only one network available i.e Ethereum Mainnet as you can see below image.

Step 2 ? To set up or get a test network click on your account avatar and then click on settings. As shown in the image below.
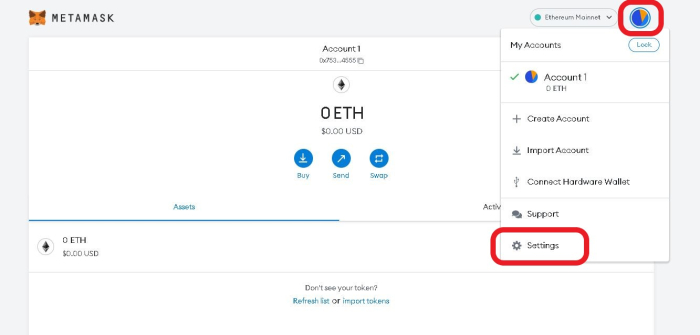
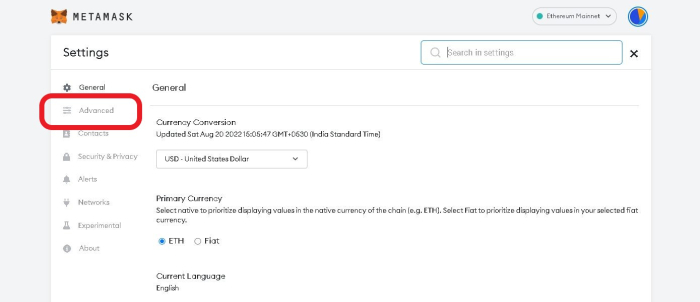
Step 3 ? After clicking on the setting another section of the wallet will open, here click on Advanced.
Step 4 ? Scroll down in the Advanced section you will notice a slider here that enables the test network in the wallet. Click it to turn on the test network.
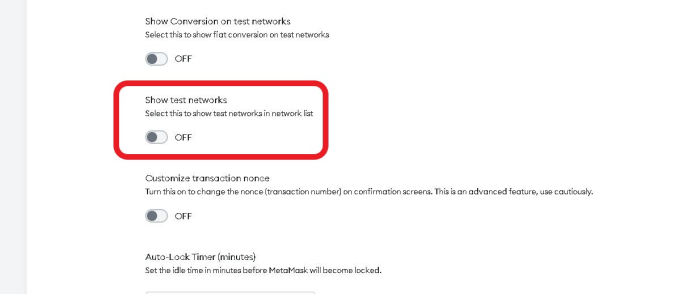
Step 5 ? Now you can see four test networks in your profile section. Each test network has its consensus mechanism.
- Ropsten Testnet ( Proof of Work)
- Rinkeby Testnet (Proof of Authority)
- Goerli Testnet (Proof of Authority)
- Kovan Testnet (Proof of Authority)
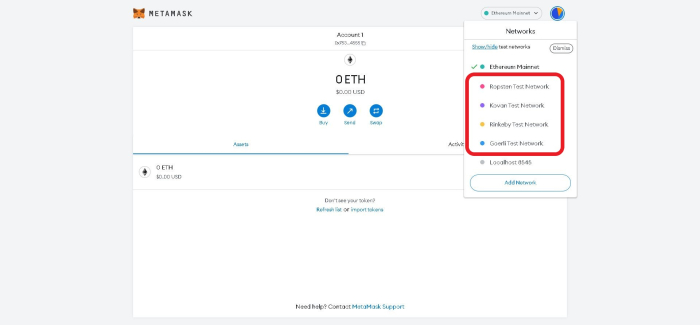
Step 6 ? Select the Ropsten Network (we are using this network in this article to demonstrate as all other networks have a similar process).
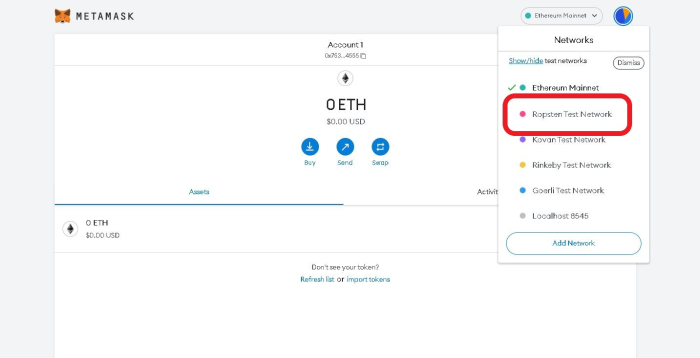
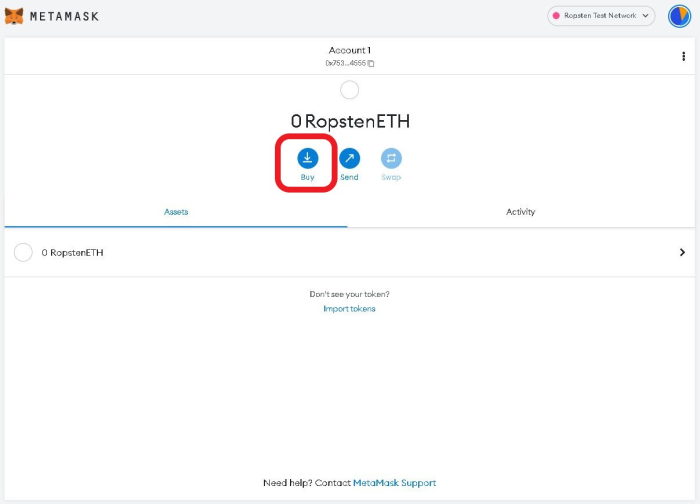
Step 7 ? once the Ropsten Test Network appeared on the screen click on the Buy Tab in blue color.
Step 8 ? A window will Pop-up to deposit the RopstenETH and Test Faucet. Click on the Test Faucet tab that will redirect you to https://faucet.metamask.io
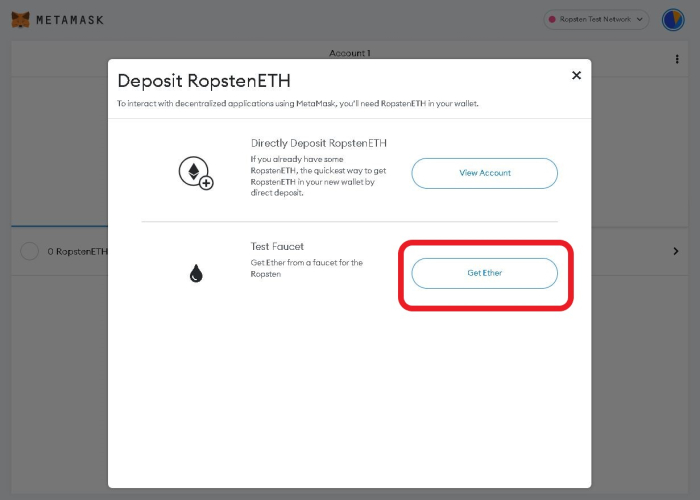
Step 9 ? Click on the green tab to request for 1Test Ether from the network.
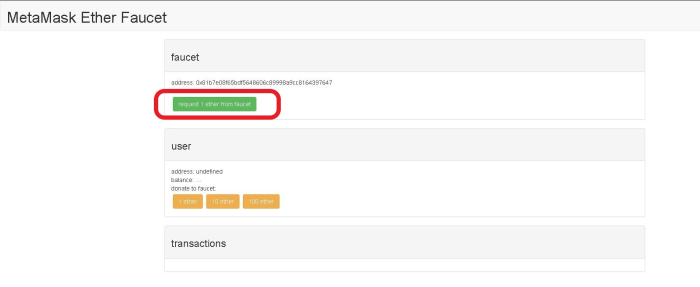
Step 10 ? As soon as possible you click on the tab it will ask for access authorization for your wallet address to transfer the tokens directly into your account.
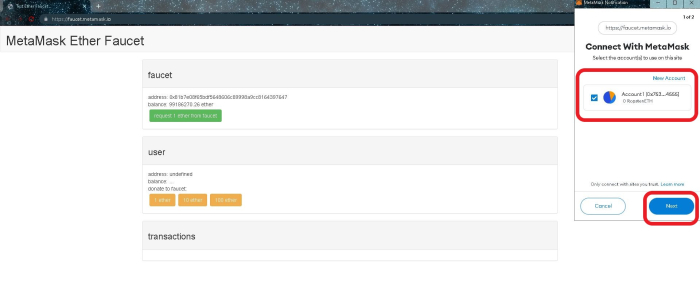
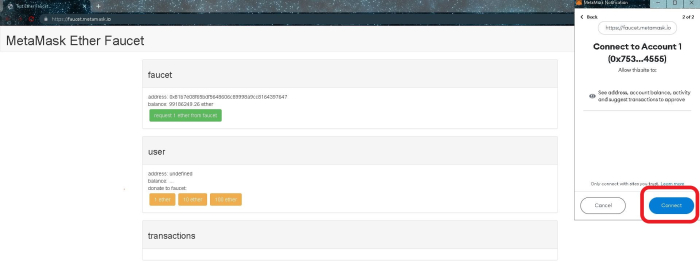
Step 11 ? Accept the permission notification for the app.
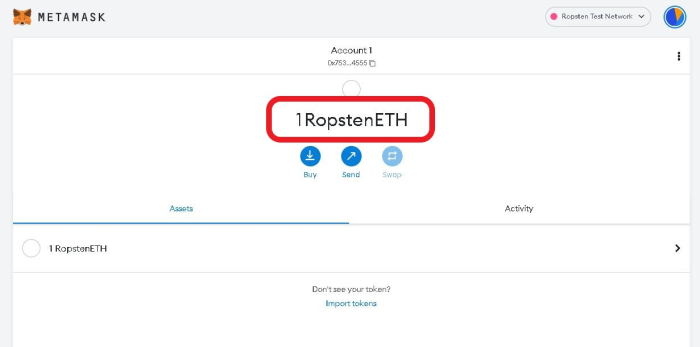
Step 12 ? Here you go, you have your test Ether for testing and development purposes without investing huge chunks of the real token.
Conclusion
These test tokens give you an environment for real-world transaction experience while you are developing your DApp or any other project related to blockchain. You can add more and more tokens to perform your task and local testing using test networks. In this article, we specifically used Ropsten Network which uses RopstenETH test tokens as you can see in your wallet.

