
Article Categories
- All Categories
-
 Data Structure
-
 Networking
-
 RDBMS
RDBMS
-
 Operating System
-
 Java
Java
-
 MS Excel
-
 iOS
iOS
-
 HTML
HTML
-
 CSS
CSS
-
 Android
-
 Python
-
 C Programming
-
 C++
C++
-
 C#
C#
-
 MongoDB
-
 MySQL
MySQL
-
 Javascript
-
 PHP
PHP
-
 Economics & Finance
How to add an image to your README.md file in Git repository?
Introduction
Git, an open-source distributed version control system, is capable of handling projects of any size, from tiny to very big. Among the most commonly used features of GitHub is version control. It is useful when you are working with more than one developer in a team.
This article shows how to add images to a GitHub README.md file
What is GitHub?
The GitHub software development platform allows users to manage, track, and collaborate on software projects online. Using this service, developers can upload their own code files and collaborate on open-source projects with their colleagues. In addition to its social networking features, GitHub is a platform where developers can openly network, collaborate, and pitch their work.
Since its founding in 2008, GitHub has become the largest platform for collaborative software development. In addition to its features, it makes it easy for you to collaborate with other developers and share code. There is no charge for it.
GitHub offers users code-related functions, as well as creating personal profiles and brands. It is possible to see what projects anyone owns and contributes to by visiting their profile. By fostering a collaborative approach to software and website development, GitHub is like a social network for programmers.
What is a README.md file?
Readme files are often the first files users read. Typically, this text file contains instructions, help, and details about patches and updates, or it may contain information about software, a project, or code.
GitHub lets you choose a default readme when you create a repository or project. Default readme files contain the repository name and some basic instructions. It is in Markdown format, which is referred to as 'md'. Text can easily be converted to this lightweight markup language.
What is the purpose of a README.md File?
The world is increasingly moving toward open-source projects and code, and GitHub is the platform where most open-source code is shared. If you share your code with the world, you might find that they do not quite understand how to use it or comprehend it at all. This is where the readme file comes in handy. The readme file describes what is uploaded and how it can be installed or used. The uploader can also use images and videos in order to help the reader navigate through the different sections of a project, which will make it easier for the reader to navigate. When you plan to include these projects in your resume, a well-written readme file is more important. During the interview, the interviewer may not understand a single line of code in your project. However, if there is a readme file attached to the project, it will make it easier for the reader to understand what the project is for, what the coding languages and frameworks were used, and how to navigate through the project itself. Making an impression in your interview is greatly enhanced by a good readme file. There is one unspoken benefit of readme files: they help you in the future. If, for some reason, the company or the team asks you to fix a bug found after you left the project a few months earlier. Without a clue where to start, you're totally out of touch. In this case, a readme file is helpful.
How to list your Existing Remotes?
Following are the steps for adding an image from your local system to the README file.
Step 1 ? Visit the https://github.com/
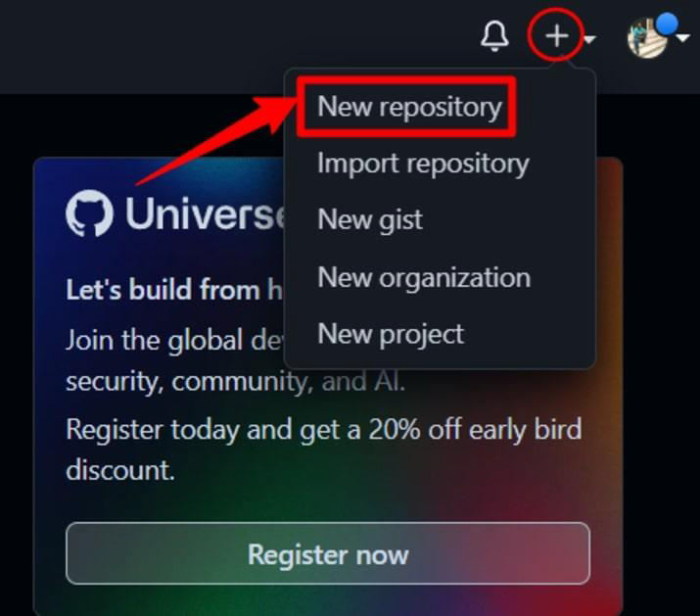
Step 2 ? Create a new repository by clicking on the top right corner "+" icon and then click on the "New Repository" button
Step 3 ? We will create a public repository called "Tutorials Point" for illustration purposes. Be sure to check the box for "Add a README file". It will automatically add the README to the repository.

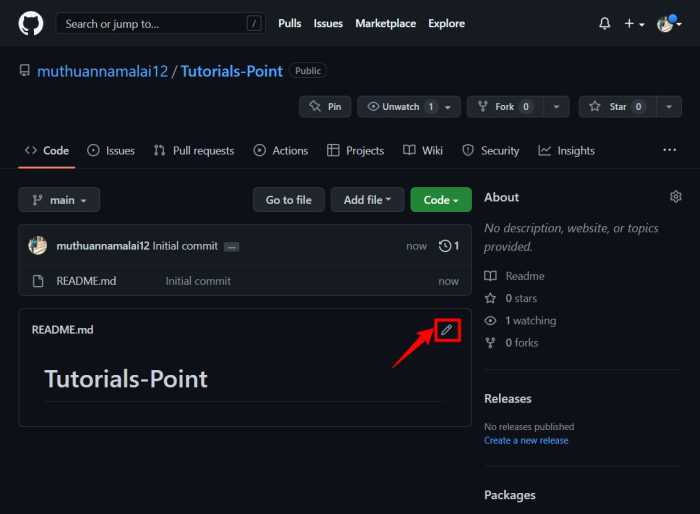
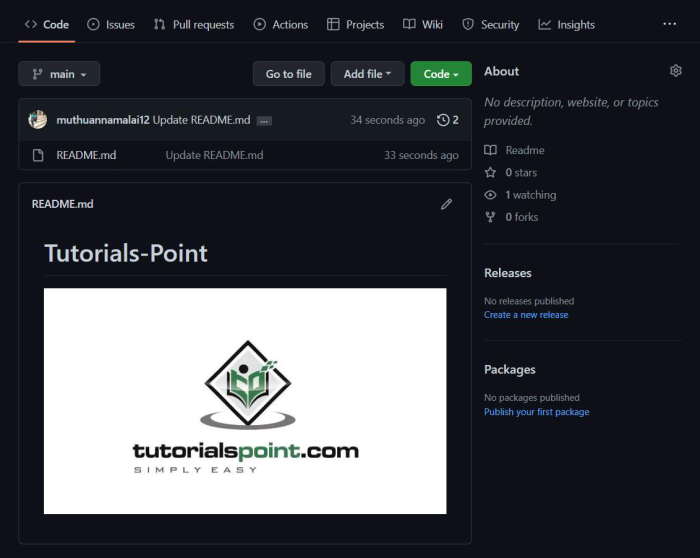
The repository "Tutorials Point" has now been successfully created. As of now, our README file contains the following information.
Step 4 ? Edit the README.md file by clicking on the pencil icon.
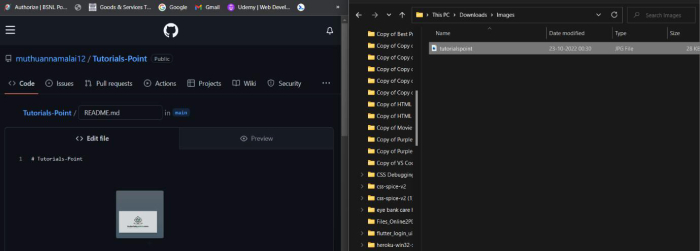
Step 5 ? To add an image to the README, simply drag and drop it.
Step 6 ? The necessary codes will be attached to the image as shown below
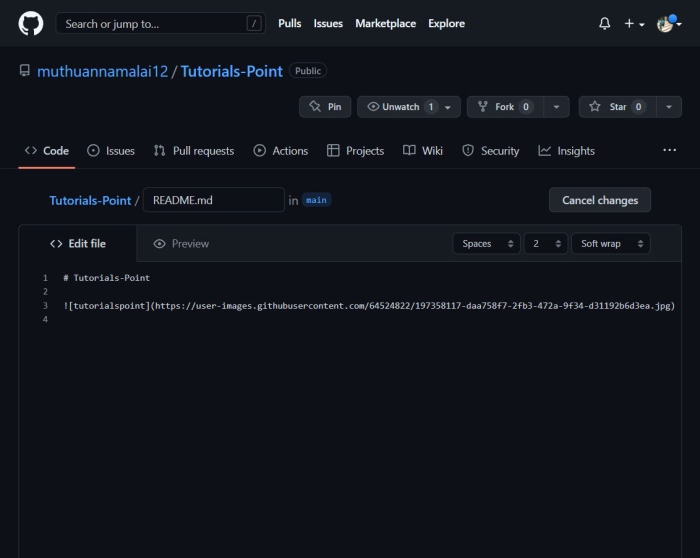
Step 7 ? Hit "Commit changes.".
We have successfully added the image. In the same way, we can add any image to the README.md file.
Conclusion
In this article, we have learned how to add images to README.md file with the help of an example

2K+ Views
