- HCatalog - Create Table
- HCatalog - Alter Table
- HCatalog - View
- HCatalog - Show Tables
- HCatalog - Show Partitions
- HCatalog - Indexes
- HCatalog Useful Resources
- HCatalog - Quick Guide
- HCatalog - Useful Resources
- HCatalog - Discussion
HCatalog - Quick Guide
HCatalog - Introduction
What is HCatalog?
HCatalog is a table storage management tool for Hadoop. It exposes the tabular data of Hive metastore to other Hadoop applications. It enables users with different data processing tools (Pig, MapReduce) to easily write data onto a grid. It ensures that users dont have to worry about where or in what format their data is stored.
HCatalog works like a key component of Hive and it enables the users to store their data in any format and any structure.
Why HCatalog?
Enabling right tool for right Job
Hadoop ecosystem contains different tools for data processing such as Hive, Pig, and MapReduce. Although these tools do not require metadata, they can still benefit from it when it is present. Sharing a metadata store also enables users across tools to share data more easily. A workflow where data is loaded and normalized using MapReduce or Pig and then analyzed via Hive is very common. If all these tools share one metastore, then the users of each tool have immediate access to data created with another tool. No loading or transfer steps are required.
Capture processing states to enable sharing
HCatalog can publish your analytics results. So the other programmer can access your analytics platform via REST. The schemas which are published by you are also useful to other data scientists. The other data scientists use your discoveries as inputs into a subsequent discovery.
Integrate Hadoop with everything
Hadoop as a processing and storage environment opens up a lot of opportunity for the enterprise; however, to fuel adoption, it must work with and augment existing tools. Hadoop should serve as input into your analytics platform or integrate with your operational data stores and web applications. The organization should enjoy the value of Hadoop without having to learn an entirely new toolset. REST services opens up the platform to the enterprise with a familiar API and SQL-like language. Enterprise data management systems use HCatalog to more deeply integrate with the Hadoop platform.
HCatalog Architecture
The following illustration shows the overall architecture of HCatalog.

HCatalog supports reading and writing files in any format for which a SerDe (serializer-deserializer) can be written. By default, HCatalog supports RCFile, CSV, JSON, SequenceFile, and ORC file formats. To use a custom format, you must provide the InputFormat, OutputFormat, and SerDe.
HCatalog is built on top of the Hive metastore and incorporates Hive's DDL. HCatalog provides read and write interfaces for Pig and MapReduce and uses Hive's command line interface for issuing data definition and metadata exploration commands.
HCatalog - Installation
All Hadoop sub-projects such as Hive, Pig, and HBase support Linux operating system. Therefore, you need to install a Linux flavor on your system. HCatalog is merged with Hive Installation on March 26, 2013. From the version Hive-0.11.0 onwards, HCatalog comes with Hive installation. Therefore, follow the steps given below to install Hive which in turn will automatically install HCatalog on your system.
Step 1: Verifying JAVA Installation
Java must be installed on your system before installing Hive. You can use the following command to check whether you have Java already installed on your system −
$ java version
If Java is already installed on your system, you get to see the following response −
java version "1.7.0_71"
Java(TM) SE Runtime Environment (build 1.7.0_71-b13)
Java HotSpot(TM) Client VM (build 25.0-b02, mixed mode)
If you dont have Java installed on your system, then you need to follow the steps given below.
Step 2: Installing Java
Download Java (JDK <latest version> - X64.tar.gz) by visiting the following link http://www.oracle.com/
Then jdk-7u71-linux-x64.tar.gz will be downloaded onto your system.
Generally you will find the downloaded Java file in the Downloads folder. Verify it and extract the jdk-7u71-linux-x64.gz file using the following commands.
$ cd Downloads/
$ ls
jdk-7u71-linux-x64.gz

$ tar zxf jdk-7u71-linux-x64.gz
$ ls
jdk1.7.0_71 jdk-7u71-linux-x64.gz
To make Java available to all the users, you have to move it to the location /usr/local/. Open root, and type the following commands.
$ su
password:
# mv jdk1.7.0_71 /usr/local/
# exit
For setting up PATH and JAVA_HOME variables, add the following commands to ~/.bashrc file.
export JAVA_HOME=/usr/local/jdk1.7.0_71
export PATH=PATH:$JAVA_HOME/bin
Now verify the installation using the command java -version from the terminal as explained above.
Step 3: Verifying Hadoop Installation
Hadoop must be installed on your system before installing Hive. Let us verify the Hadoop installation using the following command −
$ hadoop version
If Hadoop is already installed on your system, then you will get the following response −
Hadoop 2.4.1
Subversion https://svn.apache.org/repos/asf/hadoop/common -r 1529768
Compiled by hortonmu on 2013-10-07T06:28Z
Compiled with protoc 2.5.0
From source with checksum 79e53ce7994d1628b240f09af91e1af4
If Hadoop is not installed on your system, then proceed with the following steps −
Step 4: Downloading Hadoop
Download and extract Hadoop 2.4.1 from Apache Software Foundation using the following commands.
$ su
password:
# cd /usr/local
# wget http://apache.claz.org/hadoop/common/hadoop-2.4.1/
hadoop-2.4.1.tar.gz
# tar xzf hadoop-2.4.1.tar.gz
# mv hadoop-2.4.1/* to hadoop/
# exit
Step 5: Installing Hadoop in Pseudo Distributed Mode
The following steps are used to install Hadoop 2.4.1 in pseudo distributed mode.
Setting up Hadoop
You can set Hadoop environment variables by appending the following commands to ~/.bashrc file.
export HADOOP_HOME=/usr/local/hadoop
export HADOOP_MAPRED_HOME=$HADOOP_HOME
export HADOOP_COMMON_HOME=$HADOOP_HOME
export HADOOP_HDFS_HOME=$HADOOP_HOME
export YARN_HOME=$HADOOP_HOME
export HADOOP_COMMON_LIB_NATIVE_DIR=$HADOOP_HOME/lib/native
export PATH=$PATH:$HADOOP_HOME/sbin:$HADOOP_HOME/bin
Now apply all the changes into the current running system.
$ source ~/.bashrc
Hadoop Configuration
You can find all the Hadoop configuration files in the location $HADOOP_HOME/etc/hadoop. You need to make suitable changes in those configuration files according to your Hadoop infrastructure.
$ cd $HADOOP_HOME/etc/hadoop
In order to develop Hadoop programs using Java, you have to reset the Java environment variables in hadoop-env.sh file by replacing JAVA_HOME value with the location of Java in your system.
export JAVA_HOME=/usr/local/jdk1.7.0_71
Given below are the list of files that you have to edit to configure Hadoop.
core-site.xml
The core-site.xml file contains information such as the port number used for Hadoop instance, memory allocated for the file system, memory limit for storing the data, and the size of Read/Write buffers.
Open the core-site.xml and add the following properties in between the <configuration> and </configuration> tags.
<configuration>
   <property>
      <name>fs.default.name</name>
      <value>hdfs://localhost:9000</value>
   </property>
</configuration>
hdfs-site.xml
The hdfs-site.xml file contains information such as the value of replication data, the namenode path, and the datanode path of your local file systems. It means the place where you want to store the Hadoop infrastructure.
Let us assume the following data.
dfs.replication (data replication value) = 1

(In the following path /hadoop/ is the user name.
hadoopinfra/hdfs/namenode is the directory created by hdfs file system.)

namenode path = //home/hadoop/hadoopinfra/hdfs/namenode

(hadoopinfra/hdfs/datanode is the directory created by hdfs file system.)
datanode path = //home/hadoop/hadoopinfra/hdfs/datanode
Open this file and add the following properties in between the <configuration>, </configuration> tags in this file.
<configuration>
   <property>
      <name>dfs.replication</name>
      <value>1</value>
   </property>

   <property>
      <name>dfs.name.dir</name>
      <value>file:///home/hadoop/hadoopinfra/hdfs/namenode</value>
   </property>

   <property>
      <name>dfs.data.dir</name>
      <value>file:///home/hadoop/hadoopinfra/hdfs/datanode</value>
   </property>
</configuration>
Note − In the above file, all the property values are user-defined and you can make changes according to your Hadoop infrastructure.
yarn-site.xml
This file is used to configure yarn into Hadoop. Open the yarn-site.xml file and add the following properties in between the <configuration>, </configuration> tags in this file.
<configuration>
   <property>
      <name>yarn.nodemanager.aux-services</name>
      <value>mapreduce_shuffle</value>
   </property>
</configuration>
mapred-site.xml
This file is used to specify which MapReduce framework we are using. By default, Hadoop contains a template of yarn-site.xml. First of all, you need to copy the file from mapred-site,xml.template to mapred-site.xml file using the following command.
$ cp mapred-site.xml.template mapred-site.xml
Open mapred-site.xml file and add the following properties in between the <configuration>, </configuration> tags in this file.
<configuration>
   <property>
      <name>mapreduce.framework.name</name>
      <value>yarn</value>
   </property>
</configuration>
Step 6: Verifying Hadoop Installation
The following steps are used to verify the Hadoop installation.
Namenode Setup
Set up the namenode using the command hdfs namenode -format as follows −
$ cd ~
$ hdfs namenode -format
The expected result is as follows −
10/24/14 21:30:55 INFO namenode.NameNode: STARTUP_MSG:
/************************************************************
STARTUP_MSG: Starting NameNode
STARTUP_MSG: host = localhost/192.168.1.11
STARTUP_MSG: args = [-format]
STARTUP_MSG: version = 2.4.1
...
...
10/24/14 21:30:56 INFO common.Storage: Storage directory
/home/hadoop/hadoopinfra/hdfs/namenode has been successfully formatted.
10/24/14 21:30:56 INFO namenode.NNStorageRetentionManager: Going to retain 1
images with txid >= 0 10/24/14 21:30:56 INFO util.ExitUtil: Exiting with status 0
10/24/14 21:30:56 INFO namenode.NameNode: SHUTDOWN_MSG:
/************************************************************
SHUTDOWN_MSG: Shutting down NameNode at localhost/192.168.1.11
************************************************************/
Verifying Hadoop DFS
The following command is used to start the DFS. Executing this command will start your Hadoop file system.
$ start-dfs.sh
The expected output is as follows −
10/24/14 21:37:56 Starting namenodes on [localhost]
localhost: starting namenode, logging to
/home/hadoop/hadoop-2.4.1/logs/hadoop-hadoop-namenode-localhost.out localhost:
starting datanode, logging to
   /home/hadoop/hadoop-2.4.1/logs/hadoop-hadoop-datanode-localhost.out
Starting secondary namenodes [0.0.0.0]
Verifying Yarn Script
The following command is used to start the Yarn script. Executing this command will start your Yarn daemons.
$ start-yarn.sh
The expected output is as follows −
starting yarn daemons
starting resourcemanager, logging to /home/hadoop/hadoop-2.4.1/logs/
yarn-hadoop-resourcemanager-localhost.out
localhost: starting nodemanager, logging to
   /home/hadoop/hadoop-2.4.1/logs/yarn-hadoop-nodemanager-localhost.out
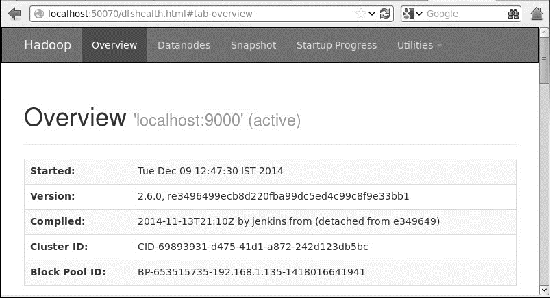
Accessing Hadoop on Browser
The default port number to access Hadoop is 50070. Use the following URL to get Hadoop services on your browser.
http://localhost:50070/
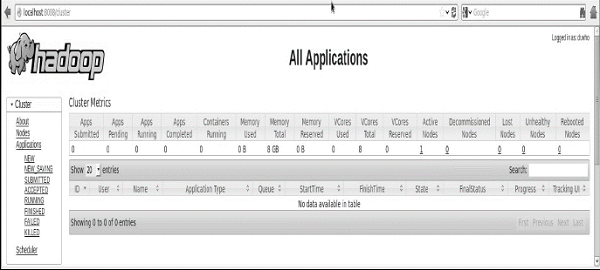
Verify all applications for cluster
The default port number to access all applications of cluster is 8088. Use the following url to visit this service.
http://localhost:8088/
Once you are done with the installation of Hadoop, proceed to the next step and install Hive on your system.
Step 7: Downloading Hive
We use hive-0.14.0 in this tutorial. You can download it by visiting the following link http://apache.petsads.us/hive/hive-0.14.0/. Let us assume it gets downloaded onto the /Downloads directory. Here, we download Hive archive named apache-hive-0.14.0-bin.tar.gz for this tutorial. The following command is used to verify the download −
$ cd Downloads
$ ls
On successful download, you get to see the following response −
apache-hive-0.14.0-bin.tar.gz
Step 8: Installing Hive
The following steps are required for installing Hive on your system. Let us assume the Hive archive is downloaded onto the /Downloads directory.
Extracting and Verifying Hive Archive
The following command is used to verify the download and extract the Hive archive −
$ tar zxvf apache-hive-0.14.0-bin.tar.gz
$ ls
On successful download, you get to see the following response −
apache-hive-0.14.0-bin apache-hive-0.14.0-bin.tar.gz
Copying files to /usr/local/hive directory
We need to copy the files from the superuser su -. The following commands are used to copy the files from the extracted directory to the /usr/local/hive directory.
$ su -
passwd:
# cd /home/user/Download
# mv apache-hive-0.14.0-bin /usr/local/hive
# exit
Setting up the environment for Hive
You can set up the Hive environment by appending the following lines to ~/.bashrc file −
export HIVE_HOME=/usr/local/hive
export PATH=$PATH:$HIVE_HOME/bin
export CLASSPATH=$CLASSPATH:/usr/local/Hadoop/lib/*:.
export CLASSPATH=$CLASSPATH:/usr/local/hive/lib/*:.
The following command is used to execute ~/.bashrc file.
$ source ~/.bashrc
Step 9: Configuring Hive
To configure Hive with Hadoop, you need to edit the hive-env.sh file, which is placed in the $HIVE_HOME/conf directory. The following commands redirect to Hive config folder and copy the template file −
$ cd $HIVE_HOME/conf
$ cp hive-env.sh.template hive-env.sh
Edit the hive-env.sh file by appending the following line −
export HADOOP_HOME=/usr/local/hadoop
With this, the Hive installation is complete. Now you require an external database server to configure Metastore. We use Apache Derby database.
Step 10: Downloading and Installing Apache Derby
Follow the steps given below to download and install Apache Derby −
Downloading Apache Derby
The following command is used to download Apache Derby. It takes some time to download.
$ cd ~
$ wget http://archive.apache.org/dist/db/derby/db-derby-10.4.2.0/db-derby-10.4.2.0-bin.tar.gz
The following command is used to verify the download −
$ ls
On successful download, you get to see the following response −
db-derby-10.4.2.0-bin.tar.gz
Extracting and Verifying Derby Archive
The following commands are used for extracting and verifying the Derby archive −
$ tar zxvf db-derby-10.4.2.0-bin.tar.gz
$ ls
On successful download, you get to see the following response −
db-derby-10.4.2.0-bin db-derby-10.4.2.0-bin.tar.gz
Copying Files to /usr/local/derby Directory
We need to copy from the superuser su -. The following commands are used to copy the files from the extracted directory to the /usr/local/derby directory −
$ su -
passwd:
# cd /home/user
# mv db-derby-10.4.2.0-bin /usr/local/derby
# exit
Setting up the Environment for Derby
You can set up the Derby environment by appending the following lines to ~/.bashrc file −
export DERBY_HOME=/usr/local/derby
export PATH=$PATH:$DERBY_HOME/bin
export CLASSPATH=$CLASSPATH:$DERBY_HOME/lib/derby.jar:$DERBY_HOME/lib/derbytools.jar
The following command is used to execute ~/.bashrc file −
$ source ~/.bashrc
Create a Directory for Metastore
Create a directory named data in $DERBY_HOME directory to store Metastore data.
$ mkdir $DERBY_HOME/data
Derby installation and environmental setup is now complete.
Step 11: Configuring the Hive Metastore
Configuring Metastore means specifying to Hive where the database is stored. You can do this by editing the hive-site.xml file, which is in the $HIVE_HOME/conf directory. First of all, copy the template file using the following command −
$ cd $HIVE_HOME/conf
$ cp hive-default.xml.template hive-site.xml
Edit hive-site.xml and append the following lines between the <configuration> and </configuration> tags −
<property>
   <name>javax.jdo.option.ConnectionURL</name>
   <value>jdbc:derby://localhost:1527/metastore_db;create = true</value>
   <description>JDBC connect string for a JDBC metastore</description>
</property>
Create a file named jpox.properties and add the following lines into it −
javax.jdo.PersistenceManagerFactoryClass = org.jpox.PersistenceManagerFactoryImpl

org.jpox.autoCreateSchema = false
org.jpox.validateTables = false
org.jpox.validateColumns = false
org.jpox.validateConstraints = false

org.jpox.storeManagerType = rdbms
org.jpox.autoCreateSchema = true
org.jpox.autoStartMechanismMode = checked
org.jpox.transactionIsolation = read_committed

javax.jdo.option.DetachAllOnCommit = true
javax.jdo.option.NontransactionalRead = true
javax.jdo.option.ConnectionDriverName = org.apache.derby.jdbc.ClientDriver
javax.jdo.option.ConnectionURL = jdbc:derby://hadoop1:1527/metastore_db;create = true
javax.jdo.option.ConnectionUserName = APP
javax.jdo.option.ConnectionPassword = mine
Step 12: Verifying Hive Installation
Before running Hive, you need to create the /tmp folder and a separate Hive folder in HDFS. Here, we use the /user/hive/warehouse folder. You need to set write permission for these newly created folders as shown below −
chmod g+w
Now set them in HDFS before verifying Hive. Use the following commands −
$ $HADOOP_HOME/bin/hadoop fs -mkdir /tmp
$ $HADOOP_HOME/bin/hadoop fs -mkdir /user/hive/warehouse
$ $HADOOP_HOME/bin/hadoop fs -chmod g+w /tmp
$ $HADOOP_HOME/bin/hadoop fs -chmod g+w /user/hive/warehouse
The following commands are used to verify Hive installation −
$ cd $HIVE_HOME
$ bin/hive
On successful installation of Hive, you get to see the following response −
Logging initialized using configuration in
   jar:file:/home/hadoop/hive-0.9.0/lib/hive-common-0.9.0.jar!/
hive-log4j.properties Hive history
   =/tmp/hadoop/hive_job_log_hadoop_201312121621_1494929084.txt
.
hive>
You can execute the following sample command to display all the tables −
hive> show tables;
OK Time taken: 2.798 seconds
hive>
Step 13: Verify HCatalog Installation
Use the following command to set a system variable HCAT_HOME for HCatalog Home.
export HCAT_HOME = $HiVE_HOME/HCatalog
Use the following command to verify the HCatalog installation.
cd $HCAT_HOME/bin
./hcat
If the installation is successful, you will get to see the following output −
SLF4J: Actual binding is of type [org.slf4j.impl.Log4jLoggerFactory]
usage: hcat { -e "<query>" | -f "<filepath>" }
   [ -g "<group>" ] [ -p "<perms>" ]
   [ -D"<name> = <value>" ]

-D <property = value>    use hadoop value for given property
-e <exec>                hcat command given from command line
-f <file>                hcat commands in file
-g <group>               group for the db/table specified in CREATE statement
-h,--help                Print help information
-p <perms>               permissions for the db/table specified in CREATE statement
HCatalog - CLI
HCatalog Command Line Interface (CLI) can be invoked from the command $HIVE_HOME/HCatalog/bin/hcat where $HIVE_HOME is the home directory of Hive. hcat is a command used to initialize the HCatalog server.
Use the following command to initialize HCatalog command line.
cd $HCAT_HOME/bin
./hcat
If the installation has been done correctly, then you will get the following output −
SLF4J: Actual binding is of type [org.slf4j.impl.Log4jLoggerFactory]
usage: hcat { -e "<query>" | -f "<filepath>" }
   [ -g "<group>" ] [ -p "<perms>" ]
   [ -D"<name> = <value>" ]

-D <property = value>    use hadoop value for given property
-e <exec>                hcat command given from command line
-f <file>                hcat commands in file
-g <group>               group for the db/table specified in CREATE statement
-h,--help                Print help information
-p <perms>               permissions for the db/table specified in CREATE statement
The HCatalog CLI supports these command line options −
| Sr.No | Option | Example & Description |
|---|---|---|
| 1 | -g | hcat -g mygroup ... The table to be created must have the group "mygroup". |
| 2 | -p | hcat -p rwxr-xr-x ... The table to be created must have read, write, and execute permissions. |
| 3 | -f | hcat -f myscript.HCatalog ... myscript.HCatalog is a script file containing DDL commands to execute. |
| 4 | -e | hcat -e 'create table mytable(a int);' ... Treat the following string as a DDL command and execute it. |
| 5 | -D | hcat -Dkey = value ... Passes the key-value pair to HCatalog as a Java system property. |
| 6 | - | hcat Prints a usage message. |
Note −
The -g and -p options are not mandatory.
At one time, either -e or -f option can be provided, not both.
The order of options is immaterial; you can specify the options in any order.
| Sr.No | DDL Command & Description |
|---|---|
| 1 | CREATE TABLE Create a table using HCatalog. If you create a table with a CLUSTERED BY clause, you will not be able to write to it with Pig or MapReduce. |
| 2 | ALTER TABLE Supported except for the REBUILD and CONCATENATE options. Its behavior remains same as in Hive. |
| 3 | DROP TABLE Supported. Behavior the same as Hive (Drop the complete table and structure). |
| 4 | CREATE/ALTER/DROP VIEW Supported. Behavior same as Hive. Note − Pig and MapReduce cannot read from or write to views. |
| 5 | SHOW TABLES Display a list of tables. |
| 6 | SHOW PARTITIONS Display a list of partitions. |
| 7 | Create/Drop Index CREATE and DROP FUNCTION operations are supported, but the created functions must still be registered in Pig and placed in CLASSPATH for MapReduce. |
| 8 | DESCRIBE Supported. Behavior same as Hive. Describe the structure. |
Some of the commands from the above table are explained in subsequent chapters.
HCatalog - Create Table
This chapter explains how to create a table and how to insert data into it. The conventions of creating a table in HCatalog is quite similar to creating a table using Hive.
Create Table Statement
Create Table is a statement used to create a table in Hive metastore using HCatalog. Its syntax and example are as follows −
Syntax
CREATE [TEMPORARY] [EXTERNAL] TABLE [IF NOT EXISTS] [db_name.] table_name
[(col_name data_type [COMMENT col_comment], ...)]
[COMMENT table_comment]
[ROW FORMAT row_format]
[STORED AS file_format]
Example
Let us assume you need to create a table named employee using CREATE TABLE statement. The following table lists the fields and their data types in the employee table −
| Sr.No | Field Name | Data Type |
|---|---|---|
| 1 | Eid | int |
| 2 | Name | String |
| 3 | Salary | Float |
| 4 | Designation | string |
The following data defines the supported fields such as Comment, Row formatted fields such as Field terminator, Lines terminator, and Stored File type.
COMMENT Employee details
FIELDS TERMINATED BY \t
LINES TERMINATED BY \n
STORED IN TEXT FILE
The following query creates a table named employee using the above data.
./hcat e "CREATE TABLE IF NOT EXISTS employee ( eid int, name String,
   salary String, destination String) \
COMMENT 'Employee details' \
ROW FORMAT DELIMITED \
FIELDS TERMINATED BY \t \
LINES TERMINATED BY \n \
STORED AS TEXTFILE;"
If you add the option IF NOT EXISTS, HCatalog ignores the statement in case the table already exists.
On successful creation of table, you get to see the following response −
OK
Time taken: 5.905 seconds
Load Data Statement
Generally, after creating a table in SQL, we can insert data using the Insert statement. But in HCatalog, we insert data using the LOAD DATA statement.
While inserting data into HCatalog, it is better to use LOAD DATA to store bulk records. There are two ways to load data: one is from local file system and second is from Hadoop file system.
Syntax
The syntax for LOAD DATA is as follows −
LOAD DATA [LOCAL] INPATH 'filepath' [OVERWRITE] INTO TABLE tablename
[PARTITION (partcol1=val1, partcol2=val2 ...)]
- LOCAL is the identifier to specify the local path. It is optional.
- OVERWRITE is optional to overwrite the data in the table.
- PARTITION is optional.
Example
We will insert the following data into the table. It is a text file named sample.txt in /home/user directory.
1201  Gopal        45000    Technical manager
1202  Manisha      45000    Proof reader
1203  Masthanvali  40000    Technical writer
1204  Kiran        40000    Hr Admin
1205  Kranthi      30000    Op Admin
The following query loads the given text into the table.
./hcat e "LOAD DATA LOCAL INPATH '/home/user/sample.txt'
OVERWRITE INTO TABLE employee;"
On successful download, you get to see the following response −
OK
Time taken: 15.905 seconds
HCatalog - Alter Table
This chapter explains how to alter the attributes of a table such as changing its table name, changing column names, adding columns, and deleting or replacing columns.
Alter Table Statement
You can use the ALTER TABLE statement to alter a table in Hive.
Syntax
The statement takes any of the following syntaxes based on what attributes we wish to modify in a table.
ALTER TABLE name RENAME TO new_name
ALTER TABLE name ADD COLUMNS (col_spec[, col_spec ...])
ALTER TABLE name DROP [COLUMN] column_name
ALTER TABLE name CHANGE column_name new_name new_type
ALTER TABLE name REPLACE COLUMNS (col_spec[, col_spec ...])
Some of the scenarios are explained below.
Rename To Statement
The following query renames a table from employee to emp.
./hcat e "ALTER TABLE employee RENAME TO emp;"
Change Statement
The following table contains the fields of employee table and it shows the fields to be changed (in bold).
| Field Name | Convert from Data Type | Change Field Name | Convert to Data Type |
|---|---|---|---|
| eid | int | eid | int |
| name | String | ename | String |
| salary | Float | salary | Double |
| designation | String | designation | String |
The following queries rename the column name and column data type using the above data −
./hcat e "ALTER TABLE employee CHANGE name ename String;"
./hcat e "ALTER TABLE employee CHANGE salary salary Double;"
Add Columns Statement
The following query adds a column named dept to the employee table.
./hcat e "ALTER TABLE employee ADD COLUMNS (dept STRING COMMENT 'Department name');"
Replace Statement
The following query deletes all the columns from the employee table and replaces it with emp and name columns −
./hcat e "ALTER TABLE employee REPLACE COLUMNS ( eid INT empid Int, ename STRING name String);"
Drop Table Statement
This chapter describes how to drop a table in HCatalog. When you drop a table from the metastore, it removes the table/column data and their metadata. It can be a normal table (stored in metastore) or an external table (stored in local file system); HCatalog treats both in the same manner, irrespective of their types.
The syntax is as follows −
DROP TABLE [IF EXISTS] table_name;
The following query drops a table named employee −
./hcat e "DROP TABLE IF EXISTS employee;"
On successful execution of the query, you get to see the following response −
OK
Time taken: 5.3 seconds
HCatalog - View
This chapter describes how to create and manage a view in HCatalog. Database views are created using the CREATE VIEW statement. Views can be created from a single table, multiple tables, or another view.
To create a view, a user must have appropriate system privileges according to the specific implementation.
Create View Statement
CREATE VIEW creates a view with the given name. An error is thrown if a table or view with the same name already exists. You can use IF NOT EXISTS to skip the error.
If no column names are supplied, the names of the view's columns will be derived automatically from the defining SELECT expression.
Note − If the SELECT contains un-aliased scalar expressions such as x+y, the resulting view column names will be generated in the form _C0, _C1, etc.
When renaming columns, column comments can also be supplied. Comments are not automatically inherited from the underlying columns.
A CREATE VIEW statement will fail if the view's defining SELECT expression is invalid.
Syntax
CREATE VIEW [IF NOT EXISTS] [db_name.]view_name [(column_name [COMMENT column_comment], ...) ]
[COMMENT view_comment]
[TBLPROPERTIES (property_name = property_value, ...)]
AS SELECT ...;
Example
The following is the employee table data. Now let us see how to create a view named Emp_Deg_View containing the fields id, name, Designation, and salary of an employee having a salary greater than 35,000.
+------+-------------+--------+-------------------+-------+
|  ID  |    Name     | Salary |    Designation    | Dept  |
+------+-------------+--------+-------------------+-------+
| 1201 |    Gopal    | 45000  | Technical manager |  TP   |
| 1202 |   Manisha   | 45000  | Proofreader       |  PR   |
| 1203 | Masthanvali | 30000  | Technical writer  |  TP   |
| 1204 |    Kiran    | 40000  | Hr Admin          |  HR   |
| 1205 |   Kranthi   | 30000  | Op Admin          | Admin |
+------+-------------+--------+-------------------+-------+
The following is the command to create a view based on the above given data.
./hcat e "CREATE VIEW Emp_Deg_View (salary COMMENT ' salary more than 35,000')
   AS SELECT id, name, salary, designation FROM employee WHERE salary ≥ 35000;"
Output
OK
Time taken: 5.3 seconds
Drop View Statement
DROP VIEW removes metadata for the specified view. When dropping a view referenced by other views, no warning is given (the dependent views are left dangling as invalid and must be dropped or recreated by the user).
Syntax
DROP VIEW [IF EXISTS] view_name;
Example
The following command is used to drop a view named Emp_Deg_View.
DROP VIEW Emp_Deg_View;
HCatalog - Show Tables
You often want to list all the tables in a database or list all the columns in a table. Obviously, every database has its own syntax to list the tables and columns.
Show Tables statement displays the names of all tables. By default, it lists tables from the current database, or with the IN clause, in a specified database.
This chapter describes how to list out all tables from the current database in HCatalog.
Show Tables Statement
The syntax of SHOW TABLES is as follows −
SHOW TABLES [IN database_name] ['identifier_with_wildcards'];
The following query displays a list of tables −
./hcat e "Show tables;"
On successful execution of the query, you get to see the following response −
OK
emp
employee
Time taken: 5.3 seconds
HCatalog - Show Partitions
A partition is a condition for tabular data which is used for creating a separate table or view. SHOW PARTITIONS lists all the existing partitions for a given base table. Partitions are listed in alphabetical order. After Hive 0.6, it is also possible to specify parts of a partition specification to filter the resulting list.
You can use the SHOW PARTITIONS command to see the partitions that exist in a particular table. This chapter describes how to list out the partitions of a particular table in HCatalog.
Show Partitions Statement
The syntax is as follows −
SHOW PARTITIONS table_name;
The following query drops a table named employee −
./hcat e "Show partitions employee;"
On successful execution of the query, you get to see the following response −
OK
Designation = IT
Time taken: 5.3 seconds
Dynamic Partition
HCatalog organizes tables into partitions. It is a way of dividing a table into related parts based on the values of partitioned columns such as date, city, and department. Using partitions, it is easy to query a portion of the data.
For example, a table named Tab1 contains employee data such as id, name, dept, and yoj (i.e., year of joining). Suppose you need to retrieve the details of all employees who joined in 2012. A query searches the whole table for the required information. However, if you partition the employee data with the year and store it in a separate file, it reduces the query processing time. The following example shows how to partition a file and its data −
The following file contains employeedata table.
/tab1/employeedata/file1
id, name,   dept, yoj
1,  gopal,   TP, 2012
2,  kiran,   HR, 2012
3,  kaleel,  SC, 2013
4, Prasanth, SC, 2013
The above data is partitioned into two files using year.
/tab1/employeedata/2012/file2
1, gopal, TP, 2012
2, kiran, HR, 2012
/tab1/employeedata/2013/file3
3, kaleel,   SC, 2013
4, Prasanth, SC, 2013
Adding a Partition
We can add partitions to a table by altering the table. Let us assume we have a table called employee with fields such as Id, Name, Salary, Designation, Dept, and yoj.
Syntax
ALTER TABLE table_name ADD [IF NOT EXISTS] PARTITION partition_spec
[LOCATION 'location1'] partition_spec [LOCATION 'location2'] ...;
partition_spec:
: (p_column = p_col_value, p_column = p_col_value, ...)
The following query is used to add a partition to the employee table.
./hcat e "ALTER TABLE employee ADD PARTITION (year = '2013') location '/2012/part2012';"
Renaming a Partition
You can use the RENAME-TO command to rename a partition. Its syntax is as follows −
./hact e "ALTER TABLE table_name PARTITION partition_spec RENAME TO PARTITION partition_spec;"
The following query is used to rename a partition −
./hcat e "ALTER TABLE employee PARTITION (year=1203) RENAME TO PARTITION (Yoj='1203');"
Dropping a Partition
The syntax of the command that is used to drop a partition is as follows −
./hcat e "ALTER TABLE table_name DROP [IF EXISTS] PARTITION partition_spec,.
   PARTITION partition_spec,...;"
The following query is used to drop a partition −
./hcat e "ALTER TABLE employee DROP [IF EXISTS] PARTITION (year=1203);"
HCatalog - Indexes
Creating an Index
An Index is nothing but a pointer on a particular column of a table. Creating an index means creating a pointer on a particular column of a table. Its syntax is as follows −
CREATE INDEX index_name
ON TABLE base_table_name (col_name, ...)
AS 'index.handler.class.name'
[WITH DEFERRED REBUILD]
[IDXPROPERTIES (property_name = property_value, ...)]
[IN TABLE index_table_name]
[PARTITIONED BY (col_name, ...)][
   [ ROW FORMAT ...] STORED AS ...
   | STORED BY ...
]
[LOCATION hdfs_path]
[TBLPROPERTIES (...)]
Example
Let us take an example to understand the concept of index. Use the same employee table that we have used earlier with the fields Id, Name, Salary, Designation, and Dept. Create an index named index_salary on the salary column of the employee table.
The following query creates an index −
./hcat e "CREATE INDEX inedx_salary ON TABLE employee(salary)
AS 'org.apache.hadoop.hive.ql.index.compact.CompactIndexHandler';"
It is a pointer to the salary column. If the column is modified, the changes are stored using an index value.
Dropping an Index
The following syntax is used to drop an index −
DROP INDEX <index_name> ON <table_name>
The following query drops the index index_salary −
./hcat e "DROP INDEX index_salary ON employee;"
HCatalog - Reader Writer
HCatalog contains a data transfer API for parallel input and output without using MapReduce. This API uses a basic storage abstraction of tables and rows to read data from Hadoop cluster and write data into it.
The Data Transfer API contains mainly three classes; those are −
HCatReader − Reads data from a Hadoop cluster.
HCatWriter − Writes data into a Hadoop cluster.
DataTransferFactory − Generates reader and writer instances.
This API is suitable for master-slave node setup. Let us discuss more on HCatReader and HCatWriter.
HCatReader
HCatReader is an abstract class internal to HCatalog and abstracts away the complexities of the underlying system from where the records are to be retrieved.
| S. No. | Method Name & Description |
|---|---|
| 1 | Public abstract ReaderContext prepareRead() throws HCatException This should be called at master node to obtain ReaderContext which then should be serialized and sent slave nodes. |
| 2 | Public abstract Iterator <HCatRecorder> read() throws HCaException This should be called at slaves nodes to read HCatRecords. |
| 3 | Public Configuration getConf() It will return the configuration class object. |
The HCatReader class is used to read the data from HDFS. Reading is a two-step process in which the first step occurs on the master node of an external system. The second step is carried out in parallel on multiple slave nodes.
Reads are done on a ReadEntity. Before you start to read, you need to define a ReadEntity from which to read. This can be done through ReadEntity.Builder. You can specify a database name, table name, partition, and filter string. For example −
ReadEntity.Builder builder = new ReadEntity.Builder();
ReadEntity entity = builder.withDatabase("mydb").withTable("mytbl").build(); 10.
The above code snippet defines a ReadEntity object (entity), comprising a table named mytbl in a database named mydb, which can be used to read all the rows of this table. Note that this table must exist in HCatalog prior to the start of this operation.
After defining a ReadEntity, you obtain an instance of HCatReader using the ReadEntity and cluster configuration −
HCatReader reader = DataTransferFactory.getHCatReader(entity, config);
The next step is to obtain a ReaderContext from reader as follows −
ReaderContext cntxt = reader.prepareRead();
HCatWriter
This abstraction is internal to HCatalog. This is to facilitate writing to HCatalog from external systems. Don't try to instantiate this directly. Instead, use DataTransferFactory.
| Sr.No. | Method Name & Description |
|---|---|
| 1 | Public abstract WriterContext prepareRead() throws HCatException External system should invoke this method exactly once from a master node. It returns a WriterContext. This should be serialized and sent to slave nodes to construct HCatWriter there. |
| 2 | Public abstract void write(Iterator<HCatRecord> recordItr) throws HCaException This method should be used at slave nodes to perform writes. The recordItr is an iterator object that contains the collection of records to be written into HCatalog. |
| 3 | Public abstract void abort(WriterContext cntxt) throws HCatException This method should be called at the master node. The primary purpose of this method is to do cleanups in case of failures. |
| 4 | public abstract void commit(WriterContext cntxt) throws HCatException This method should be called at the master node. The purpose of this method is to do metadata commit. |
Similar to reading, writing is also a two-step process in which the first step occurs on the master node. Subsequently, the second step occurs in parallel on slave nodes.
Writes are done on a WriteEntity which can be constructed in a fashion similar to reads −
WriteEntity.Builder builder = new WriteEntity.Builder();
WriteEntity entity = builder.withDatabase("mydb").withTable("mytbl").build();
The above code creates a WriteEntity object entity which can be used to write into a table named mytbl in the database mydb.
After creating a WriteEntity, the next step is to obtain a WriterContext −
HCatWriter writer = DataTransferFactory.getHCatWriter(entity, config);
WriterContext info = writer.prepareWrite();
All of the above steps occur on the master node. The master node then serializes the WriterContext object and makes it available to all the slaves.
On slave nodes, you need to obtain an HCatWriter using WriterContext as follows −
HCatWriter writer = DataTransferFactory.getHCatWriter(context);
Then, the writer takes an iterator as the argument for the write method −
writer.write(hCatRecordItr);
The writer then calls getNext() on this iterator in a loop and writes out all the records attached to the iterator.
The TestReaderWriter.java file is used to test the HCatreader and HCatWriter classes. The following program demonstrates how to use HCatReader and HCatWriter API to read data from a source file and subsequently write it onto a destination file.
import java.io.File;
import java.io.FileInputStream;
import java.io.FileOutputStream;
import java.io.IOException;
import java.io.ObjectInputStream;
import java.io.ObjectOutputStream;

import java.util.ArrayList;
import java.util.HashMap;
import java.util.Iterator;
import java.util.List;
import java.util.Map;
import java.util.Map.Entry;

import org.apache.hadoop.conf.Configuration;
import org.apache.hadoop.hive.metastore.api.MetaException;
import org.apache.hadoop.hive.ql.CommandNeedRetryException;
import org.apache.hadoop.mapreduce.InputSplit;

import org.apache.hive.HCatalog.common.HCatException;
import org.apache.hive.HCatalog.data.transfer.DataTransferFactory;
import org.apache.hive.HCatalog.data.transfer.HCatReader;
import org.apache.hive.HCatalog.data.transfer.HCatWriter;
import org.apache.hive.HCatalog.data.transfer.ReadEntity;
import org.apache.hive.HCatalog.data.transfer.ReaderContext;
import org.apache.hive.HCatalog.data.transfer.WriteEntity;
import org.apache.hive.HCatalog.data.transfer.WriterContext;
import org.apache.hive.HCatalog.mapreduce.HCatBaseTest;

import org.junit.Assert;
import org.junit.Test;

public class TestReaderWriter extends HCatBaseTest {
   @Test
   public void test() throws MetaException, CommandNeedRetryException,
      IOException, ClassNotFoundException {

      driver.run("drop table mytbl");
      driver.run("create table mytbl (a string, b int)");

      Iterator<Entry<String, String>> itr = hiveConf.iterator();
      Map<String, String> map = new HashMap<String, String>();

      while (itr.hasNext()) {
         Entry<String, String> kv = itr.next();
         map.put(kv.getKey(), kv.getValue());
      }

      WriterContext cntxt = runsInMaster(map);
      File writeCntxtFile = File.createTempFile("hcat-write", "temp");
      writeCntxtFile.deleteOnExit();

      // Serialize context.
      ObjectOutputStream oos = new ObjectOutputStream(new FileOutputStream(writeCntxtFile));
      oos.writeObject(cntxt);
      oos.flush();
      oos.close();

      // Now, deserialize it.
      ObjectInputStream ois = new ObjectInputStream(new FileInputStream(writeCntxtFile));
      cntxt = (WriterContext) ois.readObject();
      ois.close();
      runsInSlave(cntxt);
      commit(map, true, cntxt);

      ReaderContext readCntxt = runsInMaster(map, false);
      File readCntxtFile = File.createTempFile("hcat-read", "temp");
      readCntxtFile.deleteOnExit();
      oos = new ObjectOutputStream(new FileOutputStream(readCntxtFile));
      oos.writeObject(readCntxt);
      oos.flush();
      oos.close();

      ois = new ObjectInputStream(new FileInputStream(readCntxtFile));
      readCntxt = (ReaderContext) ois.readObject();
      ois.close();

      for (int i = 0; i < readCntxt.numSplits(); i++) {
         runsInSlave(readCntxt, i);
      }
   }

   private WriterContext runsInMaster(Map<String, String> config) throws HCatException {
      WriteEntity.Builder builder = new WriteEntity.Builder();
      WriteEntity entity = builder.withTable("mytbl").build();

      HCatWriter writer = DataTransferFactory.getHCatWriter(entity, config);
      WriterContext info = writer.prepareWrite();
      return info;
   }

   private ReaderContext runsInMaster(Map<String, String> config,
      boolean bogus) throws HCatException {
      ReadEntity entity = new ReadEntity.Builder().withTable("mytbl").build();
      HCatReader reader = DataTransferFactory.getHCatReader(entity, config);
      ReaderContext cntxt = reader.prepareRead();
      return cntxt;
   }

   private void runsInSlave(ReaderContext cntxt, int slaveNum) throws HCatException {
      HCatReader reader = DataTransferFactory.getHCatReader(cntxt, slaveNum);
      Iterator<HCatRecord> itr = reader.read();
      int i = 1;

      while (itr.hasNext()) {
         HCatRecord read = itr.next();
         HCatRecord written = getRecord(i++);

         // Argh, HCatRecord doesnt implement equals()
         Assert.assertTrue("Read: " + read.get(0) + "Written: " + written.get(0),
         written.get(0).equals(read.get(0)));

         Assert.assertTrue("Read: " + read.get(1) + "Written: " + written.get(1),
         written.get(1).equals(read.get(1)));

         Assert.assertEquals(2, read.size());
      }

      //Assert.assertFalse(itr.hasNext());
   }

   private void runsInSlave(WriterContext context) throws HCatException {
      HCatWriter writer = DataTransferFactory.getHCatWriter(context);
      writer.write(new HCatRecordItr());
   }

   private void commit(Map<String, String> config, boolean status,
      WriterContext context) throws IOException {
      WriteEntity.Builder builder = new WriteEntity.Builder();
      WriteEntity entity = builder.withTable("mytbl").build();
      HCatWriter writer = DataTransferFactory.getHCatWriter(entity, config);

      if (status) {
         writer.commit(context);
      } else {
         writer.abort(context);
      }
   }

   private static HCatRecord getRecord(int i) {
      List<Object> list = new ArrayList<Object>(2);
      list.add("Row #: " + i);
      list.add(i);
      return new DefaultHCatRecord(list);
   }

   private static class HCatRecordItr implements Iterator<HCatRecord> {
      int i = 0;

      @Override
      public boolean hasNext() {
         return i++ < 100 ? true : false;
      }

      @Override
      public HCatRecord next() {
         return getRecord(i);
      }

      @Override
      public void remove() {
         throw new RuntimeException();
      }
   }
}
The above program reads the data from the HDFS in the form of records and writes the record data into mytable
HCatalog - Input Output Format
The HCatInputFormat and HCatOutputFormat interfaces are used to read data from HDFS and after processing, write the resultant data into HDFS using MapReduce job. Let us elaborate the Input and Output format interfaces.
HCatInputFormat
The HCatInputFormat is used with MapReduce jobs to read data from HCatalog-managed tables. HCatInputFormat exposes a Hadoop 0.20 MapReduce API for reading data as if it had been published to a table.
| Sr.No. | Method Name & Description |
|---|---|
| 1 | public static HCatInputFormat setInput(Job job, String dbName, String tableName)throws IOException Set inputs to use for the job. It queries the metastore with the given input specification and serializes matching partitions into the job configuration for MapReduce tasks. |
| 2 | public static HCatInputFormat setInput(Configuration conf, String dbName, String tableName) throws IOException Set inputs to use for the job. It queries the metastore with the given input specification and serializes matching partitions into the job configuration for MapReduce tasks. |
| 3 | public HCatInputFormat setFilter(String filter)throws IOException Set a filter on the input table. |
| 4 | public HCatInputFormat setProperties(Properties properties) throws IOException Set properties for the input format. |
The HCatInputFormat API includes the following methods −
- setInput
- setOutputSchema
- getTableSchema
To use HCatInputFormat to read data, first instantiate an InputJobInfo with the necessary information from the table being read and then call setInput with the InputJobInfo.
You can use the setOutputSchema method to include a projection schema, to specify the output fields. If a schema is not specified, all the columns in the table will be returned. You can use the getTableSchema method to determine the table schema for a specified input table.
HCatOutputFormat
HCatOutputFormat is used with MapReduce jobs to write data to HCatalog-managed tables. HCatOutputFormat exposes a Hadoop 0.20 MapReduce API for writing data to a table. When a MapReduce job uses HCatOutputFormat to write output, the default OutputFormat configured for the table is used and the new partition is published to the table after the job completes.
| Sr.No. | Method Name & Description |
|---|---|
| 1 | public static void setOutput (Configuration conf, Credentials credentials, OutputJobInfo outputJobInfo) throws IOException Set the information about the output to write for the job. It queries the metadata server to find the StorageHandler to use for the table. It throws an error if the partition is already published. |
| 2 | public static void setSchema (Configuration conf, HCatSchema schema) throws IOException Set the schema for the data being written out to the partition. The table schema is used by default for the partition if this is not called. |
| 3 | public RecordWriter <WritableComparable<?>, HCatRecord > getRecordWriter (TaskAttemptContext context)throws IOException, InterruptedException Get the record writer for the job. It uses the StorageHandler's default OutputFormat to get the record writer. |
| 4 | public OutputCommitter getOutputCommitter (TaskAttemptContext context) throws IOException, InterruptedException Get the output committer for this output format. It ensures that the output is committed correctly. |
The HCatOutputFormat API includes the following methods −
- setOutput
- setSchema
- getTableSchema
The first call on the HCatOutputFormat must be setOutput; any other call will throw an exception saying the output format is not initialized.
The schema for the data being written out is specified by the setSchema method. You must call this method, providing the schema of data you are writing. If your data has the same schema as the table schema, you can use HCatOutputFormat.getTableSchema() to get the table schema and then pass that along to setSchema().
Example
The following MapReduce program reads data from one table which it assumes to have an integer in the second column ("column 1"), and counts how many instances of each distinct value it finds. That is, it does the equivalent of "select col1, count(*) from $table group by col1;".
For example, if the values in the second column are {1, 1, 1, 3, 3, 5}, then the program will produce the following output of values and counts −
1, 3
3, 2
5, 1
Let us now take a look at the program code −
import java.io.IOException;
import java.util.Iterator;

import org.apache.hadoop.conf.Configuration;
import org.apache.hadoop.conf.Configured;
import org.apache.hadoop.io.IntWritable;
import org.apache.hadoop.io.Text;
import org.apache.hadoop.io.WritableComparable;

import org.apache.hadoop.mapreduce.Job;
import org.apache.hadoop.mapreduce.Mapper;
import org.apache.hadoop.mapreduce.Reducer;

import org.apache.hadoop.util.GenericOptionsParser;
import org.apache.hadoop.util.Tool;
import org.apache.hadoop.util.ToolRunner;

import org.apache.HCatalog.common.HCatConstants;
import org.apache.HCatalog.data.DefaultHCatRecord;
import org.apache.HCatalog.data.HCatRecord;
import org.apache.HCatalog.data.schema.HCatSchema;

import org.apache.HCatalog.mapreduce.HCatInputFormat;
import org.apache.HCatalog.mapreduce.HCatOutputFormat;
import org.apache.HCatalog.mapreduce.InputJobInfo;
import org.apache.HCatalog.mapreduce.OutputJobInfo;

public class GroupByAge extends Configured implements Tool {

   public static class Map extends Mapper<WritableComparable,
      HCatRecord, IntWritable, IntWritable> {
      int age;

      @Override
      protected void map(
         WritableComparable key, HCatRecord value,
         org.apache.hadoop.mapreduce.Mapper<WritableComparable,
         HCatRecord, IntWritable, IntWritable>.Context context
      )throws IOException, InterruptedException {
         age = (Integer) value.get(1);
         context.write(new IntWritable(age), new IntWritable(1));
      }
   }

   public static class Reduce extends Reducer<IntWritable, IntWritable,
      WritableComparable, HCatRecord> {
      @Override
      protected void reduce(
         IntWritable key, java.lang.Iterable<IntWritable> values,
         org.apache.hadoop.mapreduce.Reducer<IntWritable, IntWritable,
         WritableComparable, HCatRecord>.Context context
      )throws IOException ,InterruptedException {
         int sum = 0;
         Iterator<IntWritable> iter = values.iterator();

         while (iter.hasNext()) {
            sum++;
            iter.next();
         }

         HCatRecord record = new DefaultHCatRecord(2);
         record.set(0, key.get());
         record.set(1, sum);
         context.write(null, record);
      }
   }

   public int run(String[] args) throws Exception {
      Configuration conf = getConf();
      args = new GenericOptionsParser(conf, args).getRemainingArgs();

      String serverUri = args[0];
      String inputTableName = args[1];
      String outputTableName = args[2];
      String dbName = null;
      String principalID = System

      .getProperty(HCatConstants.HCAT_METASTORE_PRINCIPAL);
      if (principalID != null)
      conf.set(HCatConstants.HCAT_METASTORE_PRINCIPAL, principalID);
      Job job = new Job(conf, "GroupByAge");
      HCatInputFormat.setInput(job, InputJobInfo.create(dbName, inputTableName, null));

      // initialize HCatOutputFormat
      job.setInputFormatClass(HCatInputFormat.class);
      job.setJarByClass(GroupByAge.class);
      job.setMapperClass(Map.class);
      job.setReducerClass(Reduce.class);

      job.setMapOutputKeyClass(IntWritable.class);
      job.setMapOutputValueClass(IntWritable.class);
      job.setOutputKeyClass(WritableComparable.class);
      job.setOutputValueClass(DefaultHCatRecord.class);

      HCatOutputFormat.setOutput(job, OutputJobInfo.create(dbName, outputTableName, null));
      HCatSchema s = HCatOutputFormat.getTableSchema(job);
      System.err.println("INFO: output schema explicitly set for writing:" + s);
      HCatOutputFormat.setSchema(job, s);
      job.setOutputFormatClass(HCatOutputFormat.class);
      return (job.waitForCompletion(true) ? 0 : 1);
   }

   public static void main(String[] args) throws Exception {
      int exitCode = ToolRunner.run(new GroupByAge(), args);
      System.exit(exitCode);
   }
}
Before compiling the above program, you have to download some jars and add those to the classpath for this application. You need to download all the Hive jars and HCatalog jars (HCatalog-core-0.5.0.jar, hive-metastore-0.10.0.jar, libthrift-0.7.0.jar, hive-exec-0.10.0.jar, libfb303-0.7.0.jar, jdo2-api-2.3-ec.jar, slf4j-api-1.6.1.jar).
Use the following commands to copy those jar files from local to HDFS and add those to the classpath.
bin/hadoop fs -copyFromLocal $HCAT_HOME/share/HCatalog/HCatalog-core-0.5.0.jar /tmp
bin/hadoop fs -copyFromLocal $HIVE_HOME/lib/hive-metastore-0.10.0.jar /tmp
bin/hadoop fs -copyFromLocal $HIVE_HOME/lib/libthrift-0.7.0.jar /tmp
bin/hadoop fs -copyFromLocal $HIVE_HOME/lib/hive-exec-0.10.0.jar /tmp
bin/hadoop fs -copyFromLocal $HIVE_HOME/lib/libfb303-0.7.0.jar /tmp
bin/hadoop fs -copyFromLocal $HIVE_HOME/lib/jdo2-api-2.3-ec.jar /tmp
bin/hadoop fs -copyFromLocal $HIVE_HOME/lib/slf4j-api-1.6.1.jar /tmp

export LIB_JARS=hdfs:///tmp/HCatalog-core-0.5.0.jar,
hdfs:///tmp/hive-metastore-0.10.0.jar,
hdfs:///tmp/libthrift-0.7.0.jar,
hdfs:///tmp/hive-exec-0.10.0.jar,
hdfs:///tmp/libfb303-0.7.0.jar,
hdfs:///tmp/jdo2-api-2.3-ec.jar,
hdfs:///tmp/slf4j-api-1.6.1.jar
Use the following command to compile and execute the given program.
$HADOOP_HOME/bin/hadoop jar GroupByAge tmp/hive
Now, check your output directory (hdfs: user/tmp/hive) for the output (part_0000, part_0001).
HCatalog - Loader & Storer
The HCatLoader and HCatStorer APIs are used with Pig scripts to read and write data in HCatalog-managed tables. No HCatalog-specific setup is required for these interfaces.
It is better to have some knowledge on Apache Pig scripts to understand this chapter better. For further reference, please go through our Apache Pig tutorial.
HCatloader
HCatLoader is used with Pig scripts to read data from HCatalog-managed tables. Use the following syntax to load data into HDFS using HCatloader.
A = LOAD 'tablename' USING org.apache.HCatalog.pig.HCatLoader();
You must specify the table name in single quotes: LOAD 'tablename'. If you are using a non-default database, then you must specify your input as 'dbname.tablename'.
The Hive metastore lets you create tables without specifying a database. If you created tables this way, then the database name is 'default' and is not required when specifying the table for HCatLoader.
The following table contains the important methods and description of the HCatloader class.
| Sr.No. | Method Name & Description |
|---|---|
| 1 | public InputFormat<?,?> getInputFormat()throws IOException Read the input format of the loading data using the HCatloader class. |
| 2 | public String relativeToAbsolutePath(String location, Path curDir) throws IOException It returns the String format of the Absolute path. |
| 3 | public void setLocation(String location, Job job) throws IOException It sets the location where the job can be executed. |
| 4 | public Tuple getNext() throws IOException Returns the current tuple (key and value) from the loop. |
HCatStorer
HCatStorer is used with Pig scripts to write data to HCatalog-managed tables. Use the following syntax for Storing operation.
A = LOAD ...
B = FOREACH A ...
...
...
my_processed_data = ...

STORE my_processed_data INTO 'tablename' USING org.apache.HCatalog.pig.HCatStorer();
You must specify the table name in single quotes: LOAD 'tablename'. Both the database and the table must be created prior to running your Pig script. If you are using a non-default database, then you must specify your input as 'dbname.tablename'.
The Hive metastore lets you create tables without specifying a database. If you created tables this way, then the database name is 'default' and you do not need to specify the database name in the store statement.
For the USING clause, you can have a string argument that represents key/value pairs for partitions. This is a mandatory argument when you are writing to a partitioned table and the partition column is not in the output column. The values for partition keys should NOT be quoted.
The following table contains the important methods and description of the HCatStorer class.
| Sr.No. | Method Name & Description |
|---|---|
| 1 | public OutputFormat getOutputFormat() throws IOException Read the output format of the stored data using the HCatStorer class. |
| 2 | public void setStoreLocation (String location, Job job) throws IOException Sets the location where to execute this store application. |
| 3 | public void storeSchema (ResourceSchema schema, String arg1, Job job) throws IOException Store the schema. |
| 4 | public void prepareToWrite (RecordWriter writer) throws IOException It helps to write data into a particular file using RecordWriter. |
| 5 | public void putNext (Tuple tuple) throws IOException Writes the tuple data into the file. |
Running Pig with HCatalog
Pig does not automatically pick up HCatalog jars. To bring in the necessary jars, you can either use a flag in the Pig command or set the environment variables PIG_CLASSPATH and PIG_OPTS as described below.
To bring in the appropriate jars for working with HCatalog, simply include the following flag −
pig useHCatalog <Sample pig scripts file>
Setting the CLASSPATH for Execution
Use the following CLASSPATH setting for synchronizing the HCatalog with Apache Pig.
export HADOOP_HOME = <path_to_hadoop_install>
export HIVE_HOME = <path_to_hive_install>
export HCAT_HOME = <path_to_hcat_install>

export PIG_CLASSPATH = $HCAT_HOME/share/HCatalog/HCatalog-core*.jar:\
$HCAT_HOME/share/HCatalog/HCatalog-pig-adapter*.jar:\
$HIVE_HOME/lib/hive-metastore-*.jar:$HIVE_HOME/lib/libthrift-*.jar:\
$HIVE_HOME/lib/hive-exec-*.jar:$HIVE_HOME/lib/libfb303-*.jar:\
$HIVE_HOME/lib/jdo2-api-*-ec.jar:$HIVE_HOME/conf:$HADOOP_HOME/conf:\
$HIVE_HOME/lib/slf4j-api-*.jar
Example
Assume we have a file student_details.txt in HDFS with the following content.
student_details.txt
001, Rajiv,    Reddy,       21, 9848022337, Hyderabad
002, siddarth, Battacharya, 22, 9848022338, Kolkata
003, Rajesh,   Khanna,      22, 9848022339, Delhi
004, Preethi,  Agarwal,     21, 9848022330, Pune
005, Trupthi,  Mohanthy,    23, 9848022336, Bhuwaneshwar
006, Archana,  Mishra,      23, 9848022335, Chennai
007, Komal,    Nayak,       24, 9848022334, trivendram
008, Bharathi, Nambiayar,   24, 9848022333, Chennai
We also have a sample script with the name sample_script.pig, in the same HDFS directory. This file contains statements performing operations and transformations on the student relation, as shown below.
student = LOAD 'hdfs://localhost:9000/pig_data/student_details.txt' USING
   PigStorage(',') as (id:int, firstname:chararray, lastname:chararray,
   phone:chararray, city:chararray);

student_order = ORDER student BY age DESC;
STORE student_order INTO 'student_order_table' USING org.apache.HCatalog.pig.HCatStorer();
student_limit = LIMIT student_order 4;
Dump student_limit;
The first statement of the script will load the data in the file named student_details.txt as a relation named student.
The second statement of the script will arrange the tuples of the relation in descending order, based on age, and store it as student_order.
The third statement stores the processed data student_order results in a separate table named student_order_table.
The fourth statement of the script will store the first four tuples of student_order as student_limit.
Finally the fifth statement will dump the content of the relation student_limit.
Let us now execute the sample_script.pig as shown below.
$./pig -useHCatalog hdfs://localhost:9000/pig_data/sample_script.pig
Now, check your output directory (hdfs: user/tmp/hive) for the output (part_0000, part_0001).
