- ASP.NET Core - Home
- ASP.NET Core - Overview
- ASP.NET Core - Environment Setup
- ASP.NET Core - New Project
- ASP.NET Core - Project Layout
- ASP.NET Core - Project.Json
- ASP.NET Core - Configuration
- ASP.NET Core - Middleware
- ASP.NET Core - Exceptions
- ASP.NET Core - Static Files
- ASP.NET Core - Setup MVC
- ASP.NET Core - MVC Design Pattern
- ASP.NET Core - Routing
- ASP.NET Core - Attribute Routes
- ASP.NET Core - Action Results
- ASP.NET Core - Views
- Setup Entity Framework
- ASP.NET Core - DBContext
- ASP.NET Core - Razor Layout Views
- ASP.NET Core - Razor View Start
- ASP.NET Core - Razor View Import
- ASP.NET Core - Razor Tag Helpers
- ASP.NET Core - Razor Edit Form
- ASP.NET Core - Identity Overview
- ASP.NET Core - Authorize Attribute
- Identity Configuration
- ASP.NET Core - Identity Migrations
- ASP.NET Core - User Registration
- ASP.NET Core - Create a User
- ASP.NET Core - Log In and Log Out
ASP.NET Core - New Project
In this chapter, we will discuss how to create a new project in Visual Studio.
Once you have installed the Visual Studio 2015 tooling, you can start building a new ASP.NET Core Application from the File → New Project menu option.
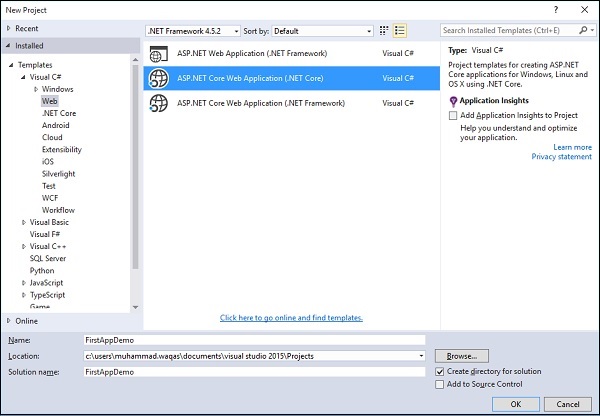
On the New Project dialog box, you will see the following three different templates for Web projects −
ASP.NET Web Application − The simple ASP.NET application templates .
ASP.NET Core Web Application (.NET Core) − This will start you with a crossplatform compatible project that runs on the .NET Core framework.
ASP.NET Core Web Application (.NET Framework) − This starts a new project that runs on the standard .NET Framework on Windows.
In the left pane, select Templates → Visual C# → Web and in the middle pane select the ASP.NET Core Web Application (.NET Core) template. Let us call this application FirstAppDemo and also specify the Location for your ASP.NET Core project and then Click OK.
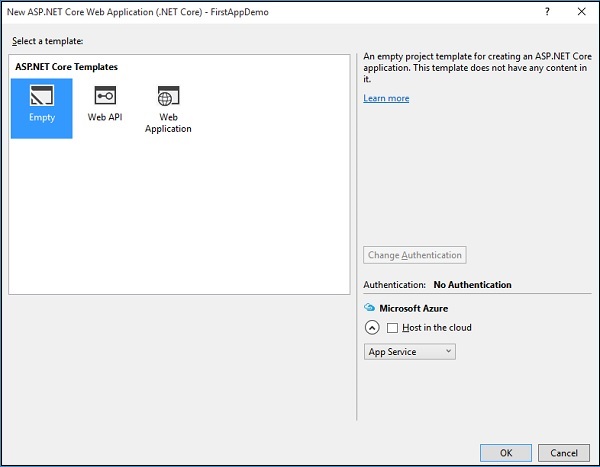
In the above dialog box, you can select a specific template for the ASP.NET application from the available ASP.NET Core Templates.
ASP.NET Core templates currently contain three different templates. Of these, the Web Application template will help you lay out a lot of files on your file system. This also allows you to use ASP.NET MVC right away.
Here, we will start with an empty template. This would help us build it from scratch. Let us select the Empty template, turn off the Host in the cloud and click OK.
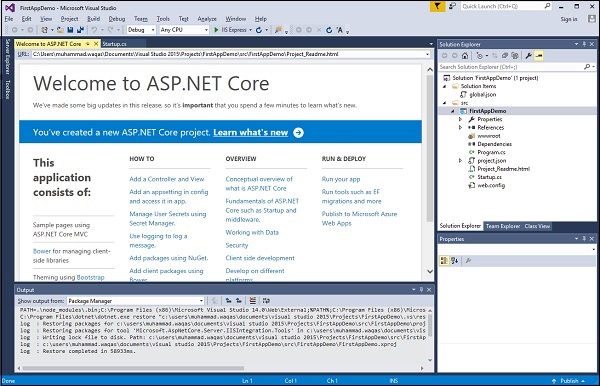
Visual Studio will now launch the project in some time. In the Solution Explorer window, you will see all the files that are in this project.
Let us run this application, you can do that by pressing Ctrl+F5 or by going to the Debug menu. After going to the Debug menu, select Start Without Debugging.
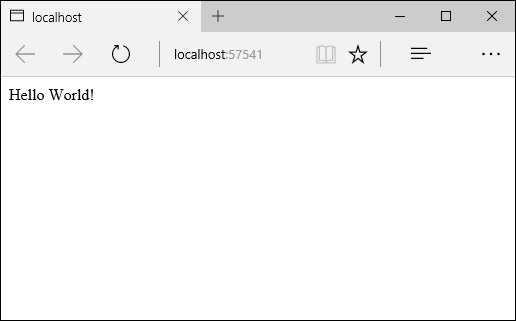
This application can display only Hello World! This runs on localhost:57741. In the window system tray, you can also see that IIS Express is running.
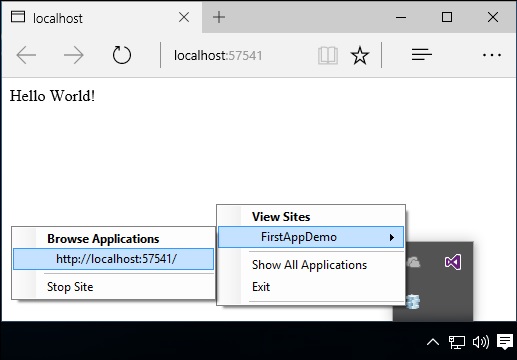
And the name of the site is FirstAppDemo. If you have been programming with ASP.NET with the previous versions of the framework, the way you would interact with the Visual Studio and the way Visual Studio uses IIS Express to host your application, all these aspects will be familiar.
