- Balsamiq Mockups - Home
- Wireframing Basics
- Balsamiq Mockups - Introduction
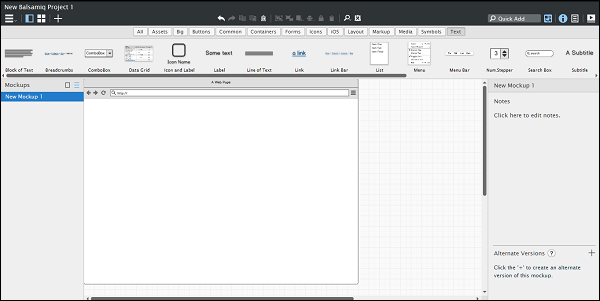
- Balsamiq Mockups - First Project
- Wireframing in Action
- Balsamiq Mockups - Navigation
- Exporting the Mockups
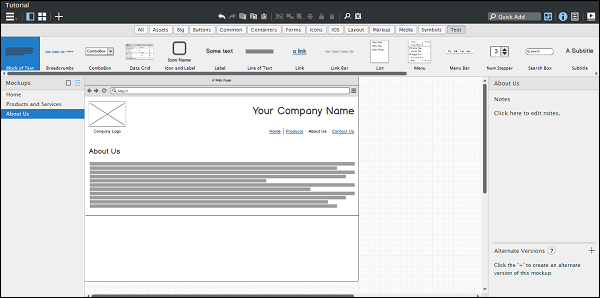
Designing the Home Page
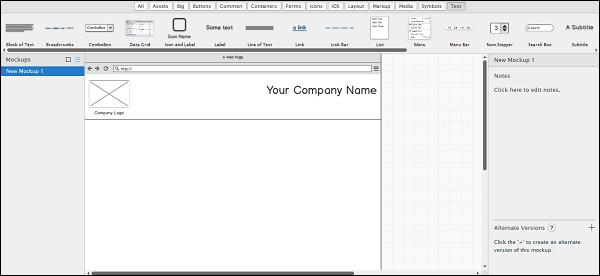
Step 1 − Open Balsamiq Mockups installed on your computer. From the UI Library, in the Quick Add control, type Browser.
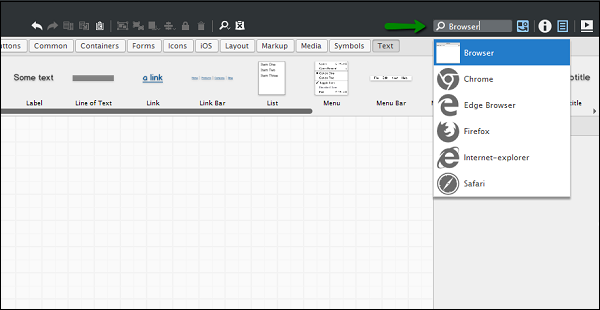
Step 2 − Once we select Browser, the control will be available in the wireframe area. Click on the toggle button Inspector to see the details of the UI controls in the right panel.
In the inspector section, enter 0 (zero) for both Position X and Y text boxes. This will get the browser control to the corner of the wireframe space for better visibility.
In the Size text boxes, enter 1024 as the width and 768 as the height.
The browser window will span through all the wireframe space using the zoom option above the UI library section, set the zoom level to Fit in Window.
Once all the above parameters are set, we will be able to see the following screen.
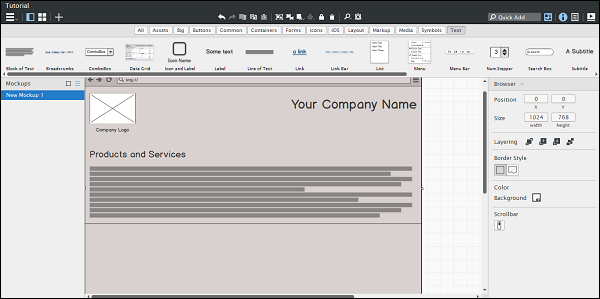
Step 3 − In the white space below the address bar in the wireframe, let us create the header for the website.
To start with the header, let us create a logo. In the wireframes, it is often sufficient to represent the positioning of the screen control. For instance, we will use the Image control and name it as Logo. In the quick-add box, type Image. The image control will be highlighted. Select it to have it placed in the wireframe area.
In the properties dialog to the right, enter size width 139 and height as 93. Position the image on X-axis at 16 and on Y-axis at 94.
Once done, we should be able to see the wireframe space as shown below.
Step 4 − Beneath the image, for better understanding of the viewer, insert a Label from the UI library; name it as Company Logo. From the properties tab on the right, set the label size to be 15.
Once done with this step, you should be able to see the image and text as shown below.
Step 5 − Now let us insert the title of the Company, in a relatively big font. In the Quick Add box with UI library, type Title. The title with A Big Title text will be shown on the screen. Double click on the text to rename it. Enter text Your Company Name.
For the purpose of this tutorial, the exact position on X and Y-axis is provided. You may drag the text to the position as you like.
In the properties section on the right, update value under position for X as 626 and to Y as 107.
We will see the header shaping up as shown in the screen below.
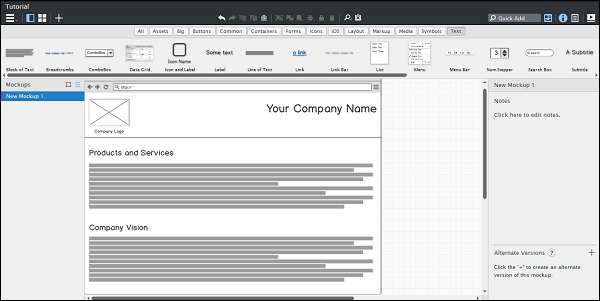
Step 6 − Add a horizontal separator under the logo text and title to separate the header from the page body content.
In the Quick Add box, type rule. It will show you H.Rule and V.Rule. It stands for Horizontal and Vertical Rule. Select H.Rule and insert the rule below the title and logo text by mouse drag. Using the handles on the rule, you can increase/decrease the size of the rule.
Zoom in by one level to see the inserted horizontal rule. Position it as shown in the screen below.
Step 7 − Similarly, insert the Products and Services section, using the UI controls - block of text and title. Use Horizontal rule to separate the section. You should be able to see the wireframe space as shown below.
Step 8 − On the same lines, add the Company Vision section by using the same UI controls as above.
Step 9 − Add Link Bar on this page for navigation purposes. Nowadays, it is a common practice to use Link Bars for easier navigation. Use the Quick Add box for inserting a Link Bar. The values are updated by double clicking on the tab bar inserted on the page. Add comma separated values for different page links. Position the link bar as shown below.
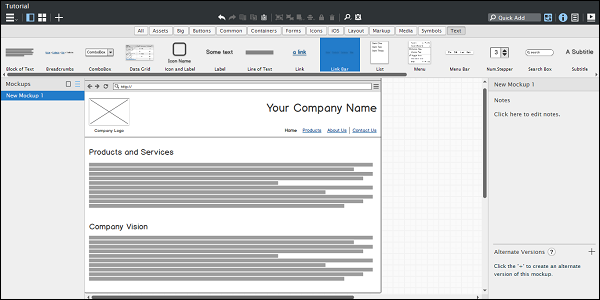
This concludes the Homepage wireframe design. We have seen how easy and simple it is to add UI controls and start with the UI layout of a website.
Save the Balsamiq Project file by going to Project Menu → Save Project.
