- AWS Glue - Home
- AWS Glue - Introduction
- AWS Glue - Getting Started
- AWS Glue - Data Catalog
- AWS Glue - Amazon S3 Integration
- AWS Glue - Crawlers
- AWS Glue - Performance Optimization
- AWS Glue - Cost Optimization
- AWS Glue Useful Resources
- AWS Glue - Quick Guide
- AWS Glue - Resources
- AWS Glue - Discussion
AWS Glue - Quick Guide
AWS Glue - Introduction
AWS Glue is a fully managed serverless data integration cloud service from Amazon Web Services (AWS). It is designed to help users prepare and transform data for analytics, machine learning, and application development. With AWS Glue, you can connect with more than 70 diverse data sources and manage your data in a centralized data catalog.
As a serverless data integration service, AWS Glue automates much of the work associated with ETL (Extract, Transform, Load) processes. It simplifies the extraction, cleaning, enrichment, and movement of data between various sources and destinations.
AWS Glue also integrates very easily with other AWS services like Amazon S3, RDS, Redshift, and Athena. This feature makes it a perfect choice for organizations who want to build data lakes or data warehouses.
Key Components of AWS Glue
The key components of AWS Glue are described below −
Glue Data Catalog
The Glue Data Catalog is a central repository that stores metadata information about your data. It automatically scans and organizes the data so that the user can easily search, query, and manage datasets. It also connects well with AWS tools like Redshift and Athena, allowing user to smoothly access the data.
Crawlers
ETL jobs that we define in AWS Glue use Data Catalog tables as sources and targets. These data catalog tables should be updated always.
The role of Crawlers in AWS Glue is to automatically discover new data, identify its schema, and update the Data Catalog accordingly. They ensure that the metadata is always up to date.
Glue Jobs
Glue Jobs is used to define and manage the ETL workflows. They extract data, transform it using Apache Spark, and load it into target systems. You can run jobs on-demand or schedule them to run at specified intervals. Glue Jobs are the core of the data transformation process.
Triggers
With the help of Triggers users can automate job execution based on a schedule or specific event. The use of triggers is helpful for automating repetitive tasks or for building complex data pipelines.
Job Notebooks
AWS Glue provides IDE (interactive development environment) using Jupyter Notebooks. You can run queries, analyze data, and develop Glue Jobs interactively.
Glue Studio
As the name implies, the Glue Studio is a visual interface for creating, running, and monitoring ETL workflows without writing code. It is useful for non-technical users or for those who are not familiar with Apache Spark.
Features of AWS Glue
We can divide the important features of AWS Glue into following three categories −
Discover and Organize Data
AWS Glue enables you to organize metadata in a structured way so that you can easily store, search, and manage all the data in one place.
AWS Glue crawlers automatically discover the data and integrate it into your Data Catalog. It validates and controls access to your databases and tables.
Transform, Prepare, and Clean Data for Analysis
You can define your ETL process in Glue studio and it automatically generates code for that process. The Job Notebooks of AWS Glue provide serverless notebooks that require minimal setup. Using these notebooks, you can start working on your project quickly.
AWS Glue has the feature of sensitive data detection which allows you to define, identify, and process sensitive data in your data lake and pipeline. AWS Glue allows users to interactively explore and prepare data.
Build and Monitor Data Pipelines
You can automate jobs using Crawlers or AWS Glue jobs with event-based triggers. It allows you to run the jobs with your choice of engine, Apache Spark or Ray.
You can organize and manage ETL processes and integration activities for different crawlers, jobs, and triggers.
AWS Glue - Getting Started
Setup AWS Glue for Your First Job
Follow the steps given below to set up AWS Glue for your first job −
Step 1: Prerequisites
You must have an AWS account to use AWS Glue. You should have IAM roles. It allows AWS Glue to access your data in Amazon S3, RDS, or any other data source.
In addition, you should have your data stored in Amazon S3, RDS, or other supported databases.
Step 2: Setup AWS Glue Data Catalog
First, create a database within the Glue Data Catalog. Next, you need to set up a crawler to scan and classify your data sources (such as Amazon S3).
The role of crawler is to automatically detect data types and create metadata tables in your Glue Data Catalog.
Step 3: Create a New Job in AWS Glue
Once your data is cataloged, go to the AWS Glue Console and select Jobs. Then, click Add Job to create a new ETL job.
Next, you need to configure the job. Use the following options to configure −
Name your job.
Select the IAM role that Glue will use.
Choose your ETL script source (either auto-generated or custom-written).
Define the data sources (Amazon S3, RDS, etc.) and target
It is optional but it is a good practice to add transformations or filters to your job script.
Step 4: Run Your Glue Job
Once done with setup, review the job settings and click Run Job. AWS Glue will start processing the data based on the defined ETL script.
Now you can monitor the progress of your job in the AWS Glue Console under the Jobs section.
Step 5: Verify the Output
To verify the output, after the job is completed, check the target location (such as Amazon S3). The transferred data should successfully load there.
Creating an AWS Glue Crawler and Database
One of the key components of AWS Glue is the Crawler, which automatically discovers new data, identifies its schema, and updates the Data Catalog accordingly. Below are the steps to create an AWS Glue Crawler and Database for your data.
Step 1: Setup Your AWS Glue Database
Before creating a crawler in AWS Glue, you need to set up a database. This database will act as a container for the metadata of your data sources.
Follow the steps given below to set up a database −
First, login to the AWS Glue Console.
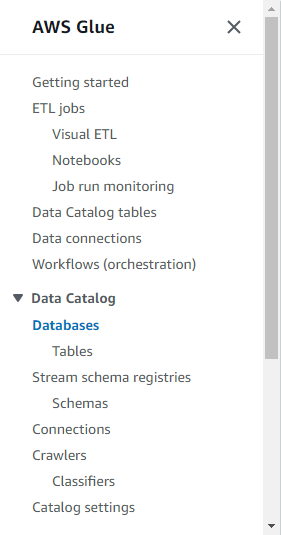
On the left-hand side navigation pane, click on Databases under the Data Catalog section.
Select Add Database and enter a name for your database (e.g., my-data-catalog).
Finally, click the Create button and your database will be ready for use.
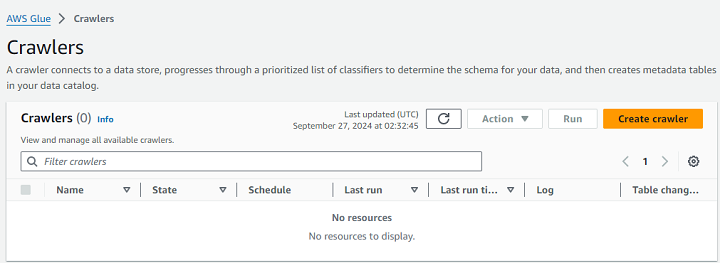
Step 2: Creating an AWS Glue Crawler
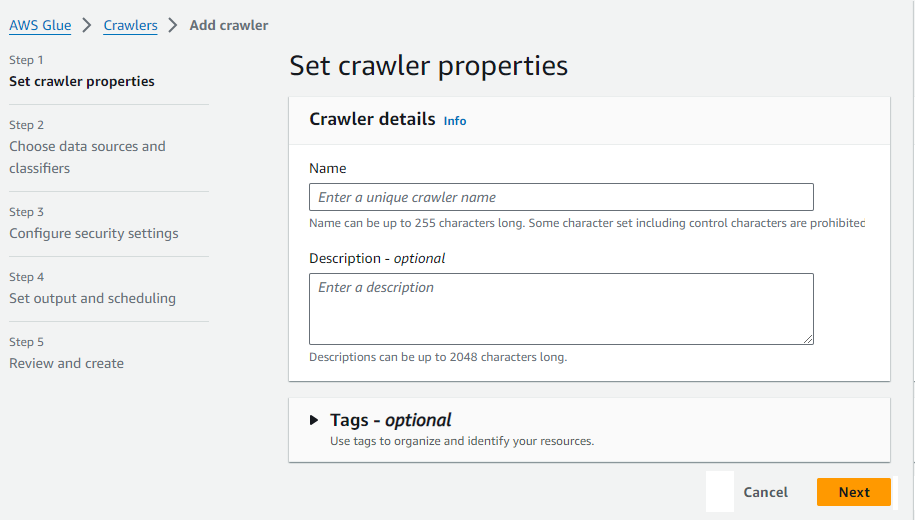
First, go to the AWS Glue Console and navigate to the Crawlers section. Next, click the Create Crawler button.
Now, enter a name for your crawler (e.g., my-data-crawler).
You also need to define the data source. This can be Amazon S3, DynamoDB, or any supported data source where your data is stored.
Next, under configure security settings section, set the IAM role that allows AWS Glue to access your data. Then, specify the target database you created earlier. This is where the crawler will store the metadata it discovers.
You can schedule your crawler to run on demand or at regular intervals to keep the metadata up to date. Finally, review your settings and click Finish.
Step 3: Run the Crawler
After setting the crawler, first, return to the Crawlers section in the Glue Console and select your newly created crawler.
Next, click Run Crawler to start the process. Once the crawler completes, it will populate the Glue Data Catalog with tables and metadata for each dataset it discovers.
AWS Glue - Data Catalog
The AWS Glue Data Catalog is central repository that stores the metadata information about your data. In simple terms, a data catalog is just like a data dictionary that keeps the details like structure of data, location of data, and how to access it using queries. This metadata information is very important to manage and organize large amounts of data.
You can store the data either in Amazon S3, Redshift, or at any other location in AWS. The main role of AWS Glue Data Catalog is to centralize the management of data and make it accessible for analysis.
Key Features of Data Catalog
Listed below are some of the key features of AWS Glue Data Catalog −
Automatic Data Detection − AWS Glue Crawlers scan your data sources, identify the schema, and automatically catalog the metadata. This data is stored in the AWS Glue Data Catalog.
Centralized Metadata Management − One of the key features of Data Catalog is that it centralizes all metadata in one place. Thats the reason the user need not to manually define the data. It also makes it easier to manage large data environments.
Integration with AWS Services − The AWS Glue Data Catalog can easily integrate with AWS services like Amazon Athena, Redshift, and SageMaker. This integration allows the user to run queries or build ML models without manually handling the data.
How to Use the AWS Glue Data Catalog?
Using AWS Glue Data Catalog is very simple. First, you need to create a database which will store the metadata for your datasets. We discussed the method to create a database in the previous section.
Once you have the database, you need to create an AWS Glue Crawler which will automatically scan your sources. The crawler identifies the data structure and updates the Data Catalog with metadata like table names, columns, and data types. This metadata is then available for querying with tools like Amazon Athena.
Managing Metadata with the Glue Data Catalog
You have the metadata, which is available for querying, but effective management of this metadata is important for organizations that deal with large amounts of data. Before learning the ways to manage metadata, it is important to understand this metadata.
Understanding Metadata
Metadata is data about data. It provides the following important information such as −
Schema − It represents the structure of your datasets. It includes tables, columns, and data types.
Location − As the name implies, it is the AWS place where your data is stored. It can be Amazon S3 buckets or databases like Amazon Redshift.
Description − It provides some additional information about data. It may include its purpose and the source from which it originates.
Ways to Manage Metadata
Here are some ways with the help of which you can manage metadata −
Manually Edit the Metadata
Although automatic data detection by AWS Crawlers is enough but you can also edit your data manually. To edit metadata manually, first find your databases and tables listed in the Data Catalog. Now you can click on a particular table you want to edit. You can edit its properties, columns and data type.
Edit the Metadata Using Tags
Tags are helpful for organizing and managing metadata more effectively. You can tag databases and tables with key-value pairs to categorize them easily.
Tags also enhance the searchability of your metadata which further make it easier to locate specific datasets within large collections.
Amazon S3 Integration with AWS Glue
Storing Data in Amazon S3 with AWS Glue
Amazon S3 (Simple Storage Service) is a flexible and reliable storage perfect for managing large datasets. AWS Glue is an Extract, Transform, and Load (ETL) service and when Amazon S3 is integrated with it, the management and processing of data becomes very easy.
Benefits of Storing Data in Amazon S3 with AWS Glue
Listed here are the key benefits of storing data in Amazon S3 with AWS Glue −
Storing data in S3 with AWS Glue allows it to easily access the data stored in S3 buckets. We can directly run ETL jobs on S3 data and convert it into meaningful formats.
With the help of Glue Crawlers, AWS Glue can automatically detect the schema of the data stored in S3 buckets. It enables us to query the data more quickly and efficiently.
Using built-in Apache Spark environment of AWS Glue, we can transform our data stored in Amazon S3 buckets.
How to Store and Process Data in Amazon S3 with AWS Glue?
Use the steps given below to store and process data in S3 buckets with AWS Glue −
Step 1: Set up your Amazon S3 Buckets − Before using AWS Glue, you must have data stored in Amazon S3 buckets. You can upload datasets in S3 buckets in both ways, manually or through automated processes like file transfers.
Step 2: Create a Glue Crawler − Now after having your data in S3 buckets, you can set a Glue Crawler which will scan your S3 bucket, extract metadata and saves it in the Glue Data Catalog.
Step 3: Define and Run ETL Jobs − Once metadata is created, you can now create an ETL job in AWS Glue to process the data stored in S3 buckets.
Step 4: Query and Analyse the Data − Once the data is processed, you can query the data using AWS services like Amazon Athena. You can also load it into data warehouses like Amazon Redshift for further analysis.
Managing Partitions in AWS Glue Jobs with Amazon S3
When you work with Amazon S3, managing partitions in AWS Glue becomes important to optimize your performance and reduce processing costs.
Partitions, as the name implies, divide a dataset into smaller but more manageable pieces based on specific keys like date, region, or product. In other words, partitions are a way to organize large datasets into smaller logical segments.
For example,
s3://your-bucket-name/data/year=2023/month=09/day=27/
In this example, the data is partitioned by year, month, and day.
Setting up Partitions in AWS Glue
Follow the steps given below to set up partitions in AWS Glue −
Step 1: Partitioning Data in Amazon S3 − Organize your data in Amazon S3 using a directory structure based on the partition key (e.g., year, month, day). For example, s3://my-bucket/sales_data/year=2023/month=09/day=27/.
Step 2: Configure AWS Glue Crawler − Once you have the partitioned data in S3, create and configure AWS Glue Crawler. The crawler will automatically recognize the folder structure and add the partition information to the Glue Data Catalog.
Step 3: Create or Modify Glue Job − Either you can create or modify Glue ETL job. In both the cases reference the partitioned data from the Glue Data Catalog. AWS Glue will use this information to process only the necessary partitions.
Managing Partitions with DynamicFrames
To manage partitioned data easily, AWS Glue provides DynamicFrames You can use the from_catalog function to load partitioned data and the filter function to process specific partitions. Lets see an example below −
import sys
from awsglue.transforms import *
from awsglue.utils import getResolvedOptions
from pyspark.context import SparkContext
from awsglue.context import GlueContext
from awsglue.job import Job

sc = SparkContext()
glueContext = GlueContext(sc)
spark = glueContext.spark_session

# Load partitioned data from Glue Data Catalog
dynamic_frame = glueContext.create_dynamic_frame.from_catalog(database="my_database", table_name="sales_data")

# Filter data for a specific year and month
filtered_frame = dynamic_frame.filter(f => f["year"] == "2023" and f["month"] == "09")

# Continue with the ETL process
-----------------
The above script will filter the data based on the year and month. It then performs transformations or actions defined in your ETL process. The final output would be written to your Amazon S3 bucket.
AWS Glue - Crawlers
ETL jobs that we define in AWS Glue use Data Catalog tables as sources and targets. These data catalog tables should be updated always.
The role of Crawlers in AWS Glue is to automatically discover new data, identify its schema, and update the Data Catalog accordingly. They ensure that the metadata is always up to date by automatically discovering and cataloging data.
How Crawlers Automate Data Discovery and Cataloging?
AWS Glue Crawlers provide us with an efficient way to automate data discovery and cataloging. By scanning data sources, identifying schemas, generating metadata, and organizing it in the Glue Data Catalog, they eliminate the need for manual data management. This automation helps businesses ensure that their data is always available and up to date for analysis.
Lets see how crawlers automate data discovery and cataloging −
Data Format Recognition
After creating and configuring AWS crawlers, they first recognize the data format. They are intelligent enough to recognize various data formats such as JSON, CSV, Avro, Parquet, and ORC. The Crawler examines the format and structure of the files in the defined data source to classify data types, schema, and tables.
Generate Metadata
Once the data format is recognized, the Crawler generates metadata for each table and dataset. This metadata includes information about the schema, such as column names, data types, and relationships between tables.
Cataloging the Data
After generating metadata, the Crawler automatically catalogs the data by storing the schema information in the Glue Data Catalog. The Data Catalog organizes the metadata into databases and tables, which can be accessed by other AWS services such as Athena, Redshift, and SageMaker for analyses and machine learning.
Automated Scheduling
We can also schedule the crawlers to run automatically at regular intervals. This ensures that new or updated data is continuously discovered and cataloged without manual efforts. It allows businesses to keep their data catalog up-to-date and ready for analysis.
Data Transformation
AWS crawlers automate data discovery and cataloging. The metadata generated by crawlers is important for setting up AWS Glue jobs to transform data. Once cataloged, data can be cleaned, enriched, and transformed using Glues ETL capabilities.
AWS Glue - Performance Optimization
Best Practices for Optimizing Glue ETL Jobs
To achieve efficiency and reduce the cost in your data processing workflows, you must optimize AWS Glue Extract, Transform, and Load (ETL) jobs.
In this chapter, we have highlighted some of the best practices for optimizing AWS Glue ETL jobs.
Optimize Data Partitioning in AWS Glue
Data partitioning is an important factor in speeding up query times and reducing the overall processing time of your ETL jobs. Below are the best practices for optimizing data partitioning −
You can organize your data in Amazon S3 using a logical folder structure, such as date-based partitions (e.g., /year=2024/month=09/day=26/).
You can use dynamic frames in AWS Glue to automatically detect partitions and load only the relevant data. It will improve the performance of your job.
You should avoid creating too many small partitions. It will increase processing costs.
Optimize I/O Operations in AWS Glue
Input / Output operations also play a significant role in the performance of your ETL jobs. Lets see how we can optimize I/O operations −
You should convert data to optimized columnar formats like Apache Parquet or ORC. These formats reduce I/O as they only load the relevant columns needed for processing.
You can use Amazon S3 multi-part upload and parallel processing to speed up data transfers between AWS services.
Use Pushdown Predicates
Pushdown predicates help filter data early in the ETL process. This means, only the relevant subset of data is processed. It is useful when you work with large datasets.
Follow the steps given below to optimize pushdown predicates −
You should apply filters directly at the data source. It will minimize the amount of data processed downstream. For example, you can filter some specific rows from a large dataset before loading it into the Glue job.
You can use the push_down_predicate argument in your ETL scripts. It only loads the data required for the transformation process.
Optimize Transformations in AWS Glue
One of the keys to enhancing performance is to reduce the complexity of transformations. AWS Glue provides built-in transformations, but some techniques given below can make ETL jobs more efficient.
Try to avoid redundant transformations by ensuring that operations like joins, filtering, or aggregations are applied only when necessary.
- You can use broadcast joins when one of the datasets is small. This technique speeds up join operations.
Enable Job Bookmarks in AWS Glue
AWS Glue Job Bookmarks are designed to keep track of the last successfully processed data in an ETL job. You can use job bookmarks to avoid reprocessing already processed data. In this way it will save time and resources.
- Always enable job bookmarks when you work with incremental data.
- Ensure that job bookmarks are correctly configured for datasets stored in Amazon S3 or databases your ETL jobs uses.
Managing Memory and Resource Allocation in AWS Glue
Efficient resources management ensures optimal performance, cost efficiency, and prevents job failures. AWS Glue provides various ways to manage memory and resource allocation for your ETL jobs.
Choosing the Right Worker Type
AWS Glue allows you to choose from three different worker types depending on your workload needs: Standard, G.1X, and G.2X workers. Each worker type offers different levels of memory and processing power.
You should use Standard workers for general-purpose ETL jobs whereas for complex transactions or working with large datasets, you can choose G.1X or G.2X workers
Tune the Number of DPUs
AWS Glue jobs use Data Processing Units (DPUs) for computing power. To make a significant difference in performance, you should allocate the right number of DPUs. You can start by assigning a minimum number of DPUs and then increase if your job requires more resources.
Monitor and Adjust Memory Usage
AWS Glue provides built-in memory monitoring via AWS CloudWatch metrics. You can monitor memory consumption in real-time and adjust job parameters as per your need.
Optimize Job Parallelism
AWS Glue can efficiently distribute the job across multiple nodes. This feature ensures that the job runs faster which significantly enhances performance.
AWS Glue - Cost Optimization
AWS Glue Pricing Structure
AWS Glue pricing is based on a pay-as-you-go model, which means you only pay for the resources you use. AWS Glue charges are divided into various components. The charges vary based on how you use the service.
Listed below are some of the key factors in AWS Glue pricing −
Data Processing Units (DPUs)
Data Processing Units (DPUs) in AWS Glue are a combination of CPU, memory, and network resources. You are charged based on the number of DPUs you used during the ETL job execution.
The cost for running Glue ETL jobs is calculated on a per-second basis, with a minimum billing duration of 1 minute.
AWS Glue Crawlers
Crawlers automatically scan your data to extract metadata and catalog the Glue Data. Glue crawlers are billed per DPU hour, with a minimum billing duration of 10 minutes.
AWS Glue Data Catalog
The Glue Data Catalog is billed based on the number of objects (such as databases, tables, and partitions) stored in the catalog. AWS offers a free tier of 1 million stored objects and 1 million requests per month for the Glue Data Catalog.
Development Endpoints
Development endpoints allow you to create and test ETL scripts interactively. Its pricing is based on the DPUs allocated for the development endpoint.
Tips for Reducing AWS Glue Costs
AWS Glue provides users with powerful tools for managing and processing data, but costs can increase if not managed properly.
In this section, we have highlighted some strategies to reduce your AWS Glue costs −
Optimize Data Processing Units (DPUs)
When you configure your AWS Glue jobs, try to allocate only the required number of DPUs. It is because using more DPUs than necessary will increase your costs.
You should use AWS CloudWatch to monitor the resource usage of your Glue jobs. To manage the cost, you can adjust the DPUs based on actual memory and CPU consumption.
Minimize Crawler Runs
Rather than running crawlers continuously, you can schedule them to run only when new data needs to be discovered or cataloged.
Rather than running crawlers on the entire dataset, you can limit them to specific partitions or folders. This will reduce the processing time and cost.
Use the Glue Data Catalog Wisely
You can use only the free tier of the Glue Data Catalog by keeping the number of stored objects under 1 million.
You should regularly review your Glue Data Catalog and remove outdated or unused tables and partitions to avoid unnecessary charges.
Use the Free Tier for Development Endpoints
As mentioned earlier, the development endpoints are billed by the hour. So, try to terminate them when they are not in use.
Optimize ETL Jobs
You can use Pushdown Predicates to filter your data at the source to reduce the amount of data processed by Glue jobs.
You should use data partitioning strategies to optimize query performance.
Monitor and Analyze Costs
You should use AWS Cost Explorer to track your Glue usage. You can also set billing alarms to notify you when your Glue costs exceed a certain limit.
