- Aurelia - Home
- Aurelia - Overview
- Aurelia - Environment Setup
- Aurelia - First Application
- Aurelia - Components
- Aurelia - Component Lifecycle
- Aurelia - Custom Elements
- Aurelia - Dependency Injections
- Aurelia - Configuration
- Aurelia - Plugins
- Aurelia - Data Binding
- Aurelia - Binding Behavior
- Aurelia - Converters
- Aurelia - Events
- Aurelia - Event Aggregator
- Aurelia - Forms
- Aurelia - HTTP
- Aurelia - Refs
- Aurelia - Routing
- Aurelia - History
- Aurelia - Animations
- Aurelia - Dialog
- Aurelia - Localization
- Aurelia - Tools
- Aurelia - Bundling
- Aurelia - Debugging
- Aurelia - Community
- Aurelia - Best Practices
Aurelia - Localization
Aurelia offers i18n plugin. In this chapter, you will learn how to localize your app using this plugin.
Step 1 - Install a Plugin
Open the command prompt window and run the following code to install i18n plugin.
C:\Users\username\Desktop\aureliaApp>jspm install aurelia-i18n
We also need to install backend plugin.
C:\Users\username\Desktop\aureliaApp>jspm install npm:i18next-xhr-backend
Step 2 - Create Folders and Files
In the project root folder, we need to create a locale directory.
C:\Users\username\Desktop\aureliaApp>mkdir locale
In this folder, you need to add new folders for any language you want. We will create en with translation.js file inside.
C:\Users\username\Desktop\aureliaApp\locale>mkdir en
C:\Users\username\Desktop\aureliaApp\locale\en>touch translation.json
Step 3 - Use a Plugin
You need to use manual bootstrapping to be able to use this plugin. Check the Configuration chapter for more information. We need to add i18n plugin to the main.js file.
main.js
import {I18N} from 'aurelia-i18n';
import XHR from 'i18next-xhr-backend';

export function configure(aurelia) {
   aurelia.use
   .standardConfiguration()
   .developmentLogging()

   .plugin('aurelia-i18n', (instance) => {
      // register backend plugin
      instance.i18next.use(XHR);

      // adapt options to your needs (see http://i18next.com/docs/options/)
      instance.setup({
         backend: {
            loadPath: '/locales/{{lng}}/{{ns}}.json',
         },

         lng : 'de',
         attributes : ['t','i18n'],
         fallbackLng : 'en',
         debug : false
      });
   });

   aurelia.start().then(a => a.setRoot());
}
Step 4 - Translation JSON File
This is the file where you can set translation values. We will use an example from an official documentation. The de-DE folder should actually be used for translating to German language, however we will use English phrases instead, for easier understanding.
translation.json
{
   "score": "Score: {{score}}",
   "lives": "{{count}} life remaining",
   "lives_plural": "{{count}} lives remaining",
   "lives_indefinite": "a life remaining",
   "lives_plural_indefinite": "some lives remaining",
   "friend": "A friend",
   "friend_male": "A boyfriend",
   "friend_female": "A girlfriend"
}
Step 5 - Set Locale
We just need to import i18n plugin and set it to use JSON code from de-DE folder.
app.js
import {I18N} from 'aurelia-i18n';

export class App {
   static inject = [I18N];

   constructor(i18n) {
      this.i18n = i18n;
      this.i18n
      .setLocale('de-DE')

      .then( () => {
         console.log('Locale is ready!');
      });
   }
}
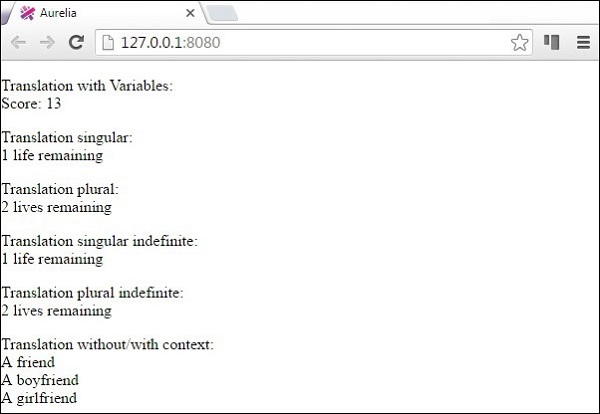
Step 6 - View
There are couple of ways to translate data. We will use a custom ValueConverter named t. You can see in the following example various ways of formatting data. Compare this with the translation.json file and you will notice the patterns used for formatting.
<template>
   <p>
      Translation with Variables: <br />
      ${ 'score' | t: {'score': 13}}
   </p>

   <p>
      Translation singular: <br />
      ${ 'lives' | t: { 'count': 1 } }
   </p>

   <p>
      Translation plural: <br />
      ${ 'lives' | t: { 'count': 2 } }
   </p>

   <p>
      Translation singular indefinite: <br />
      ${ 'lives' | t: { 'count': 1, indefinite_article: true  } }
   </p>

   <p>
      Translation plural indefinite: <br />
      ${ 'lives' | t: { 'count': 2, indefinite_article: true } }
   </p>

   <p>
      Translation without/with context: <br />
      ${ 'friend' | t } <br />
      ${ 'friend' | t: { context: 'male' } } <br />
      ${ 'friend' | t: { context: 'female' } }
   </p>

</template>
When we run the app, we will get the following output.