- Apache Drill - Home
- Apache Drill - Introduction
- Apache Drill - Fundamentals
- Apache Drill - Architecture
- Apache Drill - Installation
- Apache Drill - SQL Operations
- Apache Drill - Query using JSON
- Window Functions using JSON
- Querying Complex Data
- Data Definition Statements
- Apache Drill - Querying Data
- Querying Data using HBase
- Querying Data using Hive
- Apache Drill - Querying Parquet Files
- Apache Drill - JDBC Interface
- Apache Drill - Custom Function
- Apache Drill - Contributors
Apache Drill - Installation
This chapter will cover how to install Apache Drill on your machine. We have two modes of installation in Drill.
Embedded mode − This mode refers to install Drill on a single node (local) on your machine. It doesnt require ZooKeeper setup.
Distributed mode − Install Apache Drill on a distributed environment. ZooKeeper is mandatory for this mode because it co-ordinates clusters. Once you installed successfully, then you will be able to connect and query Hive, HBase or any other distributed data sources.
Now lets continue with the embedded mode steps for installation.
Embedded Mode Installation
Embedded mode is a quick way to install. You can install Apache Drill in the embedded mode on Linux, Mac OS or Windows Operating System.
Step 1: Verify Java Installation
Hopefully, you have already installed java on your machine, so you just verify it using the following command.
$ java -version
If Java is successfully installed on your machine, you could see the version of installed Java. Otherwise download the latest version of JDK by visiting the following link −
http://www.oracle.com/technetwork/java/javase/downloads/index.html
After downloading the latest version, extract those files, move to the directory after setting the path and add Java alternatives. Then Java will be installed on your machine.
Step 2: Apache Drill Installation
Download the latest version of Apache Drill by visiting the following link −
http://www.apache.org/dyn/closer.cgi/drill/drill-1.6.0/apache-drill-1.6.0.tar.gz
Now apache-drill-1.6.0.tar.gz will be downloaded on your machine.
You can then extract the tar file using the following program −
$ cd opt/
$ tar apache-drill-1.6.0.tar.gz
$ cd apache-drill-1.6.0
Step 3: Start Drill
To start the Drill shell in the embedded mode, use the following command. Internally, the command uses a jdbc connection string and identifies the local node as the ZooKeeper node.
$ bin/drill-embedded
After the command, you can see the following response −
$ 0: jdbc:drill:zk = local>
Where,
0 − is the number of connections to Drill, which can be only one in embedded node
jdbc − is the connection type
zk = local − means the local node substitutes for the ZooKeeper node
Once you get this prompt, you will be able to run your queries on Drill.
Step 4: Exit Drill
To exit the Drill shell, issue the following command −
$ !quit
Distributed Mode Installation
You will have to follow the subsequent steps to ensure a proper Distributed Mode Installation on your system.
Step 1: Verify Java installation
$ java -version
If java is successfully installed on your machine, you could see the version of installed Java. Otherwise download latest version of JDK by visiting the following link −
http://www.oracle.com/technetwork/java/javase/downloads/index.html
After downloading the latest version, extract those files and move them to the directory after setting the path and adding Java alternatives. Then Java will be installed on your machine.
Step 2: Verify ZooKeeper Installation
Hopefully, you have installed Apache ZooKeeper on your machine. To verify the installation, you can issue the following command −
$ bin/zkServer.sh start
Then you will get the following program on your screen −
$ JMX enabled by default
$ Using config: /Users/../zookeeper-3.4.6/bin/../conf/zoo.cfg
$ Starting zookeeper ... STARTED
Step 3: Apache Drill Installation
You can start with downloading the latest version of Apache Drill by visiting the following linkhttp://www.apache.org/dyn/closer.cgi/drill/drill-1.6.0/apache-drill-1.6.0.tar.gz
Now apache-drill-1.6.0.tar.gz will be downloaded on your machine.
The next step is to extract the tar file by issuing the following command −
$ cd opt/
$ tar apache-drill-1.6.0.tar.gz
$ cd apache-drill-1.6.0
Step 4: Configuration Settings
Open the drill-override file by using the following command.
$ vi conf/drill-override.conf
Then you will see the following response −
drill.exec: {
   cluster-id: "drillbits1",
   zk.connect: "localhost:2181"
}
Here cluster-id: drillbits1 indicates we have one instance running. If two or more instances are running, then drillbits also increases.
Step 5: Start Drillbit shell
To start the drillbit shell you can use the following command.
$ bin/drillbit.sh start
Then you will see the following response −
$ 0: jdbc:drill:zk = <zk1host>:
Step 6: Exit the Drill Shell
To exit the Drill shell, you can issue the following command −
$ 0: jdbc:drill:zk = <zk1host>: !quit
Step 7: Stop Drill
Navigate to the Drill installation directory, and issue the following command to stop a Drillbit.
$ bin/drillbit.sh stop
Step 8: Start Drill in Web Console
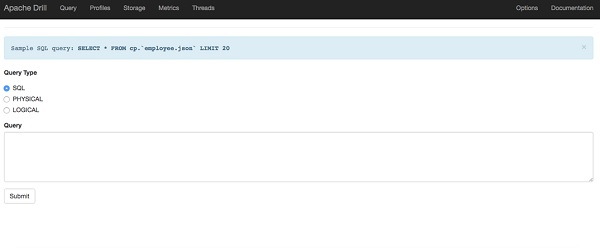
Apache Drill Web Console is one of the client interfaces to access Drill.
To open this Drill Web Console, launch a web browser, and then type the following URL http://localhost:8047
Now you will see the following screen which is similar to the Query option.