- AWS - Cloud Computing
- AWS - Basic Architecture
- AWS - Management Console
- AWS - Console Mobile App
- AWS - Account
- Amazon Computer Services
- AWS - Elastic Compute Cloud
- AWS - Auto Scaling
- AWS - WorkSpaces
- AWS - Lambda
- Amazon Network Services
- AWS - Virtual Private Cloud
- AWS - Route 53
- AWS - Direct Connect
- Amazon Storage Services
- AWS - Amazon S3
- AWS - Elastic Block Store
- AWS - Storage Gateway
- AWS - CloudFront
- Amazon Database Services
- AWS - Relational Database Service
- AWS - DynamoDB
- AWS - Redshift
- Amazon Analytics Services
- AWS - Amazon Kinesis
- AWS - Elastic MapReduce
- AWS - Data Pipeline
- AWS - Machine Learning
- Amazon Application Services
- AWS - Simple WorkFlow Service
- AWS - WorkMail
- Amazon Web Services Resources
- AWS - Quick Guide
- AWS - Useful Resources
- AWS - Discussion
AWS - Elastic Compute Cloud
Amazon EC2 (Elastic Compute Cloud) is a web service interface that provides resizable compute capacity in the AWS cloud. It is designed for developers to have complete control over web-scaling and computing resources.
EC2 instances can be resized and the number of instances scaled up or down as per our requirement. These instances can be launched in one or more geographical locations or regions, and Availability Zones (AZs). Each region comprises of several AZs at distinct locations, connected by low latency networks in the same region.
EC2 Components
In AWS EC2, the users must be aware about the EC2 components, their operating systems support, security measures, pricing structures, etc.
Operating System Support
Amazon EC2 supports multiple OS in which we need to pay additional licensing fees like: Red Hat Enterprise, SUSE Enterprise and Oracle Enterprise Linux, UNIX, Windows Server, etc. These OS needs to be implemented in conjunction with Amazon Virtual Private Cloud (VPC).
Security
Users have complete control over the visibility of their AWS account. In AWS EC2, the security systems allow create groups and place running instances into it as per the requirement. You can specify the groups with which other groups may communicate, as well as the groups with which IP subnets on the Internet may talk.
Pricing
AWS offers a variety of pricing options, depending on the type of resources, types of applications and database. It allows the users to configure their resources and compute the charges accordingly.
Fault tolerance
Amazon EC2 allows the users to access its resources to design fault-tolerant applications. EC2 also comprises geographic regions and isolated locations known as availability zones for fault tolerance and stability. It doesnt share the exact locations of regional data centers for security reasons.
When the users launch an instance, they must select an AMI that's in the same region where the instance will run. Instances are distributed across multiple availability zones to provide continuous services in failures, and Elastic IP (EIPs) addresses are used to quickly map failed instance addresses to concurrent running instances in other zones to avoid delay in services.
Migration
This service allows the users to move existing applications into EC2. It costs $80.00 per storage device and $2.49 per hour for data loading. This service suits those users having large amount of data to move.
Features of EC2
Here is a list of some of the prominent features of EC2 −
Reliable − Amazon EC2 offers a highly reliable environment where replacement of instances is rapidly possible. Service Level Agreement commitment is 99.9% availability for each Amazon EC2 region.
Designed for Amazon Web Services − Amazon EC2 works fine with Amazon services like Amazon S3, Amazon RDS, Amazon DynamoDB, and Amazon SQS. It provides a complete solution for computing, query processing, and storage across a wide range of applications.
Secure − Amazon EC2 works in Amazon Virtual Private Cloud to provide a secure and robust network to resources.
Flexible Tools − Amazon EC2 provides the tools for developers and system administrators to build failure applications and isolate themselves from common failure situations.
Inexpensive − Amazon EC2 wants us to pay only for the resources that we use. It includes multiple purchase plans such as On-Demand Instances, Reserved Instances, Spot Instances, etc. which we can choose as per our requirement.
How to Use AWS EC2
Step 1 − Sign-in to AWS account and open IAM console by using the following link https://console.aws.amazon.com/iam/.
Step 2 − In the navigation Panel, create/view groups and follow the instructions.
Step 3 − Create IAM user. Choose users in the navigation pane. Then create new users and add users to the groups.
Step 4 − Create a Virtual Private Cloud using the following instructions.
Open the Amazon VPC console by using the following link − https://console.aws.amazon.com/vpc/
Select VPC from the navigation panel. Then select the same region in which we have created key-pair.
Select start VPC wizard on VPC dashboard.
Select VPC configuration page and make sure that VPC with single subnet is selected. The choose Select.
VPC with a single public subnet page will open. Enter the VPC name in the name field and leave other configurations as default.
Select create VPC, then select Ok.
Step 5 − Create WebServerSG security groups and add rules using the following instructions.
On the VPC console, select Security groups in the navigation panel.
Select create security group and fill the required details like group name, name tag, etc.
Select your VPC ID from the menu. Then select yes, create button.
Now a group is created. Select the edit option in the inbound rules tab to create rules.
Step 6 − Launch EC2 instance into VPC using the following instructions.
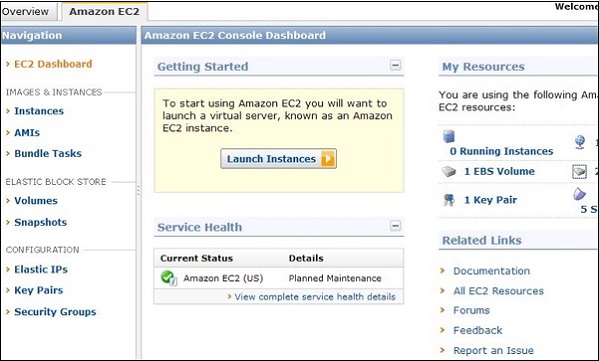
Open EC2 console by using the following link − https://console.aws.amazon.com/ec2/
Select launch instance option in the dashboard.
A new page will open. Choose Instance Type and provide the configuration. Then select Next: Configure Instance Details.
A new page will open. Select VPC from the network list. Select subnet from the subnet list and leave the other settings as default.
Click Next until the Tag Instances page appears.
Step 7 − On the Tag Instances page, provide a tag with a name to the instances. Select Next: Configure Security Group.
Step 8 − On the Configure Security Group page, choose the Select an existing security group option. Select the WebServerSG group that we created previously, and then choose Review and Launch.
Step 9 − Check Instance details on Review Instance Launch page then click the Launch button.
Step 10 − A pop up dialog box will open. Select an existing key pair or create a new key pair. Then select the acknowledgement check box and click the Launch Instances button.
