- VueJS - Home
- VueJS - Overview
- VueJS - Environment Setup
- VueJS - Introduction
- VueJS - Instances
- VueJS - Template
- VueJS - Components
- VueJS - Computed Properties
- VueJS - Watch Property
- VueJS - Binding
- VueJS - Events
- VueJS - Rendering
- VueJS - Transition & Animation
- VueJS - Directives
- VueJS - Routing
- VueJS - Mixins
- VueJS - Render Function
- VueJS - Reactive Interface
- VueJS - Examples
VueJS - Quick Guide
VueJS - Overview
VueJS is an open source progressive JavaScript framework used to develop interactive web interfaces. It is one of the famous frameworks used to simplify web development. VueJS focusses on the view layer. It can be easily integrated into big projects for front-end development without any issues.
The installation for VueJS is very easy to start with. Any developer can easily understand and build interactive web interfaces in a matter of time. VueJS is created by Evan You, an ex-employee from Google. The first version of VueJS was released in Feb 2014. It recently has clocked to 64,828 stars on GitHub, making it very popular.
Features
Following are the features available with VueJS.
Virtual DOM
VueJS makes the use of virtual DOM, which is also used by other frameworks such as React, Ember, etc. The changes are not made to the DOM, instead a replica of the DOM is created which is present in the form of JavaScript data structures. Whenever any changes are to be made, they are made to the JavaScript data structures and the latter is compared with the original data structure. The final changes are then updated to the real DOM, which the user will see changing. This is good in terms of optimization, it is less expensive and the changes can be made at a faster rate.
Data Binding
The data binding feature helps manipulate or assign values to HTML attributes, change the style, assign classes with the help of binding directive called v-bind available with VueJS.
Components
Components are one of the important features of VueJS that helps create custom elements, which can be reused in HTML.
Event Handling
v-on is the attribute added to the DOM elements to listen to the events in VueJS.
Animation/Transition
VueJS provides various ways to apply transition to HTML elements when they are added/updated or removed from the DOM. VueJS has a built-in transition component that needs to be wrapped around the element for transition effect. We can easily add third party animation libraries and also add more interactivity to the interface.
Computed Properties
This is one of the important features of VueJS. It helps to listen to the changes made to the UI elements and performs the necessary calculations. There is no need of additional coding for this.
Templates
VueJS provides HTML-based templates that bind the DOM with the Vue instance data. Vue compiles the templates into virtual DOM Render functions. We can make use of the template of the render functions and to do so we have to replace the template with the render function.
Directives
VueJS has built-in directives such as v-if, v-else, v-show, v-on, v-bind, and v-model, which are used to perform various actions on the frontend.
Watchers
Watchers are applied to data that changes. For example, form input elements. Here, we dont have to add any additional events. Watcher takes care of handling any data changes making the code simple and fast.
Routing
Navigation between pages is performed with the help of vue-router.
Lightweight
VueJS script is very lightweight and the performance is also very fast.
Vue-CLI
VueJS can be installed at the command line using the vue-cli command line interface. It helps to build and compile the project easily using vue-cli.
Comparison with Other Frameworks
Now let us compare VueJS with other frameworks such as React, Angular, Ember, Knockout, and Polymer.
VueJS v/s React
Virtual DOM
Virtual DOM is a virtual representation of the DOM tree. With virtual DOM, a JavaScript object is created which is the same as the real DOM. Any time a change needs to be made to the DOM, a new JavaScript object is created and the changes are made. Later, both the JavaScript objects are compared and the final changes are updated in the real DOM.
VueJS and React both use virtual DOM, which makes it faster.
Template v/s JSX
VueJS uses html, js and css separately. It is very easy for a beginner to understand and adopt the VueJS style. The template based approach for VueJS is very easy.
React uses jsx approach. Everything is JavaScript for ReactJS. HTML and CSS are all part of JavaScript.
Installation Tools
React uses create react app and VueJS uses vue-cli /CDN/npm. Both are very easy to use and the project is set up with all the basic requirements. React needs webpack for the build, whereas VueJS does not. We can start with VueJS coding anywhere in jsfiddle or codepen using the cdn library.
Popularity
React is popular than VueJS. The job opportunity with React is more than VueJS. There is a big name behind React i.e. Facebook which makes it more popular. Since, React uses the core concept of JavaScript, it uses the best practice of JavaScript. One who works with React will definitely be a very good with all the JavaScript concepts.
VueJS is a developing framework. Presently, the job opportunities with VueJS are less in comparison to React. According to a survey, many people are adapting to VueJS, which can make it more popular in comparison to React and Angular. There is a good community working on the different features of VueJS. The vue-router is maintained by this community with regular updates.
VueJS has taken the good parts from Angular and React and has built a powerful library. VueJS is much faster in comparison to React/Angular because of its lightweight library.
VueJS v/s Angular
Similarities
VueJS has a lot of similarities with Angular. Directives such as v-if, v-for are almost similar to ngIf, ngFor of Angular. They both have a command line interface for project installation and to build it. VueJS uses Vue-cli and Angular uses angular-cli. Both offer two-way data binding, server side rendering, etc.
Complexity
Vuejs is very easy to learn and start with. As discussed earlier, a beginner can take the CDN library of VueJS and get started in codepen and jsfiddle.
For Angular, we need to go through a series of steps for installation and it is little difficult for beginners to get started with Angular. It uses TypeScript for coding which is difficult for people coming from core JavaScript background. However, it is easier to learn for users belonging to Java and C# background.
Performance
To decide the performance, it is up to the users. VueJS file size is much lighter than Angular. A comparison of the framework performance is provided in the following link https://krausest.github.io/js-framework-benchmark/
Popularity
At present, Angular is more popular than VueJS. A lot of organizations use Angular, making it very popular. Job opportunities are also more for candidates experienced in Angular. However, VueJS is taking up the place in the market and can be considered as a good competitor for Angular and React.
Dependencies
Angular provides a lot of built-in features. We have to import the required modules and get started with it, for example, @angular/animations, @angular/form.
VueJS does not have all the built-in features as Angular and needs to depend on third party libraries to work on it.
Flexibility
VueJS can be easily merged with any other big project without any issues. Angular will not be that easy to start working with any other existing project.
Backward Compatibility
We had AngularJS, Angular2 and now Angular4. AngularJS and Angular2 have vast difference. Project application developed in AngularJS cannot be converted to Angular2 because of the core differences.
The recent version of VueJS is 2.0 and it is good with backward compatibility. It provides good documentation, which is very easy to understand.
Typescript
Angular uses TypeScript for its coding. Users need to have knowledge of Typescript to get started with Angular. However, we can start with VueJS coding anywhere in jsfiddle or codepen using the cdn library. We can work with standard JavaScript, which is very easy to start with.
VueJS v/s Ember
Similarities
Ember provides Ember command line tool, i.e. ember-cli for easy installation and compiling for Ember projects.
VueJS has also a command line tool vue-cli to start and build projects.
They both have features such as router, template, and components which makes them very rich as the UI framework.
Performance
VueJS has better performance in comparison to Ember. Ember has added a glimmer rendering engine with the aim of improving the re-render performance, which is a similar concept as VueJS and React using virtual DOM. However, VueJS has a better performance when compared to Ember.
VueJS v/s Knockout
Knockout provides a good browser support. It is supported on the lower version of the IE whereas VueJS is not supported on IE8 and below. Knockout development has slowed down over time. There is not much popularity for the same in recent times.
On the other hand, VueJS has started gaining popularity with the Vue team providing regular updates.
VueJS v/s Polymer
Polymer library has been developed by Google. It is used in many Google projects such as Google I/O, Google Earth, Google Play Music, etc. It offers data binding and computed properties similar to VueJS.
Polymer custom element definition comprises plain JavaScript/CSS, element properties, lifecycle callbacks, and JavaScript methods. In comparison, VueJS allows to easily use JavaScript/html and CSS.
Polymer uses web component features and requires polyfills for browsers, which does not support these features. VueJS does not have such dependencies and works fine in all browsers from IE9+.
VueJS - Environment Setup
There are many ways to install VueJS. Some of the ways on how to carry out the installation are discussed ahead.
Using the <script> tag directly in HTML file
<html>
   <head>
      <script type = "text/javascript" src = "vue.min.js"></script>
   </head>
   <body></body>
</html>
Go to the home site https://vuejs.org/v2/guide/installation.html of VueJS and download the vue.js as per need. There are two versions for use - production version and development version. The development version is not minimized, whereas the production version is minimized as shown in the following screenshot. Development version will help with the warnings and debug mode during the development of the project.

Using CDN
We can also start using VueJS file from the CDN library. The link https://unpkg.com/vue@3.5.16/dist/vue.global.js will give the latest version of VueJS. VueJS is also available on jsDelivr (https://cdn.jsdelivr.net/npm/vue/dist/vue.js) and cdnjs (https://cdnjs.cloudflare.com/ajax/libs/vue/2.4.0/vue.js).
We can host the files at our end, if required and get started with VueJS development.
Using NPM
For large scale applications with VueJS, it is recommended to install using the npm package. It comes with Browserify and Webpack along with other necessary tools, which help with the development. Following is the command to install using npm.
npm install vue
Using CLI Command Line
VueJS also provides CLI to install the vue and get started with the server activation. To install using CLI, we need to have CLI installed which is done using the following command.
npm install --global vue-cli
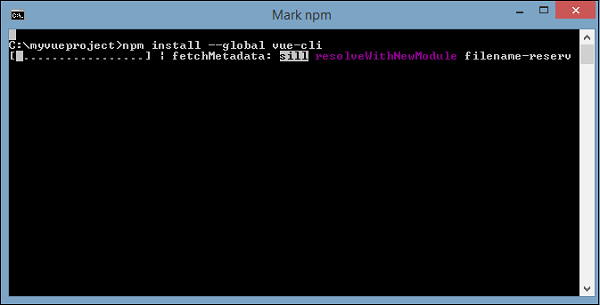
Once done, it shows the CLI version for VueJS. It takes a few minutes for the installation.
+ vue-cli@2.8.2
added 965 packages in 355.414s
Following is the command to create the project using Webpack.
vue init webpack myproject
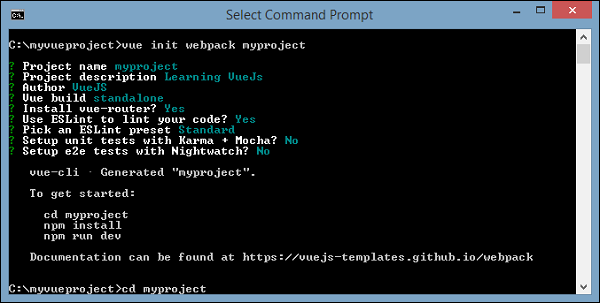
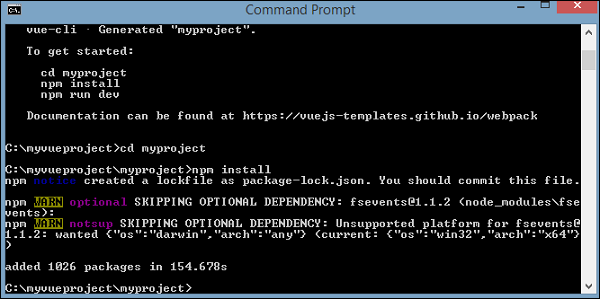
To get started, use the following command.
cd myproject
npm install
npm run dev
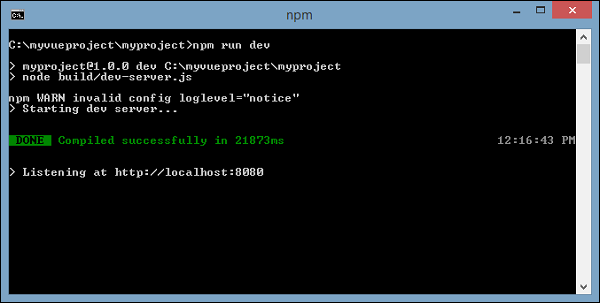
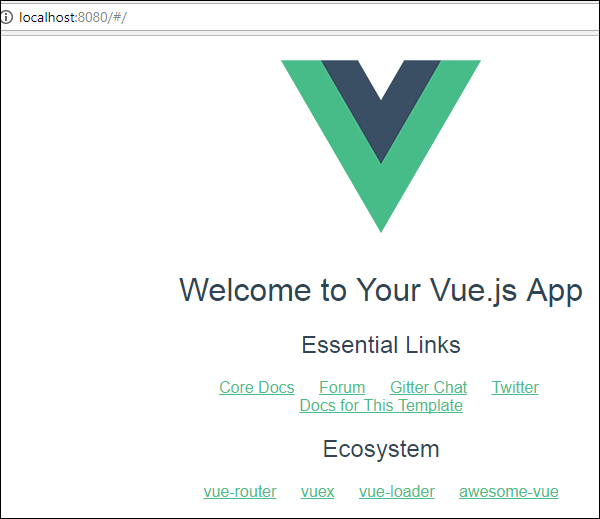
Once we execute npm run dev, it starts the server and provides the url for display to be seen in the browser which is as shown in the following screenshot.
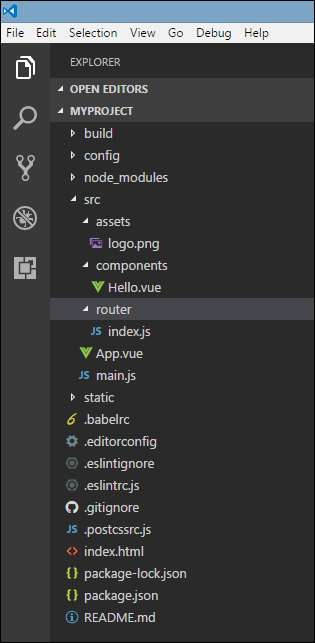
The project structure using CLI looks like the following.
VueJS - Introduction
Vue is a JavaScript framework for building user interfaces. Its core part is focused mainly on the view layer and it is very easy to understand. The version of Vue that we are going to use in this tutorial is 2.0.
As Vue is basically built for frontend development, we are going to deal with lot of HTML, JavaScript and CSS files in the upcoming chapters. To understand the details, let us start with a simple example.
In this example, we are going to use the development verison of vuejs.
Example
<html>
   <head>
      <title>VueJs Introduction</title>
      <script type = "text/javascript" src = "js/vue.js"></script>
   </head>
   <body>
      <div id = "intro" style = "text-align:center;">
         <h1>{{ message }}</h1>
      </div>
      <script type = "text/javascript">
         var vue_det = new Vue({
            el: '#intro',
            data: {
               message: 'My first VueJS Task'
            }
         });
      </script>
   </body>
</html>
Output
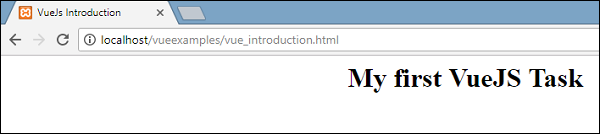
This is the first app we have created using VueJS. As seen in the above code, we have included vue.js at the start of the .html file.
<script type = "text/javascript" src = "js/vue.js"></script>
There is a div which is added in the body that prints My first VueJS Task in the browser.
<div id = "intro" style = "text-align:center;">
   <h1>{{ message }}</h1>
</div>
We have also added a message in a interpolation, i.e. {{}}. This interacts with VueJS and prints the data in the browser. To get the value of the message in the DOM, we are creating an instance of vuejs as follows −
var vue_det = new Vue({
   el: '#intro',
   data: {
      message: 'My first VueJS Task'
   }
})
In the above code snippet, we are calling Vue instance, which takes the id of the DOM element i.e. e1:#intro, it is the id of the div. There is data with the message which is assigned the value My first VueJS Task. VueJS interacts with DOM and changes the value in the DOM {{message}} with My first VueJS Task.
If we happen to change the value of the message in the console, the same will be reflected in the browser. For example −

Console Details
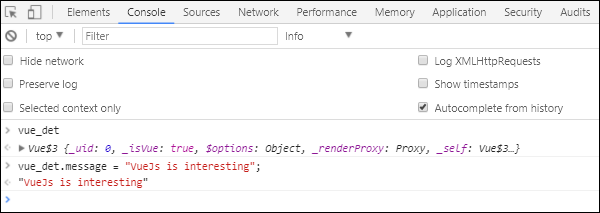
In the above console, we have printed the vue_det object, which is an instance of Vue. We are updating the message with VueJs is interesting and the same is changed in the browser immediately as seen in the above screenshot.
This is just a basic example showing the linking of VueJS with DOM, and how we can manipulate it. In the next few chapters, we will learn about directives, components, conditional loops, etc.
VueJS - Instances
To start with VueJS, we need to create the instance of Vue, which is called the root Vue Instance.
Syntax
var app = new Vue({
   // options
})
Let us look at an example to understand what needs to be part of the Vue constructor.
<html>
<head>
<title>VueJs Instance</title>
<script type = "text/javascript" src = "js/vue.js"></script>
</head>
<body>
<div id = "vue_det">
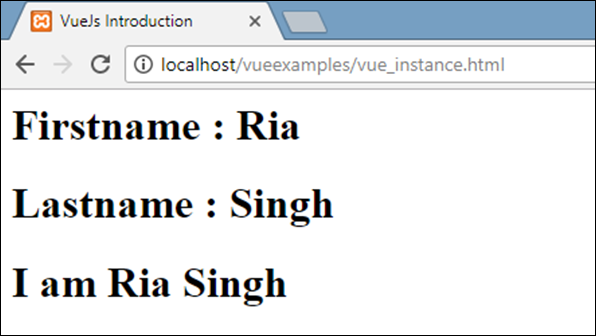
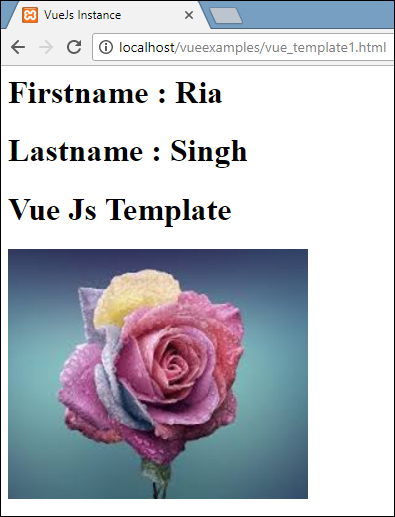
<h1>Firstname : {{firstname}}</h1>
<h1>Lastname : {{lastname}}</h1>
<h1>{{mydetails()}}</h1>
</div>
<script type = "text/javascript" src = "js/vue_instance.js"></script>
</body>
</html>
vue_instance.js
var  vm = new Vue({
   el: '#vue_det',
   data: {
      firstname : "Ria",
      lastname  : "Singh",
      address    : "Mumbai"
   },
   methods: {
      mydetails : function() {
         return "I am "+this.firstname +" "+ this.lastname;
      }
   }
})
For Vue, there is a parameter called el. It takes the id of the DOM element. In the above example, we have the id #vue_det. It is the id of the div element, which is present in .html.
<div id = "vue_det"></div>
Now, whatever we are going to do will affect the div element and nothing outside it.
Next, we have defined the data object. It has value firstname, lastname, and address.
The same is assigned inside the div. For example,
<div id = "vue_det">
   <h1>Firstname : {{firstname}}</h1>
   <h1>Lastname : {{lastname}}</h1>
</div>
The Firstname : {{firstname}} value will be replaced inside the interpolation, i.e. {{}} with the value assigned in the data object, i.e. Ria. The same goes for last name.
Next, we have methods where we have defined a function mydetails and a returning value. It is assigned inside the div as
<h1>{{mydetails()}}</h1>
Hence, inside {{} } the function mydetails is called. The value returned in the Vue instance will be printed inside {{}}. Check the output for reference.
Output
Now, we need to pass options to the Vue constructor which is mainly data, template, element to mount on, methods, callbacks, etc.
Let us take a look at the options to be passed to the Vue.
#data − This type of data can be an object or a function. Vue converts its properties to getters/setters to make it reactive.
Lets take a look at how the data is passed in the options.
Example
<html>
   <head>
      <title>VueJs Introduction</title>
      <script type = "text/javascript" src = "js/vue.js"></script>
   </head>
   <body>
      <script type = "text/javascript">
         var _obj = { fname: "Raj", lname: "Singh"}

         // direct instance creation
         var vm = new Vue({
            data: _obj
         });
         console.log(vm.fname);
         console.log(vm.$data);
         console.log(vm.$data.fname);
      </script>
   </body>
</html>
Output
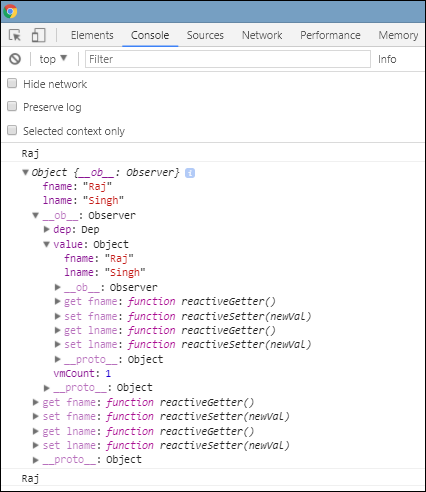
console.log(vm.fname); // prints Raj
console.log(vm.$data); prints the full object as shown above
console.log(vm.$data.fname); // prints Raj
If there is a component, the data object has to be referred from a function as shown in the following code.
<html>
   <head>
      <title>VueJs Introduction</title>
      <script type = "text/javascript" src = "js/vue.js"></script>
   </head>
   <body>
      <script type = "text/javascript">
         var _obj = { fname: "Raj", lname: "Singh"};

         // direct instance creation
         var vm = new Vue({
            data: _obj
         });
         console.log(vm.fname);
         console.log(vm.$data);
         console.log(vm.$data.fname);

         // must use function when in Vue.extend()
         var Component = Vue.extend({
            data: function () {
               return _obj
            }
         });
         var myComponentInstance = new Component();
         console.log(myComponentInstance.lname);
         console.log(myComponentInstance.$data);
      </script>
   </body>
</html>
In case of a component, the data is a function, which is used with Vue.extend as shown above. The data is a function. For example,
data: function () {
   return _obj
}
To refer to the data from the component, we need to create an instance of it. For example,
var myComponentInstance = new Component();
To fetch the details from the data, we need to do the same as we did with the parent component above. For example,
console.log(myComponentInstance.lname);
console.log(myComponentInstance.$data);
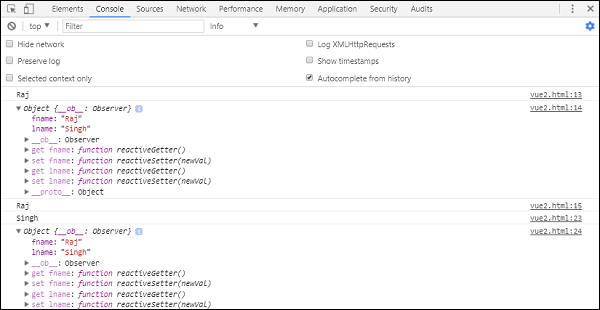
Following are the details displayed in the browser.
Props − Type for props is an array of string or object. It takes an array-based or object-based syntax. They are said to be attributes used to accept data from the parent component.
Example 1
Vue.component('props-demo-simple', {
   props: ['size', 'myMessage']
})
Example 2
Vue.component('props-demo-advanced', {
   props: {
      // just type check
      height: Number,

      // type check plus other validations
      age: {
         type: Number,
         default: 0,
         required: true,
         validator: function (value) {
            return value >= 0
         }
      }
   }
})
propsData − This is used for unit testing.
Type − array of string. For example, { [key: string]: any }. It needs to be passed during the creation of Vue instance.
Example
var Comp = Vue.extend({
   props: ['msg'],
   template: '<div>{{ msg }}</div>'
})
var vm = new Comp({
   propsData: {
      msg: 'hello'
   }
})
Computed − Type: { [key: string]: Function | { get: Function, set: Function } }
Example
<html>
   <head>
      <title>VueJs Introduction</title>
      <script type = "text/javascript" src = "js/vue.js"></script>
   </head>
   <body>
      <script type = "text/javascript">
         var vm = new Vue({
            data: { a: 2 },
            computed: {

               // get only, just need a function
               aSum: function () {
                  return this.a + 2;
               },

               // both get and set
               aSquare: {
                  get: function () {
                     return this.a*this.a;
                  },
                  set: function (v) {
                     this.a = v*2;
                  }
               }
            }
         })
         console.log(vm.aSquare);  // -> 4
         vm.aSquare = 3;
         console.log(vm.a);       // -> 6
         console.log(vm.aSum); // -> 8
      </script>
   </body>
</html>
Computed has two functions aSum and aSquare.
Function aSum just returns this.a+2. Function aSquare again two functions get and set.
Variable vm is an instance of Vue and it calls aSquare and aSum. Also vm.aSquare = 3 calls the set function from aSquare and vm.aSquare calls the get function. We can check the output in the browser which looks like the following screenshot.
Methods − Methods are to be included with the Vue instance as shown in the following code. We can access the function using the Vue object.
<html>
   <head>
      <title>VueJs Introduction</title>
      <script type = "text/javascript" src = "js/vue.js"></script>
   </head>
   <body>
      <script type = "text/javascript">
         var vm = new Vue({
            data: { a: 5 },
            methods: {
               asquare: function () {
                  this.a *= this.a;
               }
            }
         })
         vm.asquare();
         console.log(vm.a); // 25
      </script>
   </body>
</html>
Methods are part of the Vue constructor. Let us make a call to the method using the Vue object vm.asquare (), the value of the property a is updated in the asquare function. The value of a is changed from 1 to 25, and the same is seen reflected in the following browser console.

VueJS - Template
We have learnt in the earlier chapters, how to get an output in the form of text content on the screen. In this chapter, we will learn how to get an output in the form of HTML template on the screen.
To understand this, let us consider an example and see the output in the browser.
<html>
   <head>
      <title>VueJs Instance</title>
      <script type = "text/javascript" src = "js/vue.js"></script>
   </head>
   <body>
      <div id = "vue_det">
         <h1>Firstname : {{firstname}}</h1>
         <h1>Lastname : {{lastname}}</h1>
         <div>{{htmlcontent}}</div>
      </div>
      <script type = "text/javascript" src = "js/vue_template.js"></script>
   </body>
</html>
vue_template.js
var vm = new Vue({
   el: '#vue_det',
   data: {
      firstname : "Ria",
      lastname  : "Singh",
      htmlcontent : "<div><h1>Vue Js Template</h1></div>"
   }
})
Now, suppose we want to show the html content on the page. If we happen to use it with interpolation, i.e. with double curly brackets, this is what we will get in the browser.
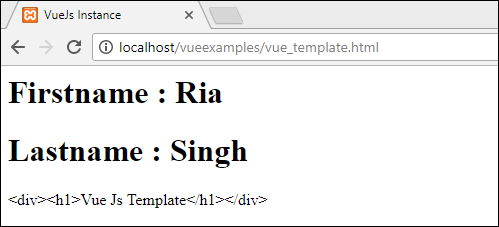
If we see the html content is displayed the same way we have given in the variable htmlcontent, this is not what we want, we want it to be displayed in a proper HTML content on the browser.
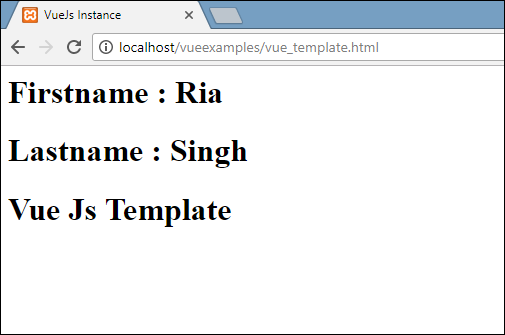
For this, we will have to use v-html directive. The moment we assign v-html directive to the html element, VueJS knows that it has to output it as HTML content. Lets add v-html directive in the .html file and see the difference.
<html>
   <head>
      <title>VueJs Instance</title>
      <script type = "text/javascript" src = "js/vue.js"></script>
   </head>
   <body>
      <div id = "vue_det">
         <h1>Firstname : {{firstname}}</h1>
         <h1>Lastname : {{lastname}}</h1>
         <div v-html = "htmlcontent"></div>
      </div>
      <script type = "text/javascript" src = "js/vue_template.js"></script>
   </body>
</html>
Now, we dont need the double curly brackets to show the HTML content, instead we have used v-html = htmlcontent where htmlcontent is defined inside the js file as follows −
var vm = new Vue({
   el: '#vue_det',
   data: {
      firstname : "Ria",
      lastname  : "Singh",
      htmlcontent : "<div><h1>Vue Js Template</h1></div>"
   }
})
The output in the browser is as follows −
If we inspect the browser, we will see the content is added in the same way as it is defined in the .js file to the variable htmlcontent : "<div><h1>Vue Js Template</h1></div>".
Lets take a look at the inspect element in the browser.
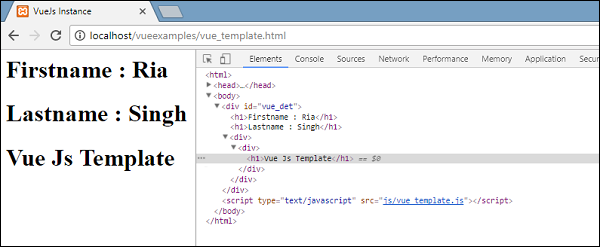
We have seen how to add HTML template to the DOM. Now, we will see how to add attributes to the exiting HTML elements.
Consider, we have an image tag in the HTML file and we want to assign src, which is a part of Vue.
Example
<html>
   <head>
      <title>VueJs Instance</title>
      <script type = "text/javascript" src = "js/vue.js"></script>
   </head>
   <body>
      <div id = "vue_det">
         <h1>Firstname : {{firstname}}</h1>
         <h1>Lastname : {{lastname}}</h1>
         <div v-html = "htmlcontent"></div>
         <img src = "" width = "300" height = "250" />
      </div>
      <script type = "text/javascript" src = "js/vue_template1.js"></script>
   </body>
</html>
Look at the img tag above, the src is blank. We need to add the src to it from vue js. Let us take a look at how to do it. We will store the img src in the data object in the .js file as follows −
var vm = new Vue({
   el: '#vue_det',
   data: {
      firstname : "Ria",
      lastname  : "Singh",
      htmlcontent : "<div><h1>Vue Js Template</h1></div>",
      imgsrc : "images/img.jpg"
   }
})
If we assign the src as follows, the output in the browser will be as shown in the following screenshot.
<img src = "{{imgsrc}}" width = "300" height = "250" />
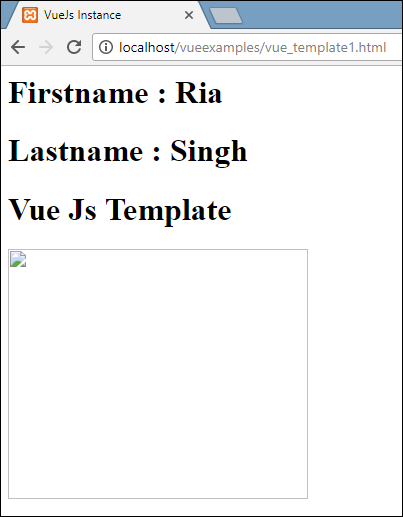
We get a broken image. To assign any attribute to HMTL tag, we need to use v-bind directive. Lets add the src to the image with v-bind directive.
This is how it is assigned in .html file.
<html>
   <head>
      <title>VueJs Instance</title>
      <script type = "text/javascript" src = "js/vue.js"></script>
   </head>
   <body>
      <div id = "vue_det">
         <h1>Firstname : {{firstname}}</h1>
         <h1>Lastname : {{lastname}}</h1>
         <div v-html = "htmlcontent"></div>
         <img v-bind:src = "imgsrc" width = "300" height = "250" />
      </div>
      <script type = "text/javascript" src = "js/vue_template1.js"></script>
   </body>
</html>
We need to prefix the src with v-bind:src = imgsrc and the name of the variable with src.
Following is the output in the browser.
Let us inspect and check how the src looks like with v-bind.
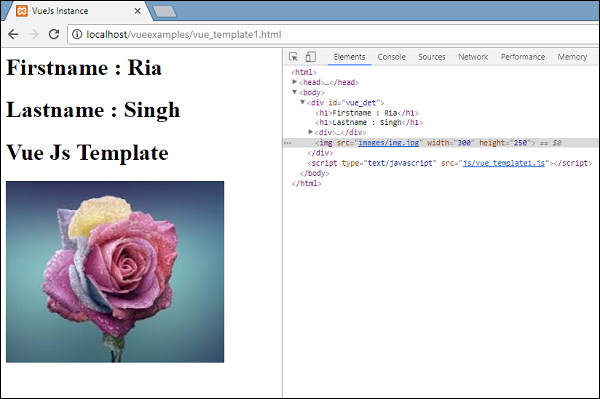
As seen in the above screenshot, the src is assigned without any vuejs properties to it.
VueJS - Components
Vue Components are one of the important features of VueJS that creates custom elements, which can be reused in HTML.
Lets work with an example and create a component, that will give a better understanding on how components work with VueJS.
Example
<html>
<head>
<title>VueJs Instance</title>
<script type = "text/javascript" src = "js/vue.js"></script>
</head>
<body>
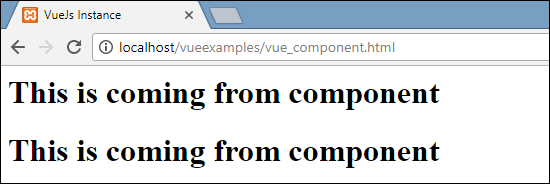
<div id = "component_test">
<testcomponent></testcomponent>
</div>
<div id = "component_test1">
<testcomponent></testcomponent>
</div>
<script type = "text/javascript" src = "js/vue_component.js"></script>
</body>
</html>
vue_component.js
Vue.component('testcomponent',{
   template : '<div><h1>This is coming from component</h1></div>'
});
var vm = new Vue({
   el: '#component_test'
});
var vm1 = new Vue({
   el: '#component_test1'
});
In the .html file, we have created two div with id component_test and component_test1. In the .js files shown above, two Vue instances are created with the div ids. We have created a common component to be used with both the view instances.
To create a component, following is the syntax.
Vue.component('nameofthecomponent',{ // options});
Once a component is created, the name of the component becomes the custom element and the same can be used in the Vue instance element created, i.e. inside the div with ids component_test and component_test1.
In the .js file, we have used a test component as the name of the component and the same name is used as the custom element inside the divs.
Example
<div id = "component_test">
   <testcomponent></testcomponent>
</div>
<div id = "component_test1">
   <testcomponent></testcomponent>
</div>
In the component created in the .js file, we have added a template to which we have assigned a HTML code. This is a way of registering a global component, which can be made a part of any vue instance as shown in the following script.
Vue.component('testcomponent',{
   template : '<div><h1>This is coming from component</h1></div>'
});
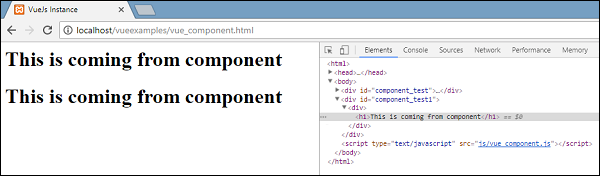
On execution, the same will be reflected in the browser.
The components are given the custom element tag, i.e. <testcomponent></testcomponent>. However, when we inspect the same in the browser, we will not notice the custom tag in plain HTML present in the template as shown in the following screenshot.
We have also directly made the components a part of vue instance as shown in the following script.
var vm = new Vue({
   el: '#component_test',
   components:{
      'testcomponent': {
         template : '<div><h1>This is coming from component</h1></div>'
      }
   }
});
This is called local registration and the components will be a part of only the vue instance created.
So far, we have seen the basic component with the basic options. Now, lets add some more options such as data and methods to it. Just as Vue instance has data and methods, component also shares the same. Hence, we will extend the code, which we have already seen with data and methods.
Example
<html>
   <head>
      <title>VueJs Instance</title>
      <script type = "text/javascript" src = "js/vue.js"></script>
   </head>
   <body>
      <div id = "component_test">
         <testcomponent></testcomponent>
      </div>
      <div id = "component_test1">
         <testcomponent></testcomponent>
      </div>
      <script type = "text/javascript" src = "js/vue_component.js"></script>
   </body>
</html>
vue_component.js
Vue.component('testcomponent',{
   template : '<div v-on:mouseover = "changename()" v-on:mouseout = "originalname();"><h1>Custom Component created by <span id = "name">{{name}}</span></h1></div>',
   data: function() {
      return {
         name : "Ria"
      }
   },
   methods:{
      changename : function() {
         this.name = "Ben";
      },
      originalname: function() {
         this.name = "Ria";
      }
   }
});
var vm = new Vue({
   el: '#component_test'
});
var vm1 = new Vue({
   el: '#component_test1'
});
In the .js file above, we have added data that is a function, which returns an object. The object has a name property, which is assigned the value Ria. This is used in the following template.
template : '<div v-on:mouseover = "changename()" v-on:mouseout = "originalname();"><h1>Custom Component created by <span id = "name">{{name}}</span></h1></div>',
In spite of having data as a function in components, we can use its properties the same way as we use with direct Vue instance. Also, there are two methods added, changename and originalname. In changename, we are changing the name property, and in originalname we are resetting it back to the original name.
We have also added two events on the div, mouseover and mouseout. The details of the events will be discussed in the Events chapter. So for now, mouseover calls changename method and mouseout calls originalname method.
The display of the same is shown in the following browser.
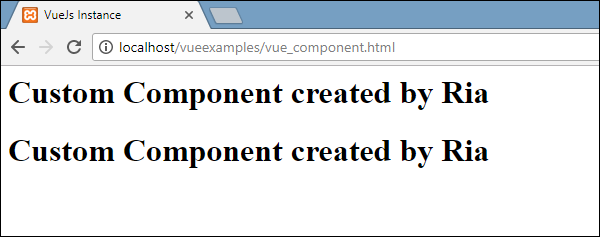
As seen in the above browser, it displays the name assigned in the data property, which is the same name. We have also assigned a mouseover event on the div and also a mouseout. Lets see what happens when we mouseover and mouseout.
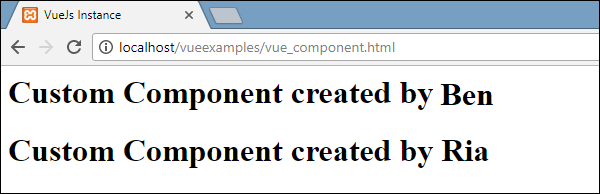
On mouseover, we see the name of the first component is changed to Ben, however, the second one remains as it is. This is because the data component is a function and it returns an object. Thus, when it is changed in one place, the same is not overwritten in other cases.
Dynamic Components
Dynamic components are created using the keyword <component></component> and it is bound using a property as shown in the following example.
Example
<html>
<head>
<title>VueJs Instance</title>
<script type = "text/javascript" src = "js/vue.js"></script>
</head>
<body>
<div id = "databinding">
<component v-bind:is = "view"></component>
</div>
<script type = "text/javascript">
var vm = new Vue({
el: '#databinding',
data: {
view: 'component1'
},
components: {
'component1': {
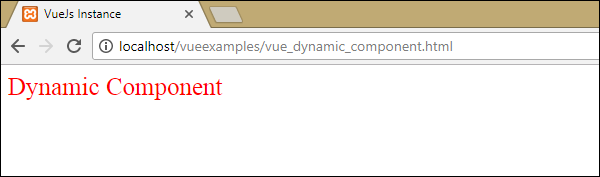
template: '<div><span style = "font-size:25;color:red;">Dynamic Component</span></div>'
}
}
});
</script>
</body>
</html>
Output
Dynamic component is created using the following syntax.
<component v-bind:is = "view"></component>
It has v-bind:is = view, and a value view is assigned to it. View is defined in the Vue instance as follows.
var vm = new Vue({
   el: '#databinding',
   data: {
      view: 'component1'
   },
   components: {
      'component1': {
         template: '<div><span style = "font-size:25;color:red;">Dynamic Component</span></div>'
      }
   }
});
When executed, the template Dynamic Component is displayed in the browser.
VueJS - Computed Properties
We have already seen methods for Vue instance and for components. Computed properties are like methods but with some difference in comparison to methods, which we will discuss in this chapter.
At the end of this chapter, we will be able to make a decision on when to use methods and when to use computed properties.
Lets understand computed properties using an example.
Example
<html>
   <head>
      <title>VueJs Instance</title>
      <script type = "text/javascript" src = "js/vue.js"></script>
   </head>
   <body>
      <div id = "computed_props">
         FirstName : <input type = "text" v-model = "firstname" /> <br/><br/>
         LastName : <input type = "text" v-model = "lastname"/> <br/><br/>
         <h1>My name is {{firstname}} {{lastname}}</h1>
         <h1>Using computed method : {{getfullname}}</h1>
      </div>
      <script type = "text/javascript" src = "js/vue_computedprops.js"></script>
   </body>
</html>
vue_computeprops.js
var vm = new Vue({
   el: '#computed_props',
   data: {
      firstname :"",
      lastname :"",
      birthyear : ""
   },
   computed :{
      getfullname : function(){
         return this.firstname +" "+ this.lastname;
      }
   }
})
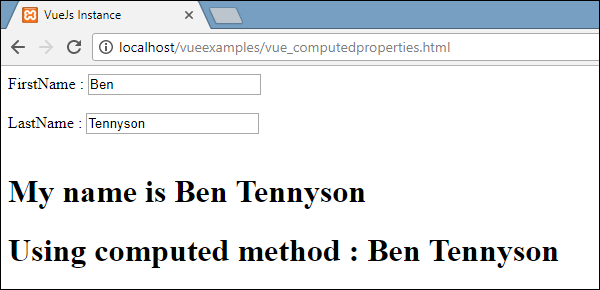
Here, we have created .html file with firstname and lastname. Firstname and Lastname is a textbox which are bound using properties firstname and lastname.
We are calling the computed method getfullname, which returns the firstname and the lastname entered.
computed :{
   getfullname : function(){
      return this.firstname +" "+ this.lastname;
   }
}
When we type in the textbox the same is returned by the function, when the properties firstname or lastname is changed. Thus, with the help of computed we dont have to do anything specific, such as remembering to call a function. With computed it gets called by itself, as the properties used inside changes, i.e. firstname and lastname.
The same is displayed in the following browser. Type in the textbox and the same will get updated using the computed function.
Now, lets try to understand the difference between a method and a computed property. Both are objects. There are functions defined inside, which returns a value.
In case of method, we call it as a function, and for computed as a property. Using the following example, let us understand the difference between method and computed property.
<html>
   <head>
      <title>VueJs Instance</title>
      <script type = "text/javascript" src = "js/vue.js"></script>
   </head>
   <body>
      <div id = "computed_props">
         <h1 style = "background-color:gray;">Random No from computed property: {{getrandomno}}</h1>
         <h1>Random No from method: {{getrandomno1()}}</h1>
         <h1>Random No from method : {{getrandomno1()}}</h1>
         <h1  style = "background-color:gray;">Random No from computed property: {{getrandomno}}</h1>
         <h1  style = "background-color:gray;">Random No from computed property: {{getrandomno}}</h1>
         <h1  style = "background-color:gray;">Random No from computed
            property: {{getrandomno}}</h1>
         <h1>Random No from method: {{getrandomno1()}}</h1>
         <h1>Random No from method: {{getrandomno1()}}</h1>
      </div>
      <script type = "text/javascript">
         var vm = new Vue({
            el: '#computed_props',
            data: {
               name : "helloworld"
            },
            methods: {
               getrandomno1 : function() {
                  return Math.random();
               }
            },
            computed :{
               getrandomno : function(){
                  return Math.random();
               }
            }
         });
      </script>
   </body>
</html>
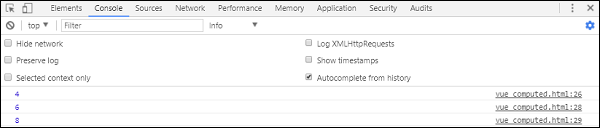
In the above code, we have created a method called getrandomno1 and a computed property with a function getrandomno. Both are giving back random numbers using Math.random().
It is displayed in the browser as shown below. The method and computed property are called many times to show the difference.
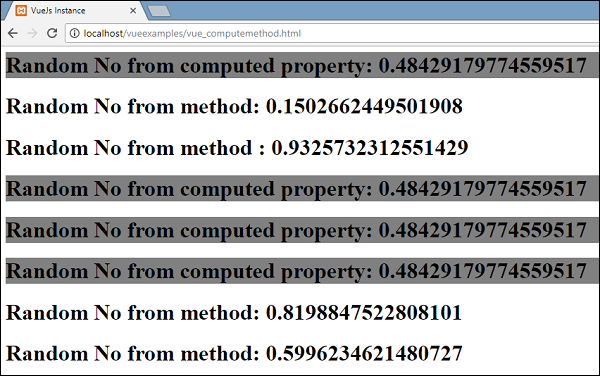
If we look at the values above, we will see that the random numbers returned from the computed property remains the same irrespective of the number of times it is called. This means everytime it is called, the last value is updated for all. Whereas for a method, its a function, hence, everytime it is called it returns a different value.
Get/Set in Computed Properties
In this section, we will learn about get/set functions in computed properties using an example.
Example
<html>
<head>
<title>VueJs Instance</title>
<script type = "text/javascript" src = "js/vue.js"></script>
</head>
<body>
<div id = "computed_props">
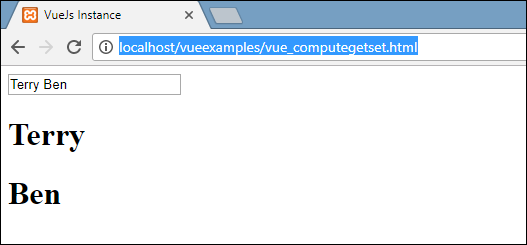
<input type = "text" v-model = "fullname" />
<h1>{{firstName}}</h1>
<h1>{{lastName}}</h1>
</div>
<script type = "text/javascript">
var vm = new Vue({
el: '#computed_props',
data: {
firstName : "Terry",
lastName : "Ben"
},
methods: {
},
computed :{
fullname : {
get : function() {
return this.firstName+" "+this.lastName;
}
}
}
});
</script>
</body>
</html>
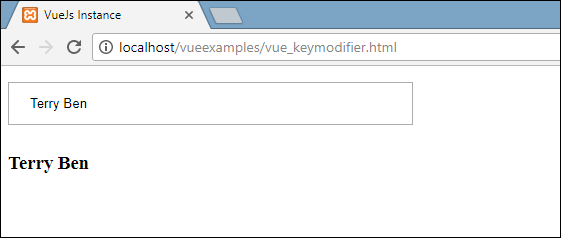
We have defined one input box which is bound to fullname, which is a computed property. It returns a function called get, which gives the fullname, i.e. the first name and the lastname. Also, we have displayed the firstname and lastname as −
<h1>{{firstName}}</h1>
<h1>{{lastName}}</h1>
Lets check the same in the browser.
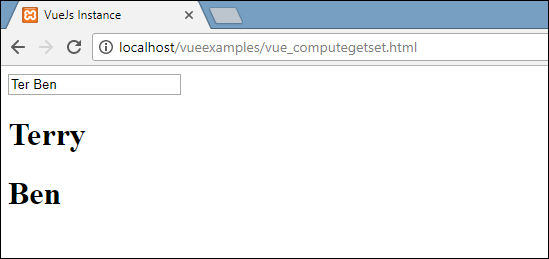
Now, if we change the name in the textbox, we will see the same is not reflected in the name displayed in the following screenshot.
Lets add the setter function in the fullname computed property.
<html>
   <head>
      <title>VueJs Instance</title>
      <script type = "text/javascript" src = "js/vue.js"></script>
   </head>
   <body>
      <div id = "computed_props">
         <input type = "text" v-model = "fullname" />
         <h1>{{firstName}}</h1>
         <h1>{{lastName}}</h1>
      </div>
      <script type = "text/javascript">
         var vm = new Vue({
            el: '#computed_props',
            data: {
               firstName : "Terry",
               lastName : "Ben"
            },
            methods: {
            },
            computed :{
               fullname : {
                  get : function() {
                     return this.firstName+" "+this.lastName;
                  },
                  set : function(name) {
                     var fname = name.split(" ");
                     this.firstName = fname[0];
                     this.lastName = fname[1]
                  }
               }
            }
         });
      </script>
   </body>
</html>
We have added the set function in the fullname computed property.
computed :{
   fullname : {
      get : function() {
         return this.firstName+" "+this.lastName;
      },
      set : function(name) {
         var fname = name.split(" ");
         this.firstName = fname[0];
         this.lastName = fname[1]
      }
   }
}
It has the name as the parameter, which is nothing but the fullname in the textbox. Later, it is split on space and the firstname and the lastname is updated. Now, when we run the code and edit the textbox, the same thing will be displayed in the browser. The firstname and the lastname will be updated because of the set function. The get function returns the firstname and lastname, while the set function updates it, if anything is edited.
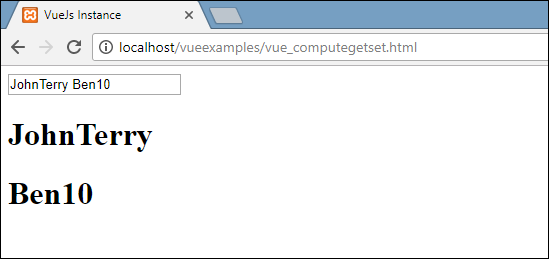
Now, whatever is typed in the textbox matches with what is displayed as seen in the above screenshot.
VueJS - Watch Property
In this chapter, we will learn about the Watch property. Using an example, we will see we can use the Watch property in VueJS.
Example
<html>
<head>
<title>VueJs Instance</title>
<script type = "text/javascript" src = "js/vue.js"></script>
</head>
<body>
<div id = "computed_props">
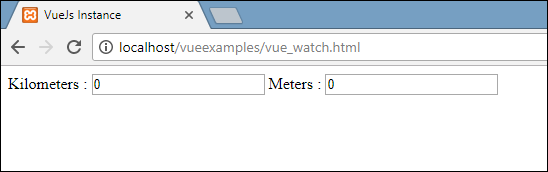
Kilometers : <input type = "text" v-model = "kilometers">
Meters : <input type = "text" v-model = "meters">
</div>
<script type = "text/javascript">
var vm = new Vue({
el: '#computed_props',
data: {
kilometers : 0,
meters:0
},
methods: {
},
computed :{
},
watch : {
kilometers:function(val) {
this.kilometers = val;
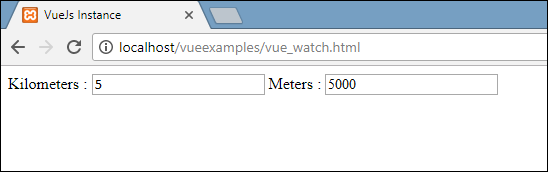
this.meters = val * 1000;
},
meters : function (val) {
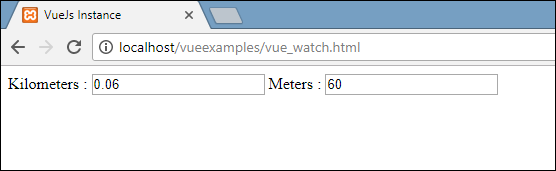
this.kilometers = val/ 1000;
this.meters = val;
}
}
});
</script>
</body>
</html>
In the above code, we have created two textboxes, one with kilometers and another with meters. In data property, the kilometers and meters are initialized to 0. There is a watch object created with two functions kilometers and meters. In both the functions, the conversion from kilometers to meters and from meters to kilometers is done.
As we enter values inside any of the texboxes, whichever is changed, Watch takes care of updating both the textboxes. We do not have to specially assign any events and wait for it to change and do the extra work of validating. Watch takes care of updating the textboxes with the calculation done in the respective functions.
Lets take a look at the output in the browser.
Lets enter some values in the kilometers textbox and see it changing in the meters textbox and vice-versa.
Lets now enter in meters textbox and see it changing in the kilometers textbox. This is the display seen in the browser.
VueJS - Binding
In this chapter will learn how to manipulate or assign values to HTML attributes, change the style, and assign classes with the help of binding directive called v-bind available with VueJS.
Lets consider an example to understand why we need and when to use v-bind directive for data binding.
Example
<html>
   <head>
      <title>VueJs Instance</title>
      <script type = "text/javascript" src = "js/vue.js"></script>
   </head>
   <body>
      <div id = "databinding">
         {{title}}<br/>
         <a href = "hreflink" target = "_blank"> Click Me </a> <br/>
         <a href = "{{hreflink}}" target = "_blank">Click Me </a>  <br/>
         <a v-bind:href = "hreflink" target = "_blank">Click Me </a>   <br/>
      </div>
      <script type = "text/javascript">
         var vm = new Vue({
            el: '#databinding',
            data: {
               title : "DATA BINDING",
               hreflink : "http://www.google.com"
            }
         });
      </script>
   </body>
</html>
In above example, we have displayed a title variable and three anchor links. We have also assigned a value to the href from the data object.
Now, if we check the output in the browser and inspect, we will see the first two anchor links do not have the href correctly as shown in the following screenshot.
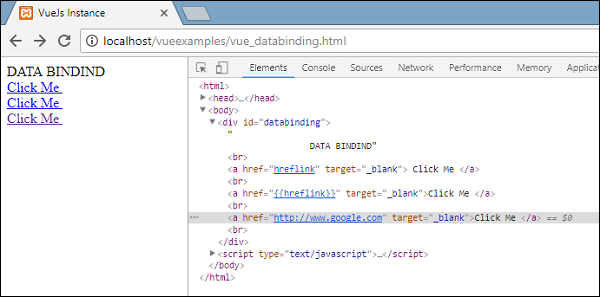
The first clickme shows the href as hreflink, and the second one shows it in {{hreflink}}, while the last one displays the correct url as we require.
Hence, to assign values to HTML attributes, we need to bind it with the directive v-bind as follows.
<a v-bind:href = "hreflink" target = "_blank">Click Me </a>
VueJS also provides a shorthand for v-bind as follows.
<a :href = "hreflink" target = "_blank">Click Me </a>
If we see the inspect element in the browser, the anchor tag does not show the v-bind attribute, however, it displays the plain HTML. None of the VueJS properties are seen when we inpsect the DOM.
Binding HTML Classes
To bind HTML class, we need to use v-bind: class. Lets consider an example and bind classes in it.
Example
<html>
   <head>
      <title>VueJs Instance</title>
      <script type = "text/javascript" src = "js/vue.js"></script>
   </head>
   <body>
      <style>
         .active {
            background: red;
         }
      </style>
      <div id = "classbinding">
         <div v-bind:class = "{active:isactive}"><b>{{title}}</b></div>
      </div>
      <script type = "text/javascript">
         var vm = new Vue({
            el: '#classbinding',
            data: {
               title : "CLASS BINDING",
               isactive : true
            }
         });
      </script>
   </body>
</html>
There is a div created with v-bind: class= {active: isactive}.
Here, isactive is a variable which is based on true or false. It will apply the class active to the div. In the data object, we have assigned the isactive variable as true. There is a class defined in the style .active with the background color as red.
If the variable isactive is true, the color will be applied otherwise not. Following will be the output in the browser.
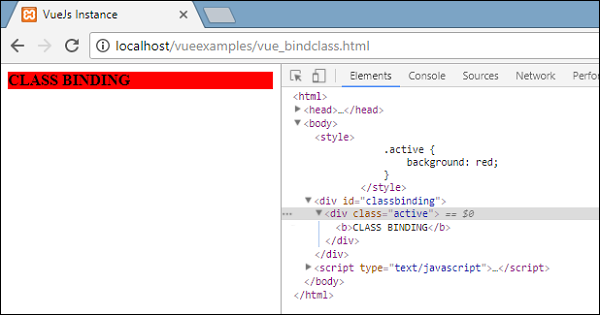
In above display, we can see the background color is red. The class = active is applied to the div.
Now, lets change the value of the variable to false and see the output. The variable isactive is changed to false as shown in the following code.
<html>
   <head>
      <title>VueJs Instance</title>
      <script type = "text/javascript" src = "js/vue.js"></script>
   </head>
   <body>
      <style>
         .active {
            background: red;
         }
      </style>
      <div id = "classbinding">
         <div v-bind:class = "{active:isactive}"><b>{{title}}</b></div>
      </div>
      <script type = "text/javascript">
         var vm = new Vue({
            el: '#classbinding',
            data: {
               title : "CLASS BINDING",
               isactive : false
            }
         });
      </script>
   </body>
</html>
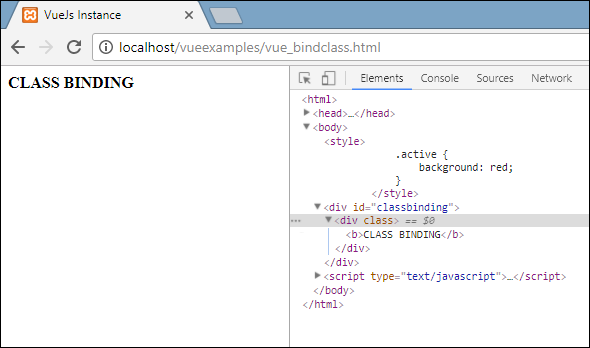
In the above display, we can see the active class is not applied to the div.
We can also assign multiple classes to the HTML tags using v-bind attribute.
Example
<html>
<head>
<title>VueJs Instance</title>
<script type = "text/javascript" src = "js/vue.js"></script>
</head>
<body>
<style>
.info {
color: #00529B;
background-color: #BDE5F8;
}
div {
margin: 10px 0;
padding: 12px;
}
.active {
color: #4F8A10;
background-color: #DFF2BF;
}
.displayError{
color: #D8000C;
background-color: #FFBABA;
}
</style>
<div id = "classbinding">
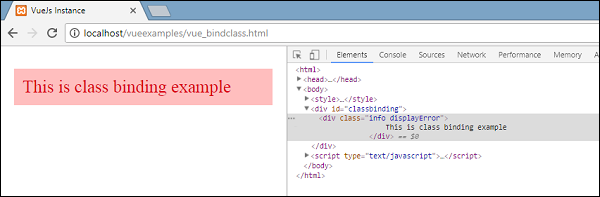
<div class = "info" v-bind:class = "{ active: isActive, 'displayError': hasError }">
{{title}}
</div>
</div>
<script type = "text/javascript">
var vm = new Vue({
el: '#classbinding',
data: {
title : "This is class binding example",
isActive : false,
hasError : false
}
});
</script>
</body>
</html>
For the div in the above code, we have applied a normal class, example class = info. Based on isActive and hasError variable, the other classes will get applied to the div.
Output
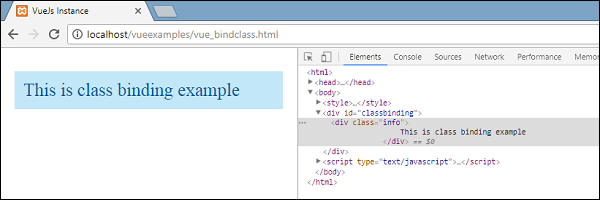
This is a normal class applied. Both the variables are false right now. Lets make isActive variable to true and see the output.
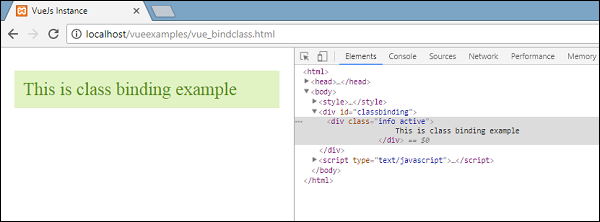
In the above display, in the DOM we can see two classes assigned to the div, info and active. Lets make hasError variable true and isActive as false.
Now, when we see in the above display, info and displayError class is applied to the div. This is how we can apply multiple classes based on conditions.
We can also pass class as an array. Let us take an example to understand this.
Example
<html>
   <head>
      <title>VueJs Instance</title>
      <script type = "text/javascript" src = "js/vue.js"></script>
   </head>
   <body>
      <style>
         .info {
            color: #00529B;
            background-color: #BDE5F8;
         }
         div {
            margin: 10px 0;
            padding: 12px;
            font-size : 25px;
         }
         .active {
            color: #4F8A10;
            background-color: #DFF2BF;
         }
         .displayError{
            color: #D8000C;
            background-color: #FFBABA;
         }
      </style>
      <div id = "classbinding">
         <div v-bind:class = "[infoclass, errorclass]">{{title}}</div>
      </div>
      <script type = "text/javascript">
         var vm = new Vue({
            el: '#classbinding',
            data: {
               title : "This is class binding example",
               infoclass : 'info',
               errorclass : 'displayError'
            }
         });
      </script>
   </body>
</html>
Output
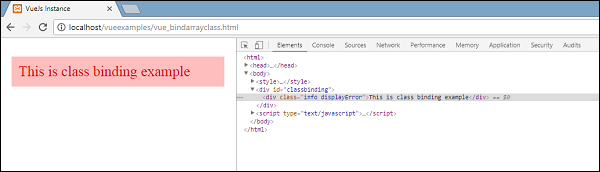
As we can see above, both classes get applied to the div. Lets use a variable and based on the value of the variable, assign the class.
<html>
<head>
<title>VueJs Instance</title>
<script type = "text/javascript" src = "js/vue.js"></script>
</head>
<body>
<style>
.info {
color: #00529B;
background-color: #BDE5F8;
}
div {
margin: 10px 0;
padding: 12px;
font-size : 25px;
}
.active {
color: #4F8A10;
background-color: #DFF2BF;
}
.displayError{
color: #D8000C;
background-color: #FFBABA;
}
</style>
<div id = "classbinding">
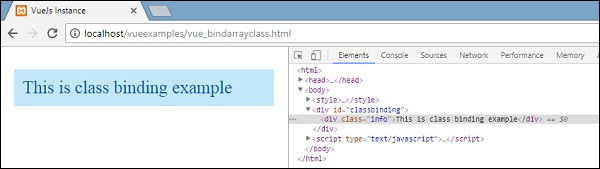
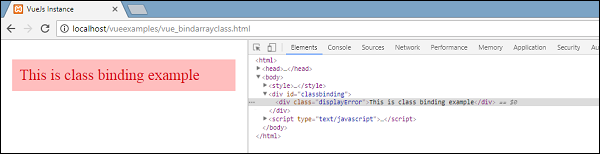
<div v-bind:class = "[isActive ? infoclass : '', haserror ? errorclass : '']">{{title}}</div>
</div>
<script type = "text/javascript">
var vm = new Vue({
el: '#classbinding',
data: {
title : "This is class binding example",
infoclass : 'info',
errorclass : 'displayError',
isActive : true,
haserror : false
}
});
</script>
</body>
</html>
We have used two variables isActive and haserror and the same is used for the div while class binding as shown in the following div tag.
<div v-bind:class = "[isActive ? infoclass : '', haserror ? errorclass : '']">{{title}}</div>
If isActive is true, then infoclass will be assigned to it. The same goes for haserror, if it is true, then only errorClass will be applied to it.
Now, let us make haserror variable as true and isActive variable as false.
We will now add v-bind for classes in the components. In the following example, we have added a class to the component template and also to the component.
Example
<html>
<head>
<title>VueJs Instance</title>
<script type = "text/javascript" src = "js/vue.js"></script>
</head>
<body>
<style>
.info {
color: #00529B;
background-color: #BDE5F8;
}
div {
margin: 10px 0;
padding: 12px;
font-size : 25px;
}
.active {
color: #4F8A10;
background-color: #DFF2BF;
}
.displayError{
color: #D8000C;
background-color: #FFBABA;
}
</style>
<div id = "classbinding">
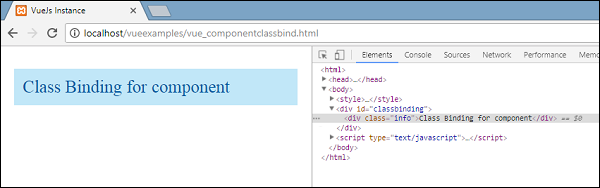
<new_component class = "active"></new_component>
</div>
<script type = "text/javascript">
var vm = new Vue({
el: '#classbinding',
data: {
title : "This is class binding example",
infoclass : 'info',
errorclass : 'displayError',
isActive : false,
haserror : true
},
components:{
'new_component' : {
template : '<div class = "info">Class Binding for component</div>'
}
}
});
</script>
</body>
</html>
Following is the output in the browser. It applies both the classes to final div.
<div class = info active></div>
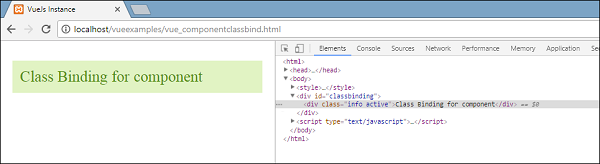
Add a variable in the component section to display, based on true/false.
<html>
   <head>
      <title>VueJs Instance</title>
      <script type = "text/javascript" src = "js/vue.js"></script>
   </head>
   <body>
      <style>
         .info {
            color: #00529B;
            background-color: #BDE5F8;
         }
         div {
            margin: 10px 0;
            padding: 12px;
            font-size : 25px;
         }
         .active {
            color: #4F8A10;
            background-color: #DFF2BF;
         }
         .displayError{
            color: #D8000C;
            background-color: #FFBABA;
         }
      </style>
      <div id = "classbinding">
         <new_component v-bind:class = "{active:isActive}"></new_component>
      </div>
      <script type = "text/javascript">
         var vm = new Vue({
            el: '#classbinding',
            data: {
               title : "This is class binding example",
               infoclass : 'info',
               errorclass : 'displayError',
               isActive : false,
               haserror : true
            },
            components:{
               'new_component' : {
                  template : '<div class = "info">Class Binding for component</div>'
               }
            }
         });
      </script>
   </body>
</html>
Since the variable is false, the active class is not applied and the info class is applied as shown in the following screenshot.
Binding Inline Styles
Object Syntax
Example
<html>
   <head>
      <title>VueJs Instance</title>
      <script type = "text/javascript" src = "js/vue.js"></script>
   </head>
   <body>
      <div id = "databinding">
         <div v-bind:style = "{ color: activeColor, fontSize: fontSize + 'px' }">{{title}}</div>
      </div>
      <script type = "text/javascript">
         var vm = new Vue({
            el: '#databinding',
            data: {
               title : "Inline style Binding",
               activeColor: 'red',
               fontSize :'30'
            }
         });
      </script>
   </body>
</html>
Output
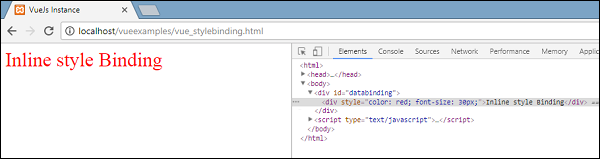
In the above example, for the div, the style is applied and the data is fetched from the data object.
<div v-bind:style = "{ color: activeColor, fontSize: fontSize + 'px' }">{{title}}</div>
data: {
   title : "Inline style Binding",
   activeColor: 'red',
   fontSize :'30'
}
We can also do the same thing by assigning all the values to a variable and then assigning the variable to the div.
Example
<html>
<head>
<title>VueJs Instance</title>
<script type = "text/javascript" src = "js/vue.js"></script>
</head>
<body>
<div id = "databinding">
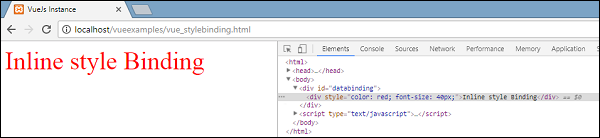
<div v-bind:style = "styleobj">{{title}}</div>
</div>
<script type = "text/javascript">
var vm = new Vue({
el: '#databinding',
data: {
title : "Inline style Binding",
styleobj : {
color: 'red',
fontSize :'40px'
}
}
});
</script>
</body>
</html>
The color and the fontSize is assigned to the object called styleobj and the same is assigned to the div.
<div v-bind:style = "styleobj">{{title}}</div>
Output
Form Input Bindings
So far in the example we have created, we have seen v-model binding the input text element and the value binded to a variable assigned. Lets learn more about it in this section.
Example
<html>
<head>
<title>VueJs Instance</title>
<script type = "text/javascript" src = "js/vue.js"></script>
</head>
<body>
<div id = "databinding">
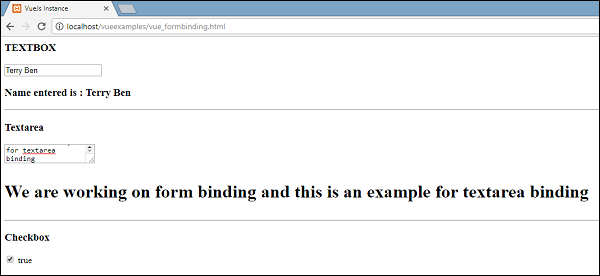
<h3>TEXTBOX</h3>
<input v-model = "name" placeholder = "Enter Name" />
<h3>Name entered is : {{name}}</h3>
<hr/>
<h3>Textarea</h3>
<textarea v-model = "textmessage" placeholder = "Add Details"></textarea>
<h1><p>{{textmessage}}</p></h1>
<hr/>
<h3>Checkbox</h3>
<input type = "checkbox" id = "checkbox" v-model = "checked"> {{checked}}
</div>
<script type = "text/javascript">
var vm = new Vue({
el: '#databinding',
data: {
name:'',
textmessage:'',
checked : false
}
});
</script>
</body>
</html>
Whatever we type in the texbox is displayed below. v-model is assigned the value name and the name is displayed in {{name}}, which displays whatever is typed in the textbox.
Output
Lets checkout out some more examples and how to use it.
Radio and Select
Example
<html>
<head>
<title>VueJs Instance</title>
<script type = "text/javascript" src = "js/vue.js"></script>
</head>
<body>
<div id = "databinding">
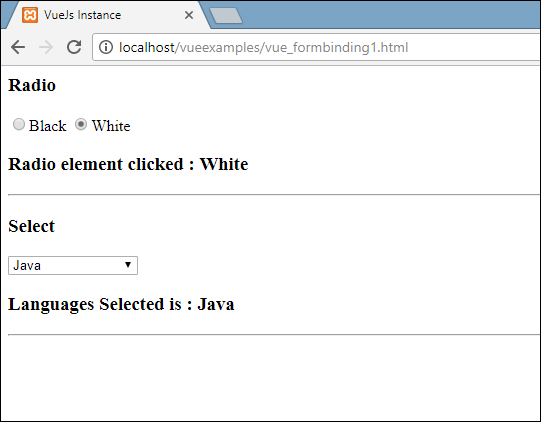
<h3>Radio</h3>
<input type = "radio" id = "black" value = "Black" v-model = "picked">Black
<input type = "radio" id = "white" value = "White" v-model = "picked">White
<h3>Radio element clicked : {{picked}} </h3>
<hr/>
<h3>Select</h3>
<select v-model = "languages">
<option disabled value = "">Please select one</option>
<option>Java</option>
<option>Javascript</option>
<option>Php</option>
<option>C</option>
<option>C++</option>
</select>
<h3>Languages Selected is : {{ languages }}</h3>
<hr/>
</div>
<script type = "text/javascript">
var vm = new Vue({
el: '#databinding',
data: {
picked : 'White',
languages : "Java"
}
});
</script>
</body>
</html>
Output
Modifiers
We have used three modifiers in the example - trim, number, and lazy.
Example
<html>
   <head>
      <title>VueJs Instance</title>
      <script type = "text/javascript" src = "js/vue.js"></script>
   </head>
   <body>
      <div id = "databinding">
         <span style = "font-size:25px;">Enter Age:</span> <input v-model.number = "age" type = "number">
         <br/>
         <span style = "font-size:25px;">Enter Message:</span> <input v-model.lazy = "msg">
         <h3>Display Message : {{msg}}</h3>
         <br/>
         <span style = "font-size:25px;">Enter Message : </span><input v-model.trim = "message">
         <h3>Display Message : {{message}}</h3>
      </div>
      <script type = "text/javascript">
         var vm = new Vue({
            el: '#databinding',
            data: {
               age : 0,
               msg: '',
               message : ''
            }
         });
      </script>
   </body>
</html>
Output
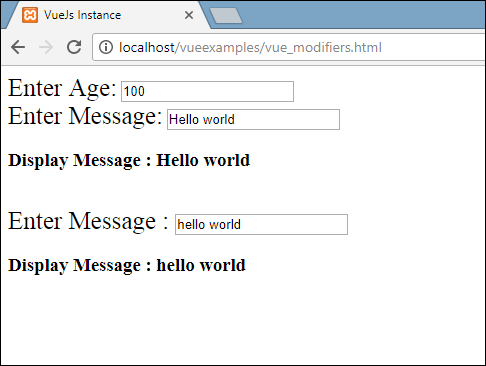
Number modifier allows to only enter numbers. It will not take any other input besides numbers.
<span style = "font-size:25px;">Enter Age:</span> <input v-model.number = "age" type = "number">
Lazy modifier will display the content present in the textbox once it is fully entered and the user leaves the textbox.
<span style = "font-size:25px;">Enter Message:</span> <input v-model.lazy = "msg">
Trim modifier will remove any spaces entered at the start and at the end.
<span style = "font-size:25px;">Enter Message : </span><input v-model.trim = "message">
VueJS - Events
v-on is the attribute added to the DOM elements to listen to the events in VueJS.
Click Event
Example
<html>
   <head>
      <title>VueJs Instance</title>
      <script type = "text/javascript" src = "js/vue.js"></script>
   </head>
   <body>
      <div id = "databinding">
         <button v-on:click = "displaynumbers">Click ME</button>
         <h2> Add Number 100 + 200 = {{total}}</h2>
      </div>
      <script type = "text/javascript">
         var vm = new Vue({
            el: '#databinding',
            data: {
               num1: 100,
               num2 : 200,
               total : ''
            },
            methods : {
               displaynumbers : function(event) {
                  console.log(event);
                  return this.total =  this.num1+ this.num2;
               }
            },
         });
      </script>
   </body>
</html>
Output
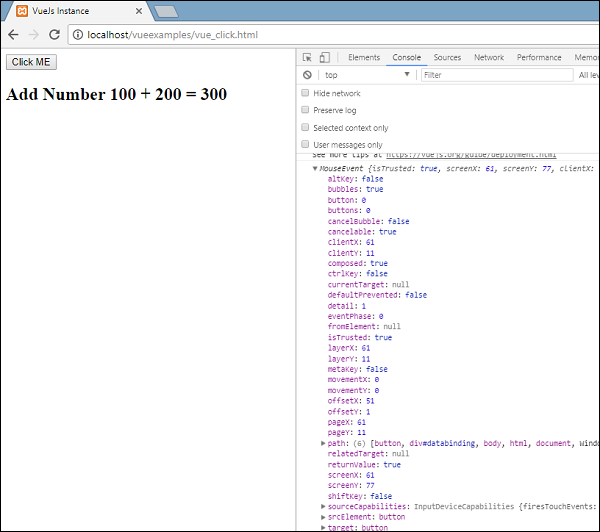
The following code is used to assign a click event for the DOM element.
<button v-on:click = "displaynumbers">Click ME</button>
There is a shorthand for v-on, which means we can also call the event as follows −
<button @click = "displaynumbers">Click ME</button>
On the click of the button, it will call the method displaynumbers, which takes in the event and we have consoled the same in the browser as shown above.
We will now check one more event mouseover mouseout.
Example
<html>
   <head>
      <title>VueJs Instance</title>
      <script type = "text/javascript" src = "js/vue.js"></script>
   </head>
   <body>
      <div id = "databinding">
         <div v-bind:style = "styleobj" v-on:mouseover = "changebgcolor" v-on:mouseout = "originalcolor"></div>
      </div>
      <script type = "text/javascript">
         var vm = new Vue({
            el: '#databinding',
            data: {
               num1: 100,
               num2 : 200,
               total : '',
               styleobj : {
                  width:"100px",
                  height:"100px",
                  backgroundColor:"red"
               }
            },
            methods : {
               changebgcolor : function() {
                  this.styleobj.backgroundColor = "green";
               },
               originalcolor : function() {
                  this.styleobj.backgroundColor = "red";
               }
            },
         });
      </script>
   </body>
</html>
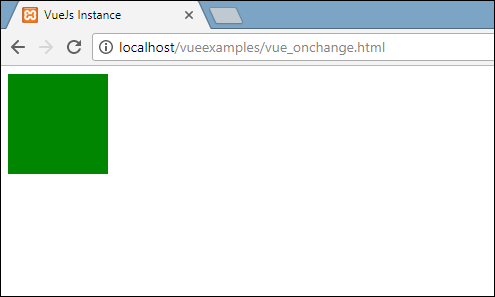
In the above example, we have created a div with width and height as 100px. It has been given a background color red. On mouseover, we are changing the color to green, and on mouseout we are changing the color back to red.
Hence, during mouseover, a method is called changebgcolor and once we move the mouse out of the div, a method is called originalcolor.
This is done as follows −
<div v-bind:style = "styleobj" v-on:mouseover = "changebgcolor" v-on:mouseout = "originalcolor"></div>
Two events - mouseover and mouseout - is assigned to the div as shown above. We have created a styleobj variable and given the required style to be assigned to the div. The same variable is binded to the div using v-bind:style = styleobj
In changebgcolor, we are changing the color to green using the following code.
changebgcolor : function() {
   this.styleobj.backgroundColor = "green";
}
Using the stylobj variable, we are changing the color to green.
Similarly, the following code is used to change it back to the original color.
originalcolor : function() {
   this.styleobj.backgroundColor = "red";
}
This is what we see in the browser.
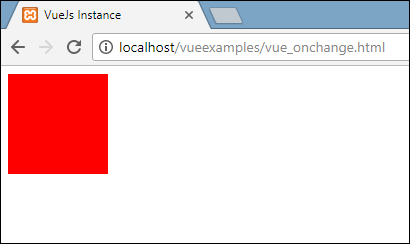
When we mouseover, the color will change to green as shown in the following screenshot.
Event Modifiers
Vue has event modifiers available on v-on attribute. Following are the modifiers available −
.once
Allows the event to execute only once.
Syntax
<button v-on:click.once = "buttonclicked">Click Once</button>
We need to add dot operator while calling the modifiers as shown in the syntax above. Let us use it in an example and understand the working of the once modifier.
Example
<html>
   <head>
      <title>VueJs Instance</title>
      <script type = "text/javascript" src = "js/vue.js"></script>
   </head>
   <body>
      <div id = "databinding">
         <button v-on:click.once = "buttonclickedonce" v-bind:style = "styleobj">Click Once</button>
         Output:{{clicknum}}
         <br/><br/>
         <button v-on:click = "buttonclicked"  v-bind:style = "styleobj">Click Me</button>
         Output:{{clicknum1}}
      </div>
      <script type = "text/javascript">
         var vm = new Vue({
            el: '#databinding',
            data: {
               clicknum : 0,
               clicknum1 :0,
               styleobj: {
                  backgroundColor: '#2196F3!important',
                  cursor: 'pointer',
                  padding: '8px 16px',
                  verticalAlign: 'middle',
               }
            },
            methods : {
               buttonclickedonce : function() {
                  this.clicknum++;
               },
               buttonclicked : function() {
                  this.clicknum1++;
               }
            }
         });
      </script>
   </body>
</html>
Output
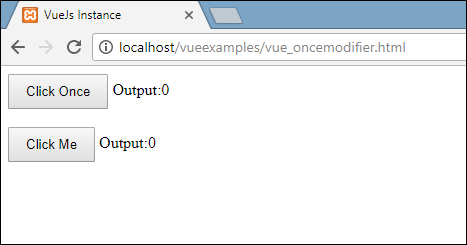
In the above example, we have created two butttons. The button with Click Once label has added the once modifier and the other button is without any modifier. This is the way the buttons are defined.
<button v-on:click.once = "buttonclickedonce" v-bind:style = "styleobj">Click Once</button>
<button v-on:click = "buttonclicked"  v-bind:style = "styleobj">Click Me</button>
The first button calls the method buttonclickedonce and the second button calls the method buttonclicked.
buttonclickedonce : function() {
   this.clicknum++;
},
buttonclicked : function() {
   this.clicknum1++;
}
There are two variables defined in the clicknum and clicknum1. Both are incremented when the button is clicked. Both the variables are initialized to 0 and the display is seen in the output above.
On the click of the first button, the variable clicknum increments by 1. On the second click, the number is not incremented as the modifier prevents it from executing or performing any action item assigned on the click of the button.
On the click of the second button, the same action is carried out, i.e. the variable is incremented. On every click, the value is incremented and displayed.
Following is the output we get in the browser.

.prevent
Syntax
<a href = "http://www.google.com" v-on:click.prevent = "clickme">Click Me</a>
Example
<html>
   <head>
      <title>VueJs Instance</title>
      <script type = "text/javascript" src = "js/vue.js"></script>
   </head>
   <body>
      <div id = "databinding">
         <a href = "http://www.google.com" v-on:click = "clickme" target = "_blank" v-bind:style = "styleobj">Click Me</a>
      </div>
      <script type = "text/javascript">
         var vm = new Vue({
            el: '#databinding',
            data: {
               clicknum : 0,
               clicknum1 :0,
               styleobj: {
                  color: '#4CAF50',
                  marginLeft: '20px',
                  fontSize: '30px'
               }
            },
            methods : {
               clickme : function() {
                  alert("Anchor tag is clicked");
               }
            }
         });
      </script>
   </body>
</html>
Output
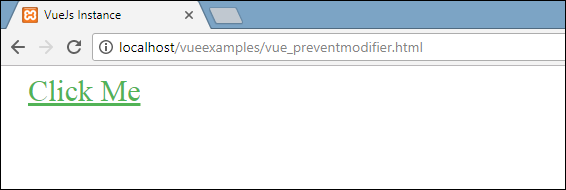
If we click the clickme link, it will send an alert as Anchor tag is clicked and it will open the link https://www.google.com in a new tab as shown in the following screenshots.
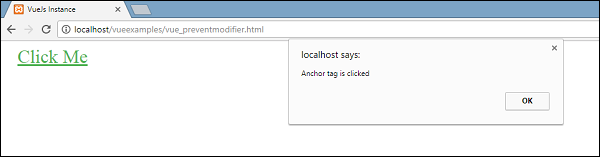
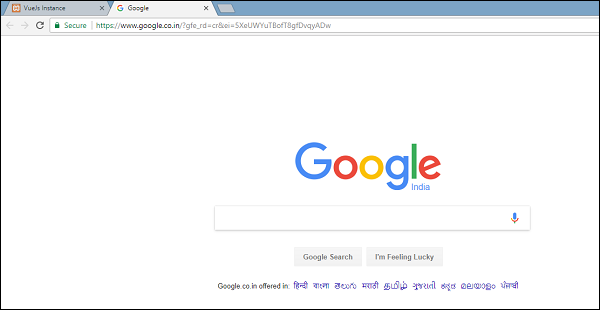
Now this works as a normal way, i.e. the link opens up as we want. In case we dont want the link to open up, we need to add a modifier prevent to the event as shown in the following code.
<a href = "http://www.google.com" v-on:click.prevent = "clickme" target = "_blank" v-bind:style = "styleobj">Click Me</a>
Once added, if we click on the button, it will send an alert message and will not open the link anymore. The prevent modifier prevents the link from opening and only executes the method assigned to the tag.
Example
<html>
   <head>
      <title>VueJs Instance</title>
      <script type = "text/javascript" src = "js/vue.js"></script>
   </head>
   <body>
      <div id = "databinding">
         <a href = "http://www.google.com" v-on:click.prevent = "clickme" target = "_blank" v-bind:style = "styleobj">Click Me</a>
      </div>
      <script type = "text/javascript">
         var vm = new Vue({
            el: '#databinding',
            data: {
               clicknum : 0,
               clicknum1 :0,
               styleobj: {
                  color: '#4CAF50',
                  marginLeft: '20px',
                  fontSize: '30px'
               }
            },
            methods : {
               clickme : function() {
                  alert("Anchor tag is clicked");
               }
            }
         });
      </script>
   </body>
</html>
Output
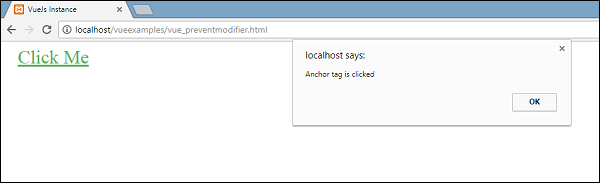
On the click of the link, it will display the alert message and does not open the url anymore.
Event - Key Modifiers
VueJS offers key modifiers based on which we can control the event handling. Consider we have a textbox and we want the method to be called only when we press Enter. We can do so by adding key modifiers to the events as follows.
Syntax
<input type = "text" v-on:keyup.enter = "showinputvalue"/>
The key that we want to apply to our event is V-on.eventname.keyname (as shown above)
We can make use of multiple keynames. For example, V-on.keyup.ctrl.enter
Example
<html>
   <head>
      <title>VueJs Instance</title>
      <script type = "text/javascript" src = "js/vue.js"></script>
   </head>
   <body>
      <div id = "databinding">
         <input type = "text" v-on:keyup.enter = "showinputvalue" v-bind:style = "styleobj" placeholder = "Enter your name"/>
         <h3> {{name}}</h3>
      </div>
      <script type = "text/javascript">
         var vm = new Vue({
            el: '#databinding',
            data: {
               name:'',
               styleobj: {
                  width: "30%",
                  padding: "12px 20px",
                  margin: "8px 0",
                  boxSizing: "border-box"
               }
            },
            methods : {
               showinputvalue : function(event) {
                  this.name=event.target.value;
               }
            }
         });
      </script>
   </body>
</html>
Output
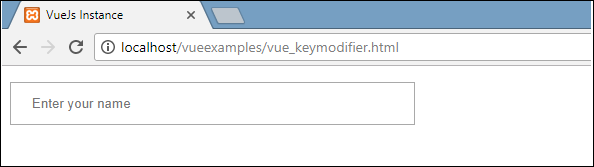
Type something in the textbox and we will see it is displayed only when we press Enter.
Custom Events
Parent can pass data to its component using the prop attribute, however, we need to tell the parent when there are changes in the child component. For this, we can use custom events.
The parent component can listen to the child component event using v-on attribute.
Example
<html>
<head>
<title>VueJs Instance</title>
<script type = "text/javascript" src = "js/vue.js"></script>
</head>
<body>
<div id = "databinding">
<div id = "counter-event-example">
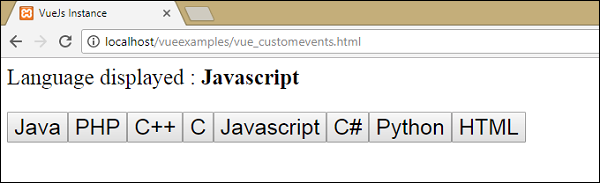
<p style = "font-size:25px;">Language displayed : <b>{{ languageclicked }}</b></p>
<button-counter
v-for = "(item, index) in languages"
v-bind:item = "item"
v-bind:index = "index"
v-on:showlanguage = "languagedisp"></button-counter>
</div>
</div>
<script type = "text/javascript">
Vue.component('button-counter', {
template: '<button v-on:click = "displayLanguage(item)"><span style = "font-size:25px;">{{ item }}</span></button>',
data: function () {
return {
counter: 0
}
},
props:['item'],
methods: {
displayLanguage: function (lng) {
console.log(lng);
this.$emit('showlanguage', lng);
}
},
});
var vm = new Vue({
el: '#databinding',
data: {
languageclicked: "",
languages : ["Java", "PHP", "C++", "C", "Javascript", "C#", "Python", "HTML"]
},
methods: {
languagedisp: function (a) {
this.languageclicked = a;
}
}
})
</script>
</body>
</html>
Output
The above code shows the data transfer between the parent component and the child component.
The component is created using the following code.
<button-counter
   v-for = "(item, index) in languages"
   v-bind:item = "item"
   v-bind:index = "index"
   v-on:showlanguage = "languagedisp">
</button-counter>
There is a v-for attribute, which will loop with the languages array. The array has a list of languages in it. We need to send the details to the child component. The values of the array are stored in the item and the index.
v-bind:item = "item"
v-bind:index = "index"
To refer to the values of the array, we need to bind it first to a variable and the varaiable is referred using props property as follows.
Vue.component('button-counter', {
   template: '<button v-on:click = "displayLanguage(item)"><span style = "font-size:25px;">{{ item }}</span></button>',
   data: function () {
      return {
         counter: 0
      }
   },
   props:['item'],
   methods: {
      displayLanguage: function (lng) {
         console.log(lng);
         this.$emit('showlanguage', lng);
      }
   },
});
The props property contains the item in an array form. We can also refer to the index as −
props:[item, index]
There is also an event added to the component as follows −
<button-counter
   v-for = "(item, index) in languages"
   v-bind:item = "item"
   v-bind:index = "index"
   v-on:showlanguage = "languagedisp">
</button-counter>
The name of the event is showlanguage and it calls a method called languagedisp which is defined in the Vue instance.
In the component, the template is defined as follows −
template: '<button v-on:click = "displayLanguage(item)"><span style = "font-size:25px;">{{ item }}</span></button>',
There is a button created. The button will get created with as many count in the language array. On the click of the button, there is a method called displayLanguage and the button clicked item is passed as a param to the function. Now the component needs to send the clicked element to the parent component for display which is done as follows −
Vue.component('button-counter', {
   template: '<button v-on:click = "displayLanguage(item)"><span style = "font-size:25px;">{{ item }}</span></button>',
   data: function () {
      return {
         counter: 0
      }
   },
   props:['item'],
   methods: {
      displayLanguage: function (lng) {
         console.log(lng);
         this.$emit('showlanguage', lng);
      }
   },
});
The method displayLanguage calls this.$emit(showlanguage, lng);
$emit is used to call the parent component method. The method showlanguage is the event name given on the component with v-on.
<button-counter
   v-for = "(item, index) in languages"
   v-bind:item = "item"
   v-bind:index = "index"
   v-on:showlanguage = "languagedisp">
</button-counter>
We are passing a parameter, i.e. the name of the language clicked to the method of the main parent Vue instance which is defined as follows.
var vm = new Vue({
   el: '#databinding',
   data: {
      languageclicked: "",
      languages : ["Java", "PHP", "C++", "C", "Javascript", "C#", "Python", "HTML"]
   },
   methods: {
      languagedisp: function (a) {
         this.languageclicked = a;
      }
   }
})
Here, the emit triggers showlanguage which in turn calls languagedisp from the Vue instance methods. It assigns the language clicked value to the variable languageclicked and the same is displayed in the browser as shown in the following screenshot.
<p style = "font-size:25px;">Language displayed : <b>{{ languageclicked }}</b></p>
Following is the output we get in the browser.

VueJS - Rendering
In this chapter, we will learn about conditional rendering and list rendering. In conditional rendering, we will discuss about using if, if-else, if-else-if, show, etc. In list rendering, we will discuss how to use for loop.
Conditional Rendering
Lets get started and work on a example first to explain the details for conditional rendering. With conditional rendering, we want to output only when the condition is met and the conditional check is done with the help of if, if-else, if-else-if, show, etc.
v-if
Example
<html>
   <head>
      <title>VueJs Instance</title>
      <script type = "text/javascript" src = "js/vue.js"></script>
   </head>
   <body>
      <div id = "databinding">
         <button v-on:click = "showdata" v-bind:style = "styleobj">Click Me</button>
         <span style = "font-size:25px;"><b>{{show}}</b></span>
         <h1 v-if = "show">This is h1 tag</h1>
         <h2>This is h2 tag</h2>
      </div>
      <script type = "text/javascript">
         var vm = new Vue({
            el: '#databinding',
            data: {
               show: true,
               styleobj: {
                  backgroundColor: '#2196F3!important',
                  cursor: 'pointer',
                  padding: '8px 16px',
                  verticalAlign: 'middle',
               }
            },
            methods : {
               showdata : function() {
                  this.show = !this.show;
               }
            },
         });
      </script>
   </body>
</html>
Output
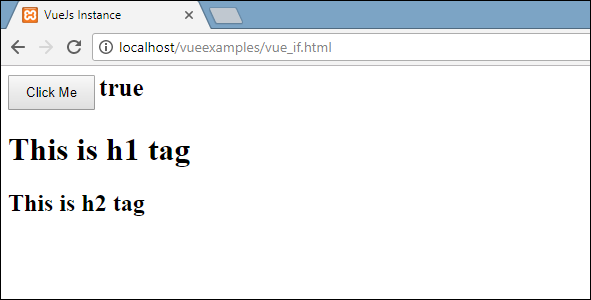
In the above example, we have created a button and two h1 tags with the message.
A variable called show is declared and initialized to a value true. It is displayed close to the button. On the click of the button, we are calling a method showdata, which toggles the value of the variable show. This means on the click of the button, the value of the variable show will change from true to false and false to true.
We have assigned if to the h1 tag as shown in the following code snippet.
<button v-on:click = "showdata" v-bind:style = "styleobj">Click Me</button>
<h1 v-if = "show">This is h1 tag</h1>
Now what it will do is, it will check the value of the variable show and if its true the h1 tag will be displayed. Click the button and view in the browser, as the value of the show variable changes to false, the h1 tag is not displayed in the browser. It is displayed only when the show variable is true.
Following is the display in the browser.
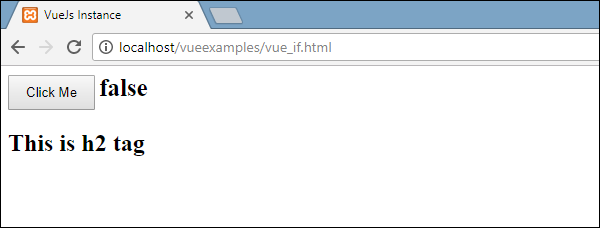
If we check in the browser, this is what we get when show is false.
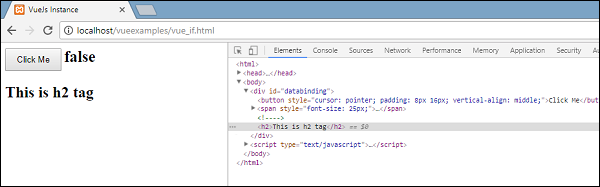
The h1 tag is removed from the DOM when the variable show is set to false.
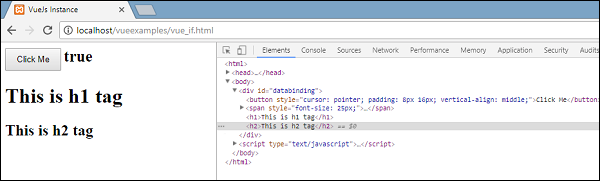
This is what we see when the variable is true. The h1 tag is added back to the DOM when the variable show is set to true.
v-else
In the following example, we have added v-else to the second h1 tag.
Example
<html>
   <head>
      <title>VueJs Instance</title>
      <script type = "text/javascript" src = "js/vue.js"></script>
   </head>
   <body>
      <div id = "databinding">
         <button v-on:click = "showdata" v-bind:style = "styleobj">Click Me</button>
         <span style = "font-size:25px;"><b>{{show}}</b></span>
         <h1 v-if = "show">This is h1 tag</h1>
         <h2 v-else>This is h2 tag</h2>
      </div>
      <script type = "text/javascript">
         var vm = new Vue({
            el: '#databinding',
            data: {
               show: true,
               styleobj: {
                  backgroundColor: '#2196F3!important',
                  cursor: 'pointer',
                  padding: '8px 16px',
                  verticalAlign: 'middle',
               }
            },
            methods : {
               showdata : function() {
                  this.show = !this.show;
               }
            },
         });
      </script>
   </body>
</html>
v-else is added using the following code snippet.
<h1 v-if = "show">This is h1 tag</h1>
<h2 v-else>This is h2 tag</h2>
Now, if show is true This is h1 tag will be displayed, and if false This is h2 tag will be displayed. This is what we will get in the browser.
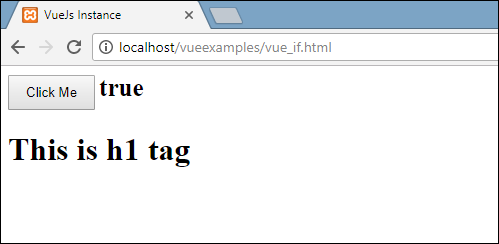
The above display is when the show variable is true. Since, we have added v-else, the second statement is not present. Now, when we click the button the show variable will become false and the second statement will be displayed as shown in the following screenshot.
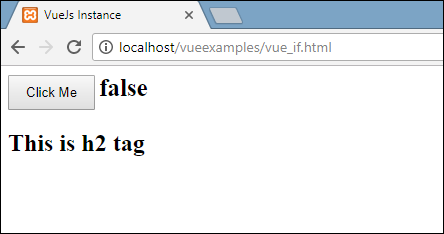
v-show
v-show behaves same as v-if. It also shows and hides the elements based on the condition assigned to it. The difference between v-if and v-show is that v-if removes the HTML element from the DOM if the condition is false, and adds it back if the condition is true. Whereas v-show hides the element, if the condition is false with display:none. It shows the element back, if the condition is true. Thus, the element is present in the dom always.
Example
<html>
   <head>
      <title>VueJs Instance</title>
      <script type = "text/javascript" src = "js/vue.js"></script>
   </head>
   <body>
      <div id = "databinding">
         <button v-on:click = "showdata" v-bind:style = "styleobj">Click Me</button>
         <span style = "font-size:25px;"><b>{{show}}</b></span>
         <h1 v-if = "show">This is h1 tag</h1>
         <h2 v-else>This is h2 tag</h2>
         <div v-show = "show">
            <b>V-Show:</b>
            <img src = "images/img.jpg" width = "100" height = "100" />
         </div>
      </div>
      <script type = "text/javascript">
         var vm = new Vue({
            el: '#databinding',
            data: {
               show: true,
               styleobj: {
                  backgroundColor: '#2196F3!important',
                  cursor: 'pointer',
                  padding: '8px 16px',
                  verticalAlign: 'middle',
               }
            },
            methods : {
               showdata : function() {
                  this.show = !this.show;
               }
            },
         });
      </script>
   </body>
</html>
v-show is assigned to the HTML element using the following code snippet.
<div v-show = "show"><b>V-Show:</b><img src = "images/img.jpg" width = "100" height = "100" /></div>
We have used the same variable show and based on it being true/false, the image is displayed in the browser.
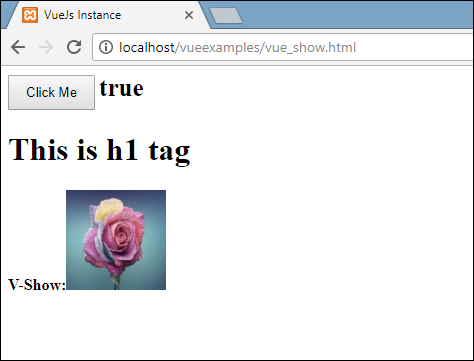
Now, since the variable show is true, the image is as displayed in the above screenshot. Let us click the button and see the display.
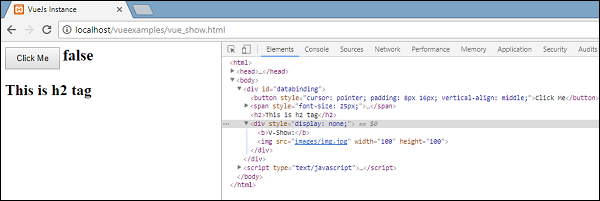
The variable show is false, hence the image is hidden. If we inspect and see the element, the div along with the image is still a part of the DOM with the style property display: none as seen in the above screenshot.
List Rendering
v-for
Let us now discuss list rendering with v-for directive.
Example
<html>
   <head>
      <title>VueJs Instance</title>
      <script type = "text/javascript" src = "js/vue.js"></script>
   </head>
   <body>
      <div id = "databinding">
         <input type = "text" v-on:keyup.enter = "showinputvalue"
            v-bind:style = "styleobj" placeholder = "Enter Fruits Names"/>
         <h1 v-if = "items.length>0">Display Fruits Name</h1>
         <ul>
            <li v-for = "a in items">{{a}}</li>
         </ul>
      </div>
      <script type = "text/javascript">
         var vm = new Vue({
            el: '#databinding',
            data: {
               items:[],
               styleobj: {
                  width: "30%",
                  padding: "12px 20px",
                  margin: "8px 0",
                  boxSizing: "border-box"
               }
            },
            methods : {
               showinputvalue : function(event) {
                  this.items.push(event.target.value);
               }
            },
         });
      </script>
   </body>
</html>
A variable called items is declared as an array. In methods, there is a method called showinputvalue, which is assigned to the input box that takes the names of the fruits. In the method, the fruits entered inside the textbox are added to the array using the following piece of code.
showinputvalue : function(event) {
   this.items.push(event.target.value);
}
We have used v-for to display the fruits entered as in the following piece of code. V-for helps to iterate over the values present in the array.
<ul>
   <li v-for = "a in items">{{a}}</li>
</ul>
To iterate over the array with for loop, we have to use v-for = a in items where a holds the values in the array and will display till all the items are done.
Output
Following is the output in the browser.
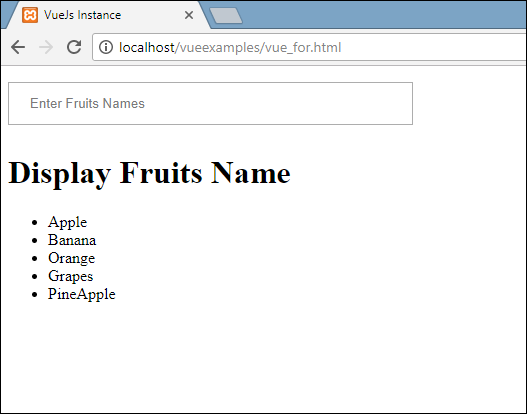
On inspecting the items, this is what it shows in the browser. In the DOM, we dont see any v-for directive to the li element. It displays the DOM without any VueJS directives.
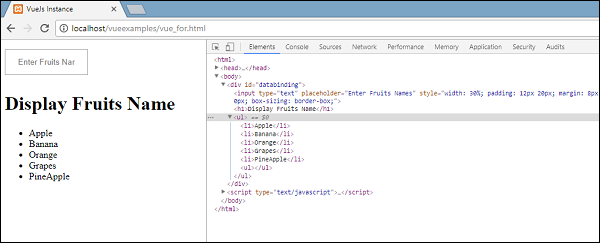
If we wish to display the index of the array, it is done using the following code.
<html>
   <head>
      <title>VueJs Instance</title>
      <script type = "text/javascript" src = "js/vue.js"></script>
   </head>
   <body>
      <div id = "databinding">
         <input type = "text" v-on:keyup.enter = "showinputvalue"
            v-bind:style = "styleobj" placeholder = "Enter Fruits Names"/>
         <h1 v-if = "items.length>0">Display Fruits Name</h1>
         <ul>
            <li v-for = "(a, index) in items">{{index}}--{{a}}</li>
         </ul>
      </div>
      <script type = "text/javascript">
         var vm = new Vue({
            el: '#databinding',
            data: {
               items:[],
               styleobj: {
                  width: "30%",
                  padding: "12px 20px",
                  margin: "8px 0",
                  boxSizing: "border-box"
               }
            },
            methods : {
               showinputvalue : function(event) {
                  this.items.push(event.target.value);
               }
            },
         });
      </script>
   </body>
</html>
To get the index, we have added one more variable in the bracket as shown in the following piece of code.
<li v-for = "(a, index) in items">{{index}}--{{a}}</li>
In (a, index), a is the value and index is the key. The browser display will now be as shown in the following screenshot. Thus, with the help of index any specific values can be displayed.
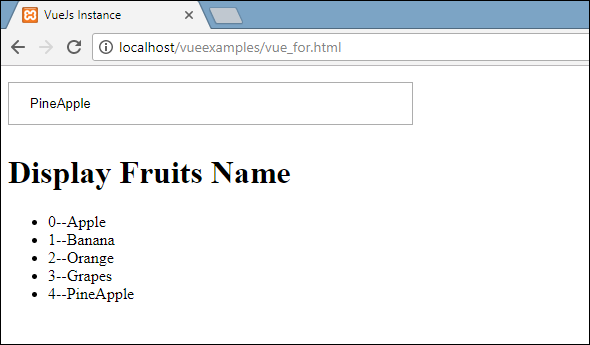
VueJS - Transition and Animation
In this chapter, we will discuss the transition and animation features available in VueJS.
Transition
VueJS provides various ways to apply transition to the HTML elements when they are added/updated in the DOM. VueJS has a built-in transition component that needs to be wrapped around the element, which needs transition.
Syntax
<transition name = "nameoftransition">
   <div></div>
</transition>
Let us consider an example to understand the working of transition.
Example
<html>
   <head>
      <title>VueJs Instance</title>
      <script type = "text/javascript" src = "js/vue.js"></script>
   </head>
   <body>
      <style>
         .fade-enter-active, .fade-leave-active {
            transition: opacity 2s
         }
         .fade-enter, .fade-leave-to /* .fade-leave-active below version 2.1.8 */ {
            opacity: 0
         }
      </style>
      <div id = "databinding">
         <button v-on:click = "show = !show">Click Me</button>
         <transition name = "fade">
            <p v-show = "show" v-bind:style = "styleobj">Animation Example</p>
         </transition>
      </div>
      <script type = "text/javascript">
         var vm = new Vue({
            el: '#databinding',
            data: {
               show:true,
               styleobj :{
                  fontSize:'30px',
                  color:'red'
               }
            },
            methods : {
            }
         });
      </script>
   </body>
</html>
There is button called clickme created using which we can change the value of the variable show to true to false and vice versa. There is a p tag which shows the text element only if the variable is true. We have wrapped the p tag with the transition element as shown in the following piece of code.
<transition name = "fade">
   <p v-show = "show" v-bind:style = "styleobj">Animation Example</p>
</transition>
The name of the transition is fade. VueJS provides some standard classes for transition and the classes are prefixed with the name of the transition.
Following are some standard classes for transition −
v-enter − This class is called initially before the element is updated/added. Its the starting state.
v-enter-active − This class is used to define the delay, duration, and easing curve for entering in the transition phase. This is the active state for entire and the class is available during the entire entering phase.
v-leave − Added when the leaving transition is triggered, removed.
v-leave-active − Applied during the leaving phase. It is removed when the transition is done. This class is used to apply the delay, duration, and easing curve during the leaving phase.
Each of the above classes will be prefixed with the name of the transition. We have given the name of the transition as fade, hence the name of the classes becomes .fade_enter, .fade_enter_active, .fade_leave, .fade_leave_active.
They are defined in the following code.
<style>
   .fade-enter-active, .fade-leave-active {
      transition: opacity 2s
   }
   .fade-enter, .fade-leave-to /* .fade-leave-active below version 2.1.8 */ {
      opacity: 0
   }
</style>
The .fade_enter_active and .fade_leave_active are defined together and it applies a transition at the start and at the leaving stage. The opacity property is changed to 0 in 2 seconds.
The duration is defined in the .fade_enter_active and .fade_leave_active. The final stage is defined in the .fade_enter, .fade_leave_to.
The display in the browser is as follows.

On the click of the button, the text will fade away in two seconds.
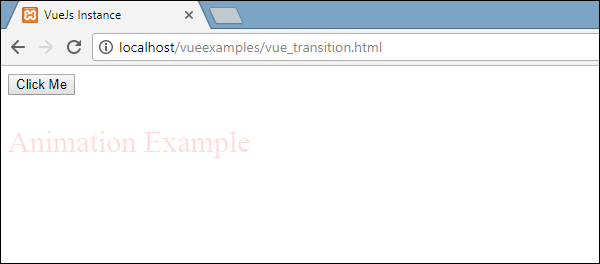
After two seconds, the text will disappear completely.
Let us consider another example, where there is an image and it is shifted on the x-axis when the button is clicked.
Example
<html>
   <head>
      <title>VueJs Instance</title>
      <script type = "text/javascript" src = "js/vue.js"></script>
   </head>
   <body>
      <style>
         .shiftx-enter-active, .shiftx-leave-active {
            transition: all 2s ease-in-out;
         }
         .shiftx-enter, .shiftx-leave-to /* .fade-leave-active below version 2.1.8 */ {
            transform :  translateX(100px);
         }
      </style>
      <div id = "databinding">
         <button v-on:click = "show = !show">Click Me</button>
         <transition name = "shiftx">
            <p v-show = "show">
               <img src = "images/img.jpg" style = "width:100px;height:100px;" />
            </p>
         </transition>
      </div>
      <script type = "text/javascript">
         var vm = new Vue({
            el: '#databinding',
            data: {
               show:true
            },
            methods : {
            }
         });
      </script>
   </body>
</html>
The name of the transition is shiftx. A transform property is used to shift the image on the x-axis by 100px using the following piece of code.
<style>
   .shiftx-enter-active, .shiftx-leave-active {
      transition: all 2s ease-in-out;
   }
   .shiftx-enter, .shiftx-leave-to /* .fade-leave-active below version 2.1.8 */ {
      transform :  translateX(100px);
   }
</style>
Following is the output.
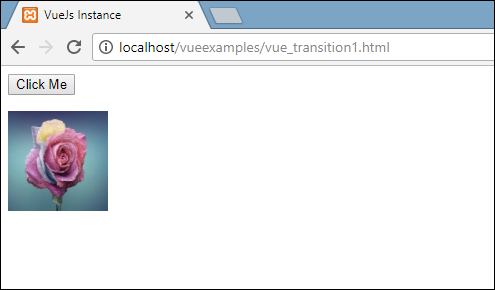
On the click of the button, the image will shift 100px towards the right as shown in the following screenshot.
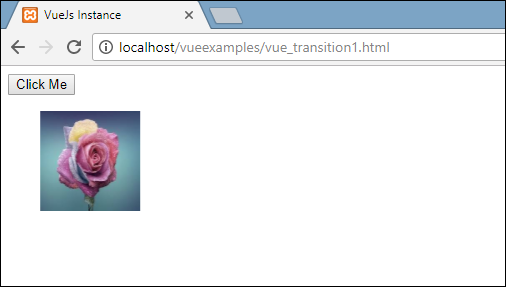
Animation
Animations are applied the same way as transition is done. Animation also has classes that needs to be declared for the effect to take place.
Let us consider an example to see how animation works.
Example
<html>
   <head>
      <title>VueJs Instance</title>
      <script type = "text/javascript" src = "js/vue.js"></script>
   </head>
   <body>
      <style>
         .shiftx-enter-active {
            animation: shift-in 2s;
         }
         .shiftx-leave-active {
            animation: shift-in 2s reverse;
         }
         @keyframes shift-in {
            0%   {transform:rotateX(0deg);}
            25%  {transform:rotateX(90deg);}
            50%  {transform:rotateX(120deg);}
            75%  {transform:rotateX(180deg);}
            100% {transform:rotateX(360deg);}
         }
      </style>
      <div id = "databinding">
         <button v-on:click = "show = !show">Click Me</button>
         <transition name = "shiftx">
            <p v-show = "show">
               <img src = "images/img.jpg" style = "width:100px;height:100px;" />
            </p>
         </transition>
      </div>
      <script type = "text/javascript">
         var vm = new Vue({
            el: '#databinding',
            data: {
               show:true
            },
            methods : {
            }
         });
      </script>
   </body>
</html>
To apply animation, there are classes same as transition. In the above code, we have an image enclosed in p tag as shown in the following piece of code.
<transition name = "shiftx">
   <p v-show = "show"><img src = "images/img.jpg" style = "width:100px;height:100px;" /></p>
</transition>
The name of the transition is shiftx. The class applied is as follows −
<style>
   .shiftx-enter-active {
      animation: shift-in 2s;
   }
   .shiftx-leave-active {
      animation: shift-in 2s reverse;
   }
   @keyframes shift-in {
      0%   {transform:rotateX(0deg);}
      25%  {transform:rotateX(90deg);}
      50%  {transform:rotateX(120deg);}
      75%  {transform:rotateX(180deg);}
      100% {transform:rotateX(360deg);}
   }
</style>
The class is prefixed with the transition name, i.e. shiftx-enter-active and .shiftx-leave-active. The animation is defined with the keyframes from 0% to 100%. There is a transform defined at each of the keyframes is as shown in the following piece of code.
@keyframes shift-in {
   0%   {transform:rotateX(0deg);}
   25%  {transform:rotateX(90deg);}
   50%  {transform:rotateX(120deg);}
   75%  {transform:rotateX(180deg);}
   100% {transform:rotateX(360deg);}
}
Following is the output.
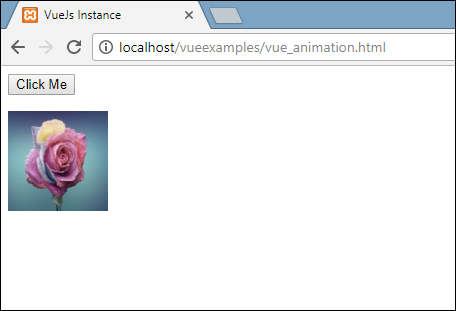
On clicking the button, it rotates from 0 to 360 degree and disappears.
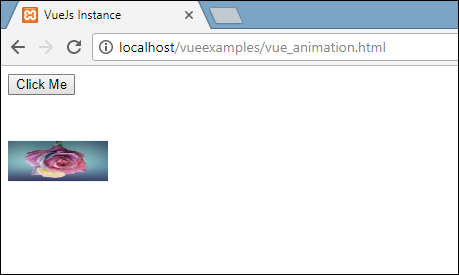
Custom Transition Classes
VueJS provides a list of custom classes, which can be added as attributes to the transition element.
- enter-class
- enter-active-class
- leave-class
- leave-active-class
Custom classes basically come into play when we want to use an external CSS library such as animate.css.
Example
<html>
   <head>
      <link href = "https://cdn.jsdelivr.net/npm/animate.css@3.5.1" rel = "stylesheet" type = "text/css">
      <script type = "text/javascript" src = "js/vue.js"></script>
   </head>
   <body>
      <div id = "animate" style = "text-align:center">
         <button @click = "show = !show"><span style = "font-size:25px;">Animate</span></button>
         <transition
            name = "custom-classes-transition"
            enter-active-class = "animated swing"
            leave-active-class = "animated bounceIn">
            <p v-if = "show"><span style = "font-size:25px;">Example</span></p>
         </transition>
      </div>
      <script type = "text/javascript">
         var vm =  new Vue({
            el: '#animate',
            data: {
               show: true
            }
         });
      </script>
   </body>
</html>
Output
Output
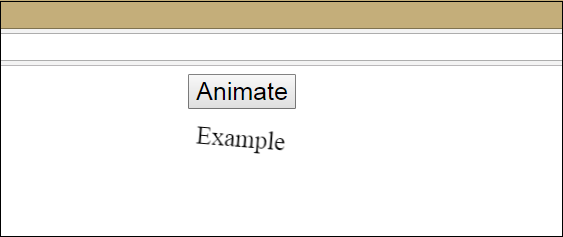
Output
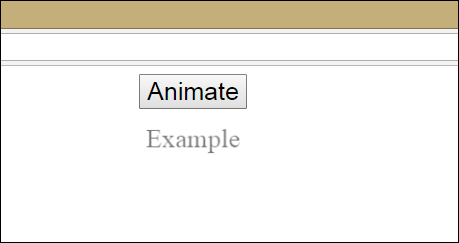
There are two animations applied in the above code. One enter-active-class = animated swing and another leave-active-class = animated bounceIn. We are making the use of custom animation classes for the animation to be applied from the third party library.
Explicit Transition Duration
We can apply transition and animation on the element using VueJS. Vue waits for the transionend and animationend event to detect if the animation or transition is done.
Sometimes the transition can cause delay. In such cases, we can apply the duration explicitly as follows.
<transition :duration = "1000"></transition>
<transition :duration = "{ enter: 500, leave: 800 }">...</transition>
We can use the duration property with a : on the transition element as shown above. In case there is a need to specify the duration separately for entering and leaving, it can be done as shown in the above piece of code.
JavaScript Hooks
The transition classes can be called as methods using JavaScript events. Let us consider an example for better understanding.
Example
<html>
   <head>
      <title>VueJs Instance</title>
      <script type = "text/javascript" src = "js/vue.js"></script>
   </head>
   <body>
      <script src = "https://cdnjs.cloudflare.com/ajax/libs/velocity/1.2.3/velocity.min.js"></script>
      <div id = "example-4">
         <button @click = "show = !show">
            <span style = "font-size:25px;">Toggle</span>
         </button>
         <transition  v-on:before-enter = "beforeEnter"
            v-on:enter = "enter"
            v-on:leave = "leave"
            v-bind:css = "false">
            <p v-if = "show" style = "font-size:25px;">Animation Example with velocity</p>
         </transition>
      </div>
      <script type = "text/javascript">
         var vm = new Vue({
            el: '#example-4',
            data: {
               show: false
            },
            methods: {
               beforeEnter: function (el) {
                  el.style.opacity = 0
               },
               enter: function (el, done) {
                  Velocity(el, { opacity: 1, fontSize: '25px' }, { duration: 1000 })
                  Velocity(el, { fontSize: '10px' }, { complete: done })
               },
               leave: function (el, done) {
                  Velocity(el, { translateX: '15px', rotateZ: '50deg' }, { duration: 1500 })
                  Velocity(el, { rotateZ: '100deg' }, { loop: 2 })
                  Velocity(el, {
                     rotateZ: '45deg',
                     translateY: '30px',
                     translateX: '30px',
                     opacity: 0
                  }, { complete: done })
               }
            }
         });
      </script>
   </body>
</html>
Output
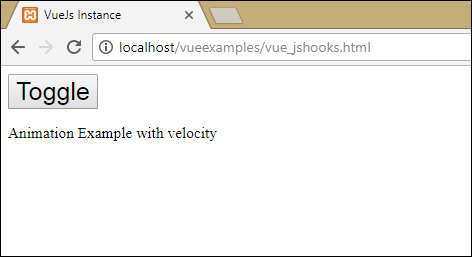
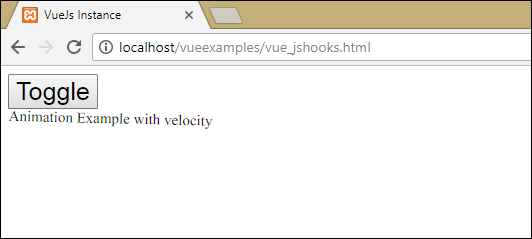
In the above example, we are performing animation using js methods on the transition element.
The methods on transition are applied as follows −
<transition  v-on:before-enter = "beforeEnter"
   v-on:enter = "enter"
   v-on:leave = "leave"
   v-bind:css = "false">
   <p v-if = "show" style = "font-size:25px;">Animation Example with velocity</p>
</transition>
There is a prefix added v-on and the name of the event to which the method is called. The methods are defined in the Vue instance as follows −
methods: {
   beforeEnter: function (el) {
      el.style.opacity = 0
   },
   enter: function (el, done) {
      Velocity(el, { opacity: 1, fontSize: '25px' }, { duration: 1000 })
      Velocity(el, { fontSize: '10px' }, { complete: done })
   },
   leave: function (el, done) {
      Velocity(el, { translateX: '15px', rotateZ: '50deg' }, { duration: 1500 })
      Velocity(el, { rotateZ: '100deg' }, { loop: 2 })
      Velocity(el, {
         rotateZ: '45deg',
         translateY: '30px',
         translateX: '30px',
         opacity: 0
      }, { complete: done })
   }
}
The required transition is applied in each of these methods. There is an opacity animation applied on the click of the button and also when the animation is done. Third party library is used for animation.
There is a property added on transition v-bind:css = "false", which is done so that Vue understands it is a JavaScript transition.
Transition at the Initial Render
In order to add animation at the start, we need to add appear property to the transition element.
Lets look at an example to understand it better.
Example
<html>
   <head>
      <link href = "https://cdn.jsdelivr.net/npm/animate.css@3.5.1" rel = "stylesheet" type = "text/css">
      <script type = "text/javascript" src = "js/vue.js"></script>
   </head>
   <body>
      <div id = "animate" style = "text-align:center">
         <transition
            appear
            appear-class = "custom-appear-class"
            appear-active-class = "animated bounceIn">
            <h1>BounceIn - Animation Example</h1>
         </transition>
         <transition
            appear
            appear-class = "custom-appear-class"
            appear-active-class = "animated swing">
            <h1>Swing - Animation Example</h1>
         </transition>
         <transition
            appear
            appear-class = "custom-appear-class"
            appear-active-class = "animated rubberBand">
            <h1>RubberBand - Animation Example</h1>
         </transition>
      </div>
      <script type = "text/javascript">
         var vm =  new Vue({
            el: '#animate',
            data: {
               show: true
            }
         });
      </script>
   </body>
</html>
In the above example, we have used three different animations from animate.css library. We have added appear to the transition element.
On execution of the above code, following will be the output in the browser.
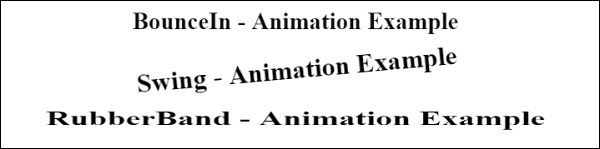
Animation on Components
We can wrap the transition for the components using the following code. We have used dynamic component here.
Example
<html>
   <head>
      <title>VueJs Instance</title>
      <script type = "text/javascript" src = "js/vue.js"></script>
      <link href = "https://cdn.jsdelivr.net/npm/animate.css@3.5.1" rel = "stylesheet" type = "text/css">
   </head>
   <body>
      <div id = "databinding" style = "text-align:center;">
         <transition  appear
            appear-class = "custom-appear-class"
            appear-active-class = "animated wobble">
            <component v-bind:is = "view"></component>
         </transition>
      </div>
      <script type = "text/javascript">
         var vm = new Vue({
            el: '#databinding',
            data: {
               view: 'component1'
            },
            components: {
               'component1': {
                  template: '<div><span style = "font-
                  size:25;color:red;">Animation on Components</span></div>'
               }
            }
         });
      </script>
   </body>
</html>
Output

VueJS - Directives
Directives are instruction for VueJS to do things in a certain way. We have already seen directives such as v-if, v-show, v-else, v-for, v-bind , v-model, v-on, etc.
In this chapter, we will take a look at custom directives. We will create global directives similar to how we did for components.
Syntax
Vue.directive('nameofthedirective', {
   bind(e1, binding, vnode) {
   }
})
We need to create a directive using Vue.directive. It takes the name of the directive as shown above. Let us consider an example to show the details of the working of directives.
Example
<html>
   <head>
      <title>VueJs Instance</title>
      <script type = "text/javascript" src = "js/vue.js"></script>
   </head>
   <body>
      <div id = "databinding">
         <div v-changestyle>VueJS Directive</div>
      </div>
      <script type = "text/javascript">
         Vue.directive("changestyle",{
            bind(e1,binding, vnode) {
               console.log(e1);
               e1.style.color = "red";
               e1.style.fontSize = "30px";
            }
         });
         var vm = new Vue({
            el: '#databinding',
            data: {
            },
            methods : {
            },
         });
      </script>
   </body>
</html>
In this example, we have created a custom directive changestyle as shown in the following piece of code.
Vue.directive("changestyle",{
   bind(e1,binding, vnode) {
      console.log(e1);
      e1.style.color = "red";
      e1.style.fontSize = "30px";
   }
});
We are assigning the following changestyle to a div.
<div v-changestyle>VueJS Directive</div>
If we see in the browser, it will display the text VueJs Directive in red color and the fontsize is increased to 30px.
Output
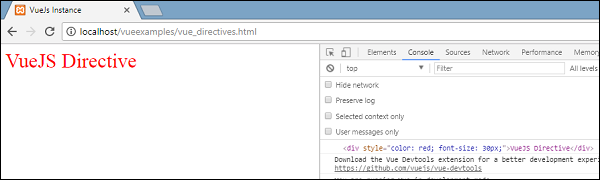
We have used the bind method, which is a part of the directive. It takes three arguments e1, the element to which the custom directive needs to be applied. Binding is like arguments passed to the custom directive, e.g. v-changestyle = {color:green}, where green will be read in the binding argument and vnode is the element, i.e. nodename.
In the next example, we have consoled all the arguments and its shows what details each of them give.
Following is an example with a value passed to the custom directive.
<html>
   <head>
      <title>VueJs Instance</title>
      <script type = "text/javascript" src = "js/vue.js"></script>
   </head>
   <body>
      <div id = "databinding">
         <div v-changestyle = "{color:'green'}">VueJS Directive</div>
      </div>
      <script type = "text/javascript">
         Vue.directive("changestyle",{
            bind(e1,binding, vnode) {
               console.log(e1);
               console.log(binding.value.color);
               console.log(vnode);
               e1.style.color=binding.value.color;
               e1.style.fontSize = "30px";
            }
         });
         var vm = new Vue({
            el: '#databinding',
            data: {
            },
            methods : {
            },
         });
      </script>
   </body>
</html>
Output

The color of the text is changed to green. The value is passed using the following piece of code.
<div v-changestyle = "{color:'green'}">VueJS Directive</div>
And it is accessed using the following piece of code.
Vue.directive("changestyle",{
   bind(e1,binding, vnode) {
      console.log(e1);
      console.log(binding.value.color);
      console.log(vnode);
      e1.style.color=binding.value.color;
      e1.style.fontSize = "30px";
   }
});
Filters
VueJS supports filters that help with text formatting. It is used along with v-bind and interpolations ({{}}). We need a pipe symbol at the end of JavaScript expression for filters.
Example
<html>
   <head>
      <title>VueJs Instance</title>
      <script type = "text/javascript" src = "js/vue.js"></script>
   </head>
   <body>
      <div id = "databinding">
         <input  v-model = "name" placeholder = "Enter Name" /><br/>
         <span style = "font-size:25px;"><b>Letter count is : {{name | countletters}}</b></span>
      </div>
      <script type = "text/javascript">
         var vm = new Vue({
            el: '#databinding',
            data: {
               name : ""
            },
            filters : {
               countletters : function(value) {
                  return value.length;
               }
            }
         });
      </script>
   </body>
</html>
In the above example, we have created a simple filter countletters. Countletters filter counts the numbers of characters entered in the textbox. To make use of filters, we need to use the filter property and define the filter used, by the following piece of code.
filters : {
   countletters : function(value) {
      return value.length;
   }
}
We are defining the method countletters and returning the length of the string entered.
To use filter in the display, we have used the pipe operator and the name of the filter, i.e. countletters.
<span style = "font-size:25px;"><b>Letter count is : {{name | countletters}}</b></span>
Following is the display in the browser.
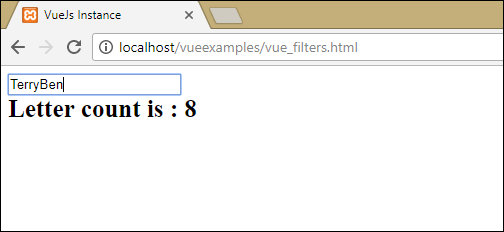
We can also pass arguments to the filter using the following piece of code.
<span style = "font-size:25px;"><b>Letter count is : {{name | countletters('a1', 'a2')}}</b></span>
Now, the countletters will have three params, i.e. message, a1, and a2.
We can also pass multiple filters to the interpolation using the following piece of code.
<span style = "font-size:25px;"><b>Letter count is : {{name | countlettersA, countlettersB}}</b></span>
In the filter property countlettersA and countlettersB will be the two methods and the countlettersA will pass the details to countlettersB.
VueJS - Routing
VueJS does not have a built-in router feauture. We need to follow some additional steps to install it.
Direct Download from CDN
The latest version of vue-router is available at https://unpkg.com/vue-router/dist/vue-router.js
Unpkg.com provides npm-based cdn links. The above link is always updated to the recent version. We can download and host it, and use it with a script tag along with vue.js as follows −
<script src = "/path/to/vue.js"></script>
<script src = "/path/to/vue-router.js"></script>
Using NPM
Run the following command to install the vue-router.
npm install vue-router
Using GitHub
We can clone the repository from GitHub as follows −
git clone https://github.com/vuejs/vue-router.git node_modules/vue-router
cd node_modules/vue-router
npm install
npm run build
Let us start with a simple example using vue-router.js.
Example
<html>
   <head>
      <title>VueJs Instance</title>
      <script type = "text/javascript" src = "js/vue.js"></script>
      <script type = "text/javascript" src = "js/vue-router.js"></script>
   </head>
   <body>
      <div id = "app">
         <h1>Routing Example</h1>
         <p>
            <router-link to = "/route1">Router Link 1</router-link>
            <router-link to = "/route2">Router Link 2</router-link>
         </p>
         <!-- route outlet -->
         <!-- component matched by the route will render here -->
         <router-view></router-view>
      </div>
      <script type = "text/javascript">
         const Route1 = { template: '<div style = "border-radius:20px;background-color:cyan;width:200px;height:50px;margin:10px;font-size:25px;padding:10px;">This is router 1</div>' }
         const Route2 = { template: '<div style = "border-radius:20px;background-color:green;width:200px;height:50px;margin:10px;font-size:25px;padding:10px;">This is router 2</div>' }
         const routes = [
            { path: '/route1', component: Route1 },
            { path: '/route2', component: Route2 }
         ];
         const router = new VueRouter({
            routes // short for `routes: routes`
         });
         var vm = new Vue({
            el: '#app',
            router
         });
      </script>
   </body>
</html>
Output
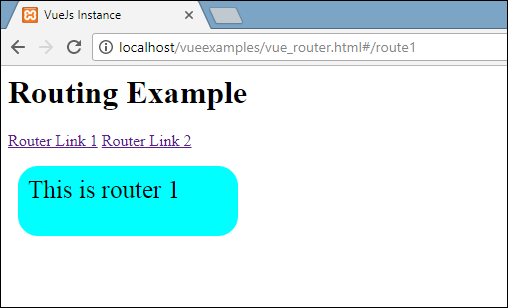
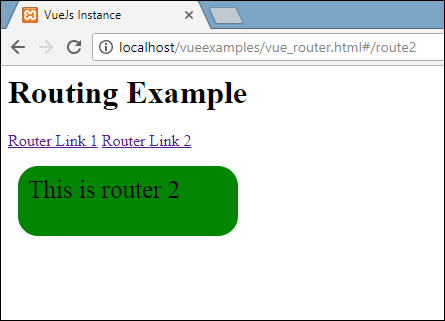
To start with routing, we need to add the vue-router.js file. Take the code from https://unpkg.com/vue-router/dist/vue-router.js and save it in the file vue-router.js.
The script is added after vue.js as follows −
<script type = "text/javascript" src = "js/vue.js"></script>
<script type = "text/javascript" src = "js/vue-router.js"></script>
In the body section, there is a router link defined as follows −
<p>
   <router-link   to = "/route1">Router Link 1</router-link>
   <router-link    to = "/route2">Router Link 2</router-link>
</p>
<router-link> is a component used to navigate to the HTML content to be displayed to the user. The to property is the destination, i.e the source file where the contents to be displayed will be picked.
In the above piece of code, we have created two router links.
Take a look at the script section where the router is initialized. There are two constants created as follows −
const  Route1 = { template: '<div style = "border-radius:20px;background-color:cyan;width:200px;height:50px;margin:10px;font-size:25px;padding:10px;">This is router 1</div>' };
const Route2 = { template: '<div style = "border-radius:20px;background-color:green;width:200px;height:50px;margin:10px;font-size:25px;padding:10px;">This is router 2</div>' }
They have templates, which needs to be shown when the router link is clicked.
Next, is the routes const, which defines the path to be displayed in the URL.
const routes = [
   { path: '/route1', component: Route1 },
   { path: '/route2', component: Route2 }
];
Routes define the path and the component. The path i.e. /route1 will be displayed in the URL when the user clicks on the router link.
Component takes the templates names to be displayed. The path from the routes need to match with the router link to the property.
For example, <router-link to = path here></router-link>
Next, the instance is created to VueRouter using the following piece of code.
const router = new VueRouter({
   routes // short for `routes: routes`
});
The VueRouter constructor takes the routes as the param. The router object is assigned to the main vue instance using the following piece of code.
var vm = new Vue({
   el: '#app',
   router
});
Execute the example and see the display in the browser. On inspecting and checking the router link, we will find that it adds class to the active element as shown in the following screenshot.
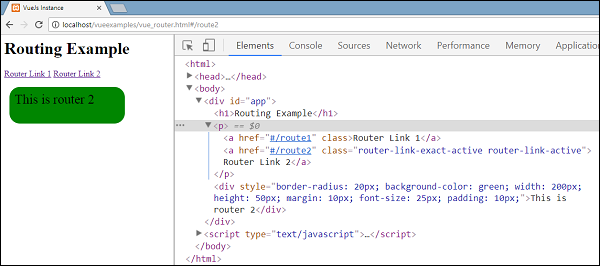
The class added is class = router-link-exact-active router-link-active. The active link gets the class as shown in the above screenshot. Another thing to notice is, the <router-link> gets rendered as a tag.
Props for Router Link
Let us see some more properties to be passed to <router-link>.
to
This is the destination path given to the <router-link>. When clicked, the value of to will be passed to router.push() internally. The value needs to be a string or a location object. When using an object, we need to bind it as shown in e.g. 2.
e.g. 1:  <router-link to = "/route1">Router Link 1</router-link>
renders as
<a href = #/route>Router Link </a>
e.g. 2:  <router-link v-bind:to = "{path:'/route1'}">Router Link 1</router-link>
e.g. 3: <router-link v-bind:to =
   "{path:'/route1', query: { name: 'Tery' }}">Router Link 1</router-link>//router link with query string.
Following is the output of e.g. 3.
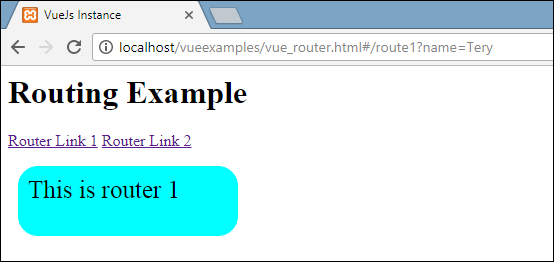
In the URL path, name = Tery is a part of the query string. E.g.: http://localhost/vueexamples/vue_router.html#/route1?name = Tery
replace
Adding replace to the router link will call the router.replace() instead of router.push(). With replace, the navigation history is not stored.
Example
<router-link v-bind:to = "{path:'/route1', query: { name: 'Tery' }}" replace>Router Link 1</router-link>
append
Adding append to the <router-link><router-link> will make the path relative.
If we want to go from the router link with path /route1 to router link path /route2, it will show the path in the browser as /route1/route2.
Example
<router-link v-bind:to = "{ path: '/route1'}" append>Router Link 1</router-link>
tag
At present <router-link> renders as a tag. In case, we want to render it as some other tag, we need to specifty the same using tag = tagname;
Example
<p>
   <router-link v-bind:to = "{ path: '/route1'}" tag = "span">Router Link 1</router-link>
   <router-link v-bind:to = "{ path: '/route2'}" tag = "span">Router Link 2</router-link>
</p>
We have specified the tag as span and this is what is displayed in the browser.
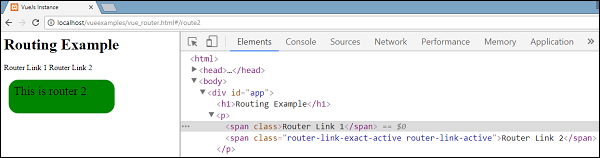
The tag displayed now is a span tag. We will still see the click going as we click on the router link for navigation.
active-class
By default, the active class added when the router link is active is router-link-active. We can overwrite the class by setting the same as shown in the following code.
<style>
   ._active{
      background-color : red;
   }
</style>
<p>
   <router-link v-bind:to = "{ path: '/route1'}" active-class = "_active">Router Link 1</router-link>
   <router-link v-bind:to = "{ path: '/route2'}" tag = "span">Router Link 2</router-link>
</p>
The class used is active_class = _active. This is the output displayed in the browser.
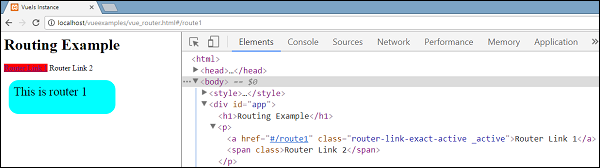
exact-active-class
The default exactactive class applied is router-link-exact-active. We can overwrite it using exact-active-class.
Example
<p>
   <router-link v-bind:to = "{ path: '/route1'}" exact-active-class = "_active">Router Link 1</router-link>
   <router-link v-bind:to = "{ path: '/route2'}" tag = "span">Router Link 2</router-link>
</p>
This is what is displayed in the browser.
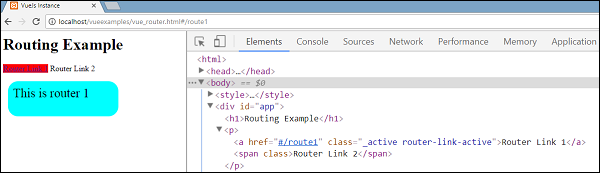
event
At present, the default event for router-link is click event. We can change the same using the event property.
Example
<router-link v-bind:to = "{ path: '/route1'}" event = "mouseover">Router Link 1</router-link>
Now, when we mouseover the router link, it will navigate as shown in the following browser. Mouseover on the Router link 1 and we will see the navigation changing.
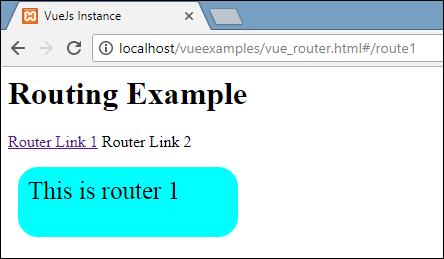
VueJS - Mixins
Mixins are basically to be used with components. They share reusable code among components. When a component uses mixin, all options of mixin become a part of the component options.
Example
<html>
   <head>
      <title>VueJs Instance</title>
      <script type = "text/javascript" src = "js/vue.js"></script>
   </head>
   <body>
      <div id = "databinding"></div>
      <script type = "text/javascript">
         var vm = new Vue({
            el: '#databinding',
            data: {
            },
            methods : {
            },
         });
         var myMixin = {
            created: function () {
               this.startmixin()
            },
            methods: {
               startmixin: function () {
                  alert("Welcome  to mixin example");
               }
            }
         };
         var Component = Vue.extend({
            mixins: [myMixin]
         })
         var component = new Component();
      </script>
   </body>
</html>
Output
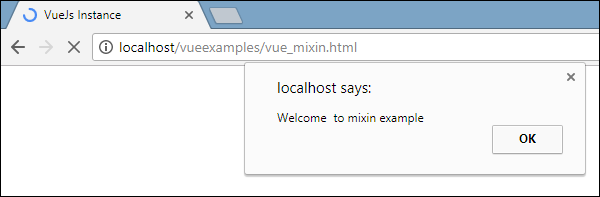
When a mixin and a component contain overlapping options, they are merged as shown in the following example.
<html>
   <head>
      <title>VueJs Instance</title>
      <script type = "text/javascript" src = "js/vue.js"></script>
   </head>
   <body>
      <div id = "databinding"></div>
      <script type = "text/javascript">
         var mixin = {
            created: function () {
               console.log('mixin called')
            }
         }
         new Vue({
            mixins: [mixin],
            created: function () {
               console.log('component called')
            }
         });
      </script>
   </body>
</html>
Now the mixin and the vue instance has the same method created. This is the output we see in the console. As seen, the option of the vue and the mixin will be merged.
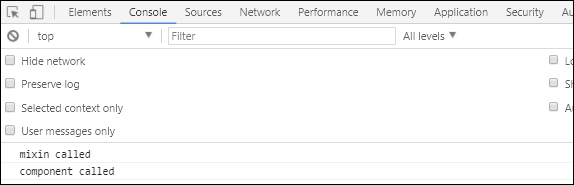
If we happen to have the same function name in methods, then the main vue instance will take priority.
Example

<html>
   <head>
      <title>VueJs Instance</title>
      <script type = "text/javascript" src = "js/vue.js"></script>
   </head>
   <body>
      <div id = "databinding"></div>
      <script type = "text/javascript">
         var mixin = {
            methods: {
               hellworld: function () {
                  console.log('In HelloWorld');
               },
               samemethod: function () {
                  console.log('Mixin:Same Method');
               }
            }
         };
         var vm = new Vue({
            mixins: [mixin],
            methods: {
               start: function () {
                  console.log('start method');
               },
               samemethod: function () {
                  console.log('Main: same method');
               }
            }
         });
         vm.hellworld();
         vm.start();
         vm.samemethod();
      </script>
   </body>
</html>
We will see mixin has a method property in which helloworld and samemethod functions are defined. Similarly, vue instance has a methods property in which again two methods are defined start and samemethod.
Each of the following methods are called.
vm.hellworld(); // In HelloWorld
vm.start(); // start method
vm.samemethod(); // Main: same method
As seen above, we have called helloworld, start, and samemethod function. samemethod is also present in mixin, however, priority will be given to the main instance, as seen in the following console.
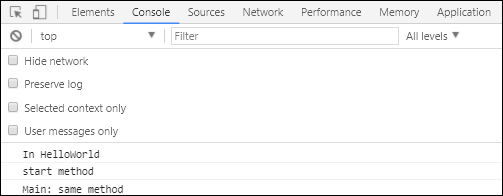
VueJS - Render Function
We have seen components and the usage of it. For example, we have a content that needs to be reused across the project. We can convert the same as a component and use it.
Lets take a look at an example of a simple component and see what the render function has to do within it.
Example
<html>
   <head>
      <title>VueJs Instance</title>
      <script type = "text/javascript" src = "js/vue.js"></script>
   </head>
   <body>
      <div id = "component_test">
         <testcomponent></testcomponent>
      </div>
      <script type = "text/javascript">
         Vue.component('testcomponent',{
            template : '<h1>Hello World</h1>',
            data: function() {
            },
            methods:{
            }
         });
         var vm = new Vue({
            el: '#component_test'
         });
      </script>
   </body>
</html>
Consider the above example of a simple component that prints Hello World as shown in the following screenshot.
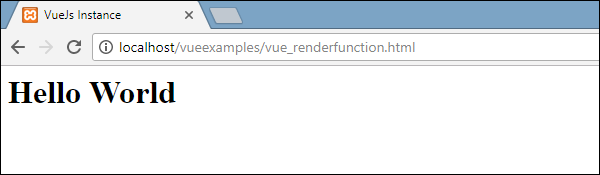
Now, if we want to reuse the component, we can do so by just printing it again. For example,
<div id = "component_test">
   <testcomponent></testcomponent>
   <testcomponent></testcomponent>
   <testcomponent></testcomponent>
   <testcomponent></testcomponent>
</div>
And the output will be the following.
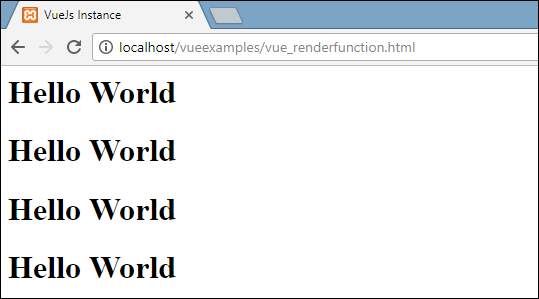
However, now we need some changes to the component. We dont want the same text to be printed. How can we change it? In case, we type something inside the component, will it be take into consideration?
Let us consider the following example and see what happens.
<div id = "component_test">
   <testcomponent>Hello Jai</testcomponent>
   <testcomponent>Hello Roy</testcomponent>
   <testcomponent>Hello Ria</testcomponent>
   <testcomponent>Hello Ben</testcomponent>
</div>
The output remains the same as we had seen earlier. It does not change the text as we want.
Component does provide something called as slots. Lets make use of it and see if we get the desired results.
Example
<html>
   <head>
      <title>VueJs Instance</title>
      <script type = "text/javascript" src = "js/vue.js"></script>
   </head>
   <body>
      <div id = "component_test">
         <testcomponent>Hello Jai</testcomponent>
         <testcomponent>Hello Roy</testcomponent>
         <testcomponent>Hello Ria</testcomponent>
         <testcomponent>Hello Ben</testcomponent>
      </div>
      <script type = "text/javascript">
         Vue.component('testcomponent',{
            template : '<h1><slot></slot></h1>',
            data: function() {
            },
            methods:{
            }
         });
         var vm = new Vue({
            el: '#component_test'
         });
      </script>
   </body>
</html>
As seen in the above code, in the template we have added slot, hence now it takes the value to send inside the component as shown in the following screenshot.
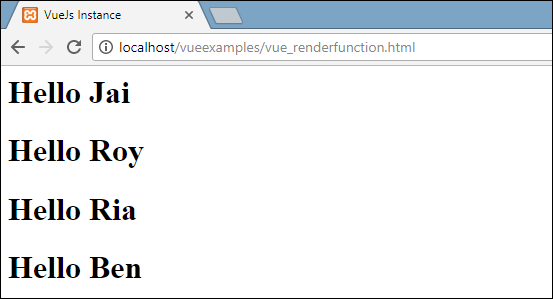
Now, let us consider we want to change the color and size. For example, currently we are using h1 tag and we want to change the HTML tag to p tag or div tag for the same component. How can we have the flexibility to carry out so many changes?
We can do so with the help of the render function. Render function helps make the component dynamic and use the way it is required by keeping it common and helping pass arguments using the same component.
Example
<html>
   <head>
      <title>VueJs Instance</title>
      <script type = "text/javascript" src = "js/vue.js"></script>
   </head>
   <body>
      <div id = "component_test">
         <testcomponent :elementtype = "'div,red,25,div1'">Hello Jai</testcomponent>
         <testcomponent :elementtype = "'h3,green,25,h3tag'">Hello Roy</testcomponent>
         <testcomponent :elementtype = "'p,blue,25,ptag'">Hello Ria</testcomponent>
         <testcomponent :elementtype = "'div,green,25,divtag'">Hello Ben</testcomponent>
      </div>
      <script type = "text/javascript">
         Vue.component('testcomponent',{
            render :function(createElement){
               var a = this.elementtype.split(",");
               return createElement(a[0],{
                  attrs:{
                     id:a[3],
                     style:"color:"+a[1]+";font-size:"+a[2]+";"
                  }
               },
               this.$slots.default
               )
            },
            props:{
               elementtype:{
                  attributes:String,
                  required:true
               }
            }
         });
         var vm = new Vue({
            el: '#component_test'
         });
      </script>
   </body>
</html>
In the above code, we have changed the component and added the render function with props property using the following piece of code.
Vue.component('testcomponent',{
   render :function(createElement){
      var a = this.elementtype.split(",");
      return createElement(a[0],{
         attrs:{
            id:a[3],
            style:"color:"+a[1]+";font-size:"+a[2]+";"
         }
      },
      this.$slots.default
      )
   },
   props:{
      elementtype:{
         attributes:String,
         required:true
      }
   }
});
The props look like the following.
props:{
   elementtype:{
      attributes:String,
      required:true
   }
}
We have defined a property called elementtype, which takes attributes field of type string. Another required field, which mentions that the field is mandatory.
In the render function, we have used the elementtype property as seen in the following piece of code.
render :function(createElement){
   var a = this.elementtype.split(",");
   return createElement(a[0],{
      attrs:{
         id:a[3],
         style:"color:"+a[1]+";font-size:"+a[2]+";"
      }
   },
   this.$slots.default
   )
}
Render function takes createElement as the argument and returns the same. CreateElement creates the DOM element the same way as in JavaScript. We have also split the elementtype on comma, using the values in the attrs field.
CreateElement is taking the first param as the elementtag to be created. It is passed to the component using the following piece of code.
<testcomponent :elementtype = "'div,red,25,div1'">Hello Jai</testcomponent>
The component needs to take the props field as shown above. It starts with : and the name of the props. Here, we are passing the element tag, color, fontsize, and the id of the element.
In render function, in createElement, we are splitting on comma, so the first element is the elementtag, which is given to the createElemet as shown in the following piece of code.
return createElement(
   a[0],{
      attrs:{
         id:a[3],
         style:"color:"+a[1]+";font-size:"+a[2]+";"
      }
   },
   this.$slots.default
)
a[0] is the html element tag. The next parameter is the attributes for the element tag. They are defined in the attr field in the following piece of code.
attrs:{
   id:a[3],
   style:"color:"+a[1]+";font-size:"+a[2]+";"
}
We have defined two attributes for the element tag - id and style. To id, we are passing a[3], which is the value we have after splitting on comma. Using style, we have defined color and fontsize.
Last is the slot, that is the message we have given in the componentin the following piece of code.
<testcomponent :elementtype = "'div,red,25,div1'">Hello Jai</testcomponent>
We have defined the text to be printed in the createElement using the following piece of code.
this.$slots.default
It takes the default assigned in the component field.
Following is the output we get in the browser.
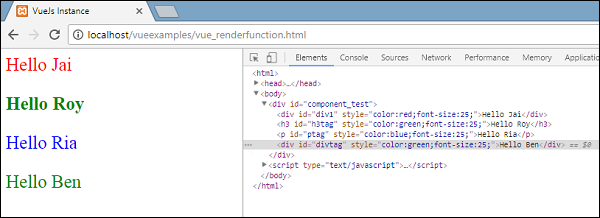
The elements also show the structure. These are the components we have defined −
<div id = "component_test">
   <testcomponent :elementtype = "'div,red,25,div1'">Hello Jai</testcomponent>
   <testcomponent :elementtype = "'h3,green,25,h3tag'">Hello Roy</testcomponent>
   <testcomponent :elementtype = "'p,blue,25,ptag'">Hello Ria</testcomponent>
   <testcomponent :elementtype = "'div,green,25,divtag'">Hello Ben</testcomponent>
</div>
VueJS - Reactive Interface
VueJS provides options to add reactivity to properties, which are added dynamically. Consider that we have already created vue instance and need to add the watch property. It can be done as follows −
Example
<html>
   <head>
      <title>VueJs Instance</title>
      <script type = "text/javascript" src = "js/vue.js"></script>
   </head>
   <body>
      <div id = "app">
         <p style = "font-size:25px;">Counter: {{ counter }}</p>
         <button @click = "counter++" style = "font-size:25px;">Click Me</button>
      </div>
      <script type = "text/javascript">
         var vm = new Vue({
            el: '#app',
            data: {
               counter: 1
            }
         });
         vm.$watch('counter', function(nval, oval) {
            alert('Counter is incremented :' + oval + ' to ' + nval + '!');
         });
         setTimeout(
            function(){
               vm.counter = 20;
            },2000
         );
      </script>
   </body>
</html>
There is a property counter defined as 1 in data object. The counter is incremented when we click the button.
Vue instance is already created. To add watch to it, we need to do it as follows −
vm.$watch('counter', function(nval, oval) {
   alert('Counter is incremented :' + oval + ' to ' + nval + '!');
});
We need to use $watch to add watch outside the vue instance. There is an alert added, which shows the value change for the counter property. There is also a timer function added, i.e. setTimeout, which sets the counter value to 20.
setTimeout(
   function(){
      vm.counter = 20;
   },2000
);
Whenever the counter is changed, the alert from the watch method will get fired as shown in the following screenshot.
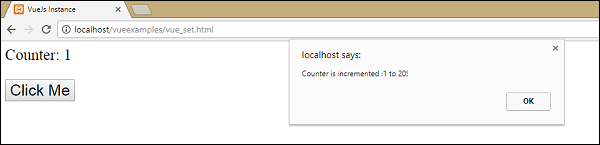
VueJS cannot detect property addition and deletion. The best way is to always declare the properties, which needs to be reactive upfront in the Vue instance. In case we need to add properties at run time, we can make use of Vue global, Vue.set, and Vue.delete methods.
Vue.set
This method helps to set a property on an object. It is used to get around the limitation that Vue cannot detect property additions.
Syntax
Vue.set( target, key, value )
Where,
target: Can be an object or an array
key : Can be a string or number
value: Can be any type
Lets take a look at an example.
Example
<html>
   <head>
      <title>VueJs Instance</title>
      <script type = "text/javascript" src = "js/vue.js"></script>
   </head>
   <body>
      <div id = "app">
         <p style = "font-size:25px;">Counter: {{ products.id }}</p>
         <button @click = "products.id++" style = "font-size:25px;">Click Me</button>
      </div>
      <script type = "text/javascript">
         var myproduct = {"id":1, name:"book", "price":"20.00"};
         var vm = new Vue({
            el: '#app',
            data: {
               counter: 1,
               products: myproduct
            }
         });
         vm.products.qty = "1";
         console.log(vm);
         vm.$watch('counter', function(nval, oval) {
            alert('Counter is incremented :' + oval + ' to ' + nval + '!');
         });
      </script>
   </body>
</html>
In the above example, there is a variable myproduct created at the start using the following piece of code.
var myproduct = {"id":1, name:"book", "price":"20.00"};
It is given to the data object in Vue instance as follows −
var vm = new Vue({
   el: '#app',
   data: {
      counter: 1,
      products: myproduct
   }
});
Consider, we want to add one more property to the myproduct array, after the Vue instance is created. It can be done as follows −
vm.products.qty = "1";
Lets see the output in the console.
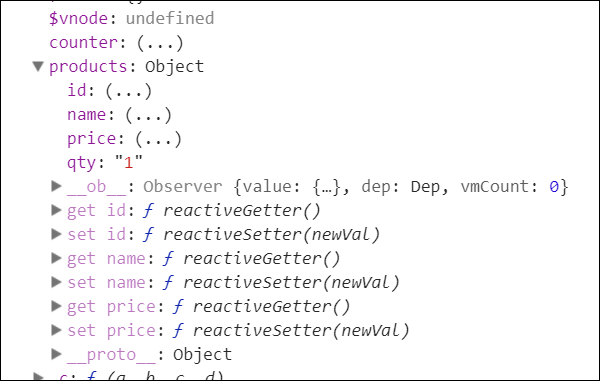
As seen above, in products the quantity is added. The get/set methods, which basically adds reactivity is available for the id, name, and price, and not available for qty.
We cannot achieve the reactivity by just adding vue object. VueJS mostly wants all its properties to be created at the start. However, in case we need to add it later, we can use Vue.set. For this, we need to set it using vue global, i.e. Vue.set.
Example
<html>
   <head>
      <title>VueJs Instance</title>
      <script type = "text/javascript" src = "js/vue.js"></script>
   </head>
   <body>
      <div id = "app">
         <p style = "font-size:25px;">Counter: {{ products.id }}</p>
         <button @click = "products.id++" style = "font-size:25px;">Click Me</button>
      </div>
      <script type = "text/javascript">
         var myproduct = {"id":1, name:"book", "price":"20.00"};
         var vm = new Vue({
            el: '#app',
            data: {
               counter: 1,
               products: myproduct
            }
         });
         Vue.set(myproduct, 'qty', 1);
         console.log(vm);
         vm.$watch('counter', function(nval, oval) {
            alert('Counter is incremented :' + oval + ' to ' + nval + '!');
         });
      </script>
   </body>
</html>
We have used Vue.set to add the qty to the array using the following piece of code.
Vue.set(myproduct, 'qty', 1);
We have consoled the vue object and following is the output.
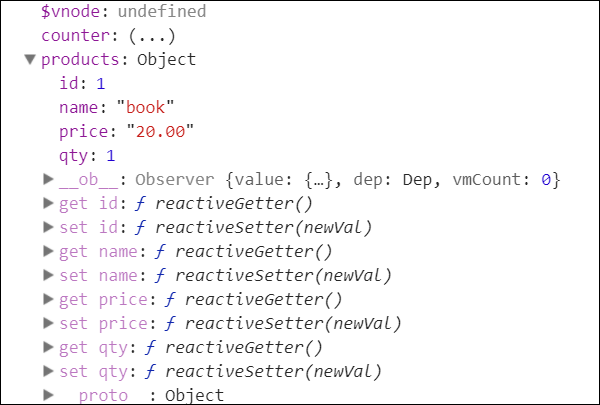
Now, we can see the get/set for qty added using Vue.set.
Vue.delete
This function is used to delete the property dynamically.
Example
Vue.delete( target, key )
Where,
target: Can be an object or an array
key: Can be a string or a number
To delete any property, we can use Vue.delete as in the following code.
Example
<html>
   <head>
      <title>VueJs Instance</title>
      <script type = "text/javascript" src = "js/vue.js"></script>
   </head>
   <body>
      <div id = "app">
         <p style = "font-size:25px;">Counter: {{ products.id }}</p>
         <button @click = "products.id++" style = "font-size:25px;">Click Me</button>
      </div>
      <script type = "text/javascript">
         var myproduct = {"id":1, name:"book", "price":"20.00"};
         var vm = new Vue({
            el: '#app',
            data: {
               counter: 1,
               products: myproduct
            }
         });
         Vue.delete(myproduct, 'price');
         console.log(vm);
         vm.$watch('counter', function(nval, oval) {
            alert('Counter is incremented :' + oval + ' to ' + nval + '!');
         });
      </script>
   </body>
</html>
In the above example, we have used Vue.delete to delete the price from the array using the following piece of code.
Vue.delete(myproduct, 'price');
Following is the output, we see in the console.
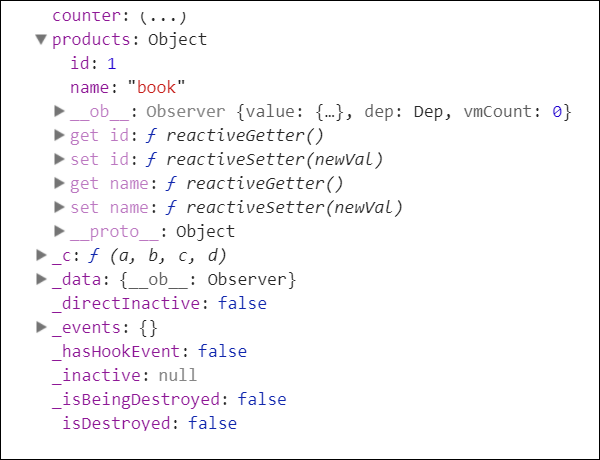
After deletion, we can see only the id and name as the price is deleted. We can also notice that the get/set methods are deleted.
VueJS - Examples
Example 1: Currency Converter
<html>
   <head>
      <title>VueJs Instance</title>
      <script type = "text/javascript" src = "js/vue.js"></script>
   </head>
   <body>
      <style>
         #databinding{
            padding: 20px 15px 15px 15px;
            margin: 0 0 25px 0;
            width: auto;
            background-color: #e7e7e7;
         }
         span, option, input {
            font-size:25px;
         }
      </style>

      <div id = "databinding" style = "">
         <h1>Currency Converter</h1>
         <span>Enter Amount:</span><input type = "number" v-model.number = "amount" placeholder = "Enter Amount" /><br/><br/>
         <span>Convert From:</span>
         <select v-model = "convertfrom" style = "width:300px;font-size:25px;">
            <option v-for = "(a, index) in currencyfrom"  v-bind:value = "a.name">{{a.desc}}</option>
         </select>
         <span>Convert To:</span>
         <select v-model = "convertto" style = "width:300px;font-size:25px;">
            <option v-for = "(a, index) in currencyfrom" v-bind:value = "a.name">{{a.desc}}</option>
         </select><br/><br/>
         <span> {{amount}} {{convertfrom}} equals {{finalamount}} {{convertto}}</span>
      </div>

      <script type = "text/javascript">
         var vm = new Vue({
            el: '#databinding',
            data: {
               name:'',
               currencyfrom : [
                  {name : "USD", desc:"US Dollar"},
                  {name:"EUR", desc:"Euro"},
                  {name:"INR", desc:"Indian Rupee"},
                  {name:"BHD", desc:"Bahraini Dinar"}
               ],
               convertfrom: "INR",
               convertto:"USD",
               amount :""
            },
            computed :{
               finalamount:function() {
                  var to = this.convertto;
                  var from = this.convertfrom;
                  var final;
                  switch(from) {
                     case "INR":
                     if (to == "USD") {
                        final = this.amount * 0.016;
                     }
                     if (to == "EUR") {
                        final = this.amount * 0.013;
                     }
                     if (to == "INR") {
                        final = this.amount;
                     }
                     if (to == "BHD") {
                        final = this.amount * 0.0059;
                     }
                     break;
                     case "USD":
                     if (to == "INR") {
                        final = this.amount * 63.88;
                     }
                     if (to == "EUR") {
                        final = this.amount * 0.84;
                     }
                     if (to == "USD") {
                        final = this.amount;
                     }
                     if (to == "BHD") {
                        final = this.amount * 0.38;
                     }
                     break;
                     case "EUR":
                     if (to == "INR") {
                        final = this.amount * 76.22;
                     }
                     if (to == "USD") {
                        final = this.amount * 1.19;
                     }
                     if (to == "EUR") {
                        final = this.amount;
                     }
                     if (to == "BHD") {
                        final = this.amount * 0.45;
                     }
                     break;
                     case "BHD":
                     if (to == "INR") {
                        final = this.amount *169.44;
                     }
                     if (to == "USD") {
                        final = this.amount * 2.65;
                     }
                     if (to == "EUR") {
                        final = this.amount * 2.22;
                     }
                     if (to == "BHD") {
                        final = this.amount;
                     }
                     break
                  }
                  return final;
               }
            }
         });
      </script>
   </body>
</html>
Output (Conversion to USD)
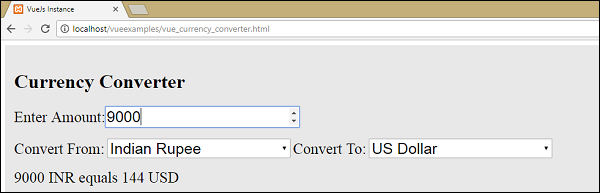
Output: Conversion to BHD
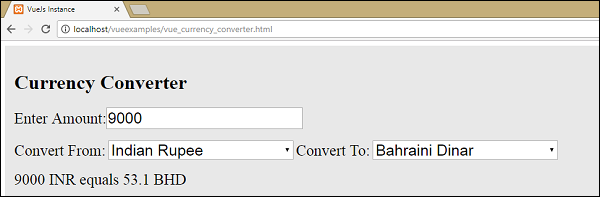
Explanation − In the above example, we have created a currency converter that converts one value of currency to the selected value of other currency. We have created two dropdowns of currency. When we enter the amount to convert in the textbox, the same is displayed below after conversion. We are using the computed property to do the necessary calculation for currency conversion.
Example 2: Customer Details
<html>
   <head>
      <title>VueJs Instance</title>
      <script type = "text/javascript" src = "js/vue.js"></script>
   </head>
   <body>
      <style>
         #databinding{
            padding: 20px 15px 15px 15px;
            margin: 0 0 25px 0;
            width: auto;
         }
         span, option, input {
            font-size:20px;
         }
         .Table{
            display: table;
            width:80%;
         }
         .Title{
            display: table-caption;
            text-align: center;
            font-weight: bold;
            font-size: larger;
         }
         .Heading{
            display: table-row;
            font-weight: bold;
            text-align: center;
         }
         .Row{
            display: table-row;
         }
         .Cell{
            display: table-cell;
            border: solid;
            border-width: thin;
            padding-left: 5px;
            padding-right: 5px;
            width:30%;
         }
      </style>

      <div id = "databinding" style = "">
         <h1>Customer Details</h1>
         <span>First Name</span>
         <input type = "text" placeholder = "Enter First Name" v-model = "fname"/>
         <span>Last Name</span>
         <input type = "text" placeholder = "Enter Last Name" v-model = "lname"/>
         <span>Address</span>
         <input type = "text" placeholder = "Enter Address" v-model = "addr"/>
         <button v-on:click = "showdata" v-bind:style = "styleobj">Add</button>
         <br/>
         <br/>
         <customercomponent
            v-for = "(item, index) in custdet"
            v-bind:item = "item"
            v-bind:index = "index"
            v-bind:itr = "item"
            v-bind:key = "item.fname"
            v-on:removeelement = "custdet.splice(index, 1)">
         </customercomponent>
      </div>

      <script type = "text/javascript">
         Vue.component('customercomponent',{
            template : '<div class = "Table"><div class = "Row"  v-bind:style = "styleobj"><div class = "Cell"><p>{{itr.fname}}</p></div><div class = "Cell"><p>{{itr.lname}}</p></div><div class = "Cell"><p>{{itr.addr}}</p></div><div class = "Cell"><p><button v-on:click = "$emit(\'removeelement\')">X</button></p></div></div></div>',
            props: ['itr', 'index'],
            data: function() {
               return {
                  styleobj : {
                     backgroundColor:this.getcolor(),
                     fontSize : 20
                  }
               }
            },
            methods:{
               getcolor : function() {
                  if (this.index % 2) {
                     return "#FFE633";
                  } else {
                     return "#D4CA87";
                  }
               }
            }
         });
         var vm = new Vue({
            el: '#databinding',
            data: {
               fname:'',
               lname:'',
               addr : '',
               custdet:[],
               styleobj: {
                  backgroundColor: '#2196F3!important',
                  cursor: 'pointer',
                  padding: '8px 16px',
                  verticalAlign: 'middle',
               }
            },
            methods :{
               showdata : function() {
                  this.custdet.push({
                     fname: this.fname,
                     lname: this.lname,
                     addr : this.addr
                  });
                  this.fname = "";
                  this.lname = "";
                  this.addr = "";
               }
            }
         });
      </script>
   </body>
</html>
Output
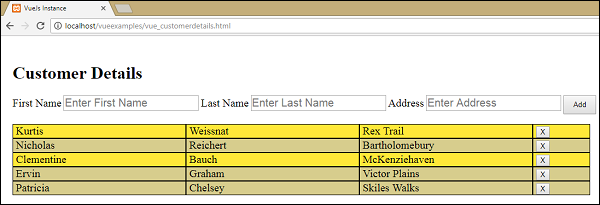
Output after deletion
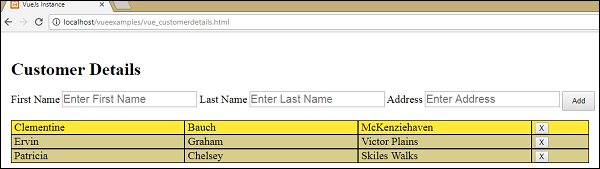
Explanation − In the above example, we have three texboxes to enter - the First Name, Last Name and Address. There is an add button, which adds the values entered in the textboxes in a table format with a delete button.
The table format is created using components. The click button interacts with the parent component using the emit event to delete the elemet from the array. The values entered are stored in the array and the same are shared with the child component using the prop property.
