- VueJS - Home
- VueJS - Overview
- VueJS - Environment Setup
- VueJS - Introduction
- VueJS - Instances
- VueJS - Template
- VueJS - Components
- VueJS - Computed Properties
- VueJS - Watch Property
- VueJS - Binding
- VueJS - Events
- VueJS - Rendering
- VueJS - Transition & Animation
- VueJS - Directives
- VueJS - Routing
- VueJS - Mixins
- VueJS - Render Function
- VueJS - Reactive Interface
- VueJS - Examples
VueJS - Binding
In this chapter will learn how to manipulate or assign values to HTML attributes, change the style, and assign classes with the help of binding directive called v-bind available with VueJS.
Lets consider an example to understand why we need and when to use v-bind directive for data binding.
Example
<html>
   <head>
      <title>VueJs Instance</title>
      <script type = "text/javascript" src = "js/vue.js"></script>
   </head>
   <body>
      <div id = "databinding">
         {{title}}<br/>
         <a href = "hreflink" target = "_blank"> Click Me </a> <br/>
         <a href = "{{hreflink}}" target = "_blank">Click Me </a>  <br/>
         <a v-bind:href = "hreflink" target = "_blank">Click Me </a>   <br/>
      </div>
      <script type = "text/javascript">
         var vm = new Vue({
            el: '#databinding',
            data: {
               title : "DATA BINDING",
               hreflink : "http://www.google.com"
            }
         });
      </script>
   </body>
</html>
In above example, we have displayed a title variable and three anchor links. We have also assigned a value to the href from the data object.
Now, if we check the output in the browser and inspect, we will see the first two anchor links do not have the href correctly as shown in the following screenshot.
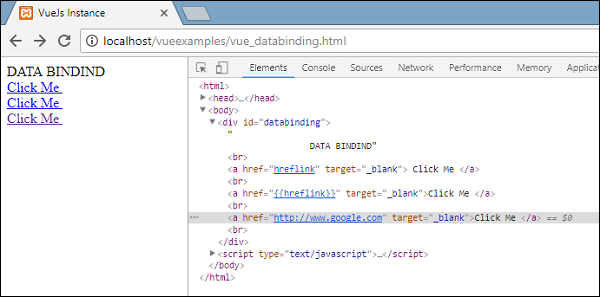
The first clickme shows the href as hreflink, and the second one shows it in {{hreflink}}, while the last one displays the correct url as we require.
Hence, to assign values to HTML attributes, we need to bind it with the directive v-bind as follows.
<a v-bind:href = "hreflink" target = "_blank">Click Me </a>
VueJS also provides a shorthand for v-bind as follows.
<a :href = "hreflink" target = "_blank">Click Me </a>
If we see the inspect element in the browser, the anchor tag does not show the v-bind attribute, however, it displays the plain HTML. None of the VueJS properties are seen when we inpsect the DOM.
Binding HTML Classes
To bind HTML class, we need to use v-bind: class. Lets consider an example and bind classes in it.
Example
<html>
   <head>
      <title>VueJs Instance</title>
      <script type = "text/javascript" src = "js/vue.js"></script>
   </head>
   <body>
      <style>
         .active {
            background: red;
         }
      </style>
      <div id = "classbinding">
         <div v-bind:class = "{active:isactive}"><b>{{title}}</b></div>
      </div>
      <script type = "text/javascript">
         var vm = new Vue({
            el: '#classbinding',
            data: {
               title : "CLASS BINDING",
               isactive : true
            }
         });
      </script>
   </body>
</html>
There is a div created with v-bind: class= {active: isactive}.
Here, isactive is a variable which is based on true or false. It will apply the class active to the div. In the data object, we have assigned the isactive variable as true. There is a class defined in the style .active with the background color as red.
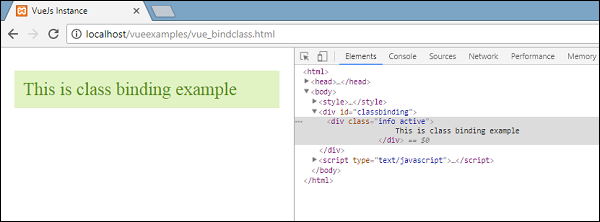
If the variable isactive is true, the color will be applied otherwise not. Following will be the output in the browser.
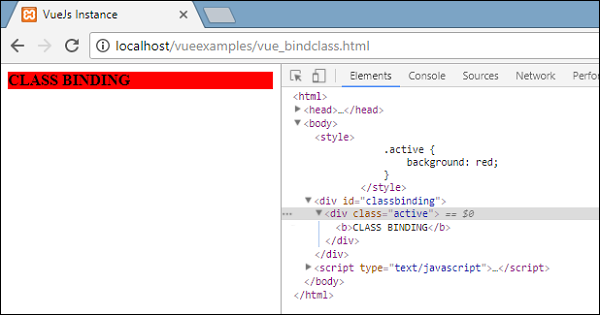
In above display, we can see the background color is red. The class = active is applied to the div.
Now, lets change the value of the variable to false and see the output. The variable isactive is changed to false as shown in the following code.
<html>
   <head>
      <title>VueJs Instance</title>
      <script type = "text/javascript" src = "js/vue.js"></script>
   </head>
   <body>
      <style>
         .active {
            background: red;
         }
      </style>
      <div id = "classbinding">
         <div v-bind:class = "{active:isactive}"><b>{{title}}</b></div>
      </div>
      <script type = "text/javascript">
         var vm = new Vue({
            el: '#classbinding',
            data: {
               title : "CLASS BINDING",
               isactive : false
            }
         });
      </script>
   </body>
</html>
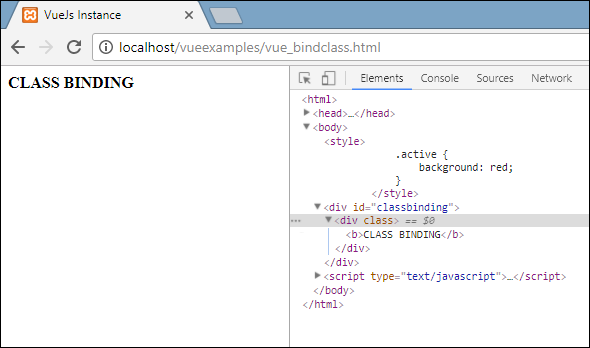
In the above display, we can see the active class is not applied to the div.
We can also assign multiple classes to the HTML tags using v-bind attribute.
Example
<html>
   <head>
      <title>VueJs Instance</title>
      <script type = "text/javascript" src = "js/vue.js"></script>
   </head>
   <body>
      <style>
         .info {
            color: #00529B;
            background-color: #BDE5F8;
         }
         div {
            margin: 10px 0;
            padding: 12px;
         }
         .active {
            color: #4F8A10;
            background-color: #DFF2BF;
         }
         .displayError{
            color: #D8000C;
            background-color: #FFBABA;
         }
      </style>
      <div id = "classbinding">
         <div class = "info"  v-bind:class = "{ active: isActive, 'displayError': hasError }">
            {{title}}
         </div>
      </div>
      <script type = "text/javascript">
         var vm = new Vue({
            el: '#classbinding',
            data: {
               title : "This is class binding example",
               isActive : false,
               hasError : false
            }
         });
      </script>
   </body>
</html>
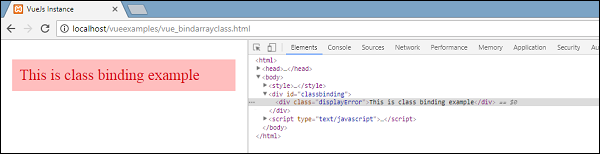
For the div in the above code, we have applied a normal class, example class = info. Based on isActive and hasError variable, the other classes will get applied to the div.
Output
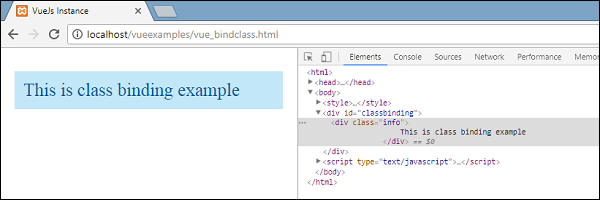
This is a normal class applied. Both the variables are false right now. Lets make isActive variable to true and see the output.
In the above display, in the DOM we can see two classes assigned to the div, info and active. Lets make hasError variable true and isActive as false.
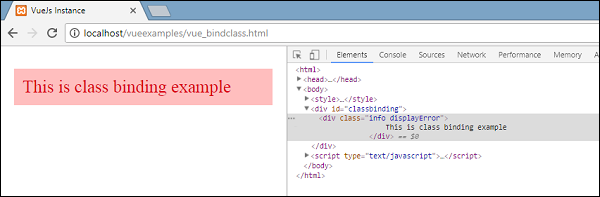
Now, when we see in the above display, info and displayError class is applied to the div. This is how we can apply multiple classes based on conditions.
We can also pass class as an array. Let us take an example to understand this.
Example
<html>
   <head>
      <title>VueJs Instance</title>
      <script type = "text/javascript" src = "js/vue.js"></script>
   </head>
   <body>
      <style>
         .info {
            color: #00529B;
            background-color: #BDE5F8;
         }
         div {
            margin: 10px 0;
            padding: 12px;
            font-size : 25px;
         }
         .active {
            color: #4F8A10;
            background-color: #DFF2BF;
         }
         .displayError{
            color: #D8000C;
            background-color: #FFBABA;
         }
      </style>
      <div id = "classbinding">
         <div v-bind:class = "[infoclass, errorclass]">{{title}}</div>
      </div>
      <script type = "text/javascript">
         var vm = new Vue({
            el: '#classbinding',
            data: {
               title : "This is class binding example",
               infoclass : 'info',
               errorclass : 'displayError'
            }
         });
      </script>
   </body>
</html>
Output
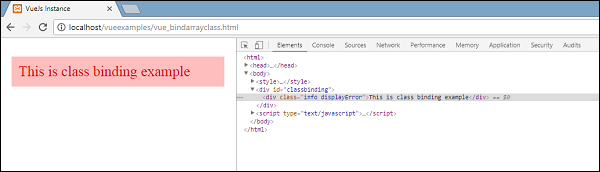
As we can see above, both classes get applied to the div. Lets use a variable and based on the value of the variable, assign the class.
<html>
   <head>
      <title>VueJs Instance</title>
      <script type = "text/javascript" src = "js/vue.js"></script>
   </head>
   <body>
      <style>
         .info {
            color: #00529B;
            background-color: #BDE5F8;
         }
         div {
            margin: 10px 0;
            padding: 12px;
            font-size : 25px;
         }
         .active {
            color: #4F8A10;
            background-color: #DFF2BF;
         }
         .displayError{
            color: #D8000C;
            background-color: #FFBABA;
         }
      </style>
      <div id = "classbinding">
         <div v-bind:class = "[isActive ? infoclass : '', haserror ? errorclass : '']">{{title}}</div>
      </div>
      <script type = "text/javascript">
         var vm = new Vue({
            el: '#classbinding',
            data: {
               title : "This is class binding example",
               infoclass : 'info',
               errorclass : 'displayError',
               isActive : true,
               haserror : false
            }
         });
      </script>
   </body>
</html>
We have used two variables isActive and haserror and the same is used for the div while class binding as shown in the following div tag.
<div v-bind:class = "[isActive ? infoclass : '', haserror ? errorclass : '']">{{title}}</div>
If isActive is true, then infoclass will be assigned to it. The same goes for haserror, if it is true, then only errorClass will be applied to it.
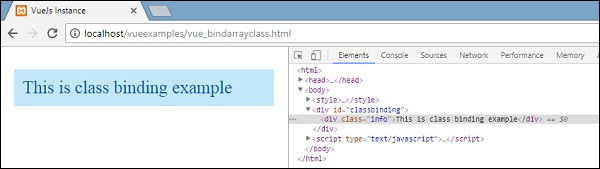
Now, let us make haserror variable as true and isActive variable as false.
We will now add v-bind for classes in the components. In the following example, we have added a class to the component template and also to the component.
Example
<html>
   <head>
      <title>VueJs Instance</title>
      <script type = "text/javascript" src = "js/vue.js"></script>
   </head>
   <body>
      <style>
         .info {
            color: #00529B;
            background-color: #BDE5F8;
         }
         div {
            margin: 10px 0;
            padding: 12px;
            font-size : 25px;
         }
         .active {
            color: #4F8A10;
            background-color: #DFF2BF;
         }
         .displayError{
            color: #D8000C;
            background-color: #FFBABA;
         }
      </style>
      <div id = "classbinding">
         <new_component class = "active"></new_component>
      </div>
      <script type = "text/javascript">
         var vm = new Vue({
            el: '#classbinding',
            data: {
               title : "This is class binding example",
               infoclass : 'info',
               errorclass : 'displayError',
               isActive : false,
               haserror : true
            },
            components:{
               'new_component' : {
                  template : '<div class = "info">Class Binding for component</div>'
               }
            }
         });
      </script>
   </body>
</html>
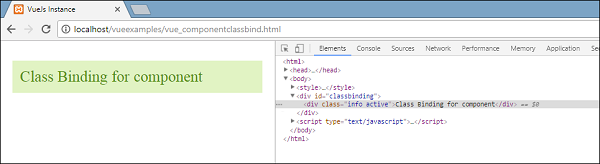
Following is the output in the browser. It applies both the classes to final div.
<div class = info active></div>
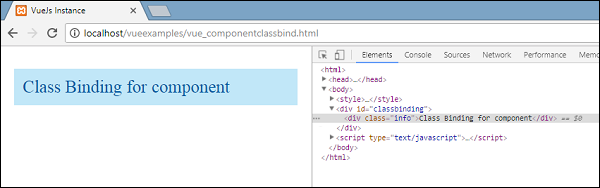
Add a variable in the component section to display, based on true/false.
<html>
   <head>
      <title>VueJs Instance</title>
      <script type = "text/javascript" src = "js/vue.js"></script>
   </head>
   <body>
      <style>
         .info {
            color: #00529B;
            background-color: #BDE5F8;
         }
         div {
            margin: 10px 0;
            padding: 12px;
            font-size : 25px;
         }
         .active {
            color: #4F8A10;
            background-color: #DFF2BF;
         }
         .displayError{
            color: #D8000C;
            background-color: #FFBABA;
         }
      </style>
      <div id = "classbinding">
         <new_component v-bind:class = "{active:isActive}"></new_component>
      </div>
      <script type = "text/javascript">
         var vm = new Vue({
            el: '#classbinding',
            data: {
               title : "This is class binding example",
               infoclass : 'info',
               errorclass : 'displayError',
               isActive : false,
               haserror : true
            },
            components:{
               'new_component' : {
                  template : '<div class = "info">Class Binding for component</div>'
               }
            }
         });
      </script>
   </body>
</html>
Since the variable is false, the active class is not applied and the info class is applied as shown in the following screenshot.
Binding Inline Styles
Object Syntax
Example
<html>
   <head>
      <title>VueJs Instance</title>
      <script type = "text/javascript" src = "js/vue.js"></script>
   </head>
   <body>
      <div id = "databinding">
         <div v-bind:style = "{ color: activeColor, fontSize: fontSize + 'px' }">{{title}}</div>
      </div>
      <script type = "text/javascript">
         var vm = new Vue({
            el: '#databinding',
            data: {
               title : "Inline style Binding",
               activeColor: 'red',
               fontSize :'30'
            }
         });
      </script>
   </body>
</html>
Output
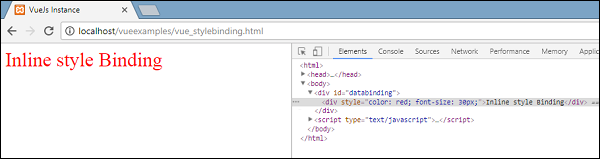
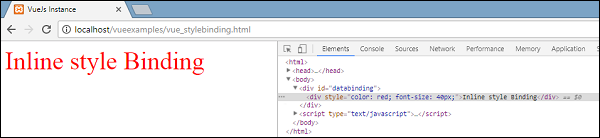
In the above example, for the div, the style is applied and the data is fetched from the data object.
<div v-bind:style = "{ color: activeColor, fontSize: fontSize + 'px' }">{{title}}</div>
data: {
   title : "Inline style Binding",
   activeColor: 'red',
   fontSize :'30'
}
We can also do the same thing by assigning all the values to a variable and then assigning the variable to the div.
Example
<html>
   <head>
      <title>VueJs Instance</title>
      <script type = "text/javascript" src = "js/vue.js"></script>
   </head>
   <body>
      <div id = "databinding">
         <div v-bind:style = "styleobj">{{title}}</div>
      </div>
      <script type = "text/javascript">
         var vm = new Vue({
            el: '#databinding',
            data: {
               title : "Inline style Binding",
               styleobj : {
                  color: 'red',
                  fontSize :'40px'
               }
            }
         });
      </script>
   </body>
</html>
The color and the fontSize is assigned to the object called styleobj and the same is assigned to the div.
<div v-bind:style = "styleobj">{{title}}</div>
Output
Form Input Bindings
So far in the example we have created, we have seen v-model binding the input text element and the value binded to a variable assigned. Lets learn more about it in this section.
Example
<html>
<head>
<title>VueJs Instance</title>
<script type = "text/javascript" src = "js/vue.js"></script>
</head>
<body>
<div id = "databinding">
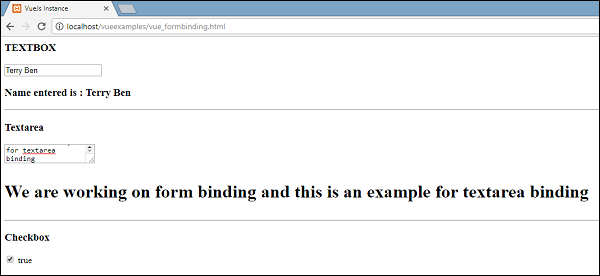
<h3>TEXTBOX</h3>
<input v-model = "name" placeholder = "Enter Name" />
<h3>Name entered is : {{name}}</h3>
<hr/>
<h3>Textarea</h3>
<textarea v-model = "textmessage" placeholder = "Add Details"></textarea>
<h1><p>{{textmessage}}</p></h1>
<hr/>
<h3>Checkbox</h3>
<input type = "checkbox" id = "checkbox" v-model = "checked"> {{checked}}
</div>
<script type = "text/javascript">
var vm = new Vue({
el: '#databinding',
data: {
name:'',
textmessage:'',
checked : false
}
});
</script>
</body>
</html>
Whatever we type in the texbox is displayed below. v-model is assigned the value name and the name is displayed in {{name}}, which displays whatever is typed in the textbox.
Output
Lets checkout out some more examples and how to use it.
Radio and Select
Example
<html>
<head>
<title>VueJs Instance</title>
<script type = "text/javascript" src = "js/vue.js"></script>
</head>
<body>
<div id = "databinding">
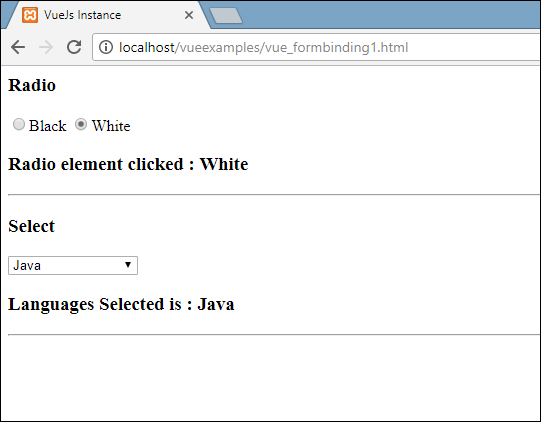
<h3>Radio</h3>
<input type = "radio" id = "black" value = "Black" v-model = "picked">Black
<input type = "radio" id = "white" value = "White" v-model = "picked">White
<h3>Radio element clicked : {{picked}} </h3>
<hr/>
<h3>Select</h3>
<select v-model = "languages">
<option disabled value = "">Please select one</option>
<option>Java</option>
<option>Javascript</option>
<option>Php</option>
<option>C</option>
<option>C++</option>
</select>
<h3>Languages Selected is : {{ languages }}</h3>
<hr/>
</div>
<script type = "text/javascript">
var vm = new Vue({
el: '#databinding',
data: {
picked : 'White',
languages : "Java"
}
});
</script>
</body>
</html>
Output
Modifiers
We have used three modifiers in the example - trim, number, and lazy.
Example
<html>
   <head>
      <title>VueJs Instance</title>
      <script type = "text/javascript" src = "js/vue.js"></script>
   </head>
   <body>
      <div id = "databinding">
         <span style = "font-size:25px;">Enter Age:</span> <input v-model.number = "age" type = "number">
         <br/>
         <span style = "font-size:25px;">Enter Message:</span> <input v-model.lazy = "msg">
         <h3>Display Message : {{msg}}</h3>
         <br/>
         <span style = "font-size:25px;">Enter Message : </span><input v-model.trim = "message">
         <h3>Display Message : {{message}}</h3>
      </div>
      <script type = "text/javascript">
         var vm = new Vue({
            el: '#databinding',
            data: {
               age : 0,
               msg: '',
               message : ''
            }
         });
      </script>
   </body>
</html>
Output
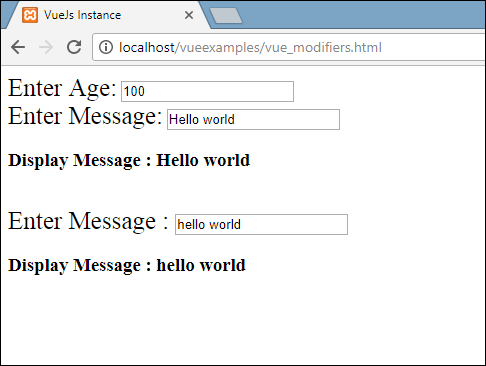
Number modifier allows to only enter numbers. It will not take any other input besides numbers.
<span style = "font-size:25px;">Enter Age:</span> <input v-model.number = "age" type = "number">
Lazy modifier will display the content present in the textbox once it is fully entered and the user leaves the textbox.
<span style = "font-size:25px;">Enter Message:</span> <input v-model.lazy = "msg">
Trim modifier will remove any spaces entered at the start and at the end.
<span style = "font-size:25px;">Enter Message : </span><input v-model.trim = "message">
